Table of Contents
Advertisement
Quick Links
OPTIMYST C S500 & C S1000
INST LL TION & OPER TING M NU L
Version 4
08/53202/0
Issue 3
OCN 10604
The product complies with the Safety Standards AS/NZS60335-1 & AS/NZS 60335-2-30 and the European Standard Electromagnetic Compatibility
(EMC) EN55014, EN60555-2 and EN60555-3. These cover the essential requirements of EEC Directives 2006/95/EC and 2004/108/EC
Approval Number ESV160149
Advertisement
Table of Contents

Related Manuals for Real Flame OPTIMYST CAS500


Summary of Contents for Real Flame OPTIMYST CAS500
- Page 1 OPTIMYST C S500 & C S1000 INST LL TION & OPER TING M NU L Version 4 08/53202/0 Issue 3 OCN 10604 The product complies with the Safety Standards AS/NZS60335-1 & AS/NZS 60335-2-30 and the European Standard Electromagnetic Compatibility (EMC) EN55014, EN60555-2 and EN60555-3. These cover the essential requirements of EEC Directives 2006/95/EC and 2004/108/EC Approval Number ESV160149...
- Page 2 Real Flame CAS500, CAS1000 Introduction Please read this information guide carefully to be able to safely install, use and maintain your product. Important Safety Advice When using electrical appliances, basic precautions should always be followed to reduce the risk of re, electrical shock and injury to persons, including the following: If the appliance is damaged, check with the supplier before installation and operation.
-
Page 3: General Information
General Information Only use ltered water in this appliance. Unpack the appliance carefully and retain the packaging for possible future use, in the event of moving or returning the re to your supplier. Always ensure that the appliance is sitting on a level surface. The appliance is a ame effect only. -
Page 4: Operating The Product
ow through the valve. You can shut off the water to the product by turning the tap on the valve clockwise until the ow stops. 4. Turn on the internal ball valve. This is located under the sump. Remove the sump as described under ‘Cleaning’ in the Maintenance section Please note: the water pressure is to be between 0.5Bar (50Kilopascals) and 8Bar (800Kilopascals) If you do not feel con dent making this connection please consult a quali ed plumber, to ensure a safe and... -
Page 5: Getting The Desired Flame Effect
• is the reduce ame button. Press this to reduce the height/intensity of your ame. You will hear an audible beep when you reach the minimum level • is the increase ame button. Press this to increase the height/intensity of your ame. You will hear an audible beep when you reach the maximum level •... -
Page 6: Receiver Controls
9. Place the fuelbeds back on the product and make the DC connection see Fig7 10. Press on/standby on the receiver or the remote control to turn back on your appliance RECEIVER CONTROLS There are manual controls on the Receiver CAS500 •... - Page 7 We recommend cleaning the following components once every 2 weeks, particularly in hard water areas:- Water Tank, Sump, Nozzle, Tank cap and seal, Air lter. For general cleaning use a soft clean duster – never use abrasive cleaners. To remove any accumulation of dust or uff the soft brush attachment of a vacuum cleaner should occasionally be used to clean the outlet grille of the fan heater.
-
Page 8: Additional Information
Your rights under this guarantee are additional to your statutory rights, which in turn are not affected by this guarantee. For Customer Service queries, please contact the Real Flame Service Warranty Desk on +61 (03) 8706 2000. RECYCLING Waste electrical products should not be disposed of with household waste. -
Page 9: Troubleshooting
Troubleshooting Symptom Cause Corrective Action The ame effect will Mains plug is not plugged in. Check plug is connected to wall socket cor- not start. rectly. Low water level. Check that the water tank is full and there is water in the sump. Low voltage connector not connected prop- Check that the connector is inserted correct- erly. -
Page 10: Warranty Information
30 days of purchase of your Real Flame product (or, if the Real Flame product is tted to a new home, within 30 days of the date of settlement of purchase of such new home). - Page 11 If you would like to speak to someone about your Real Flame Gas Burner or claiming under this warranty, please contact the Real Flame Service Warranty Desk on 1300 554 155.
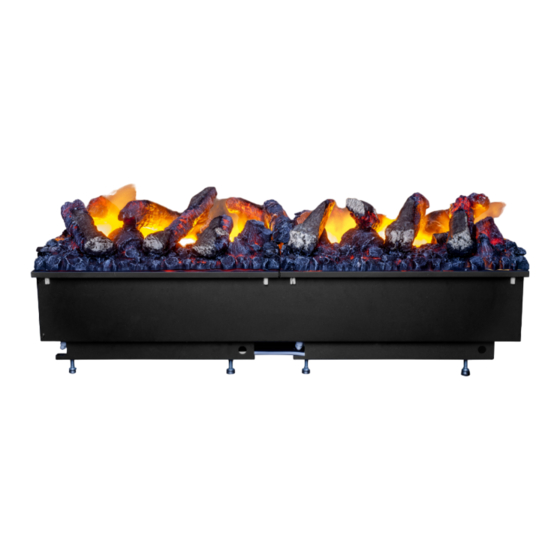
- Page 12 MODEL DIM ‘A’ CAS500 508mm CAS1000 1017mm Fig.1 Fig.2 Fig.3a Fig.3b Fig.3c Fig.4 Fig.5...
- Page 13 Fig.6 CAS500 CAS1000 Fig.8a Fig.7 Fig.8b Fig.10 Fig.11...
- Page 14 Switch ‘A’ CAS500 Fig.9 CAS1000 Fig.12 Fig.13 Fig.14 ‘A’ Fig.16 Fig.15...
- Page 15 Fig.17 >210cm >210cm Fig.18 >420cm >420cm...
- Page 16 GLEN DIMPLEX AUSTRALIA PTY LTD ABN 69 118 275 460 Head Office/Factory/Showroom 1340 Ferntree Gully Rd. Scoresby Vic 3179 Ph: (03) 8706 2000 Fax: (03) 8706 2001 E-mail: info@realflame.com.au Richmond - VIC Showroom 300 Swan St. Richmond Vic 3121 Ph: (03) 9428 4443 Fax: (03) 9428 4445 Dandenong - VIC Showroom 3/328 South Gippsland Highway, Dandenong South Vic 3164...
Need help?
Do you have a question about the OPTIMYST CAS500 and is the answer not in the manual?
Questions and answers