Table of Contents
Advertisement
Quick Links
Operation
Manual
for Web Interface
Thank you for purchasing our product.
This manual provides important information about safe and proper operations
of this switch.
Please read "Important Safety Instructions" on pages 3 to 4 before use.
For target model names and numbers, refer to the next page.
Layer 2 Switching Hub
Model No. PN28080i/PN28160i/
PN28240i
Advertisement
Table of Contents

Related Manuals for Panasonic PN28080i-TH


Summary of Contents for Panasonic PN28080i-TH
- Page 1 Layer 2 Switching Hub Operation Manual Model No. PN28080i/PN28160i/ for Web Interface PN28240i Thank you for purchasing our product. This manual provides important information about safe and proper operations of this switch. Please read "Important Safety Instructions" on pages 3 to 4 before use. ...
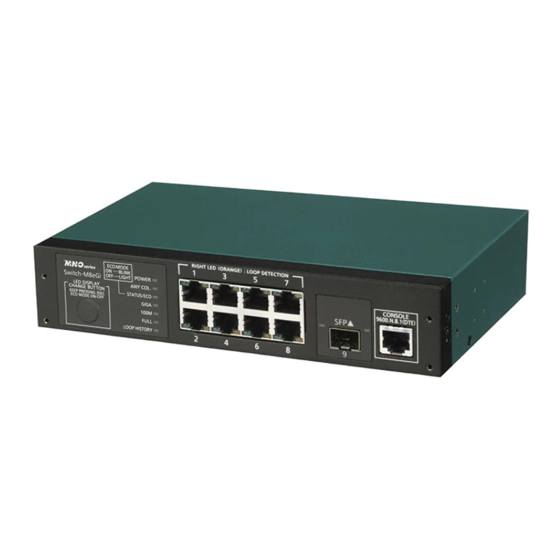
- Page 2 The target model for this Operation Manual is as follows. Model name Model number Firmware version Switch-M8eGi PN28080i-ID 3.0.0.00 or later PN28080i-TH PN28080i-MY PN28080i-SG PN28080i-NZ Switch-M16eGi PN28160i-ID 3.0.0.00 or later PN28160i-TH PN28160i-MY PN28160i-SG Switch-M24eGi PN28240i-ID 3.0.0.00 or later PN28240i-TH PN28240i-MY...
-
Page 3: Important Safety Instructions
Important Safety Instructions Please Follow the Instructions This chapter contains important safety instructions for preventing bodily injury and/or property damage. You are required to follow them. ■Severity of bodily injury and/or property damage, which could result from incor- rect use of the switch, are explained below. This symbol indicates safety instructions.Deviation from these instruc- tions could lead to bodily injury and/or property damage. - Page 4 ● Do not connect equipments other than 10BASE-T/100BASE-TX/ 1000BASE-T to twisted pair port. Deviation could lead to fire, electric shock, and/or equipment failure. ● Do not place this Switching Hub in harsh environment (such as near water, high humid, and/or high dust) . Deviation could lead to fire, electric shock, and/or equipment failure.
- Page 5 ● Use the bundled power cord (AC 100 - 240V specifications) . Deviation could lead to electric shock, malfunction, and/or equipment failure. ● Unplug the power cord in case of equipment failure. Deviation, such as keeping connected for a long time, could lead to fire.
-
Page 6: Basic Instructions For The Use Of This Product
Basic Instructions for the Use of This Product ●For inspection and/or repair, consult the shop. ● Use commercial power supply from a wall socket, which is close and easily accessible to this Switching Hub. ● Unplug the power cord when installing or moving this Switching Hub. ●... - Page 7 (PN54022/PN54024) is inserted into the SFP extension slot. For the lat- est information about compatible SFP extension modules, check our website. 1. Panasonic will not be liable for any damage resulting from the operation not in accordance with this operation manual, or loss of communications, which may or may not be caused by failure and/or malfunction of this device.
-
Page 8: Table Of Contents
Table of Contents Important Safety Instructions ................3 ● Basic Instructions for the Use of This Product ..........6 Product Outline ..................10 Web Browser-based Control ..............11 2.1. System Requirements ................11 2.2. Access to Web Control Function ............12 2.3. - Page 9 3.2.7.Storm Control Config ..............55 3.2.8.802.1X Access Control ..............57 3.2.9.Port Monitoring Config ..............59 3.2.10. Classifier Config ................61 3.2.11.In-Profile Action Config ..............63 3.2.12.Out-Profile Action Config .............. 64 3.2.13.Port List Config ................65 3.2.14. Policy Config ................66 3.2.15.Loop Detection Config ..............
-
Page 10: Product Outline
1. Product Outline Thank you for purchasing Switch-M8eGi/M16eGi/M24eGi (hereinafter referred to as this switch) . This manual provides information required to use the Web control function of this switch. -
Page 11: Web Browser-Based Control
2. Web Browser-based Control The Web browser-based control function (hereinafter called the Web control func- tion) allows you to easily perform administration tasks, such as configuration and monitoring, from a web browser, Microsoft Internet Explorer. The Web control function allows you to configure and monitor this switch over the network via the user interface of your Web browser. -
Page 12: Access To Web Control Function
2.2. Access to Web Control Function To use the Web control function, enter the IP address of this switch in the address bar of your Web browser and press the Enter key. Then, a login screen, similar to Figure 2-1, is displayed. Enter your user name and password. The factory default user name is "manager"... - Page 13 Figure 2-2 Select Screen for Display Language Select a language, and the screen shown in Figure 2-3 will appear.
- Page 14 Figure 2-3 Main Screen...
- Page 15 The left side of the main screen shows a list of actions available to you on this screen. (1) General Info Displays a list of basic information of this switch. (2) Basic Config Configure the basic settings such as IP address and port settings. (3) Advanced Config Configure the advanced settings such as VLAN, QoS, and IGMP snooping.
-
Page 16: Displaying Basic Information
2.3. Displaying Basic Information Selecting "General Info" opens the screen shown in Figure 2-4. This screen shows a list of basic information of this switch. Figure 2-4 General Info... - Page 17 Screen Description System Informa- Displays the operating time and firmware version of this switch. tion Operating Time Displays the cumulative time since the power on of this switch. Boot Code Displays this switch's firmware version. Version * The firmware update described in Section 3.3.1 is available only for runtime codes.
-
Page 18: Switch Configuration
3. Switch Configuration After completing configuration, you must save the configuration information in accordance with Section 3.3.3. Unless the configuration information is saved, the settings configured so far will not be reflected after restart. 3.1. Basic Config 3.1.1. Administration Configration Select "Basic Config"... -
Page 19: Ip Config
3.1.2. IP Config Select "Basic Config" and "IP Config" to open the screen shown in Figure 3-2. On this screen, you can configure the IP address of this switch. Figure 3-2 IP Config Screen Description MAC Address Displays the MAC address of this switch. This item is uniquely assigned to each device and cannot be changed. - Page 20 Note: Unless you configure these settings, you cannot use the SNMP management functions and remotely connect to the switch via Telnet or SSH. Be sure to configure them. If you are unsure, consult the network administrator. All IP addresses on the local network must be unique, and no duplications are allowed.
-
Page 21: Snmp Config
3.1.3. SNMP Config Select "Basic Config" and "SNMP" and then "SNMPConfig" to open the screen shown in Figure 3-3. On this screen, you can configure the SNMP manager set- tings. Figure 3-3 snMP Config Screen Description Displays the entry number on the SNMP manager List. Status Displays the SNMP manager status. - Page 22 3.1.4. SNMP Extend User Config Select "Basic Config," "SNMP," and then "SNMP Extend User Config" to open the screen shown in Figure 3-4. On this screen, you can configure the SNMP manager settings. Figure 3-4 SNMP Extend User Config Screen Description Total Entry Displays the number of created SNMP users (number of indexes) .
-
Page 23: Snmp Extend View Config
3.1.5. SNMP Extend View Config Select "Basic Config," "SNMP," and then "SNMP Extend View Config" to open the screen shown in Figure 3-5. On this screen, you can configure the SNMP manager settings. Figure 3-5 SNMP Extend View Config Screen Description Total Entry Displays the number of created SNMP view entries. -
Page 24: Snmp Extend Group Config
3.1.6. SNMP Extend Group Config Select "Basic Config," "SNMP," and then "SNMP Extend Group Config" to open the screen shown in Figure 3-6. On this screen, you can configure the SNMP manager settings. Figure 3-6 SNMP Extend Group Config Screen Description Total Entry Displays the number of created SNMP group entries. -
Page 25: Basic Trap Configuration
3.1.7. Basic Trap Configuration Select "Basic Config" and "SNMP" and then "Basic Trap Configuration" to open the screen shown in Figure 3-7. On this screen, you can configure the SNMP Trap set- tings. Figure 3-7 Basic Trap Configuration Screen Description Displays the entry number for the trap receiver. -
Page 26: Advanced Trap Configuration
3.1.8. Advanced Trap Configuration Select "Basic Config" and "SNMP" and then "Advanced Trap Configuration" to open the screen shown in Figure 3-8. On this screen, you can configure the operations for sending traps. Figure 3-8 Advanced Trap Configuration... - Page 27 Screen Description SNMPAuthentica- Displays the trap sending settings for an SNMP authentication failure. tion Failuer Enable Enables the trap sending. Disable Disables the trap sending. (Factory default setting) Target Ports Displays and configures a port to which the trap is sent when its link status changes.
-
Page 28: Basic Port Config
3.1.9. Basic Port Config Select "Basic Config" and "Port Config" and then "Basic Port Configuration" to open the screen shown in Figure 3-9. On this screen, you can configure port status dis- play settings and mode and other settings. Figure 3-9 Basic Port Config... - Page 29 Screen Description Target Port Select- Select multiple target ports for configuring settings at a time. Click the "Select All" button, and all ports will be selected. Click the "Reset" button, and all ports will be deselected. Click the "Set selected port (s) " button after selecting and changing the items for configuring settings at a time, and the same settings will apply to the selected ports.
-
Page 30: Extend Port Config
3.1.10. Extend Port Config Select "Basic Config" and "Port Config" and then "Extend Port Config" to open the screen shown in Figure 3-10. On this screen, you can configure port status display settings and mode and other settings. Figure 3-10 Extend Port Config Screen Description Global Jumbo Sta- Displays the jumbo frame settings. - Page 31 Eap Frame Fowerd- Displays the EAP Packet Forwarding function settings. The factory default set- ting is "Disable" for all ports. Setting this item to "Enable" forwards EAP frames used in IEEE802.1X authentication. Setting this item to "Disable" destroys EAP frames. Enable Indicates that the EAP frame forwarding function is enabled.
-
Page 32: Power Saving Port Configration
3.1.11. Power Saving Port Configration Select "Basic Config" and "Port Config" and then "Power Saving Port Config" to open the screen shown in Figure 3-11. On this screen, you can configure the power saving settings of ports. Figure 3-11 Power Saving Port Configration Screen Description Target Port Select- Select multiple target ports for configuring settings at a time. - Page 33 Power Saving Displays the power saving mode settings. For all ports, "Half" is the factory default setting. Full The MNO series power saving mode status is enabled (Full). Half The MNO series power saving mode status is enabled (Half) . Disable The MNO series power saving mode status is disabled.
-
Page 34: System Security
3.1.12. System Security Select "Basic Config" and System Security" and then "System Security" to open the screen shown in Figure 3-12. On this screen, you can configure the various settings for accessing this switch for configuration and management. Figure 3-12 System Security Screen Description Console Displays the idle timeout settings (in minutes) for terminating a console-con-... - Page 35 IP Setup Displays the access settings for the IP address configuration software, bundled with the Panasonic network cameras. "Enable" is the factory default setting.* For instructions, refer to Appendix.B. Enable Access is enabled. Disable Access is disabled. LED Base Mode Displays the current LED base mode.
-
Page 36: Syslog Transmission Configration
3.1.13. Syslog Transmission Configration Select "Basic Config" and "System Security" and then "Syslog Transmission Confi- gration" to open the screen shown in Figure 3-13. On this screen, you can config- ure the settings of the Syslog server to which a system log is sent. Figure 3-13 Syslog Transmission Configration Screen Description Global Syslog... -
Page 37: Radius Configuration
3.1.14. RADIUS Configuration Select "Basic Config" and "System Security" and then "RADIUS Configuration" to open the screen shown in Figure 3-14. On this screen, you can configure the set- tings of the RADIUS server that is used in IEEE802.1X authentication. Figure 3-14 RADIUS Configuration Screen Description NAS ID... -
Page 38: Telnet Access Limit
3.1.15. Telnet Access Limit Select "Basic Config" and "System Security" and then "Telnet Access Limit" to open the screen shown in Figure 3-15. On this screen, you can configure limitation of equipment accessing this switch via Telnet. Figure 3-15 Telnet Access Limit Screen Description Telnet Access Displays the IPv4 Telnet access limit. -
Page 39: Id/Password Change
3.1.16. ID/Password Change Select "Basic Config" and "System Security" and then "ID/Password Change" to open the screen shown in Figure 3-16. On this screen, you can configure the user- name/password. Figure 3-16 ID/Password Change Screen Description Current User ID Enter the current username. This setting is used to log in to this switch. -
Page 40: Mac Learning
3.1.17. MAC Learning Select "Basic Config" and "Forwarding Database" and then "MAC Learning" to open the screen shown in Figure 3-17. On this screen, you can configure the MAC Learn- ing settings for each port. Figure 3-17 Telnet Access Limit Screen Description Port Number Displays the port number. -
Page 41: Static Fdb Table
3.1.18. Static FDB Table Select "Basic Config" and "FDB" and then "FDB Manual Setting" to open the screen shown in Figure 3-18. On this screen, you can manually register the MAC address in the FDB table. Figure 3-18 FDB Manual Setting Screen Description Click the "Add"... -
Page 42: Fdb Table
3.1.19. FDB Table Select "Basic Config" and "FDB" and then "FDB Table" to open the screen shown in Figure 3-19. This screen shows the MAC addresses registered with the FDB table. Figure 3-19 FDB Table (by Port) Screen Description Aging Displays the time for which an automatically learned FDB entry is retained. -
Page 43: Time Configration
3.1.20. Time Configration Select "Basic Config" and "Time Config" to open the screen shown in Figure 3-20. On this screen, you can configure the time settings and the SNTP settings. Figure 3-20 Time Configuration of This Switch Screen Description Time Zone Displays the time zone. -
Page 44: Static Arp Table
3.1.21. Static ARP Table Select "Basic Config" and "ARP Table" and then "Static ARP Table" to open the screen shown in Figure 3-21. On this screen, you can manually register the relation- ship between the IP address and the MAC address with the ARP table. Figure 3-21 Static ARP Table Screen Description Click the "Add"... -
Page 45: Arp Table
3.1.22. ARP Table Select "Basic Config" and "ARP Table" and then "ARP Table" to open the screen shown in Figure 3-22. This screen shows the ARP Table. Figure 3-22 ARP Table Screen Description ARP Age Time- Displays the time for which an automatically learned ARP table is retained. It is equal to the time after receiving the last packet. -
Page 46: Ndp Table
3.1.23. NDP Table Select "Basic Config" and then "NDP Table" to open the screen shown in Figure 3- 23. On this screen, you can refer to and configure the NDP table. Figure 3-23 NDP Table Screen Description NDP Reachable Displays the timeout value of a reachable time. Time NDP Stale Time Displays the timeout value of a stale time. -
Page 47: Advanced Config
3.2. Advanced Config 3.2.1. VLAN Management Select "Advanced Config" and "VLAN" and then "VLAN Management" to open the screen shown in Figure 3-24. On this screen, you can configure the VLAN-related settings. Figure 3-24 VLAN Management Screen Description Internet Displays Internet Mansion function. Mansion Enable Internet Mansion function is enabled. -
Page 48: Vlan Modification
3.2.1.a. VLAN Modification On the "VLAN Management" screen, select "Modify" to open the screen shown in Figure 3-25. On this screen, you can modify the VLAN configuration information. Figure 3-25 VLAN Modification Screen Description VLAN ID Displays the VLAN ID. VLAN Name Displays the VLAN name. -
Page 49: Vlan Creation
3.2.2. VLAN Creation Select "Advanced Config" and "VLAN" and then "VLAN Creation" to open the screen shown in Figure 3-26. On this screen, you can create a new VLAN. Figure 3-26 VLAN Creation Screen Description VLAN ID Set the VLAN ID. VLAN Name Set the VLAN name. -
Page 50: Vlan Port Config
3.2.3. VLAN Port Config Select "Advanced Config" and "VLAN" and then "VLAN Port Config" to open the screen shown in Figure 3-27. On this screen, you can configure the specified VLAN port settings. Figure 3-27 VLAN Port Config Screen Description Target Port Select multiple target ports for configuring settings at a time. -
Page 51: Traffic Class Config
3.2.4. Traffic Class Config Select "Advanced Config" and "QoS Config" and then "Traffic Class Config" to open the screen shown in Figure 3-28. On this screen, you can configure the QoS and Traffic Class settings. Figure 3-28 QoS Config Screen Description Displays the setting of the QoS function using IEEE802.1p. -
Page 52: Egress Rate Limiting Config
3.2.5. Egress Rate Limiting Config Select "Advanced Config" and "QoS Config" and then "Egress Rate Limiting Config" to open the screen shown in Figure 3-29. On this screen, you can configure the Egress Rate settings. Figure 3-29 Egress Rate Limiting Config Screen Description Target Port Selecting Select multiple target ports for configuring settings at a time. -
Page 53: Link Aggregation Config
3.2.6. Link Aggregation Config Select "Advanced Config" and "Link Aggregation Config" to open the screen shown in Figure 3-30. On this screen, you can configure the group settings of link aggre- gation. Figure 3-30 Link Aggregation Config Screen Description Group Member Select the ports being group members of link aggregation. -
Page 54: Link Aggregation Modification
3.2.6.a. Link Aggregation Modification Select "Advanced Config" and "Link Aggregation Config" and then click the "Mod- ify" button of a group to open the screen shown in Figure 3-31. On the screen, you can modify a registered group. Figure 3-31 Link Aggregation Modification Screen Description Group Member Select the ports being group members of link aggregation. -
Page 55: Storm Control Config
3.2.7. Storm Control Config Select "Advanced Config" and "Storm Control Config" to open the screen shown in Figure 3-32. On this screen, you can configure the storm control settings. Figure 3-32 Storm Control Config Screen Description Target Port Select- Select multiple target ports for configuring settings at a time. Click the "Select All"... - Page 56 Threshold Displays the threshold value for the number of packets.
-
Page 57: 802.1X Access Control
3.2.8. 802.1X Access Control Select "Advanced Config" and "802.1X Access Control" to open the screen shown in Figure 3-33. On this screen, you can configure port-based access control using IEEE802.1X. Figure 3-33 802.1X Port Based Access Control Configuration Screen Description NAS ID Displays the authentication ID (NAS Identifier) . - Page 58 Server Timeout Displays the timeout time for an authentication server. The factory default set- ting is 30 seconds. Maximum Request This is the maximum number of retries for retransmission in authentication. The factory default setting is 2. Quiet Period This is the time to the next authentication request after authentication fails. The factory default setting is 60 seconds.
-
Page 59: Port Monitoring Config
3.2.9. Port Monitoring Config Select "Advanced Config" and "Port Monitoring Config" to open the screen shown in Figure 3-34. On this screen, you can configure the port monitoring settings. Figure 3-34 Port Monitoring Config Screen Description Monitor Output Displays the port number of a port at which packets from other ports can be monitored. - Page 60 Note: Management packets such as Ping or ARP transmitted from this switch can- not be captured.
-
Page 61: Classifier Config
3.2.10. Classifier Config Select "Advanced Config," and then "Classifier Config" to open the screen shown in Figure 3-35. On this screen, you can configure the Classifier settings. Figure 3-35 Classifier Config Screen Description Classifier Index Displays the index number of Classifier. Total Entry Displays the number of created Classifier entries. - Page 62 TCP SYN Flag Displays whether or not to use a filter for TCP SYN Flag. ICMP Type Displays the ICMP type.
-
Page 63: In-Profile Action Config
3.2.11. In-Profile Action Config Select "Advanced Config," and then "In-Profile Action Config" to open the screen shown in Figure 3-36. On this screen, you can configure the in-profile settings. Figure 3-36 In-Profile Action Config Screen Description Total Entry Displays the number of created In-profiles (number of indexes) . Displays the index number of an In-profile. -
Page 64: Out-Profile Action Config
3.2.12. Out-Profile Action Config Select "Advanced Config," and then "Out-Profile Action Config" to open the screen shown in Figure 3-37. On this screen, you can configure the out-profile settings. Figure 3-37 Out-Profile Action Config Screen Description Total Entry Displays the number of created Out-profiles (number of indexes) . Displays the index number of an Out-profile. -
Page 65: Port List Config
3.2.13. Port List Config Select "Advanced Config," " and then "Port List Config" to open the screen shown in Figure 3-38. On this screen, you can configure the settings of port lists subject to Access Control. When the Access Control function and the Link Aggregation function are used simultaneously, specify the actual physical port number instead of the number of the logical port created in Link Aggregation. -
Page 66: Policy Config
3.2.14. Policy Config Select "Advanced Config," and then "Policy Config" to open the screen shown in Figure 3-39. On this screen, you can configure the policy settings. Figure 3-39 Policy Config Screen Description Policy Priority Displays the policy priority. The options "1" and "2" are used to specify priority. Total Entry Displays the number of created policies (number of indexes) . -
Page 67: Loop Detection Config
3.2.15. Loop Detection Config Select "Advanced Config" and "Loop Detection" and then "Loop Detection Config" to open the screen shown in Figure 3-40. On this screen, you can configure the Loop detection and blocking function settings. Figure 3-40 Loop Detection Config Screen Description Global Loop Detec- Displays the status of the Loop detection and blocking function. - Page 68 Loop Detect Displays the setting status of the Loop detection and blocking function for that port. Enable The Loop detection and blocking function is enabled. (the fac- tory default setting for a downlink port) Disable The Loop detection and blocking function is disabled. (the fac- tory default setting for an uplink port) Mode Displays the setting status of the Loop detection mode for that port.
-
Page 69: Loop History Info
3.2.16. Loop History Info Select "Advanced Config" and "Loop Detection" and then "Loop History Info" to open the screen shown in Figure 3-41. On this screen, you can view the loop detec- tion/block date and time and a list of event information. Figure 3-41 Loop History Info Screen Description Clear History... -
Page 70: Port Group Config
3.2.17. Port Group Config Select "Advanced Config" and "Port Group Config" to open the screen shown in Figure 3-43. On this screen, you can configure the port grouping settings. With port grouping, ports specified as members of the port group can communicate only with the member ports in the same group. - Page 71 Figure 3-43 Port Group Config Screen Description Port Group ID Displays a port group ID. Port Group Displays the name of the set port group. Name ★ポートグループ Displays the member ports that belong to the port group. メンバーポート Total Entry Displays the number of created port groups (number of indexes) .
-
Page 72: Dmi (Ddm) Config
3.2.18. DMI (DDM) Config Select "Advanced Config" and "DMI (DDM) Config" to open the screen shown in Figure 3-44. On this screen, you can configure the DMI (Digital Diagnostic Monitor- ing Interface) settings. Figure 3-44 DMI (DDM) Config Screen Description Limit Trap Displays the status of the Limit Trap function. -
Page 73: Static Multicat Address
3.2.19. Static Multicat Address Select "Advanced Config" and then "Static Multicast Address" to open the screen shown in Figure 3-45. On this screen, you can configure the Static Multicast Group settings. Figure 3-45 Static Mulitcast Address Screen Description VLAN ID Displays the VLAN ID of the multicast group. -
Page 74: System Tools
3.3. System Tools 3.3.1. Software Update Select "System Tools" and "Software Update" to open the screen shown in Figure 3- 46. On this screen, you can update the firmware. Figure 3-46 Software Update Screen Description Current Firmaware Version Displays the current firmware version. TFTP Server Displays the IP address of the TFTP server on which the firmware for IP Address... - Page 75 Click the "Update" button to open the screen shown in Figure 3-47, and firmware data will be transferred. To stop the data transfer, click the "Cancel Download" but- ton. Figure 3-47 Firmware Data Being Transferred When it has been completed, the firmware data will be rewritten after the screen shown in Figure 3-48 appears.
-
Page 76: Reboot
3.3.2. Reboot Select "System Tools" and "Reboot" to open the screen shown in Figure 3-49. On this screen, you can reboot this switch. Figure 3-49 Reboot Screen Description Reboot Option Displays the reboot method. "Normal" is the factory default setting. Normal Normal reboot is conducted. - Page 77 Click the "Reboot" button, and this switch will be reboot after the screen shown in Figure 3-50 appears. Figure 3-50 Rebooting When the switch has been rebooted, the "Reload" button will be enabled. Click it to reload the screen.
-
Page 78: Save Current Config
3.3.3. Save Current Config Select "System Tools" and "Save Current Config" to open the screen shown in Fig- ure 3-51. On this screen, you can save configuration information. Figure 3-51 Save Current Config Click "Save" to save the settings of this switch to its internal RAM. Unless the config- uration information is saved, the settings configured so far will not be reflected after restart. -
Page 79: Statistics
3.3.4. Statistics Select "System Tools" and "Ststistics" to open the screen shown in Figure 3-52. On this screen, you can check the statistic information. Figure 3-52 Statistic Information Screen Description Target Port Select the target port number. Number Elapsed time Displays the time elapsed since power-on or counter reset of this switch. - Page 80 The counter values are listed below. Total RX Bytes Displays the number of bytes of all packets received. Total RX Pkts Displays the number of all packets received. Good Broadcast Displays the number of broadcast packets received. Good Multicast Displays the number of multicast packets received. CRC/Align Errors Displays the number of error packets that have a normal packet length (64 to 1518 bytes) ;...
- Page 81 Click a counter name to open the screen shown in Figure 3-53. This screen displays the totals and per-second averages of the counter by port. Figure 3-53 Statistic Information of a Counter by Port Screen Description System Uptime Displays the elapsed time since power-on of this switch. Click the "Update"...
-
Page 82: System Log
3.3.5. System log Select "System Tools" and "System log" to open the screen shown in Figure 3-54. This screen displays the logs of events that occurred on this switch. By viewing events, you can keep track of phenomena that occurred on this switch, which are useful for network management. - Page 83 Screen Description Delete Log Deletes the saved system log. Number Displays the event number. Time Displays the time when the event occurred. Displays the time accumulated after the boot of this switch if the clock is not set. Event Displays the description of the event that occurred on this switch. Next Page Switches the display range of a list.
-
Page 84: Config File Transfer
3.3.6. Config File Transfer Select "System Tools" and "Config File Transfer" to open the screen shown in Figure 3-55. On this screen, you can upload and download configuration files. Figure 3-55 Config File Transfer Screen Description TFTP Server IP Displays the IP address of the TFTP server that saves and reads configuration infor- mation. - Page 85 When the upload or download has been completed, the screen shown in Figure 3- 56 will appear. Check the execution result. Click the "Back to previous page," and the screen will return to "Config File Trans- fer." Figure 3-56 Execution Result (After Completion of Upload)
-
Page 86: Ping Execution
3.3.7. Ping Execution Select "System Tools" and "Ping Execution" to open the screen shown in Figure 3- 57. On this screen, you can check communications by sending pings to other devices connected to this switch. Figure 3-57 Ping Execution Screen Description Target IP Address Displays the IP address of the target to which a ping is sent. - Page 87 Click the "Execution" button, and pings will be sent. After the pings have been sent a specified number of times, the execution result will appear as shown in Figure 3- Figure 3-58 Execution Result of Pings...
-
Page 88: Exception Handler
3.3.8. Exception Handler Select "System Tools" and "Exception Handler" to open the screen shown in Figure 3-59. On this screen, you can configure the software exception handling opera- tions. When the exception handling function is enabled, a detected software exception is processed in the method specified in "Exception Handler Mode."... -
Page 89: Watch Dog Timer
3.3.9. Watch Dog Timer Select "System Tools" and "Watchdog Timer" to open the screen shown in Figure 3- 60. The Watchdog Timer function periodically monitors that software running on the system works properly. When this function is enabled, this switch will be reboot if the software has abnormality. -
Page 90: Appendix A.specifications
Appendix A.Specifications Refer to "Operation Manual for Menu Screens" for your switching hub to read the specifications. -
Page 91: Appendix B.easy Ip Address Setup Function
[Known compatible software] Panasonic Corporation "Easy IP Setup" V3.01/V4.00/V4.24R00 Panasonic System Networks Co., Ltd. "Easy Config" Ver3.10R00 Panasonic Life Solutions Networks Co., Ltd. "ZEQUO assist Plus" Ver.1.2.9.2 [User-settable items] ・ IP address, subnet mask, and default gateway ・ System name * This item can be configured only with the software "Easy Config."... -
Page 92: Appendix C.troubleshooting
Appendix C.Troubleshooting If you find any problems, please take the following steps to check. ◆ LED indicators ■ The POWER LED (Power) is not lit. ● Is the correct port LED display mode selected by pressing the LED switch button? ●... -
Page 93: Appendix D.after-Sales Service
Appendix D.After-sales Service 1. Warranty card A warranty card is included in the operating instructions (paper) provided with this switch. Be sure to confirm that the date of purchase, shop (company) name, etc., have been entered in the warranty card and then receive it from the shop. Keep it in a safe place. - Page 94 Tel (* You can check the version on the screen described in section 4.4 of the Operation © Panasonic Life Solutions Networks Co., Ltd. 2019-2021 Panasonic Life Solutions Networks Co., Ltd. 2-12-7, Higashi-Shimbashi, Minato-ku, Tokyo Japan, 105-0021 URL:http://panasonic.co.jp/ls/plsnw/...
Need help?
Do you have a question about the PN28080i-TH and is the answer not in the manual?
Questions and answers