
Related Manuals for Extech Instruments 793950343524


Summary of Contents for Extech Instruments 793950343524
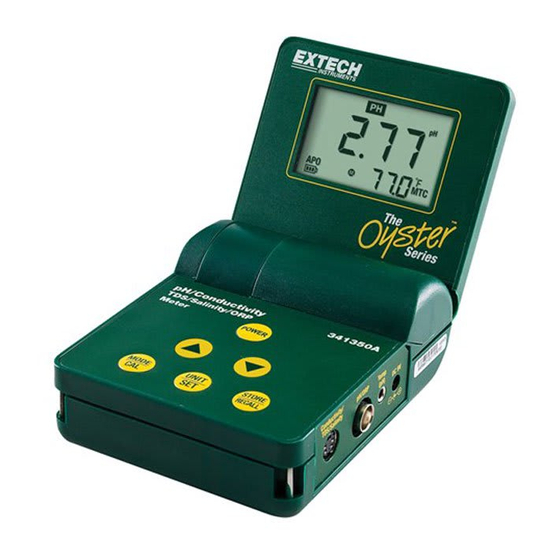
- Page 1 USER GUIDE Oyster Meter pH, Conductivity, TDS, Salinity, and ORP (mV) Model 341350A ...
- Page 2 Introduction Congratulations on your purchase of the Extech Oyster Series meter. This device measures pH, Conductivity, TDS, ORP and Salinity. These meters are intended for routine laboratory and field testing. Accurate measurements are provided in a battery operated, portable meter with a hinged display that can be adjusted to any viewing angle. This device is shipped fully tested and calibrated and, with proper use, will provide years of reliable service. Meter Description Front and Side panels LCD display Battery compartment Power button Up/Down arrow buttons MODE/CAL button UNIT/SET button STORE/RECALL button Connector, Conductivity probe Connector, pH probe, ORP probe Connector, Temperature probe Connector, AC adaptor 9 10 11 Display Mode indicators Primary display Data Hold indicator Probe Renew indicator Auto Power Off indicator Low battery indicator Memory status indicators Calibration status indicators Temperature display Unit indicators 341350A-en-US_V1.3 8/15 1.800.561.8187 information@itm.com www.
- Page 3 Operation Battery Installation/Replacement Open the battery cover by inserting a small coin into the latch slot and pressing downward. The cover will release in the direction of the arrow. Install the new battery and replace the cover. pH Measurements Press the POWER button to turn the meter ON (the meter will cycle through a self‐check). Press the MODE/CAL button until the PH icon switches on. Press the UNIT/SET button to select ºC or ºF. Connect the pH electrode to the side pH BNC connector. Adjust the ▲▼buttons to match the temperature of the solution (or use the external temperature probe to do so). If required, calibrate the electrode (see pH Calibration). Place the electrode in the sample solution and read the pH value on the display. When all measurements have been taken, unplug the electrode and rinse in distilled water; then shake and store it in the wetting cap with 4.0 M KCL or in a pH 4 buffer solution. Conductivity/TDS/Salt Measurements Press the POWER button to turn the meter ON. Press the MODE/CAL button until the COND, SALT or TDS icon is displayed. Connect the conductivity electrode to the side conductivity connector. If required, calibrate the electrode (see Conductivity Calibration). Place the electrode in the sample solution and read the value on the display. When finished, unplug the electrode and rinse in distilled water. ORP (mV) Measurements Press the POWER button to turn the meter ON. Press the MODE/CAL button until the ORP icon is displayed. Connect the ORP electrode to the side ORP BNC connector. Place the electrode in the sample solution and read the mV value on the display. When all measurements have been taken, unplug the electrode and rinse in distilled water. Store the probe tip in the wetting cap in a 4.0 M KCL or in a pH 4 buffer solution. 341350A-en-US_V1.3 8/15 1.800.561.8187 information@itm.com www. .com...
- Page 4 Data Memory 25 readings can be stored to, and recalled from, the internal memory. Storing readings With the reading on the display, momentarily press the STORE/RECALL button. The STORE and HOLD display icons will appear on the LCD and the reading will freeze. Momentarily press the STORE/RECALL button again to confirm and to return to the normal operation mode. Up to 25 readings can be stored in this way. Recalling Readings Press and hold the STORE/RECALL button. The RECALL icon and the memory location number will appear, followed by the data stored in the displayed memory location. Use the ▼ ▲buttons to scroll through the memory locations and to view the stored data. Momentarily press the STORE/RECALL button to exit the Recall Readings mode. End will appear in the display; the meter will then return to the normal measurement mode. Clearing the memory With the meter on, press and hold the ▼ and ▲ buttons for 2 seconds. The CLr icon will appear on the display, indicating that the memory has been erased. Temperature Units Press the UNIT button to select ºF or ºC. Manual Temperature Compensation In the pH mode, the solution temperature can be measured and set by using the optional external temperature probe or, when the probe is not used, by adjusting the temperature display. Press the ▲▼buttons to set the temperature when the MTC icon is displayed. The Conductivity probe has a built‐in temperature sensor so manual temperature compensation does not apply for Conductivity measurements. Auto Power off (APO) The meter is equipped with an Automatic Power Off feature. The meter will power down after a 10‐minute period of inactivity. This feature can be disabled by pressing and holding the POWER button for 2 seconds (the APO display icon indicates that this feature is enabled). After disabling APO, the next time the meter is powered up APO will be re‐enabled. Reset to Default settings The meter can be reset to its factory default configuration: With the meter OFF, press and hold the POWER and STORE/RECALL buttons simultaneously until dFLt rSt appears in the display. Release the buttons and the meter will continue with a normal startup. Default values include: Calibration values, Conductivity mode, ºC, MTC, APO and RENEW off 341350A-en-US_V1.3 8/15 1.800.561.8187 information@itm.com www.
- Page 5 pH Calibration (1, 2, or 3 points) A two point calibration with a buffer of 7 plus 4 or 10 (whichever is nearest to the expected sample value) is always recommended. A one point calibration (choose the value closest to the expected sample value) or a three point calibration is also valid. For best accuracy, always calibrate at the sample temperature. Frequency of calibration is dependent on how often the meter is used, the care of the electrode, and strength of the samples tested. Typically, it is recommended that calibration be performed once a day; or before each use if the meter is not used on a daily basis. Connect the pH probe and place it into a pH7 buffer. Press the POWER button to turn the meter on and press the MODE/CAL button until the PH icon appears. (Note: disable the Auto Power Off feature to avoid an automatic power off during calibration). If the MTC icon appears next to the temperature display, press the ▼ or ▲ button to set the temperature of the pH buffer. If the optional temperature probe is used, insert the probe into the buffer solution. Press and HOLD the MODE/CAL button until the display begins to flash ‘7.00’. The meter automatically recognizes the buffer and calibrates itself to that value. At the end of the calibration cycle, SA and End will briefly appear on the display and the meter will return to the normal operating mode. When a calibration is performed, the calibration icons (pH10) (pH7) (pH4) will be cleared (calibration data is not erased) and will be replaced when a successful calibration is performed for each buffer within one power on cycle. These icons indicate what calibration levels were last performed. They do not indicate how recently the calibration was performed or if the calibrations are still valid. Remove the electrode from the pH7 buffer, rinse in a rinse solution and insert it into the pH4 or pH10 buffer solution. Repeat step 4 for the second calibration point and then the third point if desired. Note: If the output of the electrode falls outside predetermined limits, the meter will cancel the calibration, indicate End, and flash the RENEW icon. This typically happens when the electrode has aged and needs replacement. Note: To avoid cross contamination, always rinse the electrode in a rinse solution, like distilled water, when changing from one buffer or sample to the next buffer or sample. ORP Calibration The ORP electrode does not require calibration. However, you can test the ORP probe’s accuracy using an ORP standard. 341350A-en-US_V1.3 8/15 1.800.561.8187 information@itm.com...
- Page 6 Conductivity (TDS & Salt) Calibration Conductivity accuracy verification should be performed on a periodic basis; once per month is the recommended cycle for normal use. If calibration is required, a conductivity standard solution must be obtained. The meter can be calibrated in any or all of the three ranges. Standardizing solutions of 84µS/cm, 1413µS/cm or 12.88mS/cm (12,880µS/cm) are used for the automatic calibration recognition procedure. No other calibration values are permitted. Calibration is always done in conductivity mode. Since salinity and TDS values are calculated from conductivity values, this procedure also calibrates the Salinity and TDS ranges. Fill a sample cup with the standardizing solution. Turn the meter ON and insert the electrode into the solution. Tap or move the electrode in the sample to dislodge any air bubbles. Press and hold the MODE/CAL button (approximately 2 seconds) until the main display starts flashing. The meter will automatically recognize and calibrate to the standardizing solution. At the end of the calibration, the display will briefly indicate “SA”, “End” and then return to the measurement mode. Note: The “SA” will not appear if the calibration fails. The “range calibrated” alert will appear in the display for each range that is calibrated during that power on cycle. Low range, 84µS/cm Medium range, 1413µS/cm High range, 12.88mS/cm (12,880µS/cm) Note: The meter allows for a 1, 2 or 3 point calibration. If calibration is done for more than one point, the lowest value standard should be done first to obtain the best accuracy. Temperature (pH and Conductivity) Offset Calibration This procedure allows for error correction of the external temperature probe (pH) or the conductivity probe’s built‐in temperature sensor. Switch to pH or Conductivity (Salt/TDS) mode. Place the temperature probe or conductivity cell in the sample and allow the temperature reading to stabilize. Press and hold the UNIT/SET button until the ºC or ºF icon begins flashing. Adjust the ▼ or ▲ buttons to set the display to indicate the known temperature of the sample. Momentarily press the UNIT/SET button to save the change and return to the measurement mode. 341350A-en-US_V1.3 8/15 1.800.561.8187 information@itm.com www.
- Page 7 pH Troubleshooting Chart Symptom Cause Recommended Solution Long response Clogged Junction Soak in 4.07 M KCL @ 60 C for 30 time or reading minutes drift Oil, paint, dyes, suspended solids on Rinse electrode alternately with sensor materials solvent then buffer 7.00 Dry Bulb Long term storage without wetting Soak electrode tip in wetting cap filled with 1ml 7.00 buffer for 24 to 48 hours Static Charge Wiping electrodes Rinse electrode in 7.0 buffer and blot. Do no wipe electrode. Same readings in Cracked or broken bulb Replace electrode. Use bulb guard. different buffers Avoid plunging electrode to bottom of and samples container and spinning bars. A wetting cap will protect bulb between measurements. Erratic LCD Samples have low ionic strength For each 50 ml of sample add 1 drop display (lacks salt); e.g. distilled, de‐ionized, (50uL) of SAT.KCL No alteration in pH boiled, lake water (high pressure) will occur by inert KCL. ...
- Page 8 SPECIFICATIONS Ranges Resolution Accuracy pH 0.00 to 14.00pH 0.01pH ± 0.02pH Conductivity 0.1µS 0.0 to 200.0µS 1µS 200 to 2000µS ± 2% FS 2.00 to 20.00mS 0.01mS TDS 0.0 to 134.0ppm 0.1ppm 134 to 1340ppm 1ppm (calculated from Conductivity) 1.34 to 13.40ppt 0.01ppt Salinity 0.0 to 100.0ppm 0.1ppm (calculated from Conductivity) 100 to 1000ppm 1ppm 1.00 to 10.00ppt 0.01ppt ORP ‐1500 to 1500mV 1mV ± 3mV Temperature 32 to 194ºF 0.1º ≤ 99.9º ± 2ºF/1ºC (meter + probe) ...
Need help?
Do you have a question about the 793950343524 and is the answer not in the manual?
Questions and answers