
Related Manuals for VTech FS6628A


Summary of Contents for VTech FS6628A
- Page 1 User’s manual • Requires a VTech FS6628A or HKBN Gateway to operate Model: ht t p: // hk p h o n e s.v te c h.c o m FS6608A...
-
Page 2: Table Of Contents
TABLE OF CONTENTS IMPORTANT SAFETYINSTRUCTIONS ..1 SET UP THE TELEPHONE ......3 Package Contents ..........3 Location ..............3 Connect the Charger ..........4 Install and Charge the Handset Batteries ...5 3. GET TO KNOW YOUR PHONE ....6 Overview of the Handset ........6 Overview of the Charger ........9 Handset LCD Display Icons .......10 Menu Structure ..........12... - Page 3 4.18.2 End a Conference Call ....21 4.19 Chain Dialling ......... 21 4.19.1 Access a Number in My Contacts While on aCall ....... 21 4.19.2 Access a Number in the Call Log While on a Call ......22 CONTACTS ..........23 Create and Review Entries ......
- Page 4 8.1.2 Set the LCD Backlight ......34 Set Audio ............35 8.2.1 Set the External Ringer ......35 8.2.2 Set the Internal Ringer ......35 8.2.3 Set the Advisory Tones ......36 Call Settings .............36 8.3.1 Set Auto Answer ........36 8.3.2 Set Auto Handsfree ......37 Phonebook Settings .........37 8.4.1 Set Default Phonebook ......38...
-
Page 5: Important Safetyinstructions
Do not overload wall outlets and extension cords as this can result in the risk of fire or electric shock. Unplug this product from the wall outlet and refer servicing to VTech under the following conditions: • When the power supply cord or plug is damaged or frayed. - Page 6 Use only the supplied AAA Ni-MH batteries! The operation periods for the handsets are only applicable with the default battery capacities. The use of other battery types or non-rechargeable batteries/primary cells can be dangerous. These may cause interference and/or unit damages. The manufacturer will not be held liable for damage arising from such non-compliance.
-
Page 7: Set Up The Telephone
SET UP THE TELEPHONE Package Contents The package contains the following items: • Handset • Charger • AC power adapter • 2 AAA Ni-MH rechargeable batteries • User’s manual • Warranty card Location For maximum coverage and reduce the interference, here are some guidelines you should consider when you place the base unit: •... -
Page 8: Connect The Charger
Connect the Charger • Plug the charger adapter into the mains power wall socket and switch the power on. -
Page 9: Install And Charge The Handset Batteries
Install and Charge the Handset Batteries Slide open the battery compartment cover. Place the supplied rechargeable battery in the battery compartment, with the correct polarity orientation as shown. Slide the battery compartment cover back on until it clicks into place. Place the handset on the base to charge the battery. -
Page 10: Get To Know Your Phone
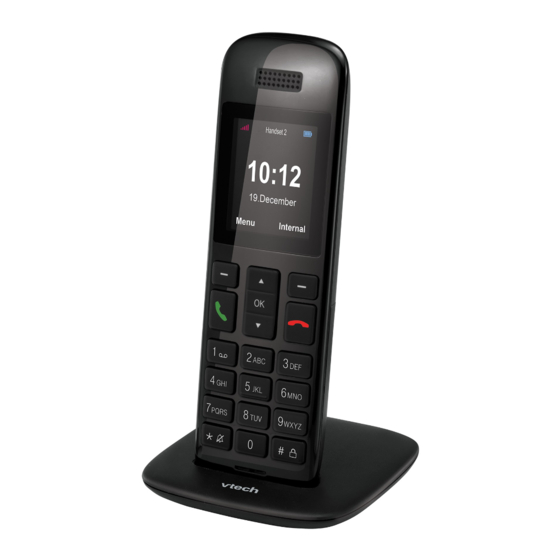
3. GET TO KNOW YOUR PHONE Overview of the Handset EARPIECE LCD DISPLAY SOFT KEYS Press to select a menu item above the key. - Page 11 4. ▲ UP KEY In menu mode: Press to scroll up the menu items. In contact list / call list: Press to scroll up the list. During a call: Press to increase the listening volume. While predialling or editing: Press to move the cursor one line upwards or to the beginning of the strings.
- Page 12 7. MICROPHONE TALK OFF In main menu: Press and hold to power on/off the handset. In menu / editing mode: Press to return to idle mode. During a call: Press to hang up and return to idle mode. 9. SPEAKERPHONE...
-
Page 13: Overview Of The Charger
Overview of the Charger 1. CHARGING CONTACTS Place the handset here to charge the battery. -
Page 14: Handset Lcd Display Icons
Handset LCD Display Icons The screen display gives you information on the current status of the telephone. Menu Icon Description Contacts Call list No. of call missed Conference call Voicemail No. of new message in voicemail Services No. of service missed Settings Fireware updates in settings Status Icon... - Page 15 ECO mode Battery status Ringer Off Alarm On Key locked Item selected Selection confirmed Alarm snooze Notification Description Icon Warning Information Reconfirmation request Firmware updates Birthday reminder Battery low...
-
Page 16: Menu Structure
Menu Structure When the handset LCD backlight is off, press any key to turn on the backlight, then press ▲/▼ to browse the main menu. Refer to the following table for the menu structure. ▲ ▼ ▲ ▼ ▲ ▼ Menu Key Press Main... -
Page 17: Text And Digit Entry Table
Text and Digit Entry Table The following table shows you where each letter and punctuation character can be found. This will be helpful when storing a name in the contacts or renaming your handset. In editing mode, a cursor is displayed to indicate the current text entry position. - Page 18 Lower Case Alphanumeric Editing Press (For contact name editing and renaming handset) space 1 & _ ( ) < > # @ = a b c 2 ä â ç d e f 3 g h i 4 î ı j k l 5 m n o 6 ö...
-
Page 19: Using The Phone
USING THE PHONE Power Off/On Handset In idle mode, press and hold for around five seconds to power off the handset. The handset displays Switch off handset?. Press to confirm. When the handset is off, press and hold for around five seconds to power on the handset. -
Page 20: Call Timer
Call Timer Your handset will automatically time the duration of all external calls. The handset display shows the call duration both during and for a few seconds after your call is terminated. Answer a Call If the handset is not on the charging cradle: Take Call •... -
Page 21: Call Waiting
Call Waiting If you subscribe to call waiting service from your telephone service provider, you hear a tone if someone calls while you are already on a call. • Press on the handset to put your current call on hold and take the new call. -
Page 22: Ringer Silencing
4.12 Ringer Silencing In idle mode, press and hold . The screen displays Ringer Off, and then in idle screen. To turn on the ringer, press and hold . The screen displays Ringer On. 4.13 Redial 4.13.1 Access the Redial List In idle mode, press and hold the key to access the redial list. -
Page 23: Delete An Entry In The Redial List
4.13.3 Delete an Entry in the Redial List In idle mode, press and hold the key to access the redial list. Press ▲/▼ to highlight the desired entry, then press Option. Press ▲/▼ to highlight Delete Entry, then press OK. The screen displays Delete?. -
Page 24: Make An Internal Call
4.15 Make an Internal Call If you have multiple handsets registered on your telephone base or router, you can make internal calls. Press Internal to enter the internal call menu when the phone is not in use. Press ▲/▼ to highlight All handset or the registered handset with which you want to have an internal call, then press OK or OK. -
Page 25: Conference Call
4.18 Conference Call 4.18.1 Conference Call between Internal and External Calls When you have two calls established on the line with either one put on hold, you can to create a 3-way conference call. During an internal call, press Option. Press ▲/▼... -
Page 26: Access A Number In The Call Log While On A Call
4.19.2 Access a Number in the Call Log While on a Call While on a call, press Option and ▲/▼ to highlight Call Log, then press to select. Press ▲/▼ to highlight the desired number and press to dial. NOTES •... -
Page 27: Contacts
CONTACTS You can create contact entries that will be stored in the handset. Create and Review Entries 5.1.1 Create a New Entry Press Menu to enter the menu when the phone is not in use. My Contacts, press OK. When the screen displays Press Option. -
Page 28: Edit A Contact Entry
5.2.2 Edit a Contact Entry Press Menu to enter the menu when the phone is not in use. When the screen displays My Contacts, press OK. Press ▲/▼ to highlight the desired entry. Press Option. Press ▲/▼ to highlight Edit Contact, then press OK or Use ▲/▼, OK, or dialing keys to edit the first name, last name, home/mobile/businesss number, and birthday. -
Page 29: View Detail Of A Contact Entry
View Detail of a contact entry Press Menu to enter the menu when the phone is not in use. When the screen displays My Contacts, press OK. Press ▲/▼ to highlight the desired entry. Press OK to view the detail. Press Option and ▲/▼... -
Page 30: Call List
CALL LIST Calling Number Display If you have subscribed to Calling Number Display service, you will be able to see your caller’s number on your handset display (provided it is not blocked) prior to answering the call. If your caller’s name is stored in the contact list and a number match is found, you will see the caller’s name on the display instead. -
Page 31: View Missed Calls
6.1.3 View Missed Calls Press Menu to enter the menu when the phone is not in use. Press ▲/▼ to highlight Call List, then press OK. Press Missed and ▲/▼ to view only entries of missed calls. Press OK to view detail of the desired entry. Press Option and ▲/▼... -
Page 32: Delete An Entry In The Call List
6.1.5 Delete an Entry in the Call List Press Menu to enter the menu when the phone is not in use. Call List, then press OK. Press ▲/▼ to highlight Press ▲/▼ to highlight the desired entry, then press OK. Press Option. -
Page 33: Others
OTHERS You can use the featured service functions to set reminder or alerts of alarm clock, birthdays, and quick dial. When there are missed calls, the number of missed calls will be displayed in idle mode. If there are 3 missed calls, the screen will display Set Alarm Clock You can set up to five independent alarms in your handset. -
Page 34: Clear An Alarm Clock
Press ▲/▼ to highlight the Edit Alarm, then press OK. Use ▲/▼, OK, or dialing keys to edit the mode, time, name, melody, and volume of the alarm. Press Save to confirm. Saved displays and you hear a confirmation tone. 7.1.3 Clear an Alarm Clock Menu... -
Page 35: Quick Dial
Quick Dial 7.3.1 Assign a Quick Dial Entry You can assign eight of your contact entries to a quick dial slot (2-9). The quick dial entries are shared by all handsets. Up to eight quick dial entries can be stored. The quick dial number must be created from an existing entry in the contacts. -
Page 36: Edit A Quick Dial Entry
When the screen displays 1. VoiceBox, press OK or Option. Press ▲/▼ to highlight a Manual Entry or My Contacts, then press OK or OK. • If Manual Entry is chosen, enter the phone number. • If My Contacts is chosen Press ▲/▼ to highlight a desired contact entry, then press OK twice. -
Page 37: Dial A Quick Dial Entry
7.3.4 Dial a Quick Dial Entry • In idle mode, press and hold the assigned dialling key to dial out. 7.3.5 Delete a Quick Dial Entry Press Menu to enter the menu when the phone is not in use. Press ▲/▼ to highlight Others, then press OK. -
Page 38: Settings
SETTINGS In settings menu, you can change the handset settings for display, audio, and details of energy, call, address book, base, and line. You also do the handset setup and troubleshooting here. Set Display Mode and LCD Backlight 8.1.1 Change the Display Mode You can choose to have the display in Icon Mode with large icons for menu options, or List Mode with only text for menu options. -
Page 39: Set Audio
Set Audio 8.2.1 Set the External Ringer You can change the ringer settings for external calls. Press Menu to enter the menu when the phone is not in use. Press ▲/▼ to highlight Settings, then press OK. Press ▲/▼ to highlight Audio, then press OK or OK. When the screen displays External Ringer, then press OK or OK. -
Page 40: Set The Advisory Tones
8.2.3 Set the Advisory Tones You can turn on or off the advisory tones for the handset, including key tone, charging tone, new notifcation tone, confirmation sound, and range warning tone. Press Menu to enter the menu when the phone is not in use. -
Page 41: Set Auto Handsfree
8.3.2 Set Auto Handsfree If you turn on the auto handsfree feature, you would answer the incoming call only in speakerphone mode. Press Menu to enter the menu when the phone is not in use. Press ▲/▼ to highlight Settings, then press OK. Press ▲/▼... -
Page 42: Set Default Phonebook
8.4.1 Set Default Phonebook Press Menu to enter the menu when the phone is not in use. Settings, then press OK. Press ▲/▼ to highlight Press ▲/▼ to highlight PhoneBK Settings, then press OK or OK. Press ▲/▼ to highlight My Contacts or My Contacts, then press OK or OK. -
Page 43: Delete All Entries In Phonebook
8.4.3 Delete All Entries In Phonebook Press Menu to enter the menu when the phone is not in use. Press ▲/▼ to highlight Settings, then press OK. Press ▲/▼ to highlight PhoneBK Settings, then press OK or OK. Press ▲/▼ to highlight My Contacts or My Contacts, then press OK or OK. -
Page 44: View Phonebook Memory Details
8.4.5 View Phonebook Memory Details Press Menu to enter the menu when the phone is not in use. Settings, then press OK. Press ▲/▼ to highlight Press ▲/▼ to highlight PhoneBK Settings, then press OK or OK. Press ▲/▼ to highlight My Contacts or My Contacts, then press OK or OK. -
Page 45: Set Dial Mode
8.5.2 Set Dial Mode Press Menu to enter the menu when the phone is not in use. Press ▲/▼ to highlight Settings, then press OK. Press ▲/▼ to highlight Base Settings, then press OK or OK. Press ▲/▼ to highlight Dial Mode, then press OK or OK. Press OK to change the dial mode from Tone to Pulse, or vice versa. -
Page 46: Set Exchange Code
8.5.4 Set Exchange code Press Menu to enter the menu when the phone is not in use. Press ▲/▼ to highlight Settings, then press OK. Press ▲/▼ to highlight Base Settings, then press OK or OK. Press ▲/▼ to highlight Exchange code, then press OK or OK. -
Page 47: Line Settings
Line Settings You can change the line settings of the router where your handset is registered. Press Menu to enter the menu when the phone is not in use. Press ▲/▼ to highlight Settings, then press OK. Press ▲/▼ to highlight Line Settings, then press OK or OK. -
Page 48: Change System Pin For Handset
8.7.2 Change System PIN for Handset Press Menu to enter the menu when the phone is not in use. Press ▲/▼ to highlight Settings, then press OK. Press ▲/▼ to highlight Setup, then press OK or OK. Press ▲/▼ to highlight Change PIN, then press OK or OK. Enter the current system PIN (default: 0000), then press Enter the new system PIN, then press OK or OK. -
Page 49: Set The Language
8.7.4 Set the language Menu Press to enter the menu when the phone is not in use. Settings, then press OK. Press ▲/▼ to highlight Press ▲/▼ to highlight Setup, then press OK or OK. Press ▲/▼ to highlight Language, then pressOK or OK. Press OK or Save to confirm. -
Page 50: Reset Base To Default
8.8.2 Reset Base to Default Press Menu to enter the menu when the phone is not in use. Settings, then press OK. Press ▲/▼ to highlight Press ▲/▼ to highlight About, then press OK or OK. Press ▲/▼ to highlight Reset Base, then press OK or Enter the system PIN (default: 0000), then press OK. -
Page 51: Registration
REGISTRATION Register Handsets Before registering the new handset to a IAD601 router or FS6628-A telephone base, the handset will display Register!. Register your handset according to the following procedure. 9.1.1 Automatic Registration for Handset Make sure the handset battery is fully charged before you begin registration. -
Page 52: Deregister Handsets
When the registration is complete, the handset displays Success connection setup, and you hear a confirmation tone. NOTES • Additional handsets are assigned numbers in the sequential order they are registered. • You cannot register a handset if any other system handset is in use. -
Page 53: 10. Technical Specifications
10. TECHNICAL SPECIFICATIONS BASIC INFORMATION Display Colour: 262k information Pixel: 176px x 220 px Resolution: 141dpi Valid range Indoor: 50m approx. Outdoor: 300m approx. Handset Standby time: 200Hours approx. Operating Time Talk time: 20Hours approx. Frequency 1880 MHz - 1900 MHz Number of 10 channels Channels... -
Page 54: Care And Maintenance Instructions
11. CARE AND MAINTENANCE INSTRUCTIONS Take care of your telephone • Your cordless telephone contains sophisticated electronic parts, so you must treat it with care. • Avoid rough treatment. • Place the handset down gently. • Save the original packing materials to protect your telephone if you ever need to ship it. - Page 55 VTECH TELECOMMUNICATIONS LTD. A member of THE VTECH GROUP OF COMPANIES. © 2016 VTech Telecommunications Ltd. All Rights Reserved. 03/17. V1.0...
Need help?
Do you have a question about the FS6628A and is the answer not in the manual?
Questions and answers