Table of Contents
Advertisement
Quick Links
Advertisement
Table of Contents

Related Manuals for Durr Dental VISTACAM2


Summary of Contents for Durr Dental VISTACAM2
- Page 1 INSTALLATION AND OPERATING INSTRUCTIONS DÜRR VISTACAM2 2000/05...
-
Page 3: Table Of Contents
CONTENT CONTENT CONTENT CONTENT CONTENT Important Information Installation 1. Notes ............26 7. Mounting ..........32 1.1 CE - Labeling ........26 7.1 Room requirements ......32 1.2 General Notes ......... 26 7.2 Choice of mounting ......32 1.3 Electromagnetic Compatibility ..26 7.3 Installation ........ -
Page 4: Important Information
IMPORTANT INFORMATION 1. NOTES 1.1 CE - Labeling CE- Labeling according to Medical Products All switches, processes, trade marks, software programs and appliances named Guidelines for Class I Products. < This product carries the CE - label “CE in this document are registered names. 0124”... -
Page 5: Using Peripheral Devices
1.6 Electrical Safety Notes Non-earthed part Type BF • The Dürr VistaCam2 may only be connected to an earthed safety socket. CE-Labeling without Notified Body • Before connecting the appliance to the... -
Page 6: Product Information
3. DELIVERY CONTENTS 2.1 Correct Usage VistaCam2 length cameracable Professional The Dürr VistaCam2 is solely designed for the 2103-100-50 (230V) PAL ......1,8m production of intra- and extraoral images in 2103-100-51 (230V) PAL ......2,3m dental-medical practices and clinics. Any 2103-300-50 (230V) NTSC ...... -
Page 7: Technical Data
• CE-Label • Produced according to ICE 601-1 and Frequency (Hz) 50/60 50/60 MPG. Rated Current (A) Basic system VistaCam2 Video color system ...... PAL / NTSC Professional ca. 0,37 ca. 0,8 Automatic brightness regulation VistaCam2 White balance High Professional ca. -
Page 8: Functional Description
5. FUNCTIONAL DESCRIPTION... -
Page 9: Function
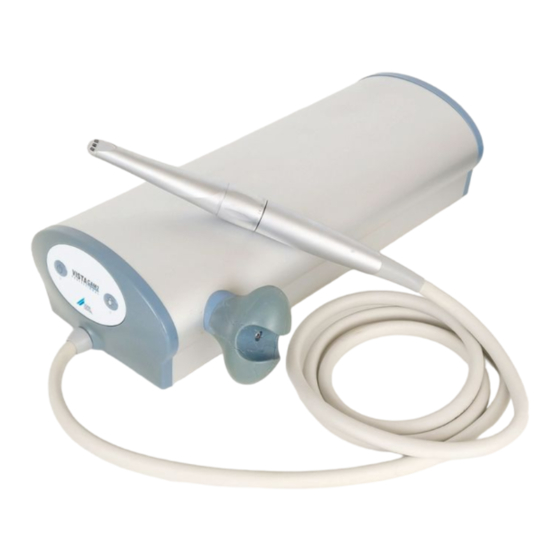
6. FUNCTION 6.1 Freeze Module The Dürr VistaCam2 consists of a base unit and handset with IFC (Iris Focus Control) When using the models Professional Freeze Optic. and High Professional Freeze it is possible to The camera electronics are housed vin the use a foot switch and select between Freeze base unit, the image sensor in the handset. -
Page 10: Installation
VistaCam2 is fixed firmly. • It is also possible to mount the VistaCam2 on either a wall or a roof column. Special mounting sets can be ordered from Dürr Dental for this purpose. -
Page 11: Connecting Image Viewer
7.5 Handset holder The handset holder (1) can be mounted directly on the VistaCam2 (on the right or left side) or mounted in any position near the VistaCam2 (camera cable is 1.65 m in length). Use mounting set, order no. 2103-105-00. -
Page 12: Electrical Connection
8. ELECTRICAL CONNECTION 8.1 Video-Setup • Connect the Video-BNC-cable (10) to the rear of the appliance, BNC-connection (7), and to the video printer, connection incoming signal • Connect the S-Video cable (4) to the rear of the appliance, 4 pin MINI-DIN-connection (6), and to the video printer, connection incoming signal Connect the S-Video cable to the video... -
Page 13: Foot Switch
PC-Setup see handbook Software DBSWin95, order no. 2100-725-99(01 8.4 Power supply The Dürr VistaCam2 is designed for use with voltage of 230V, 50/60Hz. Check that the required voltage is available before connecting the appliance to the power supply. -
Page 14: Putting Into Operation
• The appliance is now ready for use and an image should be visible on the image viewing appliance. 9.2 IEC 601 Check After commissioning the VistaCam2 all checks according to IEC 601 must be carried out and documented, e.g. patient static etc. -
Page 15: Use
10. OPERATION For reasons of hygiene when using the VistaCam2 for intraoral imaging disposable sheaths should always be used. When disinfecting the VistaCam2 use cloths e.g. FD 350. 10.1 IFC Optic Sheath For hygienic reasons rubber gloves should be worn before removing the disposable sheaths from their packaging. - Page 16 • Using the tips of the fingers very carefully press the sheath against the optic to remove any air bubbles that may be present • Hold the white edge of the sheath firmly and carefully pull off the plastic packaging in the direction of the IFC Optic •...
-
Page 17: Operation Model Professional
10.2 Operation Model Professional • Switch on appliance power switch Green LED lights when on. • Switch on the integrated lighting Yellow LED lights when on. • Switch on image viewing appliance. • Place the sheath over the IFC Optic As soon as the handset is removed from its holder, the integrated lighting is automatically switched on. -
Page 18: Operating The
10.4 Operating the IFC Optic • Prepare the appliance for use • Before sliding the sheath in position, turn the setting ring, to focus the IFC Optic Symbol Tooth: Macro (12) Rectangle: intraoral (13) Face: extraoral (14) • Place sheath over handset •... -
Page 19: Operation Freeze Frame (Only Available With Professional Freeze And High Professional Freeze)
10.5 Operation Freeze Frame (only available with Professio- nal Freeze and High Professional Freeze) The models Professional Freeze and High Professional Freeze feature a 4-fold image memory activated via a foot switch.On switching on the appliance the Live-Mode is activated. The left panel (15) enables one to switch to freeze frame or back to original (live) mode. -
Page 20: Transport
12. TRANSPORT Transport of the VistaCam2 when mounted on the VistaCart or similar trolley For safety reasons the appliance should be disconnected from all power even when moved only short distances! Before using the appliance plug in the machine correctly! •... -
Page 21: Repair And Maintenance
• Extract the lamp with holder, remove the holder from the lamp Only use original lamps as they guarantee maximum lighting. The VistaCam2 uses special high quality lamps. These Lamps have an average life of ca. 50 hours. Do not touch the new lamp with fingers, use gloves •... -
Page 22: Troubleshooting
TROUBLESHOOTING 14. TIPS FOR OPERATOR Probable Cause Problem Solution 1. Image opaque, • Sheath incorrectly positioned • Correctly align/position disposable milky sheath (see section 10 Operation) • IFC Optic dirty • Clean the IFC Optic (see section 11 Cleaning) • A disposable sheat was used •... -
Page 23: Disposal
DISPOSAL 15. DISPOSAL OF APPLIANCE All electronic components including boards should be disposed of as electronic waste. All other parts can be disposed of according to the relevant regulations concerning waste disposal.
Need help?
Do you have a question about the VISTACAM2 and is the answer not in the manual?
Questions and answers