
Related Manuals for Daikin TSTATD2152-2


Summary of Contents for Daikin TSTATD2152-2
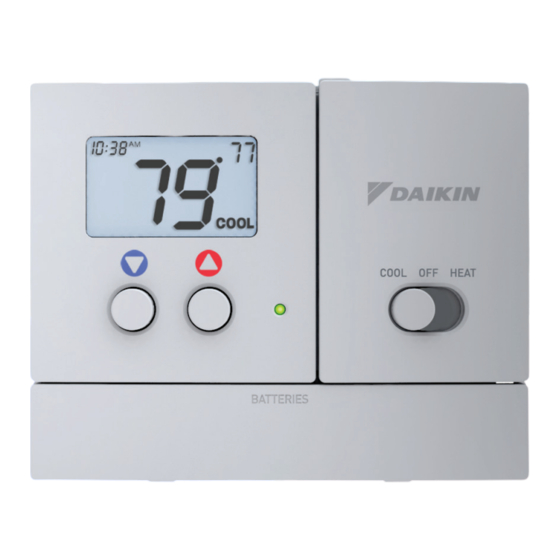
- Page 1 TSTATD2152-2 RESIDENTIAL Digital Thermostat Heat Pump • 5 + 2 Day Programmable Owner's Manual Residential Use...
-
Page 2: Table Of Contents
Table of Contents Safety Warnings ..............3 Location of Controls .............4 Dispay ..................5 Normal Operation ..............6 Manual Operation ............7 Programmed Operation Aux Heat .................8 Clock Set ................9 Time Period Programming Overview ....................Weekday Programming ................ Weekend Programming ................ Advanced Setup ..............18 Advanced Features..............19 Factory Defaults ..............20 Calibration ................21... -
Page 3: Safety Warnings
Safety Warnings Follow Installation Instructions carefully. DISCONNECT POWER TO THE HEATER - AIR CONDITIONER BEFORE REMOVING THE OLD THERMOSTAT AND INSTALLING THE NEW THERMOSTAT. The two Alkaline “AA” batteries must be replaced at least once every 12 months to ensure proper operation. The Low Battery icon (fig. -
Page 4: Location Of Controls
Location of Controls AUX HEAT PROGRAM SWITCH SWITCH RUN program Emergency Program OFF Normal SET program Lockout FAN SWITCH AUX HEAT On or Auto AUTO NORM EMRGC’Y LOCKOUT PROGRAM HEAT NEXT BUTTON NEXT RUN OFF SET For programming RESET How to use: The NEXT FILTER button is used to advance COOL... -
Page 5: Dispay
Display 12:00 Morning Evening MTuWThF SaSu FILTER Night HEAT COOL Day of the week. When programming, MTuWThF represent the five weekdays and SaSu represent the two weekend days. Heat and Cool indicators. In normal operation, Heat or Cool appears, depending on the Mode Switch position. When heat or cool is energized, the Heat or Cool indicator will flash. -
Page 6: Normal Operation
Normal Operation PROGRAM SWITCH RUN program Program OFF SET program AUX HEAT SWITCH On or Auto AUTO NORM EMRGC’Y LOCKOUT PROGRAM HEAT NEXT RUN OFF SET RESET FILTER COOL HEAT BATTERIES COOLER & WARMER MODE SWITCH Cool, Off, or Heat BUTTONS Manual Operation (Program Switch OFF) Select Cool or Heat with the Mode Switch. -
Page 7: Programmed Operation
Normal Operation PROGRAM SWITCH RUN program Program OFF SET program AUX HEAT SWITCH On or Auto AUTO NORM EMRGC’Y LOCKOUT PROGRAM HEAT NEXT RUN OFF SET RESET FILTER COOL HEAT BATTERIES COOLER & WARMER MODE SWITCH Cool, Off, or Heat BUTTONS Programmed Operation Select Cool or Heat with the Mode Switch. -
Page 8: Aux Heat
Aux Heat AUX HEAT AUTO NORM EMRGC’Y LOCKOUT AUX HEAT PROGRAM SWITCH HEAT NEXT RUN OFF SET RESET FILTER COOL HEAT BATTERIES Emergency - Disables all compressor functions* and energizes only Aux Heat to satisfy the heat demand. Normal - Aux Heat is allowed to run, if necessary, along with the heat pump to satisfy the heat demand. -
Page 9: Clock Set
Clock Set PROGRAM Slide the Program Switch to the SET position. RUN OFF SET Setting the time & day are the first two steps after sliding the Program Switch to SET. Use these buttons to adjust the current time. Press NEXT to advance To slew the time more rapidly, push and hold the NEXT... -
Page 10: Time Period Programming Overview
Time Period Programming Overview PROGRAM SWITCH • Slide the Program Switch to the SET position. PROGRAM • The blinking icon(s) on the display may be changed by pressing the COOLER or WARMER buttons. RUN OFF SET • After the blinking icon is changed to the desired selection, press the NEXT button. -
Page 11: Weekday Programming
Time Period Programming Weekday Programming PROGRAM Setting the time & day are the first two steps after sliding the Program Switch to SET (page 9). RUN OFF SET Press NEXT Morning Use these buttons to to advance MTuWThF adjust the start time for NEXT the morning time period. - Page 12 Time Period Programming Weekday Programming Press NEXT Use these buttons to to advance MTuWThF adjust the cool setpoint for NEXT the day time period. COOL Press NEXT to advance Use these buttons to MTuWThF adjust the heat setpoint for NEXT the day time period.
- Page 13 Time Period Programming Weekday Programming Evening Press NEXT to advance Use these buttons to MTuWThF adjust the heat setpoint for NEXT the evening time period. HEAT Press NEXT to advance Use these buttons to MTuWThF adjust the start time for NEXT the night time period.
-
Page 14: Weekend Programming
Time Period Programming Weekend Programming Morning Press NEXT to advance Use these buttons to SaSu adjust the start time for NEXT the morning time period. Press NEXT Morning to advance Use these buttons to SaSu adjust the cool setpoint for NEXT the morning time period. - Page 15 Time Period Programming Weekend Programming Press NEXT to advance Use these buttons to SaSu adjust the cool setpoint for NEXT the day time period. COOL Press NEXT to advance Use these buttons to SaSu adjust the heat setpoint for NEXT the day time period.
- Page 16 Time Period Programming Weekend Programming Press NEXT Evening to advance Use these buttons to SaSu adjust the heat setpoint for NEXT the evening time period. HEAT Press NEXT to advance Use these buttons to SaSu adjust the start time for NEXT Night the night time period.
- Page 17 Time Period Programming After you have completed setting the time period PROGRAM programming, you have two options: 1) Run the time period program by sliding the Program Switch to the RUN position. RUN OFF SET 2) Do not run the time period program. The PROGRAM thermostat will operate as a manual heat or cool thermostat.
-
Page 18: Advanced Setup
Advanced Setup This is normally done by installer at initial installation. Enter advanced setup by sliding the Program Switch to SET. When the clock is flashing, press the NEXT button for 5 seconds. Do not release the button until this screen appears. Press NEXT to advance Use these buttons to... -
Page 19: Advanced Features
Advanced Setup Press and hold the Press NEXT Press RESET to advance FILTER RESET FILTER button RESET to reset the filter NEXT FILTER counter to 0 and remove the Actual hours of icon from the display. fan operation Adjust the number of hours the blower will run before the icon appears on the... -
Page 20: Factory Defaults
Factory Defaults If, for any reason, you desire to return all the stored settings back to the factory default settings, follow the instructions below. Enter advanced setup by sliding the Program Switch to SET. When the clock is flashing, press the NEXT button for 5 seconds. Do not release the button until this screen appears. -
Page 21: Calibration
Calibration Under normal circumstances it will not be necessary to adjust the calibration of the temperature sensor. If calibration is required, please contact a trained HVAC technician to correctly perform the following procedure. Enter advanced setup by sliding the Program Switch to SET. When the clock is flashing, press the NEXT button for 5 seconds. -
Page 22: Battery Replacement
Battery Replacement The batteries are easily accessible from the battery door located on the bottom front of the thermostat (fig. 1). To open the battery slot, pull out on the battery door (fig. 1) and swing down (fig. 2). FIG. 1 FIG. -
Page 23: Warranty
Installer Name __________________________________________________________________ Installation Date ________________________________________________________________ Model # _______________________________________________________________________ Serial # ________________________________________________________________________ For further information about this warranty, contact Daikin Consumer Affairs at (877) 254-4729 or by mail to 7401 Security Way, Houston, Texas 77040. - Page 24 Programming Worksheet See page 10 DAY PERIOD START TIME COOL HEAT Morning Evening Night Morning Copy Mon to Tues Evening Night Morning Copy Tues to Wed Evening Night Morning Copy Wed to Thurs Evening Night Morning Copy Thurs to Fri Evening Night Morning...
Need help?
Do you have a question about the TSTATD2152-2 and is the answer not in the manual?
Questions and answers