Table of Contents
Advertisement
Advertisement
Table of Contents

Related Manuals for Daikin ENVi


Summary of Contents for Daikin ENVi
- Page 1 Daikin ENVi Thermostat Installation Manual...
- Page 2 SAFETY CONSIDERATIONS Read these SAFETY CONSIDERATIONS for Installation carefully before installing the Daikin ENVi thermostat kit. After completing the installation, make sure that the unit operates properly. Instruct the customer on how to operate and maintain the thermostat. Inform customers that they should store this Installation Manual with the Operation Manual for future reference.
-
Page 3: Table Of Contents
FCC Compliance Statement Specifications Wiring Requirements INSTALLING THE THERMOSTAT KIT Step 1. Power Off the Daikin Indoor Unit Step 2. Position and Wire the DPCA Step 3. Install the Daikin ENVi Thermostat Step 4. Connect the Thermostat Wiring Step 5. Mount the DPCA Step 6. -
Page 5: Getting Started
GETTING STARTED Welcome The Daikin ENVi thermostat kit has been designed to ensure the installation process is simple and efficient. This step-by-step Installation Manual will walk you through all aspects of the installation. To ensure an on-going service relationship with your customers, please register all of your Daikin ENVi thermostats in your Contractor Portal. -
Page 6: Package Contents
Package Contents The Daikin ENVi thermostat kit includes the following items. ENVi Thermostat Trim Plate DPCA with Power Cable Wiring Harness Double-Sided Adhesive Installation and User Screws (4) and Manuals Drywall Anchors (4) Serial Number Wire Ties (2) Sticker Daikin ENVi Thermostat Kit Contents... -
Page 7: Before You Begin
Please read it carefully before beginning the installation. For information on how to operate the Daikin ENVi thermostat, please see the Daikin ENVi User Manual. The Daikin ENVi thermostat is designed to be mounted on the homeowner’s wall in a convenient location. -
Page 8: Daikin System Compatibility
Applicable indoor unit models: FTXS, FTXN (09/12 requires KRP980B1 interface adapter), CTXS, FDXS and CDXS The Daikin ENVi thermostat can also support a single-stage auxiliary heater. Any auxiliary heater that requires air flow from the Indoor Unit should be equipped with an air flow switch for safety. - Page 9 To ensure compliance, operation at closer than this distance is not allowed. FCC ID: XF6-RS91-10N1102 IC: 8407A-91101102 Warning: Changes or modifications not expressly approved by Daikin AC (Americas) could void the user’s authority to operate the equipment.
-
Page 10: Specifications
Specifications Thermostat Specifications Temperature Heat Set Point Range 45 to 80 °F (7 to 26.5 °C) Cool Set Point Range 65 to 95 °F (18.5 to 35 °C) Display Range 40 to 100 °F (5 to 37 °C) Sensitivity +/- 1 °F (0.5 °C) Operating Range 32 to 130 °F (0 to 55 °C) Humidity... -
Page 11: Wiring Requirements
22 AWG: 500 ft/150 m INSTALLING THE THERMOSTAT KIT There are 5 steps to install the Daikin ENVi thermostat kit: Step 1. Power Off the Daikin Indoor Unit Step 2. Position and Wire the DPCA Step 3. Install the Daikin ENVi thermostat Step 4. -
Page 12: Step 2. Position And Wire The Dpca
Step 2. Position and Wire the DPCA The Daikin Power and Communication Adapter (DPCA) provides an interface between the thermostat and Indoor Unit. To install the DPCA: 1. Position the DPCA in a suitable location, away from water and near the Indoor Unit (for example, a backside cavity of a wall-mounted unit). - Page 13 Power Cable Power cable to terminal block on Indoor Unit Indoor Unit Terminal Block Wires to outdoor unit are not shown L1 L2 Black Green DPCA P1 Terminal 4-wire low-voltage cable to thermostat (not included) Cover P2 Terminal Wire harness to Indoor Unit (included) To terminal S21 on Indoor Unit main control board...
-
Page 14: Step 3. Install The Daikin Envi Thermostat
In an area that could restrict air flow To install the thermostat: 1. If necessary, remove the previous thermostat. 1. Gently separate the backplate from the Daikin ENVi thermostat. 2. Place the thermostat backplate on the wall. Make sure that any existing wires can be inserted through the opening for the wiring. - Page 15 The solid color indicates mounting holes 4. Move the backplate out of the way and make holes where indicated in the previous step. The mounting holes can accommodate a #6 pan-head screw. It is recommended to use the included fasteners to ensure proper fitting of the front housing.
-
Page 16: Step 4. Connect The Thermostat Wiring
1. Connect the wires as shown: P1 Terminal on DPCA Optional Auxiliary Heater 24VAC Daikin ENVi Thermostat 2. Attach the Daikin ENVi thermostat to the backplate. Ensure that the pins on the thermostat align with the terminal block on the backplate. -
Page 17: Step 5. Mount The Dpca
Step 6. Power On Daikin Indoor Unit After you’ve completed the wiring, you can apply power to the Daikin Indoor Unit. The Daikin ENVi thermostat receives power from the equipment and will automatically power on. After you power on the Indoor Unit: 1. -
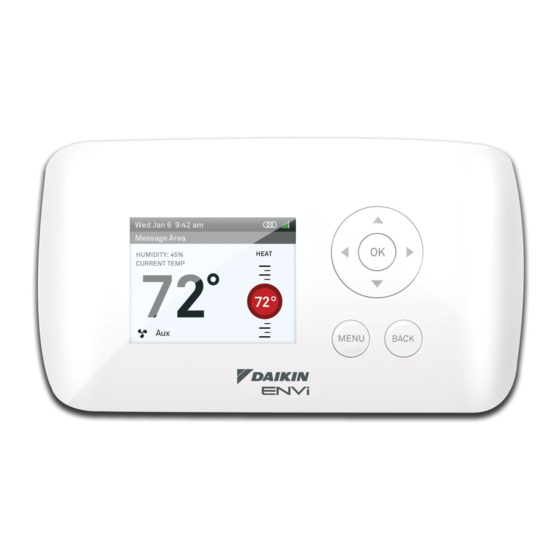
Page 18: Navigating The Menus
NAVIGATING THE MENUS The Daikin ENVi thermostat has an easy-to-read color screen that displays all the information you need to configure the thermostat. Use the navigation buttons on the right to quickly change the temperature, access features, and configure settings. - Page 19 MENU MENU Pressing displays a list of all available options. If a menu is currently MENU MENU displayed, pressing will cancel any unsaved changes and return to the Home screen. BACK On a menu screen, press BACK to go BACK back to the previous screen.
-
Page 20: Configuring The Daikin Envi Thermostat
CONFIGURING THE DAIKIN ENVi THERMOSTAT The first step after installing the Daikin ENVi thermostat is to configure the thermostat settings for the Indoor Unit. Preferences This section describes the user preferences that should be configured during installation. For a complete description of all user preferences, see the Daikin ENVi User Manual. -
Page 21: Installation Settings
Installation Settings To configure the The Installation Settings let you configure system settings: the equipment connected to the Daikin ENVi thermostat. From the Home screen, press MENU. Allow Auto Heat/Cool Settings ▶ Select Installation Settings. Enabling this option allows the user to select auto change-over as a system mode. - Page 22 damage to the compressor. You can also set this value to determine when you want the auxiliary heat (if installed) to engage to help meet the set temperature. The temperature range is adjustable from –10 to 65 °F (–23.3 to 18.3 °C) or disabled by default.
- Page 23 Indoor Unit uses a temperature offset for the heating set point, taking into consideration the higher sensing temperature. The Daikin ENVi thermostat applies the offset to the set point which is sent to the Indoor Unit. The offset should be 3.5°F (2.0°C) for wall-mounted and ducted...
- Page 24 reached). Options are Auto (default) and 1 to 10 °F (0.6 to 5.6 °C). Only visible if Indoor Unit supports heat and an auxiliary heat source is also configured. Heat Pump to Aux Runtime The maximum amount of time the heat pump will run before engaging Aux Heat.
- Page 25 Above this level, the auxiliary heat will not be activated. The temperature is adjustable from 0 to 80 °F (-17.8 to 26.5 °C) in increments of 0.5°F (0.3°C). The default value is 70°F (21°C). Fan Configuration The Fan Configuration settings map the Indoor Unit’s internal fan speeds to the fan speed options displayed to the user on the thermostat.
-
Page 26: Reset Equipment Or User Settings
3262. The code is fixed and cannot be changed. Reset Equipment or User Settings You can restore equipment or user settings on To reset the Daikin ENVi the Daikin ENVi thermostat back to their factory thermostat: defaults. From the Home screen, press MENU. -
Page 27: Rebooting The Daikin Envi Thermostat
Contractor who installed the Daikin ENVi thermostat. Rebooting the Daikin ENVi thermostat You can reboot the Daikin ENVi thermostat by pressing the physical hardware reset button, located through an opening in the bottom left corner of the Daikin ENVi thermostat. Rebooting will not alter programming or configuration options. -
Page 28: Configuring Reminders And Alerts
CONFIGURING REMINDERS AND ALERTS To configure Reminders The Daikin ENVi thermostat can generate and Alerts periodic maintenance reminders that help the homeowner know when to perform periodic From the Home screen, maintenance. press MENU. The thermostat can also generate alerts if the... - Page 29 104 °F (15.5 to 40 °C). Display Alerts on Thermostat Select No if you do not want any of the alerts to be displayed on the Daikin ENVi thermostat screen. Alerts will continue to be displayed on the web portal and sent via email.
-
Page 30: List Of Alerts
Lost communication Communication with the Indoor Unit has been lost. Check the wiring connections between the DPCA, ENVi thermostat and Indoor Unit. The green LED on DPCA should be on and solid. Upon initial power up of the system communication, this alert may be generated. -
Page 31: One-Year Limited Warranty
The limited warranty will be void and of no effect, and Daikin AC will have no liability to Customer or anyone, including without limitation, if the Product: • was operated/stored in abnormal use or maintenance conditions not prescribed in the User... - Page 32 No one is authorized by Daikin AC to modify this limited warranty in any respect or to create for Daikin AC any other obligation or liability in connection with the Product unless done so in a written agreement bearing the handwritten signature of the President of Daikin AC.
- Page 34 Daikin AC (Americas), Inc. 1645 Wallace Drive, Suite 110 Carrollton, TX 75006 USA IM-TS1-1-1305...
Need help?
Do you have a question about the ENVi and is the answer not in the manual?
Questions and answers