Table of Contents
Advertisement
Quick Links
Advertisement
Table of Contents

Related Manuals for Siemens CS656GBS1B/25


Summary of Contents for Siemens CS656GBS1B/25
- Page 1 Built-in oven CS656GB.1B Instruction manual...
-
Page 3: Table Of Contents
Table of contents e n I n s t r u c t i o n m a n u a l Intended use ......4 Time-setting options . -
Page 4: Intended Use
This appliance is intended for use up to a Additional information on products, accessories, replacement parts and services can be found at maximum height of 2000 metres above sea www.siemens-home.bsh-group.com and in the online level. shop www.siemens-home.bsh-group.com/eshops This appliance may be used by children over... -
Page 5: Important Safety Information
Important safety information Warning – Risk of scalding! (Important safety The accessible parts become hot during ■ information operation. Never touch the hot parts. Keep children at a safe distance. When you open the appliance door, hot G eneral information Risk of scalding! ■... -
Page 6: Steam
Causes of damage Steam ]Causes of damage Warning – Risk of scalding! G eneral information The water in the water tank may become ■ C a u s e s o f d a m a g e very hot if you continue to operate the Caution! appliance. -
Page 7: Steam
Environmental protection Steam 7Environmental protection Caution! Baking tins: Ovenware must be heat and steam Y our new appliance is particularly energy-efficient. ■ resistant. Silicone baking tins are not suitable for E n v i r o n m e n t a l p r o t e c t i o n Here you can find tips on how to save even more combined operation with steam. -
Page 8: Environmentally-Friendly Disposal
Environmental protection Open the appliance door as infrequently as possible ■ when the appliance is in use. It is best to bake several cakes one after the other. ■ The cooking compartment stays warm. This reduces the baking time for the second cake. You can place two cake tins next to each other in the cooking compartment. -
Page 9: Getting To Know Your Appliance
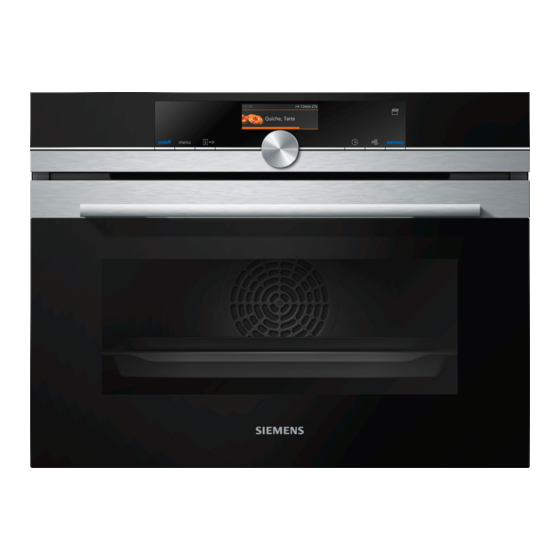
Getting to know your appliance Control panel *Getting to know your In the control panel, you can use the various buttons appliance and the rotary selector to set the required function of the appliance. The current settings are shown on the display. -
Page 10: Operating Modes Menu
Getting to know your appliance the oven. You can use the ² button to check the Progress line current heating temperature when heating up. The progress line shows you how much the oven has already heated up or how much time has elapsed, for example. -
Page 11: Steam
Getting to know your appliance Hot air grilling * 30-250 °C For roasting poultry, whole fish and larger pieces of meat. The grill element and the fan switch on and off alternately. The fan circulates the hot air around the food. Grill, large area Grill settings: For grilling flat items such as steaks, sausages or bread, and for browning food. -
Page 12: Cooking Compartment Functions
Accessories Cooking compartment functions _Accessories Some functions make your appliance easier to use. This, for example, enables the cooking compartment to Y our appliance is accompanied by a range of be well lit and a cooling fan to prevent the appliance A c c e s s o r i e s accessories. -
Page 13: Inserting Accessories
Accessories Inserting accessories Combining accessories You can insert the wire rack and the universal pan at The cooking compartment has three shelf positions. the same time to catch drops of liquid. The shelf positions are counted from the bottom up. When inserting the wire rack, ensure that both spacers ‚... -
Page 14: Before Using For The First Time
Before using for the first time KBefore using for the first Profi pan For preparing large quantities. time Lid for the Profi pan The lid turns the Profi pan into a Profi roasting dish. B efore you can use your new appliance, you must Pizza tray B e f o r e u s i n g f o r t h e f i r s t t i m e make some settings. -
Page 15: Calibrating The Appliance And Cleaning The Cooking
Before using for the first time Set the specified type of heating, temperature and Setting the language duration for the calibration, then start the appliance. German is the preset language. ~ "FullSteam – Steam cooking" on page 17 Use the rotary selector to select the required Calibration language. -
Page 16: Operating The Appliance
Example in the picture: Top/bottom heating at 180 °C. blue. Use the rotary selector to change the type of The Siemens logo appears in the display, and then a heating. type of heating and a temperature. You can specify which operating modes should... -
Page 17: Rapid Heat Up
Steam Rapid heat up `Steam You can use the c button to heat up the cooking compartment particularly quickly. F ood can be cooked particularly gently using steam. The rapid heat up function is not possible for all types of S t e a m With some types of heating, you can prepare food with heating. -
Page 18: Steam-Assisted Cooking
Steam Reheating Menu cooking With steam, you can cook a whole menu at once, With the "Reheating W" type of heating, you can gently without the different flavours mixing. ~ "Tested for you reheat food that has already been cooked or crisp up in our cooking studio"... -
Page 19: Defrosting
Steam Cancelling Caution! The appliance may become damaged due to the use of Touch the Start/Stop button to cancel the operation. unsuitable liquids. Do not use distilled water, highly chlorinated tap water Finishing (> 40 mg/l) or other liquids. Touch the On/Off button to switch off the appliance. Only use cold, fresh tap water, softened water or uncarbonated mineral water. -
Page 20: After Every Steam Operation
Steam Insert the filled water tank (Fig. ). Ensure that the Emptying the water tank water tank locks into place behind both holders ‚ Caution! (Fig. Do not dry the water tank in the hot cooking ■ compartment. This will damage the water tank. Do not clean the water tank in the dishwasher. -
Page 21: Time-Setting Options
Time-setting options Leave the appliance to cool down. OTime-setting options Remove the worst dirt from the cooking compartment immediately and wipe away moisture from the cooking compartment floor. Y our appliance has different time-setting options. T i m e - s e t t i n g o p t i o n s If necessary, press the On/Off button to switch on the appliance. -
Page 22: Cooking Time
Time-setting options Cooking time Touch the "End y" field. The end time is displayed. If you set the cooking time for your meal, the operation stops automatically once this time has elapsed. The oven stops heating. Prerequisite: A type of heating and a temperature have been set. -
Page 23: Childproof Lock
Childproof lock AChildproof lock QBasic settings Y our appliance is equipped with a childproof lock so T here are various settings available to you in order to C h i l d p r o o f l o c k B a s i c s e t t i n g s that children cannot switch it on accidentally or change help use your appliance effectively and simply. -
Page 24: Changing The Time
Sabbath mode FSabbath mode Operation after switching Main menu Heating modes W ith the Sabbath mode, a cooking time of up to Steaming S a b b a t h m o d e 74 hours can be set. You can keep the food in the Dishes* cooking compartment warm without having to switch Night-time dimming... -
Page 25: Cleaning Function
Cleaning function .Cleaning function Warning – Risk of burns! ; The appliance becomes very hot on the outside during the cleaning function. Never touch the appliance Y our appliance has the "Cleaning function" and door. Allow the appliance to cool down. Keep children C l e a n i n g f u n c t i o n "Descaling"... -
Page 26: Descaling
Cleaning function Descaling Press the "Start/stop" button to start the cleaning operation. To ensure that your appliance continues to operate The appliance is descaled. You can see the duration correctly, it must be descaled regularly. counting down in the status bar. An audible signal sounds once descaling has finished. -
Page 27: Cleaning Agent
Cleaning agent DCleaning agent Door panels Hot soapy water: Clean with a dish cloth and then dry with a soft cloth. W ith good care and cleaning, your appliance will retain Do not use a glass scraper or a stainless steel C l e a n i n g a g e n t its appearance and remain fully functioning for a long scouring pad. -
Page 28: Surfaces In The Cooking Compartment
Cleaning agent Keeping the appliance clean Notes Slight differences in colour on the front of the ■ Always keep the appliance clean and remove dirt appliance are caused by the use of different immediately so that stubborn deposits of dirt do not materials, such as glass, plastic and metal. -
Page 29: Rails
Rails Attaching the rails pRails The rails only fit on the right or the left side. For both rails, ensure that the curved rods are at the front. W ith good care and cleaning, your appliance will retain R a i l s First, insert the rail in the middle of the rear socket ‚, its appearance and remain fully functional for a long until the rail rests against the cooking compartment... -
Page 30: Appliance Door
Appliance door Fitting the appliance door qAppliance door Press down on the seal ‚ along the drip trough (figure ); otherwise, the seal ‚ may become W ith good care and cleaning, your appliance will retain detached during cleaning. A p p l i a n c e d o o r its appearance and remain fully functional for a long time to come. -
Page 31: Removing And Installing The Door Panels
Appliance door Remove the cover (figure Loosen and remove the screws on the left and right " Close the appliance door carefully. of the appliance door (figure Before closing the door again, trap a tea towel which has been folded several times in the door (figure Pull out the front panel upwards and lay it on a flat surface with the door handle facing downwards. -
Page 32: Trouble Shooting
Trouble shooting 3Trouble shooting Warning – Risk of electric shock! Incorrect repairs are dangerous. Repairs may only be carried out and damaged power cables replaced by I f a fault occurs, there is often a simple explanation. one of our trained after-sales technicians. If the T r o u b l e s h o o t i n g Before calling the after-sales service, please refer to the appliance is defective, unplug the appliance from the... -
Page 33: Maximum Operating Time Exceeded
Trouble shooting The panel for removing the tank does The plug is not plugged into the mains Connect the appliance to the electricity supply not open Power cut Check whether other kitchen appliances are working The circuit breaker is faulty Check in the fuse box to make sure that the fuse for the appliance is in working order X field sensor faulty... -
Page 34: Customer Service
Customer service 4Customer service PDishes O ur after-sales service is there for you if your appliance Y ou can use the "Dishes" operating mode to prepare a C u s t o m e r s e r v i c e D i s h e s needs to be repaired. -
Page 35: Selecting A Dish
Dishes Selecting a dish Categories Food Vegetables The dishes are arranged in a uniform structure: Menu Category ■ Reheat, crisp up Baked goods Food ■ Dish Side dishes ■ Defrosting food Fruit, vegetables The following table lists the categories with the corresponding food. -
Page 36: Tested For You In Our Cooking Studio
Tested for you in our cooking studio Baking on one level JTested for you in our When baking on one level, use the following shelf position: cooking studio Level 1 ■ Baking on two levels H ere, you can find a selection of dishes and the ideal Use 4D hot air. - Page 37 Tested for you in our cooking studio The setting values apply to food that is placed into a Remove unused accessories from the cooking cold cooking compartment; by doing this, you can compartment. This will ensure that you achieve the best make energy savings of up to 20 per cent.If you possible cooking results and energy savings of up to preheat the oven, you can reduce the indicated baking...
- Page 38 Tested for you in our cooking studio Dish Accessories/cookware Shelf po- Type of Tempera- Steam in- Cooking sition heating ture in °C tensity time in mins. Meat Pie rectangular pie tin 170-180 40-50 Yorkshire Pudding 12-cup-tin 200-220* 15-25 Jacket potatoes baking tray 150-170 75-90...
-
Page 39: Roasting And Braising
Tested for you in our cooking studio The cake looks good, but is not Use a lower temperature and bake slightly longer; if necessary, add slightly less liquid. For cakes with a moist cooked properly in the middle. topping, bake the base first. Sprinkle it with almonds or breadcrumbs and then place the topping on top. The cake cannot be turned out of the Allow the cake to cool down for 5 to 10 minutes after baking. - Page 40 Tested for you in our cooking studio In the table, you can find specifications for poultry and Steaming meat with default values for the weight. If you wish to By contrast to the steam assistance function, the prepare heavier poultry or meat, use the lower steaming function cooks the meat particularly gently, temperature in every case.
- Page 41 Tested for you in our cooking studio Dish Accessories/cookware Shelf po- Type of Tempera- Steam in- Time in min. sition heating ture in °C tensity Roasting joint, 1.5 kg wire rack 190-200 160-170 80-100 Loin joint wire rack 180-190 35+35 Loin joint, 1 kg wire rack 180-190...
-
Page 42: Grilling
Tested for you in our cooking studio Dish Accessories/cookware Shelf po- Type of Tempera- Steam in- Time in min. sition heating ture in °C tensity With chicken wire rack + wire rack calculation for chicken (see table above) With chicken wire rack + wire rack 65-75 ... - Page 43 Tested for you in our cooking studio Roasting in cookware Grilling flat pieces It is more convenient to roast and braise meat in Flat pieces of poultry, meat and fish, such as steaks, cookware. You can take the joint out of the cooking drumsticks and burgers, can be prepared well using the compartment more easily in the cookware, and prepare "Grill"...
- Page 44 Tested for you in our cooking studio Types of heating used: The levels of steam intensity are indicated as numbers 4 Circulated air grilling in the table: ■ ( Grill, large area ■ 1 = Low ■ 2 = Medium ■...
-
Page 45: Convenience Products
Tested for you in our cooking studio Dish Accessories Shelf po- Type of Temperature in C / Steam in- Time in min. sition heating Grill setting tensity Chicken breast, boned, 150 g wire rack 1st side 10-15 each 2nd side 10-15 Chicken breast, boned, 150 g wire rack 200-210... - Page 46 Tested for you in our cooking studio oven, the indicated cooking times will be reduced by Greaseproof paper Only use greaseproof paper that is suitable for the several minutes. selected temperature. Always cut greaseproof paper to Preheating is necessary for selected dishes, and this is size.
-
Page 47: Steaming
Tested for you in our cooking studio Dish Accessories/cookware Shelf po- Type of Tempera- Steam in- Cooking sition heating ture in °C tensity time in mins. Food, frozen Lasagna, 500 g* ovenproof dish on universal pan Lasagna, 500 g ovenproof dish on wire rack 180-190 40-50 Lasagna, 1,5 kg... - Page 48 Tested for you in our cooking studio Compote Dampfnudeln (steamed bread rolls) Weigh the fruit and add approx. Y as much water. Add Prepare the yeast dough according to your recipe sugar and spices to taste. Use the settings indicated in without cooking.
-
Page 49: Yogurt
Tested for you in our cooking studio Dish Accessories/cookware Shelf po- Type of Tempera- Cooking sition heating ture in °C time in mins. Brussel sprouts steam container, perforated Mixed vegatables, 1 kg steam container, perforated 5-10 Rice Basmati rice, 1:1,5 cookware, flat 10-15 Long-grain rice, 1:1,5 ... -
Page 50: Eco Heating Functions
Tested for you in our cooking studio Eco heating functions Universal pan or baking tray Slide the universal pan or the baking tray in carefully as Hot air eco and Top/bottom heating eco are intelligent far as the limit stop with the bevelled edge facing the heating functions that allow you to gently cook meat, appliance door. -
Page 51: Acrylamide In Foodstuffs
Tested for you in our cooking studio Dish Accessories/cookware Shelf po- Type of Tempera- Cooking sition heating ture in °C time in mins. Meat Beef, slow roast joint wire rack 140+150 35+40 ‘ Casserole Diced meat (beef, pork, lamb), 500 g meat cookware, covered 100-120 ‘... -
Page 52: Drying
Tested for you in our cooking studio Type of heating used: Recommended setting values . Slow cooking The slow cooking temperature and cooking time are ■ dependent on the size, thickness and quality of the meat. Different settings ranges are indicated for this reason. -
Page 53: Preserving And Juicing
Tested for you in our cooking studio Use the following shelf positions when drying: dependent on the type, moisture, ripeness and 1 wire rack: Level 2 thickness of the food to be dried. The longer you leave ■ 2 wire racks: Level 3+1 the food to be dried, the better it will be preserved. -
Page 54: Sterilising Bottles And Hygiene
Tested for you in our cooking studio Type of heating used: P Steaming ■ Dish Accessories/cookware Shelf posi- Type of Tempera- Cooking tion heating ture in °C time in mins. Preserving Vegetables, e.g. carrots 1-litre preserving jars + XL steam container 1 30-120 Stone fruit, e.g. -
Page 55: Defrosting
Tested for you in our cooking studio Type of heating used: R Proving dough ■ Dish Accessories/cookware Shelf posi- Type of Step Tempera- Cooking tion heating ture in °C time in mins. Yeast dough, sweet E.g. small baked items Bowl Dough fer- 35-40 30-45... -
Page 56: Reheating
Tested for you in our cooking studio Dish Accessories Shelf posi- Type of Tempera- Cooking tion heating ture in °C time in mins. Cake Cake, moist Baking tray 70-90 Cake, dry Baking tray 60-75 Fruit, vegetables Berries Steam container 30-40 10-15 Vegetables Steam container... -
Page 57: Keeping Warm
Tested for you in our cooking studio Keeping warm You can keep cooked dishes warm using the "Keeping warm" heating type. You can use the various moisture levels to prevent the cooked dishes from drying out. Do not cover the food. Do not keep cooked dishes warm for longer than two hours. -
Page 58: Test Dishes
Tested for you in our cooking studio Test dishes cake tin onto the universal pan instead of onto the wire rack. These tables have been produced for test institutes to facilitate appliance testing. Notes The setting values apply to dishes placed into a cold As per EN 60350-1. - Page 59 Tested for you in our cooking studio Shelf positions for steaming on two levels (use a Steam maximum of 1.8 kg per level): Slide the universal pan in under the perforated steam Perforated steam container (size XL): Level 3 container (size XL) if indicated in the table. Any dripping ■...
- Page 60 *9000943495* 9000943495 (990731)
Need help?
Do you have a question about the CS656GBS1B/25 and is the answer not in the manual?
Questions and answers