
Related Manuals for Tektronix SPG70UP


Summary of Contents for Tektronix SPG70UP
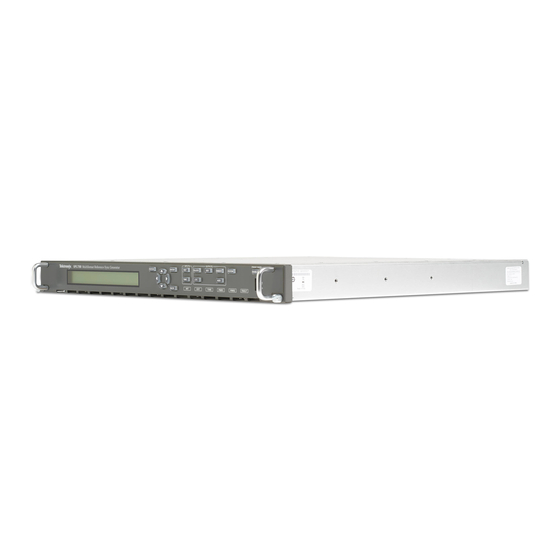
- Page 1 SPG700 Multiformat Reference Sync Generator SPG70UP Field Upgrade Instructions www.tek.com *P075109300* 075-1093-00...
- Page 2 Copyright © Tektronix. All rights reserved. Licensed software products are owned by Tektronix or its subsidiaries or suppliers, and are protected by national copyright laws and international treaty provisions. Tektronix products are covered by U.S. and foreign patents, issued and pending. Information in this publication supersedes that in all previously published material.
-
Page 3: Table Of Contents
Backup user files to a USB drive................Firmware upgrade overview ................. USB firmware upgrade ..................Network firmware upgrade .................. Verify the firmware upgrade ................. Restore user files from a USB drive ................ Troubleshoot the firmware upgrade................. SPG70UP Field Upgrade Instructions... - Page 4 Table of Contents SPG70UP Field Upgrade Instructions...
-
Page 5: Important Safety Information
Read the safety sections of the other component manuals for warnings and cautions related to operating the system. When incorporating this equipment into a system, the safety of that system is the responsibility of the assembler of the system. SPG70UP Field Upgrade Instructions... - Page 6 Do not operate in wet/damp conditions. Be aware that condensation may occur if a unit is moved from a cold to a warm environment. Do not operate in an explosive atmosphere. Keep product surfaces clean and dry. Remove the input signals before you clean the product. SPG70UP Field Upgrade Instructions...
-
Page 7: Service Safety Summary
Be sure your work area meets applicable ergonomic standards. Consult with an ergonomics professional to avoid stress injuries. Use only the Tektronix rackmount hardware specified for this product. Service safety summary The Service safety summary section contains additional information required to safely perform service on the product. -
Page 8: Terms In This Manual
find out the nature of the potential hazards and any actions which have to be taken to avoid them. (This symbol may also be used to refer the user to ratings in the manual.) The following symbol(s) may appear on the product: SPG70UP Field Upgrade Instructions... -
Page 9: Introduction
firmware. (See page 13.) Firmware upgrade Tektronix releases software and firmware updates for products to add new features and to fix product problems. You can find the latest firmware for your product at the Tektronix Web site (www.tek.com/downloads). -
Page 10: Standard Accessories
Introduction Standard accessories The following accessories are shipped with the field upgrade kit: SPG70UP Field Upgrade Instructions (this document) Tektronix part number: 075-1093-XX Option DPW: Power Supply module with the power cord option you ordered (see list below) International power cord All of the available power cord options except as noted below include a lock mechanism to keep the power cord attached to the instrument. -
Page 11: Product Documentation
Introduction Product documentation The user documentation for your product is listed in the following table. Check the Tektronix Web site for the latest version of the documents (www.tek.com/downloads). Table 1: Product documentation Availability Document Tektronix Part Number Description Print Installation and Safety... -
Page 12: How To Install And Configure Option Dpw
Do not use any devices capable of generating or holding a static charge in the work area where you remove, install, or handle modules. Avoid handling modules in areas that have a floor or work-surface covering capable of generating a static charge. SPG70UP Field Upgrade Instructions... -
Page 13: Install The Backup Power Supply Module
This matches the orientation of the PWR1 and PWR2 indicators on the front panel. The STATUS LED on the rear panel of each Power Supply module will match the status shown by the front-panel PWR1 and PWR 2 indicators. SPG70UP Field Upgrade Instructions... - Page 14 6. Check that the status of the Power Supply module you just installed is bright green or dim green. 7. If desired, change the preferred supply configuration. (See page 11, Configure the preferred (active) supply.) Figure 2: Removing an installed Power Supply module SPG70UP Field Upgrade Instructions...
-
Page 15: Configure The Preferred (Active) Supply
Press the SYSTEM button to access the SYSTEM menu. b. Press the up (▲) or down (▼) arrow button to select SYSTEM : DIAGNOSTICS, and then press the ENTER button to access the DIAGNOSTICS menu. SPG70UP Field Upgrade Instructions... - Page 16 PWR1 and PWR2 indicators on the front panel. 7. If status of the supply is Inactive, press the ENTER button to change the status to Active, Preferred. The front-panel indicator for the selected supply should change to bright green. SPG70UP Field Upgrade Instructions...
-
Page 17: How To Upgrade The Instrument Firmware
How to upgrade the instrument firmware How to upgrade the instrument firmware Tektronix releases software and firmware updates for products to add new features and to fix product problems. You can find the latest firmware for your product at the Tektronix Web site (www.tek.com/downloads). - Page 18 How to upgrade the instrument firmware 3. Verify the latest version of software at the Tektronix Web site: a. On a computer, use a Web browser to navigate to the following Tektronix Web site: http://www.tek.com/downloads b. On the Downloads Finder Web page, search by model number (such as SPG700) and filter by software and software type to locate the...
-
Page 19: Backup User Files To A Usb Drive
8. Press the ENTER button to safely unmount the USB device. You can now use the USB device to transfer the saved files to another SPG700 generator or to restore user files after a firmware upgrade. SPG70UP Field Upgrade Instructions... -
Page 20: Firmware Upgrade Overview
If you receive a memory error while attempting to upgrade the firmware, you need to delete some of the test signal or frame picture files and then perform the upgrade. SPG70UP Field Upgrade Instructions... -
Page 21: Usb Firmware Upgrade
If the instrument still does not recognize the USB device, attempt this procedure again using a different USB device from a well known brand that is 16 GB or less. 9. Press the up (▲) or down (▼) arrow button to select SYSTEM : FIRMWARE UPGRADE. SPG70UP Field Upgrade Instructions... - Page 22 (See page 23, Troubleshoot the firmware upgrade.) 14. If the instrument does not reboot at the completion of the firmware upgrade, remove and then reconnect the power cable. SPG70UP Field Upgrade Instructions...
-
Page 23: Network Firmware Upgrade
Press the up (▲) or down (▼) arrow button to select SYSTEM : FIRMWARE UPGRADE. c. Press the left (◄) or right (►) arrow button to select Network Upgrade, and then press the ENTER button. A confirmation message is displayed as shown below. SPG70UP Field Upgrade Instructions... - Page 24 An example display is shown below. g. If no network connection is established, cycle power on the instrument and verify the network connection before attempting the firmware upgrade again. See the SPG700 User Manual for details on configuring the network connections. SPG70UP Field Upgrade Instructions...
- Page 25 Figure 3: Sample of transfer.exe window after the upgrade is complete 5. If the instrument does not reboot at the completion of the firmware upgrade, remove and then reconnect the power cable. 6. Proceed to Verify the firmware upgrade. (See page 22.) SPG70UP Field Upgrade Instructions...
-
Page 26: Verify The Firmware Upgrade
If the display reads “Unmounted” or “Not Connected”, try to reinstall the USB device. If the instrument still does not recognize the USB device, attempt this procedure again using a different USB device from a well known brand that is 16 GB or less. SPG70UP Field Upgrade Instructions... -
Page 27: Troubleshoot The Firmware Upgrade
4. Press the left (◄) or right (►) arrow button to select a network speed (10BaseT, 100BaseT, or 1000BaseT), and then press the ENTER button. If you do not know your network speed, the 100BaseT selection is recommended. SPG70UP Field Upgrade Instructions... - Page 28 8. When the upgrade is complete, the instrument should reboot. If it does not, cycle the power. If you continue to experience an upgrade problem, contact Tektronix customer support or your local Tektronix representative for assistance. SPG70UP Field Upgrade Instructions...
Need help?
Do you have a question about the SPG70UP and is the answer not in the manual?
Questions and answers