
Related Manuals for Electro-Voice ETX-12P


Summary of Contents for Electro-Voice ETX-12P
- Page 1 ETX Powered Loudspeakers ETX-10P, ETX-12P, ETX-15P, ETX-35P, ETX-15SP, and ETX-18SP en | User Manual...
-
Page 3: Table Of Contents
Subwoofer DSP control menu Recommended configurations 4.6.1 Daisy-chaining full-range systems 4.6.2 Using full-range systems as monitors 4.6.3 Stacking full-range systems with subwoofers 4.6.4 Subwoofer cardioid array Removing the subwoofer caster wheels Troubleshooting Electro-Voice User Manual 2016.04 | 05 | F.01U.276.083... -
Page 4: Safety
12. Protect the power cord from being walked on or pinched particularly at plugs, convenience receptacles, and the point where they exit from the apparatus. 13. Unplug the apparatus during lightning storms or when unused for long periods of time. 2016.04 | 05 | F.01U.276.083 User Manual Electro-Voice... -
Page 5: Suspension
Electro-Voice loudspeakers can only be suspended using accessories and hardware described in Electro-Voice manuals and installation guides. Do NOT use handles to suspend the loudspeaker. Handles on Electro- Voice loudspeakers are intended to only be used for temporary transport by people. -
Page 6: Fcc Information
Consult the dealer or an experienced radio/TV technician. Precautions If an Electro-Voice loudspeaker is used outdoors on a sunny day, place the loudspeaker in a shaded or covered area. The loudspeaker amplifiers have protection circuits that temporarily shut the loudspeaker off when extremely high temperatures are reached. -
Page 7: Description
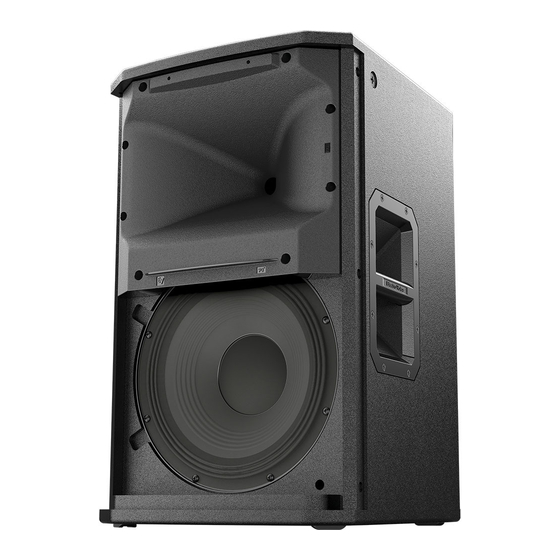
Description Thank you for choosing an Electro-Voice powered loudspeaker system. Please take time to consult the manual to understand all the features built into your EV system and fully utilize its performance capabilities. The ETX Powered Loudspeakers are a high-end wood loudspeaker family; consisting of the ETX-10P, ETX-12P, ETX-15P, ETX-35P, ETX-15SP, and ETX-18SP. -
Page 8: System Features
System features ETX Powered Loudspeakers from Electro-Voice build upon the legacy and heritage of EV , to deliver the most advanced powered loudspeaker products for portable and permanent applications. The output, response and coverage pattern of EV transducers are all optimized... - Page 9 ETX-12P—12-inch two-way powered loudspeaker system ▪ 2000 W amplifier and 135 dB peak SPL ▪ Single-knob DSP includes presets for multiple configurations and top+sub combinations (performance style, locations, and space) ▪ Loudspeaker system performance monitoring via integrated LCD and front panel LED ▪...
-
Page 10: System Overview
ETX Powered Loudspeakers System overview Technical specifications ETX-10P, ETX-12P, and ETX-15P ETX-10P ETX-12P ETX-15P Frequency Response (-3 dB): 85 Hz – 20 kHz 55 Hz – 20 kHz 48 Hz – 20 kHz Frequency Range (-10 dB): 65 Hz – 20 kHz 43 Hz –... - Page 11 Power Consumption: 100 – 240 V~, 50 – 60 Hz, 1.6 – 0.8 A Full space measurement using the music DSP preset. Maximum SPL is measured at 1 m using broadband pink noise at maximum output. Current rating is 1/8 power. Electro-Voice User Manual 2016.04 | 05 | F.01U.276.083...
-
Page 12: Dimension Drawings
236 mm 526 mm [9 in] [21 in] 365 mm [14 in] 137 mm [5 in] 40° 166 mm [7 in] Left View Front View Right View Figure 3.1: ETX-10P dimension drawing 2016.04 | 05 | F.01U.276.083 User Manual Electro-Voice... - Page 13 [24 in] [9 in] 400 mm [16 in] 159 mm [6 in] 40° 166 mm [7 in] Figure 3.2: ETX-12P dimension drawing 431 mm 224 mm [17 in] [9 in] 342 mm [13 in] 691 mm 236 mm [27 in]...
-
Page 14: Frequency Response Graphs
[7 in] Figure 3.6: ETX-18SP dimension drawing Frequency response graphs Figure 3.7: ETX-10P frequency response graph: speech, live, and music modes Figure 3.8: ETX-12P frequency response graph: speech, live, and music modes 2016.04 | 05 | F.01U.276.083 User Manual Electro-Voice... - Page 15 Figure 3.9: ETX-15P frequency response graph: speech, live, and music modes Figure 3.10: ETX-35P frequency response graph: speech, live, and music modes Figure 3.11: ETX-15SP frequency response graph: live and music modes Figure 3.12: ETX-18SP frequency response graph: live and music modes Electro-Voice User Manual 2016.04 | 05 | F.01U.276.083...
-
Page 16: Operation
Tripod and floor monitor operation Multi-angle pole cup The multi-angle pole cup is used to position the ETX-10P, ETX-12P, and ETX-15P loudspeakers for optimal sound coverage. The multi-angle pole cup has two (2) positions 0° and 7.5°. The 0° position points the sound horizontally straight towards the audience. The 7.5° position points the sound at an angle towards the audience and is used when the loudspeaker is above the audience. - Page 17 Tripod or pole mount ETX-10P, ETX-12P, and ETX-15P loudspeakers mount on a tripod stand or on a pole above a subwoofer. Mounting a loudspeaker on a tripod stand Figure 4.2: Full-Range models on tripod stand Caution! Tripod is not evaluated for safety with this loudspeaker. Check the specifications of the tripod stand to be certain it is capable of supporting the weight of the loudspeaker.
- Page 18 Turn the M20 threaded pole clockwise to secure the pole to the subwoofer. Using two (2) hands lift the loudspeaker. Set the multi-angle pole cup located on the bottom of the loudspeaker onto the pole. 2016.04 | 05 | F.01U.276.083 User Manual Electro-Voice...
- Page 19 Figure 4.5: Multi-angle pole cup 0° (left) and multi-angle pole cup 7.5° (right) Floor monitor ETX-10P, ETX-12P, and ETX-15P loudspeakers may be used as a floor monitor by placing the speaker on the integral monitor angle. To set up a loudspeaker as a floor monitor, do the following: Place the loudspeaker on a level stable surface.
-
Page 20: Suspension
ETX Powered Loudspeakers Suspension The ETX-10P, ETX-12P, ETX-15P, and ETX-35P enclosures have eight (8) M10 threaded points; six (6) points on top of the enclosure and two (2) points on the bottom. Forged shoulder eyebolts rated for overhead suspension may be used to suspend an individual loudspeaker, such as the EBK-M10 accessory. - Page 21 Eyebolts must be fully seated and oriented in the plane of pull. Always use fender washers at least 1.5 inch in diameter and 1/16 inch thick under the eyebolt to distribute the load on the enclosure. Washer Washer Used Used Figure 4.8: Eyebolt shown with and without washer Electro-Voice User Manual 2016.04 | 05 | F.01U.276.083...
- Page 22 Correct Incorrect Figure 4.9: Eyebolts shown oriented in the plane of pull Warning! Never exceed the limitations or maximum recommended working load for Electro-Voice loudspeakers. Disregarding this warning could result in serious injury or death. 50 lb per Suspension Point 5°...
- Page 23 Correct Figure 4.11: Loudspeaker vertical suspension Electro-Voice User Manual 2016.04 | 05 | F.01U.276.083...
-
Page 24: Amplifier Dsp Controls
Full-Range loudspeaker control and monitoring interface The full-range loudspeaker DSP control menu selections are available for the ETX-10P, ETX-12P, ETX-15P, and ETX-35P. Figure 4.12: Full-Range loudspeaker amplifier panel LCD – DSP control and monitoring interface. MASTER VOL – Adjusts the sound level. - Page 25 POWER – AC switch for switching the power ON or OFF. The LCD screen lights up when the POWER is turned ON. MAINS IN – AC connection is established via an IEC-connector. See also • DSP controls, page 27 Electro-Voice User Manual 2016.04 | 05 | F.01U.276.083...
-
Page 26: System Status
TEMP limiter – The temp limiter protects the transducer from thermal failures by reducing the gain. The TEMP LIMITER will flash if any gain reduction is being done. 2016.04 | 05 | F.01U.276.083 User Manual Electro-Voice... -
Page 27: Dsp Controls
The setting is saved. The focus returns to the menu items on the left side of the DSP menu. Repeat steps 2 through 5 to modify additional DSP and system settings. Select EXIT to return to the home screen. Electro-Voice User Manual 2016.04 | 05 | F.01U.276.083... -
Page 28: Full-Range Loudspeaker Dsp Control Menu
LOCATION Menu The Location menu is used to optimize the loudspeaker for different boundaries. ETX-10P, ETX-12P, and ETX-15P: Available options for this selection are: TRIPOD, MONITOR, WALL, and SUSPEND. ETX-35P: Available options for this selection are: TRIPOD, ARRAY, WALL, and SUSPEND. - Page 29 BACK PEQ1, ETX-10P Range: 60 Hz – 20.0 kHz Default: 0 dB PEQ2, ETX-12P Range: 50 Hz – 20.0 kHz Range: -12 dB – +6 dB PEQ3: ETX-15P Range: 45 Hz – 20.0 kHz Q: 1.2 ETX-35P Range: 40 Hz – 20.0 kHz Notice! The Room EQ range shown is the factory default range with a stand alone loudspeaker.
- Page 30 If menu lock is ON, the user is allowed to adjust the MASTER VOL. To unlock the DSP menu, do the following: > Press and hold the MASTER VOL knob for 5 seconds. The DSP menu unlocks. 2016.04 | 05 | F.01U.276.083 User Manual Electro-Voice...
-
Page 31: Subwoofer Dsp Control Menu
NORMAL. (Default) ▪ CARDIOID – should ONLY be used on the rear firing subwoofers in cardioid arrays. To set up cardioid, do the following: From the DSP menu, scroll to LOCATION. Electro-Voice User Manual 2016.04 | 05 | F.01U.276.083... - Page 32 Available options for this selection are: 80 Hz, 100 Hz, 120 Hz, 150 Hz, ETX-10P, ETX-12P, ETX-15P and ETX-35P. The low passes are 24 dB/octave Linkwitz/Riley slopes. The 80 Hz, 100 Hz, 120 Hz, and 150 Hz selections are generic low pass settings for use with other full-range loudspeaker systems.
- Page 33 The Dim Display menu is used to dim the display when the display is idle for two (2) minutes. Available options for this selection are: ON or OFF. The default is ON. Electro-Voice User Manual 2016.04 | 05 | F.01U.276.083...
- Page 34 The loudspeaker restarts and resets the system to the original factory settings. INFORMATION Menu The Information menu is used to display the preset version, firmware version, and build date. See also • System status, page 26 • Subwoofer cardioid array, page 38 2016.04 | 05 | F.01U.276.083 User Manual Electro-Voice...
-
Page 35: Recommended Configurations
The direction of the arrow indicates the signal path. Location: Tripod Function: Speech Subwoofer: Table 4.1: DSP settings loudspeaker on a tripod See also • Full-Range loudspeaker DSP control menu, page 28 Electro-Voice User Manual 2016.04 | 05 | F.01U.276.083... -
Page 36: Using Full-Range Systems As Monitors
The direction of the arrow indicates the signal path. Location: Monitor Function: Live Subwoofer: Table 4.2: DSP settings loudspeaker as a monitor See also • Full-Range loudspeaker DSP control menu, page 28 2016.04 | 05 | F.01U.276.083 User Manual Electro-Voice... -
Page 37: Stacking Full-Range Systems With Subwoofers
4.6.3 Stacking full-range systems with subwoofers ETX-12P Mixer Notice! The direction of the arrow indicates the signal path. ETX-12P Location: Tripod Function: Live Subwoofer: ETX-18SP ETX-18SP Location: Normal Function: Live High Pass: ETX-12P Table 4.3: DSP settings loudspeaker and subwoofer stacked See also •... -
Page 38: Subwoofer Cardioid Array
The ETX-15SP and ETX-18SP subwoofers have cardioid array processing originally developed for Electro-Voice concert subwoofer systems. Cardioid subwoofer arrays can be used to direct the output of an array of subwoofers in order to limit excessive amounts of bass in undesired areas. - Page 39 Normal Delay: 0 m (zero) Table 4.4: Subwoofer cardioid For more information about cardioid arrays, see ETX-15SP or ETX-18SP product pages on www.electrovoice.com. See also • Subwoofer DSP control menu, page 31 Electro-Voice User Manual 2016.04 | 05 | F.01U.276.083...
-
Page 40: Removing The Subwoofer Caster Wheels
Ensure all 16 M6 screws are tight. Notice! If the caster wheels are removed reinstall the screws. If the screws are not reinstalled air leaks occur in the enclosure, resulting in undesirable performance. 2016.04 | 05 | F.01U.276.083 User Manual Electro-Voice... -
Page 41: Troubleshooting
MIC microphone pre-amp. INPUT 2 position Sound is Excessive input level Reduce the input level or loudspeaker level knobs to distorted front prevent limit. LED is OFF, LCD screen LIMIT is ON Electro-Voice User Manual 2016.04 | 05 | F.01U.276.083... - Page 42 Press and hold the MASTER VOL knob for 5 seconds. locked. function has been turned on. A lock symbol displays on the LCD screen. If these suggestions do not solve your problem, contact your nearest Electro-Voice dealer or Electro- Voice distributor. See also • System status, page 26 •...
- Page 44 Bosch Sicherheitssysteme GmbH Robert-Bosch-Ring 5 Bosch Security Systems, Inc 85630 Grasbrunn 12000 Portland Avenue South Germany Burnsville MN 55337 www.boschsecurity.com © Bosch Sicherheitssysteme GmbH, 2016 www.electrovoice.com...
Need help?
Do you have a question about the ETX-12P and is the answer not in the manual?
Questions and answers