Table of Contents
Advertisement
Quick Links
MANUAL
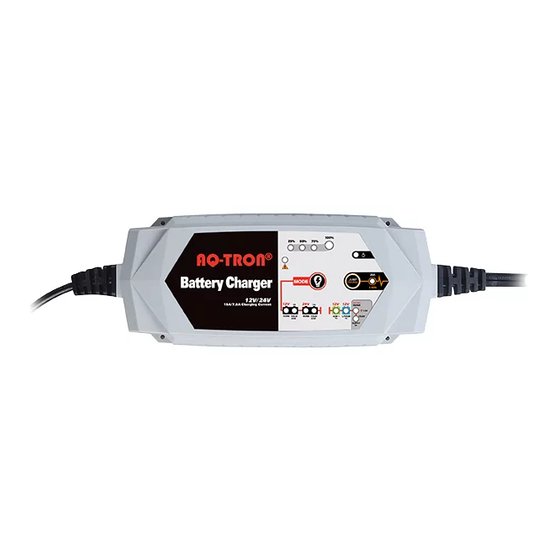
Battery Charger User Guide
MODEL: AQ7000
AC Input: 220-240VAC, 50-60Hz, 1A
DC Output: 12VDC, 7A;
24VDC, 3.5A;
Temperature Controlled
Please read and understand all important safety and operating instructions before using this
charger. In addition, please read and follow all battery and vehicle manufacturer's
instructions and cautionary markings.
www.aqtron.com - info@aqtron.com
LAD/AQ7000
®
Advertisement
Table of Contents

Summary of Contents for AQ-Tron LAD/AQ7000
- Page 1 MANUAL LAD/AQ7000 Battery Charger User Guide MODEL: AQ7000 AC Input: 220-240VAC, 50-60Hz, 1A DC Output: 12VDC, 7A; 24VDC, 3.5A; Temperature Controlled Please read and understand all important safety and operating instructions before using this charger. In addition, please read and follow all battery and vehicle manufacturer’s instructions and cautionary markings.
-
Page 2: Important Safety Instructions
MANUAL LAD/AQ7000 IMPORTANT SAFETY INSTRUCTIONS SAFETY PRECAUTIONS FOR WORKING IN THE PROXIMITY OF A BATTERY 1) Batteries generate explosive gases during normal operation. Use in well-ventilated area. 2) Consider having someone close enough or within the range of your voice to come to your aid when you work near a battery. - Page 3 MANUAL LAD/AQ7000 above a battery being charged; gases or fluids from battery will corrode and damage charger. 2) Do NOT cover the charger while charging. 3) Do NOT expose to rain or wet conditions. 4) Connect and disconnect DC output only after setting AC cord from electric outlet.
-
Page 4: Connecting To The Battery
MANUAL LAD/AQ7000 battery. 7) Following is the charger’s technical specification: AC Input 220-240VAC, 50-60Hz, 1A DC Output 12VDC, 7A; 24VDC, 3.5A; Temperature Controlled Charger Type 8 steps, Full-automatic Charging Cycle Start Voltage > 1V Housing Protection IP54 All Types of 12V & 24V Lead-acid... -
Page 5: Charging Modes
MANUAL LAD/AQ7000 Connect the end of the 12V accessory plug to the charger; insert the 12V accessory plug into the vehicle’s 12V outlet. If the vehicle’s ignition key has to be on in order for the 12V outlet to supply / receive power, turn the key, without starting the engine. - Page 6 MANUAL LAD/AQ7000 Yellow LED + 12V/24 mode LEDs Converting to a DC power supply for powering 12V 13.6V SUPPLY ––– DC device or as a memory retainer when replacing (Hold & Press) a battery (Yellow LED) These “Hold or / and Press” modes are advanced charging modes that require your full attention before selecting.
- Page 7 MANUAL LAD/AQ7000 Supply Mode provides 13.6V at 5A with overload protection at 6A (Max). Both spark proof and reverse polarity protection are disabled in this mode. Do NOT allow the positive and negative battery clamp or ring terminal to touch or connect to each other as the charger could generate sparks.
-
Page 8: Charging Steps
MANUAL LAD/AQ7000 CHARGING STEPS STEP 1: DIAGNOSIS (Check if battery has connected with the charger and also check battery voltage) STEP 2: DESULPHATION (If battery voltage is too low, programs automatically generate pulsing current to remove sulphate, up to 5 hours) -
Page 9: Battery Level Indicator
MANUAL LAD/AQ7000 BATTERY LEVEL INDICATOR Explanation The 25% Charge Red LED will slowly flash when the battery level is less than 25%. When 25% is reached, the LED will be solid. The 50% Charge Red LED will slowly flash when the battery level is less than 50%. - Page 10 MANUAL LAD/AQ7000 mode LED 2) Clean the battery posts 3) Replace the battery with a new one immediately 4) Disconnect red and black output terminals Please do manually press Slow flashing Red Mode button to choose Warning! LED correct charge mode.
- Page 11 MANUAL LAD/AQ7000 Quick flashing Red Warning! LED Battery cannot store Replace the battery with a electric charge during new one immediately Corresponding charging charging process mode LED Only corresponding charging mode LED In Desulphation Process ------ Four battery level indicator LEDs are all...
- Page 12 MANUAL LAD/AQ7000 Class II :For indoor use only Before charging, read the instructions Fuse :Correct Disposal of this product This marking indicates that this battery charger and batterypack should not be disposed with other household wastes throughout the EU. To prevent possible harm to the environment or human health from uncontrolled waste disposal, recycle it responsibly to promote the sustainable reuse of material resources.
-
Page 13: Warranty
MANUAL LAD/AQ7000 WARRANTY 1) This product is warranted to the original purchaser for a period of two (2) years from the original shipping date, to be free of defects in material and workmanship. 2) Warranty Performance: During the above two (2) years warranty period, a product with a defect will be replaced with a new one when the product is returned to the manufacturer. - Page 14 MANUAL LAD/AQ7000 3)If the supply cord is damaged, it must be replaced by the manufacturer, its service agent or similarly qualified persons in order to avoid a hazard. 3)The battery terminal not connected to the chassis has to be connected first. The other connection is to be made to the chassis, remote from the battery and fuel line.


Need help?
Do you have a question about the LAD/AQ7000 and is the answer not in the manual?
Questions and answers