Table of Contents
Advertisement
Quick Links
Advertisement
Table of Contents

Related Manuals for Oki MC573dn


Summary of Contents for Oki MC573dn
- Page 1 MC573 /ES5473 MFP User’s Manual...
-
Page 2: Table Of Contents
Table of contents Network Settings ............................50 E-mail Setting ............................. 51 Test Print ..............................54 Before starting ....................5 Connecting to a Wireless LAN (Only When the Wireless LAN Module is Mounted) ....56 Cautions Related to Safety ......................6 Before Connecting to a Wireless LAN ....................... 56 Enabling Wireless LAN Connection ...................... - Page 3 Scan ......................115 Replacing the Toner Cartridges ....................... 159 Replacing the Image Drum ........................163 Sending Scanned Data as an E-mail Attachment ..............116 Replacing the Image Drum and Toner Cartridge at the Same Time ............167 Before Using Scan To E-mail ........................116 Cleaning Each Part of the Machine ..................
- Page 4 Scanner Specifications ..........................223 Printing Specifications ..........................223 Network Specifications ..........................224 Wireless LAN Specifications (Option) .......................225 Contact Us ....................... 226 - 4 -...
-
Page 5: Before Starting
Before starting Cautions Related to Safety General Cautions About This Manual Trademarks and Other Information License... -
Page 6: Cautions Related To Safety
1. Before starting Cautions Related to Safety Indicates additional information which, if ignored or not followed, may result in personal injury or death. Indicates additional information which, if ignored, may result in personal injury. - 6 -... -
Page 7: General Cautions
1. Before starting General Cautions Do not vacuum spilled toner with an electric vacuum cleaner. Vacuuming spilled toner with an electric vacuum cleaner may result in ignition due to sparks from electric contacts or other reasons. If toner spills on the floor or other places, wipe the toner gently with a damp rag or other cloth while using care not to scatter the toner. - Page 8 1. Before starting Do not touch a broken liquid crystal display. Injury may result. If you get liquid (liquid crystal) spilled from the liquid crystal display into your eyes or mouth, immediately rinse with a large amount of water. Seek medical advice if necessary.
-
Page 9: About This Manual
• Copyright of the manual About Marks All rights reserved by Oki Data Corporation. No part of this document may be reproduced in any form or by any means without prior written permission from Oki Data Corporation. This manual uses the following marks. - Page 10 1. Before starting Symbol Meaning Indicates a menu name, item name, option, or other items that are displayed on the display screen on the operator panel. Indicates a menu, window, or dialog name that is displayed on the screen on a computer.
-
Page 11: Trademarks And Other Information
LENGTH CORE SHIELD (METER) OKI is a registered trademark of Oki Electric Industry Co., Ltd. Power ENERGY STAR is a trademark of the United States Environmental Protection Agency. Microsoft, Windows, Windows Server, Windows Vista and Internet Explorer are registered 10.0 trademarks of Microsoft Corporation. - Page 12 1. Before starting • ENVIRONMENTAL INFORMATION - 12 -...
-
Page 13: License
1. Before starting License Copyright (c) 2009-2012 Eric Haszlakiewicz Permission is hereby granted, free of charge, to any person obtaining a copy of this software and associated documentation files (the "Software"), to deal in the Software without restriction, including without limitation the rights This product contains software developed by the Heimdal Project. -
Page 14: Setting Up
Setting Up Installation Requirements Checking the Accessories Unpacking and Installing the Machine Installing the Optional Equipment Connecting a Telephone Line Connecting the Power Code Connecting a LAN Cable/USB Cable Loading Paper in the Tray Checking the Setting Information Setting Up This Machine Connecting to a Wireless LAN (Only When the Wireless LAN Module is Mounted) Installing a Driver and Software to a Computer... -
Page 15: Installation Requirements
2. Setting Up Installation Requirements Installation Environment Install the machine in the following environment. Ambient temperature: 10°C to 32°C • Installation Environment Ambient humidity: 20% to 80% RH (relative humidity) • Installation Space Maximum wet bulb temperature: 25°C • Use care to prevent condensation. It may cause a malfunction. •... -
Page 16: Installation Space
2. Setting Up Installation Space Install the machine on a flat surface that is wide enough to accommodate the legs of the machine. Do not install this machine directly on a thick rug or carpet. • Do not install this machine in a closed room or other locations with bad circulation and •... - Page 17 2. Setting Up • Side view (when the additional tray unit is installed) - 17 -...
-
Page 18: Checking The Accessories
2. Setting Up Checking the Accessories The starter toner cartridge is not installed in the ES model. Install the toner cartridge that is included in this machine. Check that you have everything shown below. Refer to "Replacing the Image Drum". •... -
Page 19: Unpacking And Installing The Machine
2. Setting Up Unpacking and Installing the Machine Lift the machine, and then place it where it is to be installed. This section describes how to unpack and install the machine. Injury may result. Lift this machine by 2 persons, because it weighs approximately 31 kg. •... - Page 20 2. Setting Up Press the button (A) and open the output tray (a) until it stops. Pull the locking levers on the fuser unit toward you to unlock. Pinch the tip of blue lever of the toner cartridge and turn forward until the tip aligns on the lug of the cartridge.
- Page 21 2. Setting Up Push the blue lever on the fuser unit and remove the orange safety stopper Push the levers on the fuser unit to lock. and film. Hold the fuser unit handle and aligning the fuser unit to the grooves behind the toner cartridges, place the fuser unit into the machine.
- Page 22 2. Setting Up Hold the handle (B) to close the scanner unit. - 22 -...
-
Page 23: Installing The Optional Equipment
2. Setting Up Installing the Optional Equipment Installing the Wireless LAN module This section describes how to install optional equipment. Install the wireless LAN module when you want to use a wireless connection. After installing, be sure to change the wireless LAN setting from [DISABLE] to [ENABLE] on the operator panel. -
Page 24: Installing The Additional Tray Unit
2. Setting Up Eject the connector from the cover and connect with the wireless LAN module. Installing the Additional Tray Unit Attach the additional tray unit when increasing the number of sheets or paper to be set is needed. Up to 2 trays can be installed. Set the number of trays on the printer driver after installing them. - Page 25 2. Setting Up If you want to install two additional trays, fix them together with the lock pieces. Screw the machine and additional tray unit with the lock pieces. Slowly stack the machine on the additional tray unit aligning their back sides and right sides.
-
Page 26: Setting The Printer Driver
- When the machine is connected via USB interface • Setting Additional Tray(s) to the Windows PCL Printer Driver Click [Start], and then select [Devices and Printers]. Right-click [OKI MC573], and then select [OKI MC573 PCL6] from [Printer properties]. Select the [Device Options] tab. - Page 27 2. Setting Up Select [Get installed options automatically] for [Installable Options], and then Select the total number of trays for [Available Tray], and then click [OK]. click [Setup]. When using a USB connection, select the total number of trays for [Available Trays] in [Installable Options]. Click [OK].
-
Page 28: Connecting A Telephone Line
2. Setting Up Connecting a Telephone Line Connecting to the Public Line (If Using Only for Faxes) This section describes how to connect a telephone cable for fax transmissions. The telephone line connection method varies depending on your environment. Connect the telephone cable that suits your environment by referring to the illustrations in this manual. -
Page 29: Connecting To The Public Line (If Connecting A Telephone To The Machine)
2. Setting Up Plug the telephone cable (f) that is connected to the external telephone into Connecting to the Public Line (If Connecting a Telephone to the the TEL connector (e) of the machine. Machine) A telephone that is connected to the machine is called an external telephone. Plug one end of the included telephone cable (a) into the LINE connector (b) of the machine and the other end into a public line (analog) (c). -
Page 30: Connecting The Optical Ip Telephone
2. Setting Up Connecting the Optical IP telephone • Only one telephone can be connected to the machine. • Do not connect the telephone to the machine in parallel. If you connect the telephone to the machine in parallel, the following problems occur, resulting in the machine not functioning correctly. - If you pick up the handset of the telephone that is connected in parallel while the machine is sending or receiving a fax, the fax image may be corrupted or a communication error may occur. -
Page 31: Connecting To The Adsl Environment
2. Setting Up Connecting to the ADSL Environment • If a fax dial fails, set the PBX line to [ON]. Besides the included telephone cable, a telephone cable of the same type is needed. User Install (Advanced Manual) • If a fax transmission or reception fails, set [Super G3] to [OFF]. User Install (Advanced Manual) Plug one end of the included telephone cable (a) into the LINE connector (b) of the machine and the other end into a phone line splitter (e). -
Page 32: Connecting Pbx, Home Telephone Or Business Phone
2. Setting Up Connecting PBX, Home Telephone or Business Phone Connecting as an Extension Telephone Plug the telephone cable that is connected to a control device such as PBX into the LINE connector (a) of the machine. Plug the included telephone cable (a) that is connected to the public line If you use a telephone line for both fax and phone, plug the telephone cable of (analog) (c) into the LINE connector (b) of the machine. -
Page 33: Connecting A Cs Tuner Or Digital Television
2. Setting Up Connecting a CS Tuner or Digital Television Plug the included telephone cable (a) that is connected to the public line (analog) (c) into the LINE connector (b) of the machine Remove the telephone connector cover. Plug the telephone cable (f) that is connected to the CS tuner or digital television (e) into the TEL connector (d) of the machine. -
Page 34: Connecting The Power Code
2. Setting Up Connecting the Power Code Fire or electric shock may result. The power supply must meet the following conditions. Be sure to turn this machine off before connecting and disconnecting the power cord • AC: 110 to 127V AC (Range 99 to 140V AC) / 220 to 240V AC (Range 198 to 264V AC) and the ground wire. - Page 35 2. Setting Up Plug the power cord into the power connector. Plug the power cord into the outlet. - 35 -...
-
Page 36: Connecting A Lan Cable/Usb Cable
2. Setting Up Connecting a LAN Cable/USB Cable Connecting a LAN Cable When using the machine in a wired network connection or connecting to a computer via a USB cable, connect the cable in the following steps. A LAN cable is not supplied. Prepare a LAN cable (category 5e or higher, twist pair, straight) and hub. - Page 37 2. Setting Up Insert one end of the LAN cable into the network interface connector. Insert the other end of the LAN cable into the hub. Pass the LAN cable under the tab, and then close the interface cover. Go to the procedure to "Loading Paper in the Tray".
-
Page 38: Connecting A Usb Cable
2. Setting Up Connecting a USB Cable Do not insert the USB cable into the network interface connector. It may cause a malfunction. A USB cable is not supplied. Prepare a USB cable. If you want to connect in USB 2.0 Hi-Speed mode, use a Hi-Speed USB 2.0 USB cable. This machine does not support USB 3.0. - Page 39 2. Setting Up For Windows, do not insert the other end of the USB cable into the computer until the instruction is displayed on the screen when the driver installation is in progress. Go to the procedure to "Loading Paper in the Tray".
-
Page 40: Loading Paper In The Tray
2. Setting Up Loading Paper in the Tray Slide the paper stopper (b) to the length of paper to be loaded. The procedure when loading paper in Tray 1 is used as an example. The same procedure applies to Tray 2/3 (optional). For details on available paper, see "About Paper Types That Can be Loaded". - Page 41 2. Setting Up Replace the paper cassette into the machine. Push the paper cassette until it stops. - 41 -...
-
Page 42: Checking The Setting Information
2. Setting Up Checking the Setting Information Item Description Setting Value Mail Server Address Set the IP address or host name for the SMTP server. The first time the machine is turned on, "Easy Setup" is displayed. You can enter up to 64 characters. SMTP Port Set the SMTP port number. -
Page 43: Setting Up This Machine
2. Setting Up Setting Up This Machine Language Setup The first time the machine is turned on or when the settings are initialized, [Easy Setup] is Press the power switch on the operator panel for a second to turn on the displayed. - Page 44 2. Setting Up Select the desired keyboard layout. Press [Continue with default settings]. Press [Close]. Check that the consumables and wiring are set up, and then press [Next]. The screen switches automatically in about 7 seconds without pressing [Close]. - 44 -...
-
Page 45: Setting Date And Time
2. Setting Up Setting Date and Time Press [ ] to switch screens. Check that the [2. Date/Time Setting] screen is displayed, and then press [Next]. The time zone setting screen appears. Set daylight saving time. Select a setting suitable to your environment, and then press [Next]. Press [Select] for the time zone you want to use. - Page 46 2. Setting Up Press [Manual]. Press the [Year] entry box once to enter the year, and then press [Next]. Use [ ] or the numeric keypad on the operator panel to enter the current time in the same manner as the date entry, and then press [Next]. The setting values are updated.
-
Page 47: Setting The Administrator Password
2. Setting Up Setting the Administrator Password • Set the administrator password using from 6 to 12 alphanumeric characters. • The password is case sensitive. The factory default administrator password is “999999”, however, we highly recommend you to set your own administrator password to prevent unauthorised access to the “admin setup”... -
Page 48: Fax Setup
2. Setting Up Press [Next]. Fax Setup The setting values are updated. Press [Close]. If you do not want to use the fax function, press [Skip>>] to go to Network Settings. Check that the [4. Fax Setting] screen is displayed, and then press [Next]. The screen switches automatically in about 7 seconds without pressing [Close]. - Page 49 2. Setting Up Use the numeric keypad on the operator panel to enter the fax number and press [Next]. The information set here is sent to the other party who receives your fax. Enter the sender’s information (sender’s name) and press [Next] on the touch Press [Close].
-
Page 50: Network Settings
2. Setting Up Set an IP address. Press [Auto]. Network Settings Since the network settings are required when using the print function, fax function, and scan function, you are supposed to make the network setting here. (Only for customers using the network function) Check that the [5. -
Page 51: E-Mail Setting
2. Setting Up E-mail Setting • Wait until updating the setting is complete. E-mail setting is required when using “Scan To E-mail”, “Internet Fax”, and “Scan To Fax • The screen switches automatically in about 7 seconds without pressing [Close]. Server”. - Page 52 2. Setting Up Enter the mail server address and press [Next] on the touch panel. Select SMTP Encryption. Enter the sender's address and press [Next] on the touch panel. Use the numeric keypad on the operator panel to enter the SMTP port and press [Next].
- Page 53 2. Setting Up Set whether to send a test mail. If [POP3] is selected, enter the POP3 server address. To send a test mail, enter a destination address capable of receiving. Select Authentication method. After updating the settings, press [Close]. If [SMTP Auth] or [POP Before SMTP] is selected, enter the user name and password, and then press [Next].
-
Page 54: Test Print
2. Setting Up Click [Print Test]. Test Print If you do not want to print test page, press [Skip>>]. The Easy Setup is complete and the home screen appears. Check that the [7. Print Test] screen is displayed, and then press [Next]. The Print Test screen is displayed. - Page 55 2. Setting Up Check that the menu map is printed, and then press [Close]. Press [Complete]. The Easy Setup is complete and the home screen appears. You can change the settings from [Device Settings] > [Easy Setup] at the top of the home screen whenever you want.
-
Page 56: Connecting To A Wireless Lan (Only When The Wireless Lan Module Is Mounted)
2. Setting Up Connecting to a Wireless LAN (Only When the Wireless Before Connecting to a Wireless LAN LAN Module is Mounted) Wireless LAN connection is disabled by default. To use the wireless LAN connection, enable • Wireless(Infrastructure) and Wireless(AP Mode) cannot be enabled at the same time. Wireless in the Admin Setup. -
Page 57: Enabling Wireless Lan Connection
2. Setting Up Check if the wireless LAN access point supports WPS. Enabling Wireless LAN Connection If it does not support WPS, check the SSID and encryption key by referring to the instruction manual that is included in the wireless LAN access point or other Check that the machine is turned on. - Page 58 2. Setting Up Press [ ] once and press [Admin Setup]. On the administrator login screen, press [OK]. Press [ ] once and press [User Install]. Enter the administrator password, and then press [OK]. Press [ ] or [ ] several times, and press [Wireless Module]. The factory default administrator name and password are "admin"...
-
Page 59: Connecting To An Access Point (Infrastructure)
2. Setting Up Press [Enable]. Connecting to an Access Point (Infrastructure) • Install this machine in a place with a good view and near a wireless access point. (We suggest that the distance between the machine and the wireless device be 30 m or less.) •... - Page 60 2. Setting Up The following message is displayed for approximately 5 seconds. If the following screen is displayed, press [Yes], and then proceed to step 6. Press [Enable]. Press [Device Settings] on the touch panel. Press [ ] once and press [Wireless(Infrastructure) Setting]. Enter the administrator name and password and press [OK].
- Page 61 2. Setting Up If your environment requires to set IP address, etc. manually, press [Network Setting]. If you do not need to set manually, go to step 12. Ask your provider or network administrator about the setting value. Press [Close] when the Wireless (infrastructure) settings are complete. The screen switches automatically in a while without pressing [Close].
- Page 62 2. Setting Up Press [WPS-PBC]. The machine starts searching for wireless LAN access points. The following screen is displayed for approximately 2 minutes, during which press and hold the WPS button for the wireless LAN access point for a few seconds. You cannot operate the panel when WPS is in progress.
- Page 63 2. Setting Up Selecting a Wireless LAN Access Point from the Operator Panel to Connect • If the following screen is displayed, repeat the procedure from step 13. If a wireless LAN access point does not support WPS, you can specify a wireless LAN access point you want to use from the wireless LAN access points that the machine detects to establish a connection.
- Page 64 2. Setting Up Press [ ] once and press [Wireless(Infrastructure) Setting]. Press [Enable]. If your environment requires to set IP address, etc. manually, press [Network Setting]. If you do not need to set manually, go to step 12. Enter the administrator name and password and press [OK]. The factory default administrator name and password are "admin"...
- Page 65 2. Setting Up Press [Manual] on the [Wireless (infrastructure) settings] screen. The screen switches automatically in a while without pressing [Close]. Press [Wireless Network Selection]. Follow the onscreen instructions to set the IP address, subnet mask, default gateway, and DHCP v6. Ask your provider or network administrator about the setting value.
- Page 66 2. Setting Up Select a wireless LAN access point to connect, and then press [Select]. Item Description Security Disable Encryption key No entry is required. If the displayed SSID is the same as the SSID that you checked in step 1, press [Yes].
- Page 67 2. Setting Up If the antenna mark is displayed at the top right of the touch panel, the connection is established correctly. • An SSID is also called a network name, ESSID, or ESS-ID. • An encryption key is also called a network key, security key, password, or Pre-shared Key. Check that the wireless LAN access point starts and is operating properly.
- Page 68 2. Setting Up Press [ ] once and press [Wireless(Infrastructure) Setting]. Press [Enable]. If your environment requires to set IP address, etc. manually, press [Network Setting]. If you do not need to set manually, go to step 12. Enter the administrator name and password and press [OK]. The factory default administrator name and password are "admin"...
- Page 69 2. Setting Up Press [Manual] on the [Wireless (infrastructure) settings] screen. The screen switches automatically in a while without pressing [Close]. Press [Wireless Network Selection]. Follow the onscreen instructions to set the IP address, subnet mask, default gateway, and DHCP v6. Ask your provider or network administrator about the setting value.
- Page 70 2. Setting Up The machine starts searching for wireless LAN access points. Wait for a while. Select the encryption method that you checked in step 1, and then press [Next]. Press [Manual Setup]. The encryption key varies depending on the wireless LAN access point or security. The procedure depends on the encryption method you selected in step 15.
- Page 71 2. Setting Up If the displayed content is the same as that you checked in step 1, press [Yes]. The antenna mark may not be displayed on some screens such as the copy top screen. • If the wireless LAN connection is unstable If the wireless LAN connection is unstable, read the cautions in "Before Connecting to a Wireless...
-
Page 72: Setting Up [Enabling Default Gateway]
2. Setting Up Press [ ] once and press [Admin Setup]. Setting up [Enabling Default Gateway] To use a wired LAN and wireless LAN simultaneously, only interfaces whose default gateway is enabled can communicate with devices out of the segment. Set only when communicating with the device outside of the segment using a wireless LAN. - Page 73 2. Setting Up On the administrator login screen, press [OK]. Press [Network Setting]. Press [ ] once and press [Network Menu]. Press [Enabling Default Gateway]. [Enabling Default Gateway] is set to [Wireless(Infrastructure)]. Press [Network Setup]. Pressing [Enabling Default Gateway] switches between [Wired] and [Wireless(Infrastructure)]. - 73 -...
-
Page 74: Connecting To The Machine Directly (Ap Mode)
2. Setting Up Press [Back] until the home screen is displayed. Connecting to the Machine Directly (AP mode) Wireless LAN (AP mode) directly connects wireless devices (computers, tablets, smartphones, etc.) to the machine without using a wireless LAN access point. •... - Page 75 2. Setting Up Press [Network Menu]. Press [Enable]. Press [Network Setup]. Press [Wireless(AP Mode) Setting]. Press [Automatic connection (push-button)]. The message below is displayed for about five seconds. - 75 -...
- Page 76 2. Setting Up Press [Yes]. Turn on the machine. If the "Do you want to Set-up wireless?" message appears, select the [Do not show next time.] check box, and then press [No]. Press [Device Settings] on the touch panel. Press [Admin Setup] on the touch panel. Enter the administrator name and password and press [OK].
- Page 77 2. Setting Up The message below is displayed for about five seconds. Press [Manual Setup]. Press [Enable]. Check the [SSID] and [Password] of the machine. Enter the [SSID] and [Password] that you checked in step 10 to connect the machine and your wireless device. - 77 -...
-
Page 78: Installing A Driver And Software To A Computer
2. Setting Up Installing a Driver and Software to a Computer For Windows Install the printer driver, scanner driver, fax driver, etc. from the "Software DVD-ROM" to the Connect the machine and computer via a network or USB cable and start installing. computer. - Page 79 2. Setting Up Select [Network] or [USB connection] in accordance to the connection method Click [Install Optional Software]. of the machine and computer, and then click [Next]. If the [Windows Security Alert] dialog is displayed, click [Allow access]. Select the model name of the machine, and then click [Next]. Installation starts.
- Page 80 2. Setting Up Click [Complete]. Click [Next]. If the following dialog is displayed, click [Yes]. - 80 -...
-
Page 81: For Mac Os X
Make sure that the machine and a computer are connected and the machine is turned on, and then insert the included "Software DVD-ROM" into the computer. Double-click the [OKI] icon on the desktop. [Drivers] > [Scanner] > Double-click [Installer for OSX]. Click [Continue]. - Page 82 Click [Continue Installation]. Insert the "Software DVD-ROM" into a computer. Double-click the [OKI] icon on the desktop. [Drivers] > [PS] > Double-click [Installer for OSX]. Enter the administrator password, and then click [OK]. Follow the on-screen instructions to complete the installation.
- Page 83 Select [Add Printer or Scanner...] when the menu is displayed. To change the name, enter a new name into [Name:]. Click [Default]. Select the machine, and then select [OKI MC573 PS] in [Use]. Types of Names Displayed in the Connection Methods List Click [Add].
- Page 84 Make sure that the machine is added to [Printers] and [OKI MC573 PS] is displayed for [Kind]. If [OKI MC573 PS] is not displayed for [Kind] correctly, click [-], delete the machine from [Printers], and then newly perform steps 8 to 12.
-
Page 85: Basic Operations
Basic Operations Names of Components Basic Operations on the Operator Panel Turning On or Off the Machine Loading Paper Setting a Document This section describes basic operations of this machine. -
Page 86: Names Of Components
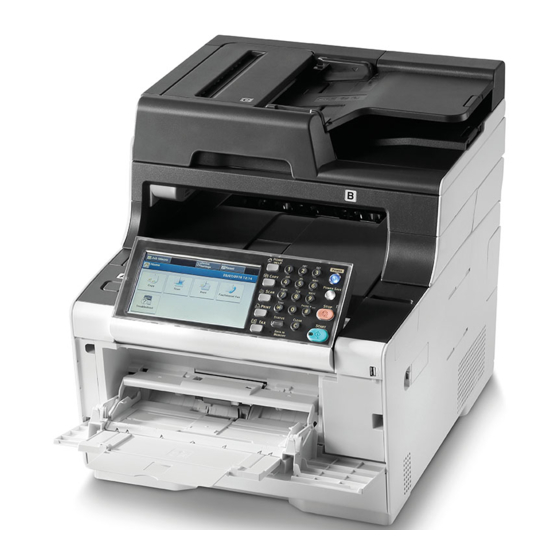
3. Basic Operations Names of Components Front View The chapter describes the name of each component. • Front View • Rear View • Inside of the machine Symbol Name Description Auto document feeder (ADF) Automatically feed document on the document tray to the scanner unit. -
Page 87: Rear View
3. Basic Operations Rear View Symbol Name Description Symbol Name Description Document glass Load document unable to set on the document tray. Telephone connector Insert the cable of the external telephone when Document glass cover Cover which holds document set on the document using the fax. -
Page 88: Inside Of The Machine
3. Basic Operations Inside of the machine Symbol Name Description LED head LED which exposes printing part to light. If printouts have vertical stripes or blurs around letters, clean the LED head. Fuser unit Fix toner on paper. Toner cartridge / Image drum (Y: yellow) Toner cartridges contain toner which is used for printing. -
Page 89: Basic Operations On The Operator Panel
3. Basic Operations Basic Operations on the Operator Panel Names and Functions This section describes the operator panel of the machine. This section describes the names and functions of components on the operator panel. • Names and Functions • Name and Functions on the Touch Panel •... -
Page 90: Name And Functions On The Touch Panel
3. Basic Operations Name and Functions on the Touch Panel • When changing the angle of the operator panel, use care not to let your hands be caught between this machine and the operator panel. Injury may result. When this machine turns on, the home screen is displayed on the touch panel. •... - Page 91 3. Basic Operations Item Description Item Description Main area Press to use the copy functions. Tab labels Displays labels for tabs. Press a label to switch between tabs. If any setting is changed from its default setting, is displayed. Press to use the scan functions. Main area Displays a preview of copy output that will be produced with the current settings.
-
Page 92: Entering Characters
3. Basic Operations Item Description Entering Characters Return button Puts a line break. This button appears when entering body text of an E-mail. • Entering with the Touch Panel Left button/right button/up button/down Moves the cursor left, right, up, or down. •... -
Page 93: Adjusting The Angle Of The Operator Panel
3. Basic Operations Adjusting the Angle of the Operator Panel [RU] may be shown in case of Russian, and [EL] in case of Greek. In case of other languages, only [Alpha] and [Symbol] may be shown. The operator panel can be tilted to improve the visibility. •... -
Page 94: Turning On Or Off The Machine
3. Basic Operations Turning On or Off the Machine Turning On the Machine This section describes how to turn on and off the machine. Check that no documents are set on the document glass or in the ADF, and the ADF cover is closed. •... -
Page 95: Turning Off The Machine
3. Basic Operations The home screen appears when the machine is ready. Turning Off the Machine • Check that the machine is not receiving data before shutting down. • Press and hold the power switch for 5 seconds or more to force shut down the machine. Use this method only if a problem occurs. - Page 96 3. Basic Operations After a while, the machine automatically turns off, and the power switch LED lamp goes out. What You Should Do If You Do Not Use This Machine for an Extended Period of Time If you do not use this machine for an extended period of time due to holidays, trips, or other reasons, unplug the power cord from the outlet.
-
Page 97: Loading Paper
Loading Paper in the MP Tray • Paper Storage If you print on paper that is not recommended by Oki Data, check the print quality and the movement of the paper thoroughly in advance to ensure that there are no problems. • Plain paper... - Page 98 3. Basic Operations • Tray 1 Paper type Paper size (mm) (Values in Paper weight brackets are inch sizes.) Available paper size Tray capacity Paper weight Custom size Width: 64 to 216 64 to 220 g/m (17 to 58 lb) 250 sheets Light Length: 90 to 1321...
- Page 99 3. Basic Operations • MP Tray • Labels Labels must be of the type recommended for use in copiers and laser printers, in which the Available paper size Tray capacity Paper weight base carrier page is entirely covered by labels. Other types of label stocks may damage the 100 sheets Light machine due to the labels peeling off during the printing process.
-
Page 100: Loading Paper In Tray 1/2/3
3. Basic Operations Fan a stack of paper well, and then align the edges of the paper. Loading Paper in Tray 1/2/3 The procedure when loading paper in Tray 1 is used as an example, and the same procedure applies to Tray 2/3 (optional). Pull the paper cassette out. -
Page 101: Loading Paper In The Mp Tray
3. Basic Operations Push the paper cassette until it stops. Loading Paper in the MP Tray • Do not press down the paper or hold the paper to pull while printing on the paper fed from the MP tray. To stop printing, open the output tray. - Page 102 3. Basic Operations Open the sub support. Insert the paper with the print side up until its edge touches the paper feed entrance. Do not load paper above the " " mark. Adjust the manual feeding paper guide to the width of paper to be loaded. When a printer is in the power saving mode, press the (Power Save) button to restore from the mode.
-
Page 103: Paper Storage
3. Basic Operations Paper Storage Store paper under the following conditions to maintain quality. • Inside a cabinet or other dry and dark place • On a flat surface • Temperature: 20°C • Humidity: 50% RH (relative humidity) Do not store paper in the places as shown below: •... -
Page 104: Setting A Document
3. Basic Operations Setting a Document About Documents That Can be Set • About Where to Set a Document This chapter describes how to set the document on this machine. Set a document in the ADF or on the document glass when copying, scanning, or faxing. -
Page 105: Setting In The Adf
3. Basic Operations • Documents still wet with ink or correction fluid Setting in the ADF Observe the following to avoid damaging the document glass. • When copying a thick document, do not press on it on the document glass. Do not jog a document stack on the ADF cover. - Page 106 3. Basic Operations Close the ADF cover. If [Direction] is set to [Portrait], set the document so that its top edge is pulled into the ADF first. Set a document face up in the ADF. Align the document guide to the document width. If [Direction] is set to [Landscape], set the document so that its left edge is pulled into the ADF first.
-
Page 107: Setting On The Document Glass
3. Basic Operations Setting on the Document Glass Do not press the document glass forcefully. Open the document glass cover. Set a document face down on the document glass. If [Direction] is set to [Portrait], align the top edge of the document with the upper-left corner of the glass. -
Page 108: Copy
Copy Copying Cancelling Copying Specifying the Number of Copies Descriptions of Screens for Copy... -
Page 109: Copying
4. Copy Copying Advanced Copy Settings (Advanced Manual) Press [Copy] on the touch panel or the (COPY) button on the operator panel. The touch panel display switches to the copy top screen. Press the (START) button. Set a document in the ADF or on the document glass. Set the copy setting if necessary. -
Page 110: Cancelling Copying
4. Copy Cancelling Copying You can cancel copying before a message is displayed to inform you that copying is complete. Press the (STOP) button when scanning the document. - 110 -... -
Page 111: Specifying The Number Of Copies
4. Copy Specifying the Number of Copies Enter the number of copies by using the numeric keypad or the numeric buttons. If you entered with the touch panel, press [OK]. Press [Copy] on the touch panel or the (COPY) button on the operator panel. -
Page 112: Descriptions Of Screens For Copy
4. Copy Descriptions of Screens for Copy • [Basic] Tab • [Copy] Tab Item Description Paper Feed Specifies the tray to set the copy paper. Item Description Duplex Copy Makes copies on both sides of paper. Stationary button area Displays buttons that appear on the screen at all times. N-in-1 Combines multiple pages on one sheet of paper. - Page 113 4. Copy • [Advanced] Tab • [Image Settings] Tab Item Description Continuous Scan Scans multiple sets of documents as a single copy job. Item Description Mixed Size Scans multiple documents having the same width but different Image Settings Specifies the following image settings: Document Type, Background lengths in the ADF, so that they can be copied on their respective Removal, Show-Through Removal, Density, Contrast, Hue, paper sizes.
- Page 114 4. Copy • [Function Settings] Screen Item Description Setting display area 1 Displays the current settings for displayed items. Setting display area 2 Displays a list of settings that are not displayed in the setting display area 1. - 114 -...
-
Page 115: Scan
Scan Sending Scanned Data as an E-mail Attachment Saving Scanned Data in a Shared Folder Cancelling Scanning Descriptions of Screens for Scan... -
Page 116: Sending Scanned Data As An E-Mail Attachment
5. Scan Sending Scanned Data as an E-mail Attachment Before Using Scan To E-mail This section describes how to send scanned data as an e-mail attachment. If the machine is set up from [Easy Setup] > [E-mail Setting], skip Before Using Scan To E- mail. -
Page 117: Entering E-Mail Address To Send E-Mail
5. Scan Press [Manual Input]. Entering E-mail Address to Send E-mail Press [Scan] on the touch panel or the (SCAN) button on the operator panel. Set a document in the ADF or on the document glass. Press [Scan To E-mail]. Enter an e-mail address. - Page 118 5. Scan Set scan settings if necessary. Press [OK]. Press the (START) button. Specifying a Destination from Address Book or Group List (Advanced Manual) Specifying a Destination Using One-touch Button (Advanced Manual) Specifying a Destination from Transmission History (Advanced Manual) Specifying a Destination Searching LDAP Server (Advanced Manual) - 118 -...
-
Page 119: Saving Scanned Data In A Shared Folder
5. Scan Saving Scanned Data in a Shared Folder Creating a Shared Folder in a Computer This section describes how to save scanned data in a shared folder on a network. If you create a shared folder in the following steps, all users whose accounts are set in your computer can access the shared folder. -
Page 120: Registering A Destination (Profile)
5. Scan Press [Next]. Registering a Destination (Profile) Enter the user name and password in [User Name] and [Password]. Create a shared folder and register to the machine as a destination. Up to 50 profiles can be registered. • If domain management is performed, enter "User name@domain name". Press [Device Settings] on the touch panel. -
Page 121: How To Use Scan To Shared Folder
5. Scan How to Use Scan To Shared Folder Scanned data is converted into a PDF, JPEG, TIFF, or XPS file, and then sent to the shared folder. PDF is set by factory default. Connect the machine to a network and create a shared folder on the computer before using the Scan To Shared Folder function. -
Page 122: Cancelling Scanning
5. Scan Cancelling Scanning You can cancel scanning while a message is being displayed to inform you that scanning is in progress. Press the (STOP) button on the operator panel. - 122 -... -
Page 123: Descriptions Of Screens For Scan
5. Scan Descriptions of Screens for Scan Scan To E-mail Screen • [Scan To E-mail] Tab This section describes the items of the screen. • Scan To E-mail Screen • Scan To Shared Folder Screen • Scan To Computer Screen (Advanced Manual) •... - Page 124 5. Scan • [Basic] Tab • [Advanced] Tab Item Description Item Description Address Book Displays e-mail addresses registered in the Address Book. Duplex Scan Specifies duplex scanning. Select an e-mail address as a destination from the Address Book. Set this function when scanning both sides of a document. Group List Displays a list of groups in which e-mail addresses are registered.
- Page 125 5. Scan • [Image Settings] Tab • [Function Settings] > [Destination] Tab Add, edit or delete a destination to which a document is sent. • [Function Settings] > [Scan Setting] Tab Item Description Image Settings Specifies the following image settings: density, document type, resolution, background removal, show-through removal, contrast, hue, saturation, and RGB.
-
Page 126: Scan To Shared Folder Screen
5. Scan • [Basic] Tab Scan To Shared Folder Screen • [Scan To Shared Folder] Tab Item Description Item Description Profile area Select a destination profile from [Select Profile]. The selected profile appears in this area. Color Mode Specifies color mode to scan a document. Shortcut buttons Displays shortcut buttons for using certain scan functions. - Page 127 5. Scan • [Advanced] Tab • [Image Settings] Tab Item Description Image Settings Specifies the following image settings: Density, Document Type, Item Description Resolution, Background Removal, Show-Through Removal, Contrast, Hue, Saturation and RGB File Name Specifies a file name for the scanned file. File Format Specifies a file format for the scanned file.
- Page 128 5. Scan • [Function Settings] > [Profile] Tab Delete a selected profile on the [Profile] tab. • [Function Settings] > [Scan Setting] Tab Item Description Setting display area 1 Displays the current settings for displayed items. Setting display area 2 Displays a list of settings that are not set by items displayed in setting display area 1.
-
Page 129: Print
Print Printing from a Computer (Windows) Printing from a Computer (Mac OS X) Cancelling a Print Job About Screens and Functions of Each Printer Driver Descriptions of Screens for Print ”WordPad" for Windows and "TextEdit" for Mac OS X are used as examples. The screens and steps may vary depending on the application. -
Page 130: Printing From A Computer (Windows)
6. Print Printing from a Computer (Windows) For Windows PCL Printer Driver Open the file to print. • For Windows PCL Printer Driver Select [Print] from the [File] menu. • For Windows PS Printer Driver Select the printer driver. Click [Preferences]. - 130 -... -
Page 131: For Windows Ps Printer Driver
6. Print Change the settings in each tab to suit your needs. For Windows PS Printer Driver Open the file to print. Select [Print] from the [File] menu. Select the PS printer driver. Click [Preferences]. Click [OK]. Click [Print] on the [Print] Screen. - 131 -... - Page 132 6. Print Change the settings in each tab to suit your needs. Click [OK]. Click [Print] on the [Print] screen. - 132 -...
-
Page 133: Printing From A Computer (Mac Os X)
6. Print Printing from a Computer (Mac OS X) Change the settings on each panel to suit your needs. You can set a paper size, paper tray, and paper weight, and paper type with the printer driver. Open the file to print. Select [Print] from the [File] menu. -
Page 134: Cancelling A Print Job
6. Print Cancelling a Print Job Click [Printers & Scanners]. Double-click the printer icon. You can cancel a print job by deleting the job in the job list displayed on the operator panel. Click [Open Print Queue...]. • The pages that are ready to be printed on this machine cannot be cancelled. •... -
Page 135: About Screens And Functions Of Each Printer Driver
6. Print About Screens and Functions of Each Printer Driver Windows PCL Printer Driver • [Setup] Tab This section describes screens and functions of the printer drivers. • Windows PCL Printer Driver • Windows PS Printer Driver • Mac OS X PS Printer Driver Item Description Driver Setting... - Page 136 6. Print • [Job Options] Tab • [Extend] Tab Item Description Quality Specifies the resolution for printing. Scale Specifies the enlargement/reduction rate for printing. Item Description Copies Specifies the number of copies to print. Watermarks Specifies when you want to use stamp print. Job Type Specifies the print type.
-
Page 137: Windows Ps Printer Driver
6. Print • [Paper/Quality] Tab Windows PS Printer Driver • [Layout] Tab Item Description Tray Selection Changes the paper feed tray. Color Selects Color or Black & White. Item Description Advanced Allows you to set detailed settings for print quality and a paper size. Orientation Specifies the printing direction. - Page 138 6. Print • [Job Options] Tab Item Description About Displays the version of the printer driver. Default Resets the settings on the tab to their default settings. • [Color] Tab Item Description Quality Specifies the resolution for printing. If you set [Toner Saving], the print density decreases to save toner.
-
Page 139: Mac Os X Ps Printer Driver
6. Print • [Color Matching] Panel Mac OS X PS Printer Driver • [Layout] Panel Item Description ColorSync Specifies the ColorSync function. In printer Performs color matching with this machine. Profile Specifies a profile. Item Description • [Paper Handling] Panel Pages per Sheet Selects the number of pages that is printed on a sheet of paper. - Page 140 6. Print • [Cover Page] Panel Item Description Pages to Print Specifies pages to print. Page Order Specifies a page order to print. Scale to fit paper size Prints to fit a paper size. A document may not be printed correctly depending on the setting.
- Page 141 6. Print • [Color] Panel • [Print Options] Panel Item Description Item Description Grayscale Specifies to use monochrome printing. Quality1, Quality2, Feed, Paper Specifies the print quality, toner saving, paper type, etc. Color Specifies alignment to color mode when printing in color. - 141 -...
- Page 142 6. Print • [User Authentication] Panel • [Secure Print] Panel Item Description Item Description Use User Authentication Select this check box if you set user authentication when printing. Job Type Specifies the job type. [Job Type Option] can be used if [Shared Print] or [Private Print] is selected.
- Page 143 6. Print • [Supply Levels] Panel Item Description Consumables Displays the remaining amount of consumables. The [Supply Levels] panel may not appear depending on the environment such as how to connect to the device. - 143 -...
-
Page 144: Descriptions Of Screens For Print
6. Print Descriptions of Screens for Print Item Description Stationary button area Displays buttons that appear on the screen at all times. Title and operation guide area Displays the title of the current screen and provides guide for possible operations. Item Description Paper Feed... -
Page 145: Fax
Basic Operations of Fax Functions Setting for Receptions Descriptions of Screens for Fax... -
Page 146: Basic Operations Of Fax Functions
7. Fax Basic Operations of Fax Functions Entering Fax Number to Send a Fax This section describes basic operations when sending and receiving a fax. Press [Fax/Internet Fax] on the touch panel or the (FAX) button on the operator panel. •... -
Page 147: Cancelling A Fax Transmission
7. Fax Press [Fax]. Cancelling a Fax Transmission • Cancelling During a Transmission • Cancelling a Reserved Transmission Cancelling During a Transmission You can cancel a fax transmission when a message is displayed and scanning is in progress. Press the (STOP) button. - Page 148 7. Fax A fax that is being sent is displayed on the top of the list. Press [Yes] on a confirmation screen. - 148 -...
-
Page 149: Setting For Receptions
7. Fax Setting for Receptions Setting the Reception Mode This section describes various settings when receiving a fax. [Fax Ready Mode] is set by factory default. Change the setting according to your environment. • [Fax Ready Mode] : Select this mode if you use this machine for fax only. •... - Page 150 7. Fax Press [ ] once to switch the screens, and then press [Admin Setup]. Press [ ] once to switch the screens, and then press [Reception Mode]. Enter the administrator password, and then press [OK]. Select a mode which is most suitable for your environment. The factory default administrator name and password are "admin"...
-
Page 151: Drd
7. Fax Type 2 : 0.4 sec ON - 0.2 sec OFF - 0.4 sec ON - 0.2 sec OFF - 0.8 sec ON - 0.4 sec OFF repeat This mode allows the machine to detect a distinctive ring if it has been enabled on the phone Type 3 : 0.5 sec ON - 0.5 sec OFF - 1 sec ON - 0.5 sec OFF - 0.5 sec ON - 3 sec OFF repeat line. -
Page 152: Receiving Operation
7. Fax Setting the Waiting Time from When an Incoming Call Arrives Receiving Operation to When Reception Starts (Response Waiting Time) Receiving operation varies depending on the specified fax reception mode. The factory default value is 1 Ring. The fax reception mode is set to [Fax Ready Mode] by factory default and the machine receives faxes automatically. - Page 153 7. Fax When Connecting an Answering Machine (Ans/Fax Ready Mode) If [Ans/Fax Ready Mode] is set, you can use an answering machine and fax. Connect an answering machine in advance. For details on how to connect an answering machine, see "Connecting a Telephone Line".
-
Page 154: Descriptions Of Screens For Fax
7. Fax Descriptions of Screens for Fax Fax Screen • [Fax] Tab This section describes the items of the screen. • Fax Screen • Internet Fax Screen (Advanced Manual) Item Description Destination area Select a fax destination. The selected fax destination appears in this area. - Page 155 7. Fax • [Basic] Tab • [Advanced] Tab Item Description Item Description Density Adjusts a level of scan density. Manual Dial Enter a fax number manually to use it as a destination. Duplex Scan Specifies duplex scanning. Speed Dial Displays destinations registered in the speed dial list. Set this function when scanning both sides of a document.
- Page 156 7. Fax • [Fax Job View/ Cancel] Tab • [Function Settings] > [Scan Setting] Tab Cancels a transmission or see the detail of the job that is proceeding. • [Function Settings] > [Destination] Tab Item Description Add, edit or delete a destination to which a fax is sent. Setting display area 1 Displays the current settings for displayed items.
-
Page 157: Maintenance
Maintenance Replacing Consumables Cleaning Each Part of the Machine This section describes how to maintain the machine to keep the machine comfortable and extend its life. -
Page 158: Replacing Consumables
8. Maintenance Replacing Consumables Cautions When Replacing Consumables This section describes how to replace consumables. Observe the following cautions when replacing. • Cautions When Replacing Consumables • Replacing the Toner Cartridges Do not throw the toner or toner cartridge into a fire. The toner will scatter, •... -
Page 159: Replacing The Toner Cartridges
• Toner powder may spill if you remove a toner cartridge before the toner runs out. • Use Oki Data genuine consumables to ensure optimum performance of the products. • Charges for services for problems caused by the use of consumables other than Oki Data genuine consumables are Prepare new toner cartridges. - Page 160 8. Maintenance Press the button (A) and open the output tray (b) completely. Lift the toner cartridge (d) from right side, and remove it from the machine. Burns may result. Burns may result. The fuser unit is extremely hot. Do not touch it. Never throw used toner cartridges into a fire.
- Page 161 8. Maintenance Shake the cartridge several times vertically and horizontally. Do not insert a toner cartridge without removing the tape. Remove the tape (e) from the toner cartridge. Insert a new toner cartridge (d) by aligning its left side indentation (f) with the protrusion (g) on the image drum so the toner cartridge and image drum color labels align.
- Page 162 8. Maintenance Hold the cartridge, pinch the tip of blue lever (c) of the toner cartridge, and turn Close the output tray (b) slowly and push the center of the output tray for forward until the tip aligns on the lug of the cartridge. confirmation.
-
Page 163: Replacing The Image Drum
• Use Oki Data genuine consumables to ensure optimum performance of the products. • Charges for services for problems caused by the use of consumables other than Oki Data genuine consumables are incurred, regardless of the warranty or in the maintenance contract. (Although use of non-genuine consumables does not always result in problems, use extra care when using them.) - Page 164 8. Maintenance Prepare new image drum. While removing consumables, be careful not to hit them to the LED head. Hold the handle (B) and open the scanner unit (a) completely. Hold the cartridge, pinch the tip of blue lever (d) of the toner cartridge, and turn Press the button (A) and open the output tray (b) completely.
- Page 165 8. Maintenance Lift the toner cartridge (e) from the right side, and remove it from the image cartridge and image drum color label align. Then insert the right side gently drum. into place. Unpack a new image drum and place it on a flat surface. Hold the cartridge, pinch the tip of blue lever (d) of the toner cartridge, and turn Remove the desiccant pack.
- Page 166 8. Maintenance While setting consumables, be careful not to hit them to the LED head. Do not close the scanner unit vigorously. It may cause the document feed roller of ADF to fall and get in the way of loading documents. If the document feed roller of ADF has fallen, open and close the ADF cover.
-
Page 167: Replacing The Image Drum And Toner Cartridge At The Same Time
8. Maintenance Press the button (A) and open the output tray (b) completely. Replacing the Image Drum and Toner Cartridge at the Same Time Burns may result. This section describes how to replace the image drum and toner cartridge with new ones at the same time. - Page 168 8. Maintenance Remove the toner cover. While removing consumables, be careful not to hit them to the LED head. Unpack a new toner cartridge. Shake the cartridge several times vertically and horizontally. Burns may result. Never throw a used image drum or toner cartridge into a fire. They may explode, and the toner inside may fly off and cause burns.
- Page 169 8. Maintenance Insert a new toner cartridge (e) by aligning its left side indentation (f) with the protrusion (g) on the image drum so that the toner cartridge and image drum If you close the output tray without turning the blue lever when installing the toner cartridge into the image drum, color label align.
- Page 170 8. Maintenance Hold the handle (B) to close the scanner unit (a). Do not close the scanner unit vigorously. It may cause the document feed roller of ADF to fall and get in the way of loading documents. If the document feed roller of ADF has fallen, open and close the ADF cover. Please recycle image drums and toner cartridges.
-
Page 171: Cleaning Each Part Of The Machine
8. Maintenance Cleaning Each Part of the Machine Cleaning the Document Glass This section describes how to clean the machine and parts. Clean the document glass once a month to maintain image quality of the printouts. Do not use benzine, thinners, or alcohol. They may damage the plastic parts of the machine. •... -
Page 172: Cleaning The Led Head
8. Maintenance Cleaning the LED Head If the document glass surface and document holding pad are very dirty, wipe gently with a soft cloth that has been moistened with neutral detergent and squeezed well, and then wipe again with a soft cloth that has been slightly Clean the LED head if vertical white lines appear, images are faded, or the periphery of moistened with water and squeezed well. - Page 173 8. Maintenance Press the button (A) and open the output tray (b) completely. Close the output tray (b) slowly and push the center of the output tray for confirmation. Burns may result. The fuser unit is extremely hot. Do not touch it. Hold the handle (B) to close the scanner unit (a).
-
Page 174: Troubleshooting
Troubleshooting If Paper Jams Occur If a Document Jam Occurs Copy Problems Scan Problems Print Problems Fax Problems If an Error Message is Displayed on the Operator Panel... -
Page 175: If Paper Jams Occur
9. Troubleshooting If Paper Jams Occur If the Error Code is "370", "371", "372" This section describes how to handle when a paper jam occurs. Check the error code on the If documents are set in the ADF or on the document glass, remove them. operator panel and see the corresponding page. - Page 176 9. Troubleshooting Press the button (A) and open the output tray (b) completely. Cover the removed image drums with paper so that the image drums are not exposed to light. Burns may result. The fuser unit is extremely hot. Do not touch it. Remove the jammed paper slowly by pulling the edge of paper.
- Page 177 9. Troubleshooting If paper jams in the fuser unit, press the jam release lever (c) on the fuser unit and slowly pull the jammed paper toward you. While removing the fuser unit, be careful not to hit it to the LED head. Tilt back the lock levers (d) on the both sides of the fuser unit toward you.
- Page 178 9. Troubleshooting Remove the jammed paper slowly by pulling the edge of paper. Turn the lock levers (e) on the both sides of the belt unit forward. Hold the fuser unit handle and place the fuser unit into the machine. Hold the lock levers of belt unit and place the belt unit into the machine.
- Page 179 9. Troubleshooting Tilt the lock levers (d) on the both sides of the fuser unit. Close the output tray (b) slowly and push the center of the output tray for confirmation. Replace the four image drums into the machine Hold the handle (B) to close the scanner unit (a). While setting consumables, be careful not to hit them to the LED head.
-
Page 180: If The Error Code Is "380", "381", "382", "385", "389
9. Troubleshooting Press the button (A) and open the output tray (b) completely. If the Error Code is "380", "381", "382", "385", "389" If documents are set in the ADF or on the document glass, remove them. Burns may result. The fuser unit is extremely hot. - Page 181 9. Troubleshooting Cover the removed image drums with paper so that the image drums are not If paper jams in the fuser unit, press the jam release lever (c) on the fuser unit exposed to light. and slowly pull the jammed paper toward you. Remove the jammed paper slowly by pulling the edge of paper.
- Page 182 9. Troubleshooting While removing the fuser unit, be careful not to hit it to the LED head. While setting the fuser unit, be careful not to hit it to the LED head. Check that any pieces of paper do not remain inside the machine. Tilt the lock levers (d) on the both sides of the fuser unit.
- Page 183 9. Troubleshooting While setting consumables, be careful not to hit them to the LED head. Do not close the scanner unit vigorously. It may cause the document feed roller of ADF to fall and get in the way of loading documents. If the document feed roller of ADF has fallen, open and close the ADF cover.
-
Page 184: If The Error Code Is "390
9. Troubleshooting Hold the handle (B) and open the scanner unit (a) completely. If the Error Code is "390" If documents are set in the ADF or on the document glass, remove them. Press the button (A) and open the output tray (b) completely. Burns may result. - Page 185 9. Troubleshooting Open the transparent cover (c) inside the machine, remove the jammed paper slowly by pulling the edge of paper. While removing consumables, be careful not to hit them to the LED head. Cover the removed image drums with paper so that the image drums are not exposed to light.
- Page 186 9. Troubleshooting Close the output tray (b) slowly and push the center of the output tray for confirmation. Do not close the scanner unit vigorously. It may cause the document feed roller of ADF to fall and get in the way of loading documents.
-
Page 187: If The Error Code Is "391", "392", "393
9. Troubleshooting If the Error Code is "391", "392", "393" If paper does not jam, the machine may have failed in feeding paper. Reduce the sheets of paper loaded in the A paper jam has occurred while feeding paper from a paper tray. tray, check the positions of paper guides and paper stopper in the tray, and ensure that paper is correctly loaded. - Page 188 9. Troubleshooting Press the button (A) and open the output tray (b) completely. Hold the handle (B) and close the scanner unit (a). Close the output tray (b) slowly and push the center of the output tray for confirmation. Do not close the scanner unit vigorously. It may cause the document feed roller of ADF to fall and get in the way of loading documents.
-
Page 189: If The Error Code Is "409
9. Troubleshooting Press the button (A) and open the output tray (d) completely. If the Error Code is "409" Close the rear output tray (b). Burns may result. The fuser unit is extremely hot. Do not touch it. Remove the four image drums from the machine and place the image drums Hold the handle (B) and open the scanner unit (c) completely. - Page 190 9. Troubleshooting Cover the removed image drums with paper so that the image drums are not If paper jams in the fuser unit, press the jam release lever (e) on the fuser unit exposed to light. and slowly pull the jammed paper toward you. Remove the jammed paper slowly by pulling the edge of paper.
- Page 191 9. Troubleshooting Remove the jammed paper slowly by pulling the edge of paper. While removing the fuser unit, be careful not to hit it to the LED head. Hold the lock levers of belt unit and place the belt unit into the machine. Turn the lock levers (g) on the both sides of the belt unit toward you and remove the belt unit by holding the lock levers.
- Page 192 9. Troubleshooting Turn the lock levers (g) on the both sides of the belt unit forward. Tilt the lock levers (f) on the both sides of the fuser unit. Hold the fuser unit handle and place the fuser unit into the machine. While setting the fuser unit, be careful not to hit it to the LED head.
- Page 193 9. Troubleshooting Close the output tray (d) slowly and push the center of the output tray for confirmation. Hold the handle (B) to close the scanner unit (c). Do not close the scanner unit vigorously. It may cause the document feed roller of ADF to fall and get in the way of loading documents.
-
Page 194: If A Document Jam Occurs
9. Troubleshooting If a Document Jam Occurs If a Document is Visible in the Paper Path This section describes how to handle when a document jam occurs. Open the ADF cover (a). • If a Document is Visible in the Paper Path •... -
Page 195: If A Document Is Invisible In The Paper Path
9. Troubleshooting Open the inner cover (b). If a Document is Invisible in the Paper Path Open the ADF cover (a). If you can see the edge of the jammed document, pull it out gently. Remove the jammed document. Proceed to step 4 if you cannot remove the jammed document. - Page 196 9. Troubleshooting If you were able to remove the document, close the inner cover. Close the ADF cover slowly. Remove the document on the document tray, and then close the ADF cover. Otherwise, documents may be torn or folded. If an error occurs while copying, the copying gets canceled. - 196 -...
-
Page 197: Copy Problems
9. Troubleshooting Copy Problems Unable to Copy • Unable to copy This section describes problems with the copy function. Point to check Solution Reference Is the machine turned on? Turn on the machine. Turning On the Machine If you cannot solve a problem with the following solutions, contact your dealer. Is the machine being initialized? Wait until initialization is complete. - Page 198 9. Troubleshooting • Unable to sort copies Point to check Solution Reference Is a print job from a computer or Wait until printing is complete. Point to check Solution Reference other device in progress? Is [Sort] set to [OFF]? Set [Sort] to [ON]. Is a fax being sent in real time? Wait until the transmission is Sorting Each Set in Page Order...
-
Page 199: Scan Problems
9. Troubleshooting Scan Problems Unable to Scan This section describes problems with the scan function. Point to check Solution Reference Is the machine turned off? Turn on the machine. Turning On the Machine Is the cable connected to the Check the cable connections, and then Connecting a LAN Cable/USB If you cannot solve a problem with the following solutions, contact your dealer. -
Page 200: Print Problems
The machine is not set as the default Set the machine as the default printer. printer. Right-click the [OKI MC573 *] icon on the [Devices and Printers] folder, and then select [Set as Default Printer]. * Indicates the driver type. (ex. PCL6/... - Page 201 9. Troubleshooting Cause Solution Reference The machine is processing data from Wait until printing is complete. another interface. "Receiving data timeout" is displayed Press [Device Settings], select [Admin on the touch panel and the machine Setup] > [Print Setup] > [Print menu] > does not print.
-
Page 202: Fax Problems
9. Troubleshooting Fax Problems Unable to Send a Fax • Unable to send a fax This section describes problems with the fax function. Point to check Solution Reference Did you send in the correct Check the procedure, and then try Entering Fax Number to Send a If you cannot solve a problem with the following solutions, contact your dealer. - Page 203 9. Troubleshooting • A document cannot be sent continuously Point to check Solution Reference Is memory full? Check the reserved transmission. Point to check Solution Reference Sending at a Specified Date and Print the documents received with the Time (Delayed Tx) (Advanced Did you set the document correctly in Set the document after aligning the confidential transmission.
-
Page 204: Unable To Receive A Fax
9. Troubleshooting Unable to Receive a Fax • Unable to receive a fax Point to check Solution Reference Did you specify the appropriate Check the reception mode. Setting the Reception Mode reception mode? Is there paper in the tray? Load the paper. Loading Paper Is there a paper jam? Check an error message, and then... -
Page 205: If An Error Message Is Displayed On The Operator Panel
9. Troubleshooting If an Error Message is Displayed on the Operator Panel Error Message List If an error occurs in this machine, an error message and/or an error code (a 3-digit number) Wait a moment. Network initializing ... is displayed on the touch panel and (STATUS) on the operator panel blinks or lights up. - Page 206 9. Troubleshooting Wait a moment. Executing maintenance. Image Drum Near Life. The programs on the machine are being updated. The image drum indicated on the screen is near life. Have a new image drum ready. Do not turn off the machine until the update completes. C: Cyan (blue), M: Magenta (red), Y: Yellow, K: Black The machine automatically restarts after the update completes.
- Page 207 9. Troubleshooting [TRAY] empty. Disk Read/Write Error No paper is loaded in the indicated tray. Load paper. An error has occurred in the file system. Press [Close]. Disk Memory Full. Flash Error Memory in the file system is full. An error has occurred when firmware was being updated. Delete unnecessary files.
- Page 208 9. Troubleshooting Wait a moment. Network initializing ... Y Non Recommended Toner. Error: 550, 554, 614, 620 Network settings for this machine are initializing. Wait for a while. The installed Y (Yellow) toner cartridge is not optimum. We recommend using an optimum toner cartridge. Paper [TRAY] is empty.
- Page 209 9. Troubleshooting Paper jam has occurred. Pull out the [TRAY] cassette and then remove the paper. Fuser Unit Life. Install New Fuser Unit. Error: 354 Error: 391, 392, 393 The fuser unit reaches its lifetime. Replace the fuser unit with a new one. A paper jammed via the paper feed path from the indicated tray.
- Page 210 9. Troubleshooting [COVER] Open. Error: 310 USB Memory Full Indicated cover is open. Close the cover. Scan To USB Memory was cancelled because the USB Memory is full. Error: 310 The output tray. Check the free space in the USB Memory. Power OFF/ON Writing to USB memory failed.
- Page 211 9. Troubleshooting Please check SMTP settings. Entering directory failed. Cannot connect to the SMTP server. Check the network settings. Connecting to the directory of the FTP server failed. Check the server settings. Please check POP3 settings. Changing data Transfer Type failed. Cannot connect to the POP3 server.
- Page 212 9. Troubleshooting Access Limitation Error. Monochrome printing was performed due to the color printing A decoding error occurred. Check the image data. limitation. An error has occurred in the image data sent to this machine. Check the image data. A color print job was converted to a mono print job due to an unauthorized user. Contact your administrator for color printing.
- Page 213 9. Troubleshooting This PDF file is password protected. Wait Timeout in menu is disabled. Printing is disabled except by USB. Clear page buffer and enable time out in menu. This PDF file is password protected. Wait Timeout is disabled. Press [Device Settings], select [Admin Setup] > [Print Setup] > [Print menu] > [Printer Adjust] > [Timeout Injob] on Valid password required to print document.
- Page 214 9. Troubleshooting Firmware Update Error Please try again. If network doesn't work, please try firmware IPv4 address is conflicted. Please change IPv4 address. update over USB. The IP address assigned to this machine is duplicated with that of another device. Check the IP addresses, and then assign another IP address.
-
Page 215: Operating Management/ Specifications
Operating Management/ Specifications Changing the Administrator Password Saving Power Consumption with the Power Save Function Specifications This section describes how to manage the machine and its specifications. -
Page 216: Changing The Administrator Password
10. Operating Management/ Specifications Changing the Administrator Password It is recommended to change the administrator password to protect your security. Set the administrator password using from 6 to 12 alphanumeric characters. Be careful not to forget the set password. Press [Device Settings] on the touch panel. Press several times and press [Admin Setup]. -
Page 217: Saving Power Consumption With The Power Save Function
10. Operating Management/ Specifications Saving Power Consumption with the Power Save Setting the Length of Idle Time Before Entering Power Save Function Mode The machine has three Power Save modes: Power Save, Sleep, and Deep Sleep. Press [Device Settings] on the touch panel. In Power Save mode, the display screen turns off and the power saving indicator lights up or Press several times and press [Admin Setup]. -
Page 218: Setting The Length Of Idle Time Before Entering Sleep Mode
10. Operating Management/ Specifications Setting the Length of Idle Time Before Entering Sleep Mode Restrictions in Power Saving Function The machine does not enter Sleep mode in the following cases. Press [Device Settings] on the touch panel. • When an error occurs on the machine Press several times and press [Admin Setup]. -
Page 219: Automatically Turning Off The Machine (Auto Power Off)
10. Operating Management/ Specifications Automatically Turning Off the Machine (Auto Power Off) The elapse time in Deep Sleep mode is not included in the intervals of WINS update time. WINS regular updates are not performed in Deep Sleep mode, possibly resulting in The machine equipped with the Auto Power Off function which automatically turns off the names that are registered in the WINS server being deleted. -
Page 220: Setting The Length Of Idle Time Before Auto Power Off Works
10. Operating Management/ Specifications Setting the Length of Idle Time Before Auto Power Off Works Press [Device Settings] on the touch panel. Press several times and press [Admin Setup]. Enter the administrator name and password and press [OK]. The factory default administrator name and password are "admin" and "999999" respectively. -
Page 221: Specifications
10. Operating Management/ Specifications Specifications General Specifications This section describes the specifications of the machine. MFP Model Model Number MC573/ES5473 MFP N36401A/N36401B • General Specifications Item MC573/ES5473 MFP • Copier Specifications ARM Processor (667MHz) Memory DDR3 32bit 1GB • Fax Specifications 3 GB •... -
Page 222: Copier Specifications
10. Operating Management/ Specifications Copier Specifications Fax Specifications Item MC573/ES5473 MFP Item MC573/ES5473 MFP Document size A4, A5, A6, B5, B6, Letter, Legal 13/13.5/14, Executive, Statement, Compatibility ITU-T G3/Super G3 8.5 SQ, Folio Compression method MH, MR, MMR, JBIG * A6 paper is not available for duplex scanning. Modem speed Up to 33.6 Kbps Document glass... -
Page 223: Scanner Specifications
10. Operating Management/ Specifications Scanner Specifications Printing Specifications Item MC573/ES5473 MFP Item MC573/ES5473 MFP Type Document Glass with ADF function Printing method Dry electrophotographic recording method with LED (Light-emitting diode) Image sensor Color CIS Page-description language PostScript 3, PCL5c, PCL6 (XL), EPSON FX, IBM ProPrinter, XPS, Light source PDF (v1.7 or earlier) Scanning resolution... -
Page 224: Network Specifications
10. Operating Management/ Specifications Item MC573/ES5473 MFP Network Specifications Paper loading capacity • Tray 1 250 sheets (less than 80 g/m ), total thickness 25 mm or lower. Item MC573/ES5473 MFP • MP tray 100 sheets (less than 80 g/m ) and total thickness 10 mm or lower, Interface Ethernet 10BASE-T/100BASE-TX/1000BASE-T, IEEE802.11 a/b/g/n... -
Page 225: Wireless Lan Specifications (Option)
10. Operating Management/ Specifications cause interference, and (2) this device must accept any interference, including interference Wireless LAN Specifications (Option) that may cause undesired operation of this device. Le présent appareil est conforme aux la partie 15 des règles de la FCC et CNR d'Ubdustrie Item MC573/ES5473 MFP Canada applicables aux appareils radio exempts de licence. -
Page 226: Contact Us
Suomi www.oki.com/fi Colombia www.oki.com/la/ Nederland www.oki.com/nl Other countries www.oki.com/printing/ België/Belgique www.oki.com/be Österreich www.oki.com/at Schweiz/Suisse/Svizzera www.oki.com/ch Polska www.oki.com/pl Česká www.oki.com/cz Slovenská www.oki.com/sk Magyarország www.oki.com/hu Россия www.oki.com/ru Україна www.oki.com/ua Türkiye'ye www.oki.com/tr Serbia www.oki.com/rs Croatia www.oki.com/hr Greece www.oki.com/gr Romania www.oki.com/ro OKI Europe www.oki.com/eu... - Page 227 46472402EE Rev5...
Need help?
Do you have a question about the MC573dn and is the answer not in the manual?
Questions and answers