
Related Manuals for Franke PROFESSIONAL Series


Summary of Contents for Franke PROFESSIONAL Series
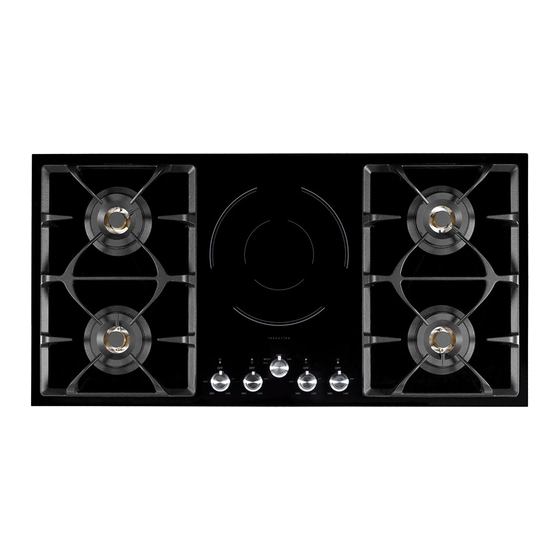
- Page 1 FRANKE PROFESSIONAL SERIES DUAL FUEL COOKTOP OPERATION MANUAL FIXG905B1 N/L FIXG903B1 N/L FIXG9041B2 N/L...
- Page 2 As well as your consumer guarantees under the Australian Consumer Law, PR Kitchen and Washroom Systems Pty Ltd ACN 138 663 279 (PRKS) offers original purchasers of the Products (Customer or you) the additional express warranty described in this document (Express Warranty) in respect of Franke Professional Appliances used in a domestic/residential setting (Product).
-
Page 3: Table Of Contents
SAFETY ELECTRICAL AND GAS CONNECTION INSTALLATION INSTRUCTIONS 9-10 LEGEND AND MANUAL IGNITION FOR GAS BURNERS GENERAL ASSEMBLY PROCEDURE FOR INSTALLATION TO USE YOUR NEW FRANKE COOKTOP ELECTRIC INDUCTION COOKING 14-16 DESCRIPTION OF THE APPLIANCE 17-18 STARTING-UP AND APPLIANCE MANAGEMENT 18-23... -
Page 4: General Information
PLEASE KEEP AND READ FOR FUTURE REFERENCE The Franke range of cooktops are state of the art appliances featuring the latest in flame auto safety shut-off. Should the flame on any burner be extinguished accidentally then the gas flow to that burner will automatically cease to flow, ensuring no hazardous build up of flammable gas from the cooktop can then occur. -
Page 5: Safety When In Use
SAFETY WHEN IN USE Remember this appliance produces heat and therefore some parts will get hot. Let pan supports and other surfaces cool down before touching them. Do not leave children unattended near the appliance when it is hot or in use. Do not store or use petrol or other flammable vapours or liquids in the vicinity of this or any other gas appliance. -
Page 6: Safety
SAFETY PRECAUTIONS BEFORE USING • Unpack all the materials. • The installation and connection of the appliance must be done by approved and qualified specialists. The manufacturer cannot be responsible for damage caused by installation or connection errors. • When used, the appliance must be correctly installed in a kitchen unit and an adapted and approved work surface. •... - Page 7 SAFETY PRECAUTIONS NOT TO DAMAGE THE APPLIANCE • Raw pan bottoms or damaged saucepans (not enameled cast iron pots) may damage ceramic glass. • Sand or other abrasive materials may damage ceramic glass. • Avoid dropping objects, even little ones, on the vitroceramic. •...
-
Page 8: Electrical And Gas Connection
ELECTRICAL CONNECTION • The installation of this appliance and the connection to the electrical network should be entrusted only to an electrician following the normal regulations. • Protection against the parts under tension must be ensured after the building-in. • The information on connections necessary are on the stickers. -
Page 9: Installation Instructions
INSTALLATION INSTRUCTIONS The installation comes under the exclusive responsibility of service. The installer must respect the legislation and the standards enforce in his home country. • The bench top or the support in which the cooktop is to be fitted, as well as the edges of the furniture, the laminates coatings and the glue used to fix them, must be able to resist temperatures of up to 100°C. - Page 10 INSTALLATION INSTRUCTIONS OTE: CONNECTION OF THE APPLIANCE TO THE GAS SUPPLY MUST BE IN ACCORDANCE WITH THE REQUIREMENTS OF ASNZ5601. A ½ INCH BSP CONNECTION AT THE INLET IS RECOMMENDED AND THE GAS SUPPLY LINE TO THE APPLIANCE MUST BE OF ADEQUATE LENGTH TO ALLOW SUFFICIENT WITHDRAWAL OF APPLIANCE FOR SERVICE OR DISCONNECTION.
-
Page 11: Legend And Manual Ignition For Gas Burners
GAS CONNECTION • Do not use as a room heater. • Do not allow clothing to pass over or near to the flame. • Do not leave handles of saucepans protruding out into the room or over adjacent burners. Always check that the pot is stable and will not be likely to tip its contents before you release your grip. -
Page 12: General Assembly Procedure For Installation
GENERAL ASSEMBLY PROCEDURE FOR INSTALLATION PLEASE KEEP AND READ FOR FUTURE REFERENCE GENERAL ASSEMBLY PROCEDURE FOR INSTALLATION _______________________________________________________________________________________________________________________ Ensure all packaging, including polystyrene, plastic and cardboard has been removed from around the appliance and burner area. Ensure that all burner(s), trivets, grates and panels are correctly located and supported. ABNORMAL OPERATION _______________________________________________________________________________________________________________________ If you are aware of any change in the operation of the appliance consult a qualified service person. -
Page 13: To Use Your New Franke Cooktop
TO USE YOUR NEW FRANKE COOKTOP (GAS BURNERS ONLY) PLEASE KEEP AND READ FOR FUTURE REFERENCE 1. Select the control knob corresponding to the gas burner you wish to use, press down and turn the knob to the position shown below. -
Page 14: Electric Induction Cooking
ELECTRIC INDUCTION COOKING (FIXG903B1, FIXG905B1) USE OF THE COOKTOP - INDUCTION ___________________________________________________________________________________________________ • Do not use the appliance until the installation is complete. • Ensure that the appliance is switched OFF when not in use, switch off the cooktop element by it’s control and do not rely on the pan detector. Never leave the cooktop unattended when being used, and use the correct size pans for the zone, never use pans that are unstable or •... - Page 15 E E L L E E C C T T R R I I C C I I N N D D U U C C T T I I O O N N C C O O O O K K I I N N G G ( ( F F I I X X G G 9 9 0 0 3 3 B B 1 1 , , F F I I X X G G 9 9 0 0 5 5 B B 1 1 ) ) ELECTRIC INDUCTION COOKING (FIXG903B1, FIXG905B1) The ceramic Induction hob fully complies with current legislation regarding electro-magnetic interference and is designed...
- Page 16 ELECTRIC INDUCTION COOKING (FIXG903B1, FIXG905B1) PROCEDURE TO START PARBOILING - INDUCTION _______________________________________________________________________________________________________________________ Automatic parboiling is activated by turning the knob anti clockwise briefly, the `A` symbol will appear. The required on-boiling stage is selected by turning knob clockwise which is shown on the display. The `A` symbol appears after 1 second upon releasing the knob. The on-boiling stage can be adjusted within 15 seconds after activation without cutting off the parboiling boost.
-
Page 17: Description Of The Appliance
DESCRIPTION OF THE APPLIANCE (FIXG9041B2) CONTROL PANEL Display Designation Description Zero The heating zone is activated 1...9 Power level Selection of the cooking level No pan detection No pan or inadequate pan Heat accelerator Automatic cooking Error message Electronic failure Residual heat The heating zone is hot Boost... -
Page 18: Starting-Up And Appliance Management
STARTING-UP AND APPLIANCE MANAGEMENT (FIXG9041B2) VENTILATION The cooling system is fully automatic. The cooling fan starts with a low speed. The ventilation starts with a high speed when the cooktop is intensively used. The cooling fan reduces speed and stops automatically when the electronic circuit is cooled. BEFORE THE FIRST USE Clean your cooktop with a damp cloth and dry the surface thoroughly. - Page 19 POWER SELECTION ZONE “SLIDER” AND TIMER SETTING ZONE To select the power with the slider, slide your finger on the “SLIDER” zone. You can directly access if you put your finger directly on the chosen level. STARTING-UP Start up/switch off the cooktop: Action Control panel Display...
- Page 20 RESIDUAL HEAT INDICATION After the heating zone is turned off, or the complete stop of the cooktop, the heating zones are still hot and indicates [ H ] on the display. The symbol [ H ] disappears when the heating zones may be touched without danger. When the residual heat indicators are on, don’t touch the heating zones and don’t put any heat sensitive object on them.
- Page 21 TIMER The timer is able to be used simultaneously with all heating zones with different time settings (from 0 to 999 minutes) for each heating zone. Setting and modification of the cooking time: Action Control panel Display Select the power level slide to the end of the “SLIDER”...
- Page 22 AUTOMATIC COOKING All the cooking zones are equipped with an automatic cooking device. The cooking zone starts at full power for a certain time, and will then reduce automatically the power on the pre-selected level. Start up: Action Control panel Display Power level selection slide on the “SLIDER”...
- Page 23 BRIDGE AND AUTOMATIC BRIDGE FUNCTION This function allows the use of 2 cooking zones at the same time with the same features as a single cooking zone. With this function the Booster function is allowed on the left and center zones. Action Control panel Display...
-
Page 24: Cooking Advice
COOKING ADVICE PAN QUALITY ccepted materials: steel, enameled steel, cast iron, ferromagnetic stainless-steel, aluminum with ferromagnetic bottom. Not accepted materials: aluminum and stainless-steel without ferromagnetic bottom, copper, brass, glass, ceramic, porcelain. The manufacturers specify if their products are compatible induction. To check if pans are compatible : •... -
Page 25: Maintenance And Cleaning
COOKING ADVICE EXAMPLES OF COOKING POWER SETTING The values below are indicative 1 to 2 Melting, reheating The heating zone is activated 2 to 3 Simmering, defrosting Selection of the cooking level 3 to 4 Steam No pan or inadequate pan 4 to 5 Water Automatic cooking... -
Page 26: Environment Preservation
The control panel displays [ Er47 ]: • The cooktop is not connected to the network. Check the connection and reconnect the cooktop. If one of the symbols above persists, contact Franke service on 03 9700 9100. ENVIRONMENT PRESERVATION •... -
Page 27: Care And Maintenance
BURNERS: The burner caps are solid brass with a black chrome finish to avoid discoloration of the brass. NOTE: The black chrome will eventually burn off with time however this will not affect the performance of the burners. The burners can be re- chromed with Franke`s exchange program, for a nominal fee. -
Page 28: Fault Finding / Abnormal Operation
FAULT FINDING / ABNORMAL OPERATION FAULT FINDING / ABNORMAL OPERATION _______________________________________________________________________________________________________________________ FAULT POSSIBLE SOLUTION(S) BURNER LIGHTS, BUT GOES OUT WHEN CONTROL IS RELEASED CONTROL KNOB IS TO BE PRESSED DOWN FIRMLY, AND HELD (GAS) FIRMLY, DURING IGNITION PROCEDURE FOR 5 SECONDS. CONTROL KNOB IS BOTTOMING OUT ON THE CONTROL PANEL AND NOT ENGAGING THE FLAME FAILURE DEVICE –... - Page 32 PR Kitchen & Washroom Systems Pty Ltd. 83 Bangholme Road Dandenong South VIC 3175 Australia Phone +61 3 9700 9100 +61 3 9700 9191 info@prks.com.au www.franke.com.au FRANKE PROFESSIONAL *T&C’s apply...
Need help?
Do you have a question about the PROFESSIONAL Series and is the answer not in the manual?
Questions and answers