
Related Manuals for Viking VGIQ554241


Summary of Contents for Viking VGIQ554241
- Page 1 Use & Care Outdoor Gas Grills VGBQ53024 / VGBQ53624 / VGBQ54224 / VGBQ55424 / VGIQ542241 / VGIQ554241 CVGBQ53024 / CVGBQ53624 / CVGBQ54224 / CVGBQ55424 / CVGIQ542241 / CVGIQ554241...
-
Page 2: Table Of Contents
Congratulations We hope you will enjoy and appreciate the care and attention we have put into every detail of your new, state-of-the-art grill. Your grill is designed to offer years of reliable service. This Use and Care Manual will provide you with the information you need to become familiar with the care and operation of your outdoor grill. -
Page 3: Warnings & Safety
Warnings & Safety Warning and Important Safety Instructions appearing in this manual are not meant to cover all possible conditions and situations that may occur. Common sense, caution, and care must be exercised when installing, maintaining, or operating the appliance. ALWAYS contact the manufacturer about problems or conditions you do not understand. - Page 4 Warnings & Safety WARNING DANGER If you smell gas TO PROTECT AGAINST ELECTRIC SHOCK 1. Shut off gas to the appliance. 1. Do not immerse cord or plugs in water or other liquids. 2. Extinguish any open flames. 2. Unplug from outlet when not in use and before cleaning. 3.
- Page 5 Warnings & Safety • Spiders and insects can nest in the burners of the grill and block the gas and air flow to the burner ports. This may cause a fire from behind the manifold cover. Inspect and clean the burners periodically. •...
-
Page 6: Features
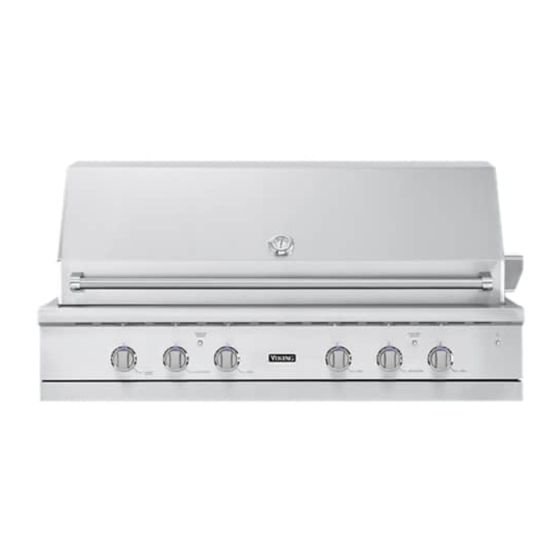
Features 1. Electronic ignition 10. Spit rod w/forks 2. Rotisserie control knob 11. Warming rack 3. Grill burner control knobs 12. Infrared rotisserie burner 4. Pull out drip tray 13. Interior lights 5. Interior light switch 14. Canopy 6. Stainless steel grids w/ceramic briquette trays underneath 7. -
Page 7: Before Lighting Grill
Before Lighting Grill Prior to turning on the gas, inspect the gas supply tubing or hose. Look for evidence of abrasion, cuts, wear and tear, or other damage which could require replacement prior to use. Make sure all burner control knobs are off. Do not attempt to light the burners if the smell of gas is present. -
Page 8: Lighting Grill
Lighting Grill Lighting Grill Burners Open the hood or remove covers. Push and turn the control knob until the “HIGH” position on the knob aligns with the indicator line on the control panel. Press the electronic ignition button corresponding to the burner being lit. You will hear a clicking sound. -
Page 9: Using Grill
Using Grill Before You Begin • The first time you use the grill, turn the control knob to “HIGH” and preheat racks for an additional 15–20 minutes. This allows the grates to be “seasoned.” • Before each use, turn the control knob to “HIGH” and preheat for 5 –7 minutes. -
Page 10: Cooking Tips
Cooking Tips Total Special instructions Weight or Control suggested and tips Food thickness setting cooking time* BEEF Hamburgers 1/2” (1.3 cm) – 8 – 15 min. Grill, turning once when juices rise to the surface. We suggest that ground chuck be used for 3/4”... -
Page 11: Grilling Tips
Grilling Tips TruSear™ Infrared Grilling Tips Infrared grilling produces intense heat which quickly sears the meat. Searing locks in flavor and juices while allowing the outer surface to absorb smoke and food aroma that is produced as grease and drippings are vaporized by the burner. The result is a crisp, flavorful outside with a tender, juicy inside. -
Page 12: Smoker Box
Smoker Box Using the smoker box feature intensifies the flavor by adding smoke to the grilling process. The additional smoke creates a “cloud” around the food which permeates meats and vegetables for added smoky flavor. In order to use the smoker box, remove the last set of stainless steel grids and briquette tray on the right hand side of the grill. - Page 13 Rotisserie To load the skewer, slide one of the rotisserie forks (prongs facing away from the end) onto the skewer. Push the skewer through the center of the food, then slide the second rotisserie fork (prongs toward the food) onto the skewer. Center the product to be cooked on the skewer then push the forks firmly toward the food.
-
Page 14: Cleaning And Maintenance
Stainless Steel Maintenance in Outdoor Environments Viking outdoor grills are made of the finest grades of stainless steel. However, the stainless steel must be maintained properly over the life of the unit to preserve its elegant appearance and optimal performance. Below are some helpful tips: •... - Page 15 Cleaning and Maintenance Cleaning Your Grill Burners Before removing the grates and burners, make sure the gas supply is off and the knobs are in the “OFF” position. To disassemble the grill for thorough cleaning, remove parts after they have cooled in the following order. Remove grill grates.
- Page 16 Cleaning and Maintenance WARNING Spider Inspection You should inspect the burners/venturi tubes at least once a SPIDER AND INSECT INFESTATION year, or immediately if any of the following conditions occur. Spiders and insects can nest in the burners/venturi tubes of this or any other grill, and cause the gas to flow from the •...
-
Page 17: Troubleshooting
Cleaning and Maintenance Replacing Interior Halogen Canopy Lights CAUTION glass light cover DISCONNECT THE ELECTRIC POWER BEFORE REPLACING BULB. DO NOT touch bulb with bare hands. Clean off any signs of oil access from the bulb and handle with a soft cloth. groove 1. -
Page 18: Service Information
Be ready to clearly describe the problem that you are having with your grill. If you are unable to obtain the name of an authorized service agency, or if you continue to have service problems, contact Viking Range, LLC at (888) 845-4641 or write to: VIKING RANGE, LLC... -
Page 19: Warranty
(2) years from the date of original retail purchase or closing date for new construction, whichever period is longer.. Viking Range, LLC, warrantor, agrees to repair or replace, at its option, any part which fails or is found to be defective during the warranty period. - Page 20 Viking Range, LLC 111 Front Street Greenwood, Mississippi 38930 USA (662) 455-1200 For product information, call 1-888-(845-4641) or visit our web site at vikingrange.com in the US or brigade.ca in Canada F21348B EN (101515)
Need help?
Do you have a question about the VGIQ554241 and is the answer not in the manual?
Questions and answers