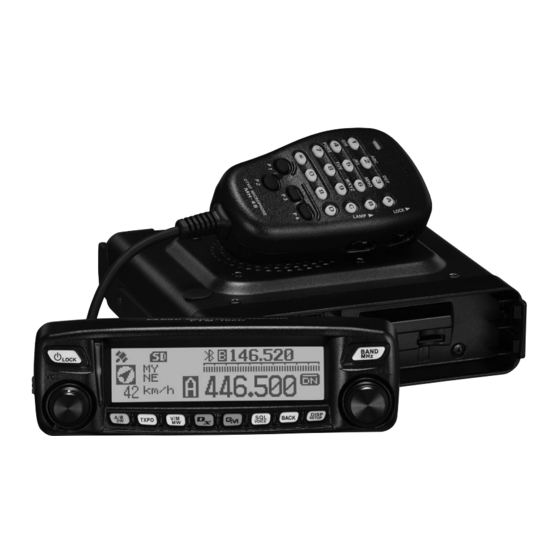
Yaesu FTM-100DR Instruction Manual
C4fm/fm 144/430 mhz dual band transceiver
Hide thumbs
Also See for FTM-100DR:
- Operating manual (177 pages) ,
- Instruction manual (82 pages) ,
- Update instruction manual (13 pages)
Table of Contents
Advertisement
Quick Links
C4FM/FM 144/430 MHz
DUAL BAND TRANSCEIVER
FTM-100DR/DE
Instruction Manual (APRS Edition)
Thank you for purchasing this Yaesu product.
This instruction manual explains information related to the "APRS Function".
For information on basic operation of the transceiver, please refer to the enclosed
FTM-100DR/DE operating manual.
Company names and products in this manual are trademarks or registered
trademarks of the respective company.
Advertisement
Table of Contents

Related Manuals for Yaesu FTM-100DR


Summary of Contents for Yaesu FTM-100DR
- Page 1 DUAL BAND TRANSCEIVER FTM-100DR/DE Instruction Manual (APRS Edition) Thank you for purchasing this Yaesu product. This instruction manual explains information related to the “APRS Function”. For information on basic operation of the transceiver, please refer to the enclosed FTM-100DR/DE operating manual.
-
Page 2: Table Of Contents
Using APRS functions ® Contents What is APRS ? ..............................3 ® APRS Initial Settings .............................. 3 Setting the position information of your own station ....................3 Using the GPS function............................3 Setting the function manually ..........................4 Setting your own station call sign ..........................6 Setting the symbol of your own station ........................ - Page 3 Contents Data transmission delay time setting ......................... 63 Setting the display units of the APRS data ......................64 Transmission beacon information setting ......................65 Status text input ..............................67 Beacon automatic transmission setting ......................67 Selecting the digipeater route ..........................70 My call sign setting.............................
-
Page 4: What Is Aprs
What is APRS ® APRS (Automatic Packet Reporting System) is a packet communication protocol on amateur radios that is advocated by Bob Bruninga (WB4APR). The APRS function of this device is a data communication system for messages and position data using the APRS format. A partner amateur radio station using a GPS receiver can send an APRS message including GPS position information of the partner station. -
Page 5: Setting The Function Manually
APRS Initial Settings Turn the DIAL and select [1 GPS]. Press “1 GPS” will be selected, and the screen will return to the menu list. Press for one second or longer. The display will return to the previous screen. Using the GPS function, the time data received from a GPS satellite will be automatically used to correct the in-built clock of the main device. - Page 6 APRS Initial Settings Turn the DIAL, select [20 MY POSITION], then press The screen for setting your own station’s information will be displayed. Press The cursor will shift to the latitude item. Turn the DIAL, select north latitude (N) or south latitude (S), then press The cursor will shift to the “degrees”...
-
Page 7: Setting Your Own Station Call Sign
Explanation Fixed stations that can exchange Marine mobile stations, land mobile messages stations 1200 bps narrow-to-middle band Using the FTM-100DR/DE etc. for mobile digipeater applications 9600 bps digipeater I-Gate station, Internet connection station 1200 bps broadband digipeater Balloons, aircraft, spacecraft, etc. - Page 8 APRS Initial Settings Turn the DIAL, select [16 MY CALL SIGN (APRS)], then press The currently set call signwill be displayed. Press The cursor will shift to the left of the call sign. Turn the DIAL and select the character. Press ] →...
-
Page 9: Setting The Symbol Of Your Own Station
The screen for selecting the symbol will be displayed. When shipped from the factory, the following combinations are set in the 4 patterns. Pattern Code Symbol and name ICON 1 /> ICON 2 REC. vehicle ICON 3 House QTH (VHF) USER Yaesu Radios... - Page 10 APRS Initial Settings Turn the DIAL, select [ICON 1], then press The code displayed within the parentheses [ ] will blink. Turn the DIAL to display the combination of preferred symbols and codes. Press The symbol will be confirmed. Repeat Steps 4 to 6 when setting [ICON 2] and [ICON 3] as well. Turn the DIAL to select the pattern that you want to use immediately from among [ICON 1] to [ICON 3].
-
Page 11: Setting The Aprs Baud Rate
APRS Initial Settings Turn the DIAL, select [USER], then press The table ID enclosed within the parentheses [ ] will blink. Turn the DIAL to display the target table ID. Press The symbol character enclosed within the parentheses [ ] will blink. Turn the DIAL and display the target symbol. -
Page 12: Other Settings
APRS Initial Settings Turn the DIAL, select [2 DATA SPEED], then press The screen for selecting the baud rate will be displayed. Turn the DIAL, select [APRS], then press The baud rate enclosed within the parentheses [ ] will blink. Turn the DIAL to select the baud rate. -
Page 13: Starting Aprs Operation
Starting APRS Operation Activating the APRS function During APRS operation, communications are carried out via the built-in APRS modem in the radio. When shipped from the factory, the APRS modem is set to OFF. Before starting APRS operation, set the APRS modem to ON. Press for one second or longer. -
Page 14: Receiving Aprs Beacons
Receiving APRS Beacons The signal containing the position of the radio station, meteorological information, communication range, etc. that is transmitted in APRS format, is known as a “beacon” while the radio station that transmitted the beacon is called a “station”. The received beacon will be downloaded into the radio memory. -
Page 15: Explanation Of The Aprs Beacon Screen And Operation Of Keys
Receiving APRS Beacons Explanation of the APRS beacon screen and operation of keys ● Explanation of the “STATION LIST” screen and operation of keys Beacons downloaded into the device can be viewed in a list. A beacon can also be selected from the list to check its contents. - Page 16 Receiving APRS Beacons ● Viewing the contents of a beacon The contents of the beacon will be displayed in the following screen. ② ③ ④ ① ⑤ ⑥ ⑦ ⑧ ⑨ Display explanation ➀ Symbol Symbol of transmitting station For overlay symbols, the characters will be displayed at the top left. ➁...
- Page 17 Receiving APRS Beacons ● Explanation of station list characters The 14 types of station list characters are classified as shown below. Display Explanation Page This is displayed when the beacon of a microphone Mic-E encoder station is received. This is displayed when the beacon of a fixed station Position 18, 20 (FIXED) or moving station (MOVING) is received.
- Page 18 Receiving APRS Beacons ● Example of a beacon information display for an E (Mic-E) station ① ② ③ ④ Turn the DIAL ⑤ ⑥ ⑦ ⑧ ⑨ Turn the DIAL ⑩ ➀ Distance This displays the distance to the partner station. ➁...
- Page 19 Receiving APRS Beacons ● Example of a beacon information display for a fixed P (Position) station The following information is displayed when a FIXED station or a fixed station is received, or when the list on the “STATION LIST” screen is selected and is pressed.
- Page 20 Receiving APRS Beacons ● Example of a beacon information display for a fixed P (Position) station The following information is displayed when a FIXED station or a fixed station (compressed type*) is received, or when the list on the “STATION LIST” screen is selected and is pressed.
- Page 21 Receiving APRS Beacons ● Example of a beacon information display for a moving P (Position) station The following information is displayed when a MOVING station or a moving station (compressed type*) is received, or when the list on the “STATION LIST” screen is selected is pressed.
- Page 22 Receiving APRS Beacons ● Example of a beacon information display for a W (Weather report) station The following information is displayed when a WEATHER station or a weather station (compressed type*) is received, or when the list on the “STATION LIST” screen is selected is pressed.
- Page 23 Receiving APRS Beacons ● Example of a beacon information display of an O (Object) object station or item station The following information is displayed when an OBJECT station, object station (compressed type*), ITEM station, item station (compressed type*), KILL OBJ station, kill obj station (compressed type*), KILL ITEM station, or kill item station (compressed type*) is received, or when the list on the “STATION LIST”...
- Page 24 Receiving APRS Beacons ● Example of a beacon information display for an S (Status) status station The following information will be displayed when a status station is received, or when the list on the “STATION LIST” screen is selected and is pressed.
- Page 25 Receiving APRS Beacons ● Example of a beacon information display for a G (Raw NMEA) raw NMEA station The following information will be displayed when a raw NMEA data station (GGA/GLL or GPRMC) is received, or when the list on the “STATION LIST” screen is selected and is pressed.
- Page 26 Receiving APRS Beacons ● Example of display for ? (Other) non-APRS packet data The following information will be displayed when an OTHER station is received, or when the list on the “STATION LIST” screen is selected and is pressed. ① ②...
- Page 27 Receiving APRS Beacons ● Example of an emergency information display from an Emg (Emergency) microphone encoder station The following information is displayed when emergency information is received from a Mic-E station. ① ② ③ ④ Turn the DIAL ⑤ ⑥ ⑦...
-
Page 28: Viewing The Beacon Information Using Packet Data (Raw Display)
Receiving APRS Beacons Viewing the beacon information using packet data (RAW display) Received beacons can be displayed in packet data form before being decoded. Press on the frequency display screen for one second or longer, then press The “LOG SELECT” screen will be displayed. Turn the DIAL, select [APRS STATION LIST], then press The “STATION LIST”... -
Page 29: Convenient Functions
Receiving APRS Beacons Convenient functions A special notification bell can be rung when a beacon from an APRS station or one within a specific range is received. ● Notification of incoming beacon from a specified station (call sign ringer) Register the call sign under [10 APRS] → [9 APRS RINGER (CALL)], and set the bell ring ON/OFF under [8 APRS RINGER] →... -
Page 30: Sorting The Station List
Receiving APRS Beacons Sorting the station list Sorting a list The station list can be sorted in different display orders. ● Setting sort condition Press for one second or longer. The set-up menu will be displayed. Turn the DIAL, select [10 APRS], then press The menu list will be displayed. -
Page 31: Filtering The List
Receiving APRS Beacons ● Sorting Press on the frequency display screen for one second or longer, then press The “LOG SELECT” screen will be displayed. Turn the DIAL, select [APRS STATION LIST], then press The “STATION LIST” screen is displayed. Press [ ]. - Page 32 Only VOIP stations such as WIRES stations will be displayed. WEATHER Only meteorological stations will be displayed. YAESU Only stations using Yaesu wireless transceivers will be displayed. OTHER PACKET Only RAW NMEA data station, status station, and packet information that could not be analysed (non-APRS format) will be displayed.
-
Page 33: Deleting Information From A List
Receiving APRS Beacons Deleting information from a list Beacon information that is no longer required can be selected and deleted from a list. ● Deleting using the beacon details screen Display the details of the beacon that you want to delete. - Page 34 Receiving APRS Beacons ● Deleting all information in the station list All information saved in the memory can be deleted in one batch. Display the “STATION LIST” screen or the beacon details screen. Press [ ]. The extension key switches. Press ] for one second or longer.
-
Page 35: Transmitting Aprs Beacons
Transmitting APRS Beacons Your own station information in the device can be transmitted as a beacon. Manually transmitting APRS beacons Beacons can be manually transmitted where required. ● Transmitting from the “STATION LIST” screen Display the “STATION LIST” screen. Press The APRS beacon will be transmitted. -
Page 36: Setting The Aprs Beacon Automatic Transmission Interval
Transmitting APRS Beacons Turn the DIAL, select [10 APRS], then press The menu list will be displayed. Turn the DIAL, select [14 BEACON TX], then press Turn the DIAL and select [1 AUTO]. Press and select ON. Tips • Factory shipping value: OFF •... -
Page 37: Using Smartbeaconing
Transmitting APRS Beacons Turn the DIAL, select [14 BEACON TX], then press Turn the DIAL, select [2 INTERVAL], then press The screen for setting the transmission interval will be displayed. Turn the DIAL and select the transmission interval time. The transmission interval can be selected from the following times. 30 sec/1 min/2 min/3 min/5 min/10 min/15 min/20 min/30 min/60 min Factory default value: 5 min Press... - Page 38 Transmitting APRS Beacons Press for one second or longer. The set-up menu will be displayed. Turn the DIAL, select [10 APRS], then press The menu list will be displayed. Turn the DIAL, select [23 SmartBeaconing], then press Turn the DIAL and select [1 STATUS]. and select [TYPE 1].
-
Page 39: Attaching Status Text To A Beacon
Transmitting APRS Beacons Attaching status text to a beacon Pre-registered comments can be appended to your own station beacons as status text. 5 types of text containing a maximum of 60 characters including embedded information can be registered. Caution When entering a long text that exceeds 21, 29 or 43 characters, the text may not be displayed in certain model radios. - Page 40 Transmitting APRS Beacons FREQ & SQL & SHIFT: The band frequency on the opposite side of the APRS operating band and information such as the tone (squelch), shift, etc., will be automatically embedded in the status text. Select either [NONE], [FREQUENCY], or [FREQ & SQL &...
-
Page 41: Selecting A Position Comment
Transmitting APRS Beacons Selecting a position comment A position comment (standard message) can be selected to be included in your own station beacon. Press for one second or longer. The set-up menu will be displayed. Turn the DIAL, select [10 APRS], then press The menu list will be displayed. -
Page 42: Setting The Digipeater Route
Transmitting APRS Beacons Setting the digipeater route A digipeater is a station that relays packets such as beacons. The following 2 types of digipeater routes can be selected for use in the device. Route Number of Address Format relay steps –... - Page 43 Transmitting APRS Beacons Turn the DIAL and select the digipeater route. The packet will not be relayed when “1 OFF” is selected. Press for one second or longer. The digipeater route will be setand the display will return to the previous screen.
-
Page 44: Sending And Receiving Aprs Messages
Sending and Receiving APRS Messages Text messages can be sent and received separately from beacons in APRS. Replies can be sent in response to messages received, and standard messages saved in the memory can also be selected to be sent as replies. A maximum of up to 100 sent and received messages can be saved in a common list in the memory. -
Page 45: Viewing The Message Contents
Sending and Receiving APRS Messages Viewing the message contents The message contents will be displayed as shown in the following screen. ① ② ③ ④ ⑤ ⑥ ⑦ ⑧ ⑨ ⑩ Display explanation ➀ Number Entry number in the message list ➁... -
Page 46: Receiving Aprs Messages
Sending and Receiving APRS Messages Receiving APRS messages A bell will ring when an APRS message is received and the details will be displayed for a period of time. The information will continue to be displayed if a key or the touch panel is operated while the information is being displayed. -
Page 47: Sending Aprs Messages
Sending and Receiving APRS Messages Sending APRS messages Text containing a maximum of 67 characters can be sent as an APRS message in this device. Numbers and symbols can be used. Creating and sending a new message Display the “MESSAGE LIST” screen. Press The screen for inputting the message and call sign time will be displayed. - Page 48 Sending and Receiving APRS Messages Cancelling a message resend When a message is sent to a specific partner station and an ACK packet to acknowledge receipt of the message is not returned by the partner station one minute after the message is sent, the same message will be resent up to 5 times. The resend may be cancelled by pressing [TxCLR] midway through the process.
-
Page 49: Using Standard Text
Sending and Receiving APRS Messages Using standard text A pre-registered character string can be appended to the message text. Up to 8 types of text containing a maximum of 16 characters can be registered. (1) Registering standard text Press for one second or longer. The set-up menu will be displayed. -
Page 50: Replying To A Received Message
Sending and Receiving APRS Messages (2) Appending standard text Edit the call sign and text according to Steps1 to 6 under “Creating and sending a new message” ( P.46). Press ] or ] to move the cursor to the position at which you want to insert the standard text. -
Page 51: Sorting The Aprs Message List
Sending and Receiving APRS Messages Sorting the APRS message list Deleting a message from the list Messages that are no longer required can be deleted from the list. ● Deleting using the message details screen Display the details of the message that you would like to delete. Press [ ]. - Page 52 Sending and Receiving APRS Messages ● Clearing the message resend counter and canceling the resend When a message is sent to a specific partner station and an ACK packet to acknowledge receipt of the message is not returned by the partner station within one minute after the message is sent, the same message will be resent up to 5 times.
-
Page 53: Message Receipt Acknowledgement (Ack)
Sending and Receiving APRS Messages Message receipt acknowledgement (ACK) When a message is sent to a specific partner station, an ACK packet (receipt acknowledgement) will be returned to acknowledge receipt of the message by the partner station. The transmission process ends when an ACK packet is returned by the partner station. -
Page 54: Aprs Set-Up Menu List
APRS Set-up Menu List Available settings Menu / Item Explanation of function (Default values shown in BOLD) 1 APRS COMPASS APRS compass operation 1 NORTH UP / 2 HEADING UP settings 2 APRS DESTINATION Display of model code APY∗∗∗ (not editable) Cannot be edited 3 APRS FILTER Filter function setting... - Page 55 1 SORT: TIME / CALLSIGN / DISTANCE Sort function / filter function setting 2 FILTER: ALL / MOBILE / FREQUENCY / OBJECT/ ITEM / DIGIPEATER / VoIP / WEATHER / YAESU / OTHER PACKET / CALL RINGER / RANGE RINGER / 1200 bps / 9600 bps...
-
Page 56: Aprs Set-Up Menu Basic Operations
APRS Set-up Menu List Available settings Menu / Item Explanation of function (Default values shown in BOLD) 25 VOICE ALERT Voice alert function setting 1 V ALERT: NORMAL / TONE SQL / DCS / RX-TSQL / RX-DCS 2 TONE SQL: 67.0Hz to 254.1Hz 100.0Hz 3 DCS: 023 to 754 023 APRS set-up menu basic operations Press... -
Page 57: Resetting The Aprs Settings
APRS Set-up Menu List Resetting the APRS settings The APRS settings can be restored to the default factory settings when shipped. Press for one second or longer. The set-up menu will be displayed. Turn the DIAL, select [13 RST/CLONE], then press Themenu listwill be displayed. -
Page 58: Using The Aprs Set-Up Menu
Using the APRS set-up menu APRS compass setting This sets the direction of the compass panel on the APRS screen. Press for one second or longer. The set-up menu will be displayed. Turn the DIAL, select [10 APRS], then press The menu list will be displayed. -
Page 59: Filter Function Settings
Using the APRS set-up menu Filter function settings The sets the filter for the downloading of various types of beacons. Press for one second or longer. The set-up menu will be displayed. Turn the DIAL, select [10 APRS], then press The menu list will be displayed. -
Page 60: Inputting Standard Message Text
Using the APRS set-up menu Turn the DIAL and set the far left digit. You can set the speed to any value between 1 and 3000. To change the unit of distance, go to [10 APRS] → [11 APRS UNITS]. Press The cursor will shift to the right. Press ] → The cursor will shift to the left. -
Page 61: Aprs Reception Pop-Up Setting
Using the APRS set-up menu Turn the DIAL, select [6 APRS MUTE], then press Turn the DIAL and select ON or OFF. 1 ON: mutes APRS band audio reception. 2 OFF: Lets you hear the sound being received by adjusting the APRS band volume settings. Factory default value:2 OFF Press for one second or longer. -
Page 62: Setting The Bell Ring When A Message Or Beacon Is Transmitted/Received
Using the APRS set-up menu Turn the DIAL and select [3 MY PACKET]. Press to turn your own station’s transmission beacon (relay wave) pop-up ON or OFF. Pressing turns this function ON and OFF. Factory shipping value: OFF Press for one second or longer. The APRS reception pop-up action will be set and the display will return to the previous screen. -
Page 63: Call Sign Setting For Call Ringer
Using the APRS set-up menu : Normal bell ring : RNG RINGER special bell ring My station Radius 10 km Example: When the distance is set at a radius of 10 km • MSG VOICE: Reads out messages. When set to ON, this function reads the content (call sign and main text) of all messages starting with “%”... -
Page 64: Data Transmission Delay Time Setting
Using the APRS set-up menu Turn the DIAL to select a number in the list that you would like to save a call sign to, then press The character input screen will be displayed. Turn the DIAL and select characters to enter the call sign. -
Page 65: Setting The Display Units Of The Aprs Data
Using the APRS set-up menu Press for one second or longer. Data transmission delay timeis set and the display returns to the previous screen. Setting the display units of the APRS data This sets the units for the latitude / longitude (POSITION), distance (DISTANCE), speed (SPEED), altitude (ALTITUDE), atmospheric pressure (BARO), temperature (TEMP), rainfall (RAIN) and wind (WIND). -
Page 66: Transmission Beacon Information Setting
Using the APRS set-up menu Turn the DIAL and select [5 BARO]. Press and select the unit of atmospheric pressure. You can change the unit of atmospheric pressure. Press to switch between hPa, mb, mmHg, and inHg. Factory default value: mb Turn the DIAL and select [6 TEMP]. - Page 67 Using the APRS set-up menu Press You can change how your own station’s position information is displayed. This function masks the lower digits of the position information (latitude, longitude) when you do not want your own station position information to be known. Pressing switches between the options in the following order.
-
Page 68: Status Text Input
Using the APRS set-up menu Status text input This sets the status text used when sending an APRS beacon. 5 types of status text containing a maximum of 60 characters can be entered. Please refer to “Attaching status text to a beacon” ( P.38) for the details. - Page 69 Using the APRS set-up menu Turn the DIAL, select the specified value, and press Selecting the time interval for automatically sending anAPRS beacon. When AUTO is set to ON (FIX), your own station APRS beacon will be automatically sent at the time interval specified here. The transmission operation will be retained when the specified time has passed and the squelch is open at the beacon transmission timing.
- Page 70 Using the APRS set-up menu ON: Extends the APRS beacon transmission time interval when your own station is stopped. When DECAY is set to ON and your own station enters into the stop mode, the “INTERVAL” setting will shift to a higher value one step at a time and the interval will gradually be extended (to a maximum of 30 minutes).
-
Page 71: Selecting The Digipeater Route
A maximum of up to 9 characters can be entered. “1 GROUP 1 ALL”, “2 GROUP 2 CQ”, “3 GROUP 3 QST”, “4 GROUP 4 YAESU”, “5 GROUP 5 (any)” and “6 GROUP 6 (any)” can be set for the group code. -
Page 72: Automatic Response Setting Of Received Messages
Using the APRS set-up menu Press The screen will return to the list of message groups and the registered group filter will be displayed. Press for one second or longer. The group filter will be set and the display will return to the previous screen. Automatic response setting of received messages A reply message set up beforehand can be automatically sent out upon receiving a message. -
Page 73: My Position Setting
Using the APRS set-up menu Press Turn the DIAL, select [3 REPLY TEXT], then press Turn the DIAL, select characters, then press Enter the automatic reply message. Numbers and symbols can be entered. Press ] → This switches between letters, numbers, and symbols. Press ] → This deletes all characters to the right of the cursor. Press ] → The cursor will shift to the left. -
Page 74: Smart Beaconing Setting
Using the APRS set-up menu Smart beaconing setting The SmartBeaconing™ function continually transmits beacons with your own station position information, movement speed and direction of advance. using data derived from a GPS antenna unit. SMART (SmartBeaconing) can be selected using the “AUTO” setting under [10 APRS] → [14 BEACON TX] in the set-up menu when STATUS is set to TYPE 1 - TYPE 3. - Page 75 Using the APRS set-up menu Turn the DIAL, select [2 LOW SPEED], and press Move the cursor over the item for which you would like to enter numbers. When the speed drops below the set speed, the beacon is transmitted at the time interval set under “4 SLOW RATE”.
- Page 76 Using the APRS set-up menu Turn the DIAL, select [5 FAST RATE], and press Move the cursor over the item for which you would like to enter numbers. Set the beacon transmission time interval for when the speed exceeds the speed set under “3 HIGH SPEED”.
-
Page 77: Sort Function And Filter Settings
Using the APRS set-up menu Press for one second or longer. The SmartBeaconing will be set and the display will return to the previous screen. Tips • This device is equipped with settings (common TYPE 1 - TYPE 3) for car-mounted mobile use in town and residential areas. -
Page 78: Voice Alert Function Setting
VoIP: Only VOIP station such as WIRES will be displayed. WEATHER: Only meteorological stations will be displayed. YAESU: Only stations which are using Yaesu wireless transceivers will be displayed. OTHER PACKET: Only RAW NMEA data stations, status stations and non-APRS packet information that cannot be analyzed are displayed. - Page 79 Using the APRS set-up menu Turn the DIAL, select [25 VOICE ALERT], then press The screen for setting the voice alert function will be displayed. Turn the DIAL and select [1 VOICE ALERT]. Press to select the voice alert action. Press to switch through the voice alert action options in the following order.
- Page 80 Using the APRS set-up menu Tips • APRS data will be received regardless of the voice alert setting. • When voice alert is in operation, the setting in this menu will be prioritized for the APRS band squelch. • The voice alert function will not work when APRS data is set to be received and sent in different bands (this will be the same state as the “NORMAL”...
-
Page 81: List Of Aprs Bell Rings
List of APRS Bell Rings List of APRS bell rings When a beacon is received When a self-addressed message is received (APRS filter: ON) (ding dong) (ding ding ding dong) When a beacon is received When a message from another station is (APRS filter: OFF) received (ding...) - Page 82 Copyright 2018 YAESU MUSEN CO., LTD. All rights reserved. No portion of this manual may be reproduced without the permission of YAESU MUSEN CO., LTD. YAESU MUSEN CO., LTD. Tennozu Parkside Building 2-5-8 Higashi-Shinagawa, Shinagawa-ku, Tokyo 140-0002 Japan YAESU USA 6125 Phyllis Drive, Cypress, CA 90630, U.S.A.
Need help?
Do you have a question about the FTM-100DR and is the answer not in the manual?
Questions and answers