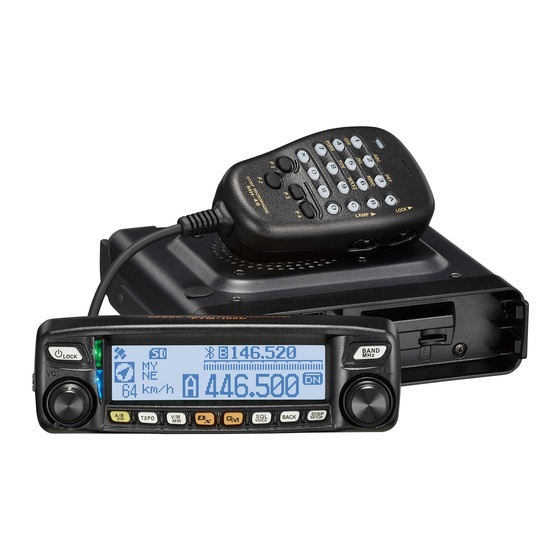
Yaesu FTM-100DR Update Instruction Manual
Panel firmware
Hide thumbs
Also See for FTM-100DR:
- Operating manual (177 pages) ,
- Instruction manual (82 pages) ,
- Quick manual (2 pages)
Advertisement
Quick Links
Advertisement

Related Manuals for Yaesu FTM-100DR


Summary of Contents for Yaesu FTM-100DR
- Page 1 FTM-100DR/DE Panel Firmware Update Instruction Manual YAESU MUSEN CO., LTD.
-
Page 2: Important Notes
• Copyrights and all other intellectual property rights for the software, as well as the software manual, are the property of YAESU MUSEN CO., LTD. • The revision, modification, reverse engineering, and decompiling of this software is prohibited. Redistribu- tion, transfer, and resale of downloaded files are also prohibited. - Page 3 Install / Uninstall Procedure Installation procedure 1. Download and unzip (extract) the update program. 2. When decompressed, the folder will automatically open. Click on the Yaesu icon in the folder to execute the update program. Uninstall procedure Delete the folder opened by the update program.
-
Page 4: Using The Programmer
Using the Programmer Open and execute the FTM-100D_PANEL_verXXX(ALL) update program file that you copied on the PC . Please check the Device Manager on your computer, it will show the connected SCU-20 COM Port number. Then select the COM Port number (see the below screen) that is connected to the SCU-20. Click the [Update] button. - Page 5 Preparing for the Update Transfer Connect the power cable to the FTM-100DR/DE main body and apply 13.8 V. Do not attempt to turn on the FTM-100DR/DE transceiver. While holding the buttons, press the button to turn the radio ON. Press the button.
- Page 6 Remove the rubber cap from the back of the PANEL Set the slide SW on the PC board downward. Push the RESET-SW button down. The display will flash one time. (We recommend using a small plastic screw driver or equivalent; avoid using a metal tool because the radio is turned ON). Connect the SCU-20 cable to the MAIN RF body rear mini-Din connector (the mini-Din connector notch should be upward), and then connect it to the USB on the PC.
- Page 7 Using the Programmer Confirm the entries, and preparation procedures on the below screen are completed and then click the [OK] button. The update progress indicator bar will be displayed when the firmware transfer begins. Wait for the updating to end.
- Page 8 When the following pop-up screen is displayed, upon completion of the update, press the OK button. The following pop-up screen will be displayed when the updating is cancelled or when the update cannot be carried out for some reason.
- Page 9 After the Update is complete, click [EXIT] button to close.
- Page 10 Reassemble the FTM-100DR/DE for Normal Operations Remove the power supply cable. Remove the SCU-20 cable. Return the slide SW of the panel to the original position (slide SW upward).
- Page 11 Replace the rubber cap on the panel back. Connected a power supply cable and turn the radio ON, verify everything is operating normally.
-
Page 12: Factory Reset
Factory reset Press and hold the button for over 1 second to turn the transceiver ON. Press and hold the button. Rotate the DIAL to select [13 RST/CLONE], then press the b u tto n . Rotate the DIAL to select [1 FACTORY RESET], then press the b u tto n . - Page 13 Check the Version No. Press and hold the button for over 1 second to turn the transceiver ON. Press the button. Rotate the DIAL to select [13 RST/CLONE], then press the b u tto n . Rotate the DIAL to select [8 SOFTWARE VERSION], then press the b u tto n .
Need help?
Do you have a question about the FTM-100DR and is the answer not in the manual?
Questions and answers