
Subscribe to Our Youtube Channel
Related Manuals for Ametek Sorensen DCS8-350E


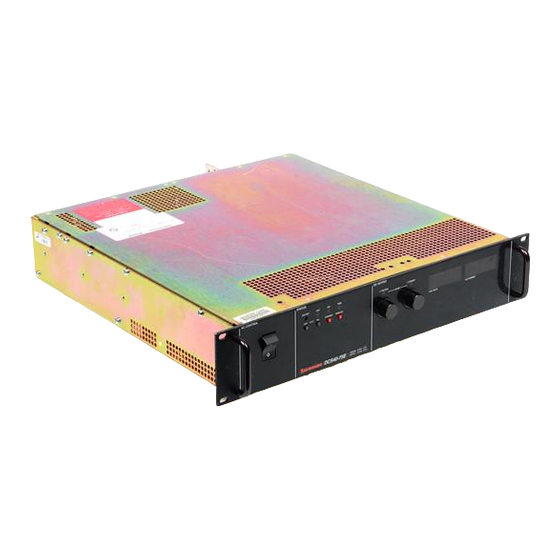
Summary of Contents for Ametek Sorensen DCS8-350E
- Page 1 DCS-E 3kW Series DC Power Supplies Operation Manual This manual covers models: DCS8-350E DCS55-55E DCS12-250E DCS60-50E DCS20-150E DCS80-37E DCS40-75E DCS150-20E M362295-01 Rev D www.programmablepower.com...
- Page 5 About AMETEK AMETEK Programmable Power, Inc., a Division of AMETEK, Inc., is a global leader in the design and manufacture of precision, programmable power supplies for R&D, test and measurement, process control, power bus simulation and power conditioning applications across diverse industrial segments.
- Page 6 This page intentionally left blank.
- Page 7 Neither AMETEK Programmable Power Inc., San Diego, California, USA, nor any of the subsidiary sales organizations can accept any responsibility for personnel, material or inconsequential injury, loss or damage that results from improper use of the equipment and accessories.
- Page 8 This page intentionally left blank.
- Page 9 AMETEK will, at its expense, deliver the repaired or replaced Product or parts to the Buyer. Any warranty of AMETEK will not apply if the Buyer is in default under the Purchase Order Agreement or where the Product or any part thereof: •...
- Page 10 This page intentionally left blank.
- Page 11 ABOUT THIS MANUAL This manual has been written expressly for the Sorensen DCS-E 3kW Series of power supplies, which have been designed and certified to meet the Low Voltage and Electromagnetic Compatibility Directive Requirements of the European Community. Units that comply with the directive are designated by an ‘E’...
- Page 12 This page intentionally left blank. viii...
-
Page 13: Table Of Contents
CONTENTS SECTION 1 INTRODUCING THE DCS-E SERIES 3KW SUPPLY ..1-1 Description ..................... 1-1 Features ......................1-1 Specifications ....................1-2 1.3.1 Electrical Specifications ..............1-2 1.3.2 Mechanical Specifications ..............1-3 SECTION 2 INSTALLATION ............2-1 Introduction ....................2-1 Safety 2-1 2.2.1 High Energy/High Voltage Warning ............ - Page 14 Contents Sorensen DCS-E Series 3kW Supplies 2.5.2 AC Input Power Requirements ............2-4 2.5.3 AC Input Connector Assembly ............2-5 2.5.4 Strain Relief Assembly ................ 2-6 Initial Functional Tests ..................2-8 2.6.1 Power-on Check ................. 2-8 2.6.2 Voltage Mode Operation Check ............2-8 2.6.3 Current Mode Operation Check ............
- Page 15 Sorensen DCS-E Series 3kW Supplies Contents Remote Programming: Output Voltage and Current Limit ........ 4-7 4.3.1 Programming Output Voltage and Current Limit with the REM/LOC Switch 4.3.2 Programming Output Voltage ............. 4-9 4.3.3 Programming Output Current Limit ........... 4-12 Using Over Voltage Protection (OVP) ............4-14 4.4.1 Front Panel OVP Operation ..............
- Page 16 Contents Sorensen DCS-E Series 3kW Supplies 5.2.5 Output Current Shunt, Shunt Amplifier, and Down Programmer (A4 PCB) 5.2.6 Control, Programming, OVP, Shutdown, Monitoring, and Auxiliary Supply Circuits (A2 PCB) ................5-3 5.2.7 Front Panel Displays and Local Operating Mode Controls (A1 PCB) .. 5-4 Detailed Circuit Descriptions ................
- Page 17 Sorensen DCS-E Series 3kW Supplies Contents SECTION 7 APPLICATION NOTES ..........7-1 Battery Charging .................... 7-1 Load Considerations ..................7-1 7.2.1 Inductive Loads .................. 7-1 LIST OF FIGURES Figure 1-1 DCS-E Series (3kW) Supply Front Panel Controls and Indicators ... 1-4 Figure 1-2 DCS-E Series (3kW) Supply Rear Panel Connectors and Terminals (including optional internal GPIB Interface) ..........
- Page 18 Contents Sorensen DCS-E Series 3kW Supplies Figure 4-5 Programming Output Voltage with a 0-10 Vdc Source ......4-10 Figure 4-6 Programming Output Voltage with a 0-1 mA Source ......4-10 Figure 4-7 Programming Output Voltage with a 5k ohm Resistance ....... 4-11 Figure 4-8 Programming Output Current Limit with a 0-5 Vdc Source .....
-
Page 19: Introducing The Dcs-Eseries 3Kw Supply
SECTION 1 INTRODUCING THE DCS-E SERIES 3KW SUPPLY DESCRIPTION The DCS-E Series System Supplies are 3000–watt supplies designed to provide highly stable, continuously variable output voltage and current for a broad range of development, system, and burn-in applications. The DCS-E Series employs high frequency switching regulator technology to achieve high power density and small package size. -
Page 20: Specifications
Introduction Sorensen DCS-E Series 3kW Supplies • Adjustable Over Voltage Protection (OVP). • External Shutdown using AC, DC, or TTL compatible signals (positive or negative logic). • Remote Voltage, Current Limit, and OVP Programming with selectable programming ranges. • Optional IEEE-488 (GPIB) interface for complete digital remote programming and readback capability. -
Page 21: Mechanical Specifications
Sorensen DCS-E Series 3kW Supplies Introduction DDITIONAL HARACTERISTICS Models DCS8-350E DCS12-250E DCS20-150E DCS40-75E DCS55-55E DCS60-50E DCS80-37E DCS150-20E Stability Voltage 4 mV 6 mV 10 mV 20 mV 27.5 mV 30 mV 40 mV 75 mV Current 175 mA 125 mA 75 mA 37.5 mA 27.5 mA... -
Page 22: Figure 1-1 Dcs-E Series (3Kw) Supply Front Panel Controls And Indicators
Introduction Sorensen DCS-E Series 3kW Supplies Figure 1-1 DCS-E Series (3kW) Supply Front Panel Controls and Indicators M362295-01 Rev D... -
Page 23: Figure 1-2 Dcs-E Series (3Kw) Supply Rear Panel Connectors And Terminals (Including Optional Internal Gpib Interface)
Sorensen DCS-E Series 3kW Supplies Introduction Figure 1-2 DCS-E Series (3kW) Supply Rear Panel Connectors and Terminals (including optional internal GPIB Interface) M362295-01 Rev D... - Page 24 Introduction Sorensen DCS-E Series 3kW Supplies This page intentionally left blank. M362295-01 Rev D...
-
Page 25: Installation
SECTION 2 INSTALLATION INTRODUCTION This section provides recommendations and procedures for inspecting, testing, and installing the DCS-E Series power supply. 1. Read and follow the safety recommendations (Section 2.2) 2. Perform an initial physical inspection of the supply (Section 2.3) 3. -
Page 26: Ac Source Grounding
Installation Sorensen DCS-E Series 3kW Supplies 2.2.2 AC Source Grounding Ensure the power supply is connected to an appropriately rated AC outlet with the recommended AC input connector as set out in Section 2.5.1 AC Input Power Connection. There is a shock hazard if the power supply chassis and cover are not connected to an electrical ground via the safety ground in the AC input connector. -
Page 27: Initial Inspection
Sorensen DCS-E Series 3kW Supplies Installation INITIAL INSPECTION On first receiving your DCS-E Series power supply, perform a quick physical check, paying particular attention to front panel controls and indicators as well as rear panel connectors and terminals. See Figure 1-1 and Figure 1-2 for front and rear panel diagrams. 2.3.1 Physical Check After unpacking, perform an initial inspection to ensure the unit and parts shipped with it have... -
Page 28: Rack Mounting
Installation Sorensen DCS-E Series 3kW Supplies 2.4.2 Rack Mounting The supply is designed to fit in a standard 19” equipment rack. Bolt holes in the chassis sides are provided for rack mount slides such as the ZERO #C300S18 slides. When installing the unit in a rack, be sure to provide adequate support for the rear of the unit while not obstructing the ventilation on the top, sides and rear of all units. -
Page 29: Ac Input Connector Assembly
Sorensen DCS-E Series 3kW Supplies Installation 2.5.3 AC Input Connector Assembly Each unit is shipped with a connector and contacts which mate with the chassis-mounted AC connector located on the rear panel. See Figure 2-1 AC Connector and Contacts. ARTS UPPLIED •... -
Page 30: Strain Relief Assembly
Installation Sorensen DCS-E Series 3kW Supplies ONTACT NSTALLATION 5. Insert contact with attached wire into the connector until lock snaps into place. See Figure 2-3 and Figure 2-4 to complete the connector for either single or three phase input. Figure 2-3 Contact Orientation Figure 2-4 AC Wire Locations 2.5.4 Strain Relief Assembly... -
Page 31: Figure 2-5 Strain Relief, As Supplied
Sorensen DCS-E Series 3kW Supplies Installation Figure 2-5 Strain Relief, as Supplied 3. Insert strain relief tab A into AC input connector slot B. Insert second strain relief tab A into AC input connector slot C. See Figure 2-6. 4. Install screws in holes provided on outside of strain relief pieces. Thread through to screw standoff inside opposite piece. -
Page 32: Initial Functional Tests
Installation Sorensen DCS-E Series 3kW Supplies INITIAL FUNCTIONAL TESTS The initial functional test procedure includes power-on and front panel function checks as well as voltage or current mode operation checks. See Figure 1-1 and Figure 1-2 for front and rear panel diagrams. -
Page 33: Current Mode Operation Check
Sorensen DCS-E Series 3kW Supplies Installation 2.6.3 Current Mode Operation Check 1. Ensure the front panel AC power switch is set to OFF. 2. Turn the voltage and current controls on the front panel fully counter-clockwise. 3. Turn the VOLTAGE control one (1) or two (2) turns clockwise. 4. -
Page 34: Load Connection
Installation Sorensen DCS-E Series 3kW Supplies LOAD CONNECTION This section provides recommendations for load wiring and connecting as they apply to both single and multiple load configurations. 2.7.1 Load Wiring When connecting load wiring to the power supply, you must consider the following factors: •... -
Page 35: Making The Connections
Sorensen DCS-E Series 3kW Supplies Installation Figure 2-8 Maximum Load Wire Length OISE AND MPEDANCE FFECTS To minimize noise pickup or radiation, load wires should be shielded-twisted pair wiring of as short a length as possible. Connect the shield to the chassis via a rear panel mounting screw. Where shielding is impossible or impractical, simply twisting the wires together will offer some noise immunity. -
Page 36: Connecting Single Loads
Installation Sorensen DCS-E Series 3kW Supplies 2.7.3 Connecting Single Loads Figure 2-9 and Figure 2-10 show recommended load and sensing connections for single loads. Local sense lines shown are default J3 connections. Refer to Section 3.3.1 Connecting Remote Sense Lines for more information about the sense line shield. Figure 2-9 Single Load with Local Sensing (Default) Figure 2-10 Single Load with Remote Sensing 2.7.4... -
Page 37: Figure 2-11 Multiple Loads With Local Sensing
Sorensen DCS-E Series 3kW Supplies Installation ADIAL ISTRIBUTION ETHOD With this method, power is connected to each load individually from a single pair of terminals designated as the positive and negative distribution terminals. These terminals may be the power supply output terminals, the terminals of one of the loads, or a distinct set of terminals especially established for distribution use. - Page 38 Installation Sorensen DCS-E Series 3kW Supplies This page intentionally left blank. 2-14 M362295-01 Rev D...
-
Page 39: Basic Operation
SECTION 3 BASIC OPERATION INTRODUCTION Once the power supply installation is complete and both the AC input power and the load have been connected (see Section 2 Installation), the DCS-E Series power supply is in its default configuration and is ready to operate in local programming mode. This section covers Constant Voltage and Constant Current Mode operation as controlled by local programming (Section 3.2). -
Page 40: Figure 3-1 Operating Modes
Basic Operation Sorensen DCS-E Series 3kW Supplies • the resistance of the attached load R Figure 3-1 provides a graphical representation of the relationships between these variables. ONSTANT OLTAGE PERATION The power supply will operate in constant voltage mode whenever the load current I is less than the current limit setting I , or: I... -
Page 41: Local Programming Mode Operation
Sorensen DCS-E Series 3kW Supplies Basic Operation 3.2.2 Local Programming Mode Operation Units are shipped from the factory configured for local programming mode operation. In local programming mode: • Output voltage and current limit settings are adjusted with the front panel controls. •... -
Page 42: Using Remote Sensing
Basic Operation Sorensen DCS-E Series 3kW Supplies USING REMOTE SENSING Remote sensing is used during voltage mode operation to shift the power supply's regulation point from its output terminals (default sense point) to the load or distribution terminals by using a separate pair of wires to monitor the load voltage. -
Page 43: Figure 3-3 Connecting Remote Sense Lines
Sorensen DCS-E Series 3kW Supplies Basic Operation Figure 3-3 Connecting Remote Sense Lines Do not use remote sensing with multiple supplies connected in series or in parallel. CAUTION! M362295-01 Rev D... - Page 44 Basic Operation Sorensen DCS-E Series 3kW Supplies This page intentionally left blank. M362295-01 Rev D...
-
Page 45: Advanced Operation
SECTION 4 ADVANCED OPERATION INTRODUCTION All DCS-E Series power supplies offer the following standard features: • Remote Programming of Output Voltage and Current Limit with 0-5V, 0-10V, 0-1 mA, and 0-5k ohms (Section 4.3) • Overvoltage Protection (OVP) with front panel controls or 0-5V and 0-10V programming (Section 4.4) •... -
Page 46: Configuring For Remote Programming, Sensing, And Monitoring
Advanced Operation Sorensen DCS-E Series 3kW Supplies CONFIGURING FOR REMOTE PROGRAMMING, SENSING, AND MONITORING This section lists switch, connector, and jumper functions for the DCS-E Series (3kW) supply. Subsequently, it provides a location diagram (Section 4.2.2), in addition to procedures for resetting the internal jumpers and switches (Section 4.2.3), and for reconfiguring or making connections to the J3 connector (Section 4.2.4). -
Page 47: Figure 4-1 Connector J3 Pin Descriptions (For Remote Programming, Remote Monitoring, And Sense Connections)
Sorensen DCS-E Series 3kW Supplies Advanced Operation Figure 4-1 Connector J3 Pin Descriptions (for Remote Programming, Remote Monitoring, and Sense Connections) M362295-01 Rev D... -
Page 48: Locating Jumpers, Switch, And Connector
Advanced Operation Sorensen DCS-E Series 3kW Supplies NTERNAL WITCH AND UMPERS If you should need to change any of the standard configurations of the supply, internal jumpers JMP1 and JMP2, and switch SW1 enable you to select: voltage and current programming scale factor, over voltage protection (OVP) programming mode and scale, voltage and current monitor range, and shutdown circuit logic. -
Page 49: Resetting Jumpers And Switch
Sorensen DCS-E Series 3kW Supplies Advanced Operation 4.2.3 Resetting Jumpers and Switch Most applications will use the default factory settings of the internal jumpers, JMP1 and JMP2, or of the internal 8-position DIP switch, SW1. If the jumpers and switch should require resetting, read Section 2.2 Safety, and follow the procedures in this section. -
Page 50: Making J3 Connections
Advanced Operation Sorensen DCS-E Series 3kW Supplies EPLACING THE PTION OARD WHEN REQUIRED 12. Place the option board into its original location over the A2 circuit board. 13. Reinstall the mounting screws into the standoffs. Reattach any cables. 14. Reinstall the jackscrews with the nut driver. 15. -
Page 51: Remote Programming: Output Voltage And Current Limit
Sorensen DCS-E Series 3kW Supplies Advanced Operation REMOTE PROGRAMMING: OUTPUT VOLTAGE AND CURRENT LIMIT Remote programming allows control of the power supply's output voltage and/or current limit to shift from local operation at the front panel voltage and current controls to external analog input sources. -
Page 52: Programming Output Voltage And Current Limit With The Rem/Loc Switch
Advanced Operation Sorensen DCS-E Series 3kW Supplies Section 4.2 Configuring for Remote Programming, Sensing, and Monitoring explains how to use the front panel REM/LOC switch, how to reconfigure or make connections to the external J3 connector, and how to access internal jumpers JMP1 and JMP2 to change their settings. 4.3.1 Programming Output Voltage and Current Limit with the REM/LOC Switch... -
Page 53: Programming Output Voltage
Sorensen DCS-E Series 3kW Supplies Advanced Operation procedures for removing the cover and resetting JMP1 and JMP2 in Section 4.2.3 Resetting Jumpers and Switch. 2. Resetting internal jumpers may require recalibration of the programming circuit to maintain programming accuracy. See Section 6.3 Calibrating for Programming Accuracy. 4.3.2 Programming Output Voltage 0-5 V... - Page 54 Advanced Operation Sorensen DCS-E Series 3kW Supplies Figure 4-5 Programming Output Voltage with a 0-10 Vdc Source WARNING Exercise caution when resetting internal jumpers. Review Section 2.2 Safety and follow procedures for removing the cover and resetting jumpers in Section 4.2.3 Resetting Jumpers and Switch.
- Page 55 Sorensen DCS-E Series 3kW Supplies Advanced Operation ROGRAMMING UTPUT OLTAGE WITH A ESISTANCE 1. Remove the jumpers connecting pins 8 to 9 and pins 20 to 21 on connector J3. 2. Connect pins 9 (voltage programming input/positive) and 21 (1 mA current source for voltage control) to the counter-clockwise end of the 5k potentiometer and connect the tap and clockwise end of the potentiometer to pin 12 (return).
-
Page 56: Programming Output Current Limit
Advanced Operation Sorensen DCS-E Series 3kW Supplies 4.3.3 Programming Output Current Limit 0-5 V ROGRAMMING UTPUT URRENT IMIT WITH A OURCE 1. Remove the jumpers connecting pins 10 to 11 and 22 to 23 on connector J3. 2. Connect the external programming source between pins 10 (current limit programming input/positive) and 12 (return). - Page 57 Sorensen DCS-E Series 3kW Supplies Advanced Operation Exercise caution when resetting internal jumpers. Review Section 2.2 Safety and follow procedures for removing the cover and resetting jumpers in Section 4.2.3 Resetting Jumpers and Switch. WARNING! ROGRAMMING UTPUT URRENT IMIT WITH A OURCE 1.
-
Page 58: Using Over Voltage Protection (Ovp)
Advanced Operation Sorensen DCS-E Series 3kW Supplies USING OVER VOLTAGE PROTECTION (OVP) The OVP circuit allows for protection of the load in the event of a remote programming error, an incorrect voltage control adjustment, or a power supply failure. The protection circuit monitors the output voltage and will reduce the output current and voltage to zero whenever a preset voltage limit is exceeded. -
Page 59: Programming Ovp With An External Voltage Source
Sorensen DCS-E Series 3kW Supplies Advanced Operation 4.4.3 Programming OVP with an External Voltage Source To set the OVP trip level with a 0-5 Vdc or a 0-10 Vdc external voltage source: 1. Ensure the power supply is turned OFF and that both the AC power source and the load are disconnected. -
Page 60: Using The Shutdown Function
Advanced Operation Sorensen DCS-E Series 3kW Supplies Figure 4-13 Remote Programming of OVP with a 0 –10 Vdc External Voltage Source USING THE SHUTDOWN FUNCTION The Shutdown function is used to disable or enable the supply's output voltage and current. It can be used to allow adjustments to be made to either the load or the power supply without shutting off the entire supply. - Page 61 Sorensen DCS-E Series 3kW Supplies Advanced Operation 2. Connect the TTL signal source to pin 14 (TTL Shutdown Input/positive) and pin 2 (Return for Shutdown Input) on the J3 connector on the rear panel. See Figure 4-14 and Figure 4-15. 3.
- Page 62 Advanced Operation Sorensen DCS-E Series 3kW Supplies AC/DC S HUTDOWN To activate the Shutdown function using a 12-250 Vac input or a 12-130 Vdc input: 1. Turn off the power supply and disconnect the AC power source. Allow five (5) minutes to elapse to dissipate stored energy before making connections or resetting switches.
-
Page 63: Shutdown Application - Contact Closure
Sorensen DCS-E Series 3kW Supplies Advanced Operation 4.5.3 Shutdown Application - Contact Closure An external relay, whether normally open or normally closed, may be used to activate the Shutdown circuit. Either positive or negative logic may be used. To activate the Shutdown function using an external relay: 1. - Page 64 Advanced Operation Sorensen DCS-E Series 3kW Supplies Figure 4-19 Using Shutdown with Contact Closure of a Normally OPEN Relay (Negative Logic) Figure 4-20 Using Shutdown with Contact Closure of a Normally CLOSED Relay (Positive Logic) Figure 4-21 Using Shutdown with Contact Closure of a Normally CLOSED Relay (Negative Logic) 4-20 M362295-01 Rev D...
-
Page 65: Remote Monitoring Of Readback Signals And Status Indicators
Sorensen DCS-E Series 3kW Supplies Advanced Operation REMOTE MONITORING OF READBACK SIGNALS AND STATUS INDICATORS 4.6.1 Readback Signals Calibrated readback signals for remote monitoring of the output voltage and current are available via connections at the J3 connector on the rear panel. Internal switch SW1 settings allow you to select either a 0-5 Vdc or a 0-10 Vdc range for the output. -
Page 66: Using Multiple Supplies
Advanced Operation Sorensen DCS-E Series 3kW Supplies USING MULTIPLE SUPPLIES DCS-E Series power supplies of the SAME MODEL may be operated with outputs in series or in parallel to obtain increased load voltage or increased current. Split supply operation allows two positive or a positive and a negative output to be obtained. -
Page 67: Configuring Multiple Supplies For Parallel Operation
Sorensen DCS-E Series 3kW Supplies Advanced Operation 4.7.2 Configuring Multiple Supplies for Parallel Operation Parallel operation is used to obtain a higher current through a single output using two or more supplies. Set all of the outputs to the same voltage before connecting the positive (+) output terminals and negative (-) output terminals in parallel. -
Page 68: Configuring Multiple Supplies For Split Supply Operation
Advanced Operation Sorensen DCS-E Series 3kW Supplies 4.7.3 Configuring Multiple Supplies for Split Supply Operation Split supply operation uses two power supplies to obtain two positive voltages with a common ground, or to obtain a positive-negative supply. To obtain two positive voltages, connect the negative output terminals of both supplies together. -
Page 69: Output Voltage Biasing
Sorensen DCS-E Series 3kW Supplies Advanced Operation Figure 4-25 Split Supply Operation of Multiple Supplies (Positive-Negative Supply) (Local sense lines shown are default J3 connections.) OUTPUT VOLTAGE BIASING The power supply output may be biased up to a maximum of 400 Vdc with respect to the chassis. - Page 70 Advanced Operation Sorensen DCS-E Series 3kW Supplies This page intentionally left blank. 4-26 M362295-01 Rev D...
-
Page 71: Theory Of Operation
SECTION 5 THEORY OF OPERATION INTRODUCTION This section describes the internal operation of the DCS-E (3kW) Series power supply. Section 5.2 Basic Functional Blocks provides an explanation of the main functions within each functional block of the supply. Section 5.3 Detailed Circuit Descriptions contains more in-depth descriptions of the supply's circuitry, including remote programming and monitoring circuits not covered in Section 5.2. -
Page 72: Ac Input And Rfi Filter (A5 Pcb)
Theory of Operation Sorensen DCS-E Series 3kW Supplies 5.2.1 AC Input and RFI Filter (A5 PCB) The AC input, either single or three phase, is connected to the power supply via a four-pole connector on the rear panel and passes through an RFI filter before going to the front panel circuit breaker. -
Page 73: Control, Programming, Ovp, Shutdown, Monitoring, And Auxiliary Supply Circuits (A2 Pcb)
Sorensen DCS-E Series 3kW Supplies Theory of Operation also used to discharge the output capacitors whenever the control circuit signal goes negative or when any of the shutdown circuits are activated. 5.2.6 Control, Programming, OVP, Shutdown, Monitoring, and Auxiliary Supply Circuits (A2 PCB) The A2 Control PCB consists of the following circuits: 1. -
Page 74: Front Panel Displays And Local Operating Mode Controls (A1 Pcb)
Theory of Operation Sorensen DCS-E Series 3kW Supplies Monitor signals are available for: • Output voltage (calibrated) • Output current (calibrated) • Operating mode • Thermal shutdown • OVP status • Local/remote programming status 5.2.7 Front Panel Displays and Local Operating Mode Controls (A1 PCB) In addition to providing the output voltage and current displays, the front panel has the local controls for:... -
Page 75: Ac Input And Rfi Filter Circuit (A5 Pcb)
Sorensen DCS-E Series 3kW Supplies Theory of Operation 5.3.1 AC Input and RFI Filter Circuit (A5 PCB) The AC input is connected to the power supply via a four-pole connector in the rear panel. For three phase operation, three (3) phase lines, X, Y, and Z (190-250 Vac at 14A), and a safety ground line are required. -
Page 76: Power Transformer, Output Rectifiers, Output Filter Inductor And Capacitor, And Down Programmer Circuit (A4 Pcb, A7 Pcb, A8 Pcb, And Power Stage Assembly)
Theory of Operation Sorensen DCS-E Series 3kW Supplies The current sense amplifier monitors the current in the primary winding of the power transformer using transformer T2 and provides the signal to the non-inverting input of the PWM comparator. Diodes CR14 and CR15 rectify the output from T2 and resistors R3 and R11-3 scale the signal before it is input to the positive input of the current sense amplifier at pin 4 of U1. -
Page 77: Auxiliary Supply, Ovp, Control, Programming, Monitor Circuit (A2 Pcb)5
Sorensen DCS-E Series 3kW Supplies Theory of Operation RC snubbers across each rectifier (also across the entire secondary of the transformer on some models) and tape-wound toroids on each transformer secondary lead are used to suppress transients. The rectifier output is filtered by capacitors C701-711 on the A7 PCB, capacitors C801-803 on the A8 PCB, and the output inductor to provide the DC output. - Page 78 Theory of Operation Sorensen DCS-E Series 3kW Supplies switches the primary winding of transformer T1. Current and voltage feedback signals to the PWM control its output pulse width, thereby regulating the auxiliary output voltages. Current feedback to the PWM is provided by shunt resistor R114 which monitors current in the transformer primary winding.
- Page 79 Sorensen DCS-E Series 3kW Supplies Theory of Operation optional IEEE-488 programming card is enabled, the reference signal is routed to the reference input through resistor R78. Resistor R10 and capacitors C7 and C8 are compensation components for U3-D. The current control circuit consists of op amp U3-C and its related components. Operation of the current control circuit is similar to that of the voltage control circuit.
- Page 80 Theory of Operation Sorensen DCS-E Series 3kW Supplies EMOTE OCAL ROGRAMMING ELECT IRCUITS These circuits select the source of the voltage and current control circuit reference signals. The reference signals are provided by one of three sources: • Front panel controls (local programming mode) •...
- Page 81 Sorensen DCS-E Series 3kW Supplies Theory of Operation Selection of IEEE-488 programming occurs when the IEEE card pulls pin 13 of U5-D and pin 2 of U5-A low through connector P2, pin 4. This causes the output of both U5-D and U5-A to go high and switch OFF both U4-C and U4-B.
- Page 82 Theory of Operation Sorensen DCS-E Series 3kW Supplies (OVP) C OLTAGE ROTECTION IRCUIT The OVP circuit protects the load connected to the power supply from over-voltage conditions arising from programming errors, incorrect voltage control adjustments, or power supply failure. The OVP circuit monitors the output voltage and activates the internal shutdown circuit of the supply whenever the output exceeds a selected trip limit.
- Page 83 Sorensen DCS-E Series 3kW Supplies Theory of Operation UTPUT OLTAGE AND URRENT EADBACK IRCUITS These circuits provide calibrated, switch-selectable 0-5V or 0-10V analog readback signals for remote monitoring of the output voltage and current. The output voltage readback signal is available at pin 19 of the rear panel J3 connector and the current readback signal is available at pin 7.
-
Page 84: Front Panel Displays And Controls (A1 Pcb)
Theory of Operation Sorensen DCS-E Series 3kW Supplies 5.3.6 Front Panel Displays and Controls (A1 PCB) The A1 front panel PCB consists of: • Output voltage and current displays • Local controls for output voltage and current limit • Local control potentiometer for the OVP set point •... - Page 85 Sorensen DCS-E Series 3kW Supplies Theory of Operation OVP S OCAL OINT ONTROL Potentiometer R29 (or R29A depending on the production part used) is a 20-turn trimpot which provides a 0-5V reference signal to the OVP circuit on the A2 PCB via pin 17 of connector P1. (V &...
- Page 86 Theory of Operation Sorensen DCS-E Series 3kW Supplies This page intentionally left blank. 5-16 M362295-01 Rev D...
-
Page 87: Maintenance
SECTION 6 MAINTENANCE INTRODUCTION This section provides general maintenance and calibration information as well as replacement parts lists for the DCS-E Series (3kW) supply. 6.1.1 Units Under Warranty Units requiring repair during their warranty period should be returned to the manufacturer for service. -
Page 88: Servicing Precautions
Maintenance Sorensen DCS-E Series 3kW Supplies 6.2.2 Servicing Precautions Always disconnect power, discharge circuits, and remove external voltage sources before making internal adjustments or replacing components. When performing internal adjustments or servicing the power supply, ensure another person with first aid and resuscitation certification is present. -
Page 89: Voltage Programming Circuit Calibration
Sorensen DCS-E Series 3kW Supplies Maintenance 6.3.1 Voltage Programming Circuit Calibration Designation & Location Voltage Programming Recalibration Procedure (Multiturn trim pots) • Voltage Program Offset Disconnect any load. Connect a DVM rated at better than 0.5% (R93) accuracy to the power supply output. •... -
Page 90: Replaceable Parts
Maintenance Sorensen DCS-E Series 3kW Supplies REPLACEABLE PARTS In this section, you will find parts lists for the following DCS-E Series (3kW) assemblies: • Main Assembly • Front Panel Assembly • A2 Control Circuit PCB Assembly (includes J3 connector and programming shell) •... -
Page 91: Dcs-E 3Kw Parts Lists By Model Number
Sorensen DCS-E Series 3kW Supplies Maintenance 6.4.3 DCS-E 3kW Parts Lists by Model Number 8-350E 12-250E 20-150E 40-75E 55-55E 60-50E 80-37E 150-20E Main 5362295-01 5362295-02 5362295-03 5362295-04 5362295-05 5362295-06 5362295-07 5362295-08 Assembly 1065809-008 1065809-012 1065809-020 1065809-040 1065809-055 1065809-080 1065809-150 Front 1068768-008 1068768-012 1068768-020... - Page 92 Maintenance Sorensen DCS-E Series 3kW Supplies This page intentionally left blank. M362295-01 Rev D...
-
Page 93: Application Notes
SECTION 7 APPLICATION NOTES BATTERY CHARGING When using the DCS-E Series (3kW) power supply to charge a battery, take the following precautions to prevent damage to the supply and/or the battery in case the overvoltage protection (OVP) circuit is activated. •... - Page 94 Application Notes Sorensen DCS-E Series 3kW Supplies It is recommended that diode and cathode connections be made as follows: • Connect a blocking diode in series with the output to protect the power supply. • Connect cathode of the freewheeling diode to the cathode of the blocking diode and the anode to return.
Need help?
Do you have a question about the Sorensen DCS8-350E and is the answer not in the manual?
Questions and answers