Table of Contents
Advertisement
Quick Links
Advertisement
Table of Contents

Related Manuals for Harman Lexicon MX400


Summary of Contents for Harman Lexicon MX400
- Page 1 MX400 User Guide Professional Audio Equipment...
- Page 2 IMPORTANT SAFETY INSTRUCTIONS WARNING FOR YOUR PROTECTION READ THE FOLLOWING: READ THESE INSTRUCTIONS. KEEP THESE INSTRUCTIONS. HEED ALL WARNINGS. FOLLOW ALL INSTRUCTIONS. The symbols shown above are internationally accepted symbols that warn of potential hazards with electrical products. The DO NOT USE THIS APPARATUS NEAR WATER. lightning flash with arrowpoint in an equilateral triangle means that there are dangerous voltages present within the unit.
- Page 3 • this device must accept any interference received, including interference that may cause undesired operation. Product name: Lexicon MX400 and MX400XL Note: Product name may be suffixed by the EU. Operation of this unit within significant electromagnetic fields should be avoided.
- Page 4 CONSIGNES DE SÉCURITÉ IMPORTANTES AVERTISSEMENT POUR VOTRE SÉCURITÉ LIRE ATTENTIVEMENT : LIRE CES CONSIGNES. CONSERVER CES CONSIGNES. RESPECTER TOUS LES AVERTISSEMENTS. SUIVRE TOUTES LES CONSIGNES. Les symboles illustrés ci-dessus sont des symboles acceptés NE PAS UTILISER CET APPAREIL PRÈS DE L’EAU. internationalement qui avertissent des dangers potentiels relatifs à...
- Page 5 à son fonctionnement. Nom du produit : Lexicon MX400 and MX400XL Remarque : Le nom du produit peut être suivi des lettres UE. L’utilisation de cet appareil à proximité de champs électromagnétiques puissants n’est pas recommandée.
- Page 6 Warranty Warranty 1. The warranty registration card that accompanies this product must be mailed within 30 days after purchase date to validate this warranty. You can also register online at . Proof-of-purchase is considered to be the responsibility of the consumer.
-
Page 7: Table Of Contents
Table of Contents MX400 TAbLe of CoNTeNTS IntroDuctIon ................1 IncLuDeD IteMS ...............1 QuIck Start ................2 Standard Parallel Connection ................2 Powering the Unit ....................2 Set Audio Levels ..................... 2 Select and Load a Program ................... 3 the front PaneL ..............4 Gain LEDs ...................... - Page 8 Table of Contents Selecting and Loading Programs (Dual Stereo Configuration) ......12 Storing/Copying Programs..................12 Editing a Program ....................13 Changing an Effect ....................14 Changing Knob Assignments ................15 Effect Mix/Routing ....................15 Stereo and Dual Stereo Configurations ..............16 Surround Configurations ..................
-
Page 9: Introduction
Introduction MX400 INTRodUCTIoN Congratulations and thank you for purchasing the MX400 Dual Stereo/Surround Reverb Processor! The MX400 provides you with the legendary Lexicon reverbs and effects powered by four processors, for a wide variety of configurations and blends, all in a single rack unit. Use the MX400 live or in the studio, connect and control it via your PC or Mac, or use it as a hardware plug-in. -
Page 10: Quick Start
Quick Start QUICK START Ideally, you should read this entire manual before using the MX400. But, if you just can’t wait to get started, this section explains how to set up a simple parallel connec- tion (using the MX400 with a mixer) and select a program. StanDarD ParaLLeL connectIon 1. -
Page 11: Select And Load A Program
Quick Start MX400 SeLect anD LoaD a ProGraM Turn the Program/Load knob to choose a program. The Program Number Display flashes the number of the program to be loaded. Press the knob to load the program. Program/Load knob Program Number Display Note that the MX400 comes with 99 Factory programs and 99 User programs. -
Page 12: The Front Panel
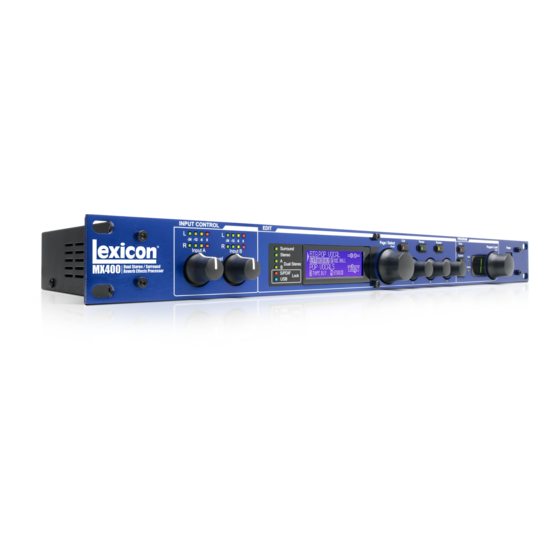
The Front Panel The fRoNT PANeL 4 5 6 7 9 10 14 15 11 12 13 1. Gain LEDs Each pair of Gain LEDs indicate input signal strength of each of the MX400’s input pairs. Range is from -24dB, -12dB, -6dB, and 0dB. 2. -
Page 13: System
The Front Panel MX400 10. System Accesses the System global setup menus. 11. Bypass Used to bypass or mute the currently selected program. 12. User and Factory LEDs Indicate whether the selected program is User or Factory. 13. Program Number Display Displays the number of the selected program. -
Page 14: The Rear Panel
The Rear Panel The ReAR PANeL 1. Power Jack Attach the power cord here. 2. USB Port Provides communication with a computer for use with MX-Edit Editor/Librarian software and MX400 plug-in window using a standard USB cable. When the MX400 is connected to a computer via USB, the blue USB LED next to the main display will light. -
Page 15: Balanced Analog Line Output Pairs
The Rear Panel MX400 6. Balanced Analog Line Output Pairs Dual RF-filtered 1/4" balanced/unbalanced TRS or balanced XLR line outputs are servo-balanced, so no signal loss is incurred when using unbalanced connections (1/4" inputs only). If only a single plug is connected to the Left output, both Left and Right signals can be summed to mono by selecting Mono Left for analog output A or B in the System Menu. -
Page 16: About The Mx400
About the MX400 AboUT The MX400 The MX400 is an extremely versatile effects processor; in fact it can operate like three different processors. When using the MX400, it is recommended that you decide what type of processor you need it to operate as (Surround, Stereo, or Dual Stereo proces- sor), make the proper cable connections, and select the Configuration that coincides with your setup. -
Page 17: Stereo Configuration Connections
Connecting the MX400 MX400 Connection Diagram: Surround In/Out Return 1 2 3 4 Send 1 Stereo confIGuratIon connectIonS Stereo Mode configures the MX400 as a single stereo input/output processor utilizing input/output pair A only (analog and S/PDIF). Input/output pair B is disabled when the Stereo configuration is selected. -
Page 18: The Mx400 And Digital I/O
The MX400 and Digital I/O For sources that will run through Program A (this is the program shown in the top half of the Program Display which uses Effect 1 and Effect 2), connect to the A Left/Right (Front) input and output pair. Sources running through Program B (this is the pro- gram shown in the bottom half of the Program Display which uses Effect 3 and Effect 4), connect to the B Left/Right (Rear) input and output pair. - Page 19 The MX400 and Digital I/O MX400 stream, and it is necessary to change the clock source from the MX400’s internal clock to Digital. Furthermore, the MX400 only receives external clock sync on the S/PDIF A input. This means when using both Digital inputs (A and B), the devices that are connected must be synced to a common clock source to work properly with the MX400.
-
Page 20: Using The Mx400
Using the MX400 USING The MX400 SeLectInG anD LoaDInG ProGraMS (SurrounD, Stereo confIGuratIonS) 1. Choose a program by rotating the Program/Load knob. The selected program number flashes in the Program Display until loaded. The name of the pro- gram also appears in the MX400’s Main Display. The Factory or User LED next to the Program Display lights to indicate whether a Factory or User pro- gram is selected. -
Page 21: Editing A Program
Using the MX400 MX400 3. When naming is complete, press the Store button again. Turn the Page/Select or Program/Load knob to select the new user program memory location to store 4. Press the Store button again to complete the store procedure. eDItInG a ProGraM Once a program has been loaded, you may find you want to make adjustments to it for your particular application. -
Page 22: Changing An Effect
Using the MX400 2. Turn Edit Knob A, B, or C Edit to modify a parameter setting. When finished, store the changes to the program if you would like them to be recalled. From the Program Edit Menus 1. While on the Program Screen, turn the Page/Select knob to highlight the effect you want to edit. -
Page 23: Changing Knob Assignments
Using the MX400 MX400 When finished, store the changes to the program if you would like them to be recalled. chanGInG knoB aSSIGnMentS The three parameters that appear for editing from the Program Screen in Surround and Stereo Configuration programs are user selectable. From the factory, these param- eters were selected in each program by their importance to the effect. -
Page 24: Stereo And Dual Stereo Configurations
Using the MX400 Stereo anD DuaL Stereo confIGuratIonS 1. Dual Mono 2. Cascade Effect 1/3 Effect 2/4 Effect 1/3 Effect 2/4 3. Parallel 4. Mono Split Effect 1/3 Effect 1/3 Effect 2/4 Effect 2/4 5. Stereo Effect 1/3 1. Dual Mono This routing option sends the Left and Right input signals through Effect 1/3 and Effect 2/4 respectively. -
Page 25: Surround Configurations
Using the MX400 MX400 SurrounD confIGuratIon 1. Stereo In/Surround Out (Front) (Front) Surround Reverb (Rear) 2. Surround In/Out (Front) (Front) Surround Reverb (Rear) (Rear) 1. Stereo In/ Surround Out This routing option takes a stereo source connected to the Left 1 and Right 1 (Front) inputs, processes them through the Surround reverb, and sends it to all four outputs. -
Page 26: Tempo Button
Effects Descriptions teMPo Button The Tempo button is used for setting the tempo parameter in delay effects. In some cases there may be two delays set up in a program using two effects. The Tempo but- ton will flash at the rate of the delay which is highlighted in the Main Display. To set the tempo of the second delay, turn the Page/Select knob until the second delay is highlighted in the Main Display. -
Page 27: Reverbs
Effects Descriptions MX400 ReveRbS Reverberation (or “reverb” for short) is the complex effect created by the way we per- ceive sound in an enclosed space. When sound waves encounter an object or boundary, they don’t just stop. Some of the sound is absorbed by the object, but most of the sound is reflected or is diffused. - Page 28 Effects Descriptions control. The surround in/surround out routing is for use with a true 4-channel input source and both front and rear output pairs each have their own wet/dry mix control for precise control of dry audio and reverb adjustments in the surround field. Plate Reverbs - Stereo SMaLL PLate, LarGe PLate, vocaL PLate, DruM PLate...
- Page 29 Effects Descriptions MX400 Studio Reverb - Stereo Much like Room reverb, Studio produces an excellent simulation of smaller, well-controlled acoustic spaces, characteristic of the main performance areas in recording studios. Studio is also useful with dialog and voiceover applications as well as individual instrument and electric guitar tracks. Arena Reverb - Stereo Arena reverb emulates a huge physical space such as an indoor sports venue...
- Page 30 Effects Descriptions up more slowly and sustains for the time set by Spread. With Shape in the middle, the build-up and sustain of the reverberation envelope emulates a large concert hall (assuming that Spread is at least halfway up, and that Size is 30 meters or larger). Low Spread settings result in a rapid onset of reverberation at the beginning of the envelope, with little or no sustain.
-
Page 31: Delays
Effects Descriptions MX400 Boing This is a unique parameter to the Spring reverb, designed to increase or decrease the amount of spring rattle that is a physical characteristic of spring tank reverbs. deLAyS Delays repeat a sound a short time after it first occurs. Delay becomes echo when the output is fed back into the input (feedback). - Page 32 Effects Descriptions 2-Tap Delay - Stereo The 2-Tap Delay is probably best described as an adjustable pong delay where each tap can be individually set in relation to the delay time. The 2 taps are a calculated percentage of the actual delay time from 1-100% (for example, if the delay time is 500ms and Tap 1 is set to 50% and Tap 2 is set to 100%, Tap 1 time would be 250ms and Tap 2 time would be 500ms).
-
Page 33: Dbx ® Dynamics
Effects Descriptions MX400 Smear This parameter controls the amount of “smear,” or signal degradation and frequency loss. Particularly evident in the Tape Delay, the higher the setting, the more each delay repeat loses intelligibility compared to the original signal. Tap 1 & 2 The Tap parameters provide independent control to the two delay taps in the 2-Tap Delay. - Page 34 Effects Descriptions Because the resulting output is less than the original signal, a third control, Makeup Gain compensates for this loss of level, but with less dynamic range, or the difference between the softest and loudest parts of the signal. Note: The De-Esser and Compressor effects are Mono In Dual Stereo configuration programs.
-
Page 35: Modulated Effects
Effects Descriptions MX400 Release Release allows adjustment of the release time constant, determining how quickly the compressor responds to decreasing input level. This should normally be set long. Short release times may cause an effect similar to “pumping” in an analog compressor. Knee In Hard Knee mode, the threshold of compression is defined as that point above which the output level no longer changes on a 1:1 basis with changes in the input level. - Page 36 Effects Descriptions Tremolo/Pan - Stereo (Wet Only) Tremolo and Panner create rhythmic changes in signal amplitude. Tremolo affects both channel’s amplitude simultaneously, while the Panner affects the ampli- tude of each channel in an alternating manner. Rotary - Mono In/Stereo Out (Wet Only) Rotary speaker cabinets were designed to provide a majestic vibrato/choir effect for electronic theater and church organs.
- Page 37 Effects Descriptions MX400 Depth Scales the intensity of the effect. This control affects the output of the LFO only. It has no effect on the outputs of the individual waveforms. Voices Controls the number of additional Chorus voices. Regen Controls the amount of modulated signal being fed back into the input, creating feed- back.
-
Page 38: Mx400 System Menus
MX400 System Menus Shift 1 & 2 Determines the amount of pitch shift or detune shift from the original signal source. Works best with individual notes. Delay 1 & 2 Sets the delay time before the pitch shift or detune effect is heard in the Pitch Shift and Detune effects. - Page 39 MX400 System Menus MX400 Input Source A The MX400 has both analog and digital inputs that can be connected to. Depending on which inputs you will be using, you need to select between analog or digital sources. The MX400 offers three different input sources to select from: Analog Mono L, Analog Stereo, and Digital.
- Page 40 MX400 System Menus Analog Output B Analog Out B is identical to Analog Out A description but refers to analog Output Pair B only. Use Knob B to select between Mono Left and Stereo B - Rear outputs. Output Level The MX400 outputs can be optimized to run with equipment requiring different output levels.
- Page 41 MX400 System Menus MX400 MIDI Channel A The MX400 is equipped with two MIDI receive channels, Channel A and Channel B. MIDI channel A is the channel used by all MX400 Configurations: Surround, Stereo, and Dual Stereo. Any program change or CC messages sent to the MX400 on MIDI Channel A will be processed by the active program.
- Page 42 MX400 System Menus MIDI CC Receive The MIDI CC receive option lets you enable or disable the MX400 from receiving MIDI CC messages. When MIDI Program Receive is set to off, it filters all MIDI CC messages so that the MX400 will not respond them in any configuration (Surround, Stereo, or Dual Stereo).
-
Page 43: The Mx-Edit Editor/Librarian - Windows And Mac
The MX-Edit Editor/Librarian - Windows and Mac ® ® MX400 2. Press and hold the Store button until the white progress bar has completely disappeared. This will complete the restore procedure and the MX400 will be returned to its factory state. The MX-edIT edIToR/LIbRARIAN - WINdoWS... -
Page 44: Installing The Mx-Edit Editor/Librarian Software - Mac
The MX-Edit Editor/Librarian - Windows and Mac ® ® INSTALLING The MX-edIT edIToR/LIbRARIAN - MAC MInIMuM SySteM reQuIreMentS - Mac Before installing the MX-Edit Editor/Librarian software, make sure that your computer meets the following minimum requirements: OSX 10.4 or higher To install the MX-Edit software for Macintosh®... -
Page 45: The Mx-Edit Library
The MX-Edit Editor/Librarian - Windows and Mac ® ® MX400 Double-click a program name to open it in the editor. The program settings are reflect- ed in the Parameter knobs and buttons in the Program Editor window. The selected program is now loaded in your MX400. Any changes made in the MX-Edit Program Editor window will also occur simultaneously on the MX400 hardware. -
Page 46: The Mx-Edit Program Editor
The MX-Edit Editor/Librarian - Windows and Mac ® ® • To open a program that has been saved to your computer (but doesn’t appear in the MX-Edit Library), click File and select Open Program. By default, the Open dialog looks in the My Documents folder (or the last folder that a program was opened from). - Page 47 The MX-Edit Editor/Librarian - Windows and Mac ® ® MX400 reverB/effect SeLectIon ButtonS To change a reverb or effect in Processor 1 or Processor 2, left click on the Reverb/ Effect Select button in Effect 1 or Effect 2 control area. A list of the MX400’s reverbs and effects appears, with a check mark next to the currently selected reverb or effect.
-
Page 48: Saving A Program
The MX-Edit Editor/Librarian - Windows and Mac ® ® teMPo If one of the MX400’s delays is selected, the Tempo button in that processor becomes active, and begins to flash at the Tempo rate. The tempo value is shown in milliseconds (ms), and a musical note appears next to the displayed Delay Time. -
Page 49: Storing A Program
The MX-Edit Editor/Librarian - Windows and Mac ® ® MX400 – anything you can do with a standard document or file. These files should, however, only be opened by MX-Edit Editor/Librarian software to prevent corruption. SToRING A PRoGRAM To store a program into one of the User program locations in the MX-Edit Library (and the corresponding location in the MX400’s physical memory), open the program you wish to store. -
Page 50: Using The Mx400 As A Hardware Plug-In
Using the MX400 as a Hardware Plug-In USING The MX400 AS A hARdWARe PLUG-IN The MX400 comes with VST™ (PC only) and Audio Units (Mac only) software which allows you to use the MX400 as a Hardware Plug-In. Now you have access to classic Lexicon®... -
Page 51: Software Configuration
Using the MX400 as a Hardware Plug-In MX400 For lower latencies and the best audio performance, it is recommended that you con- nect the MX400 to your computer’s audio I/O device using the S/PDIF Inputs and out- puts. If your I/O device does not have a S/PDIF connection, or if it already connected to another device, you may use the analog connections from your computer’s I/O device to the 1/4”... -
Page 52: Using The Mx400 Plug-In Window
Main Mix Bus, just as you would any audio or plug-in effect. USING The MX400 PLUG-IN WINdoW In your DAW, open the Lexicon MX400 plug-in. You’ll see an instance of the Program Editor window. You can use the MX400 plug-in software just as you would any other plug-in: Session Recall, automation –... -
Page 53: Midi Implementation Chart
MX400 MIdI IMPLeMeNTATIoN ChART... - Page 54 MIdI CC MAP - MIdI CC MAP - Dual StereO effectS Dual StereO effectS...
-
Page 55: Midi Cc Maps
MX400 MX400 MIdI CC MAP - MIdI CC MAP - rOutIng 5 Dual StereO effectS, StereO effectS rOutIng 5 Dual StereO effectS, StereO effectS... - Page 56 MIDI CC MAP- MIDI CC MAP - ROUTING 5 DUAL STEREO EFFECTS, STEREO EFFECTS ROUTING 5 DUAL STEREO EFFECTS, STEREO EFFECTS...
- Page 57 MX400 MX400 MIdI CC MAP - MIdI CC MAP - SurrOunD hall effectS SurrOunD hall effectS 49 49...
-
Page 58: Program Lists
PROGRAMS - DUAL STEREO Dual Stereo Programs Program Title Routing Program Title Routing BIG POP VOCAL Cascade TAPS Cascade POP VOCALS Dual Stereo (Parallel) TAP CHAMBER Cascade RETROVERB Cascade SPACED OUT Cascade CHORUS + PLATE Mono Split DUAL HALLS Dual Mono VOCAL HALL + PLATE Mono Split TRIED AND TRUE... - Page 59 MX400 PRoGRAMS - StereO...
- Page 60 PRoGRAMS - SurrOunD...
-
Page 61: Specifications
MX400 SPeCIfICATIoNS Analog Audio Inputs Connectors four ¼" TRS balanced or unbalanced Impedance 50k Ohms bal., 25k Ohms unbal. Input Level +4 dBu nominal, +24 dBu maximum A/D Conversion 24-bit, 48kHz or 44.1kHz, 128 x oversampling Analog Audio Outputs Connectors four ¼"... - Page 64 MX400 / MX400XL Owner's Manual PN: 18-0446V-D Copyright 2014 Lexicon ® Printed in China...
Need help?
Do you have a question about the Lexicon MX400 and is the answer not in the manual?
Questions and answers