Table of Contents
Advertisement
Quick Links
Advertisement
Table of Contents

Subscribe to Our Youtube Channel
Related Manuals for Minolta MN12Z


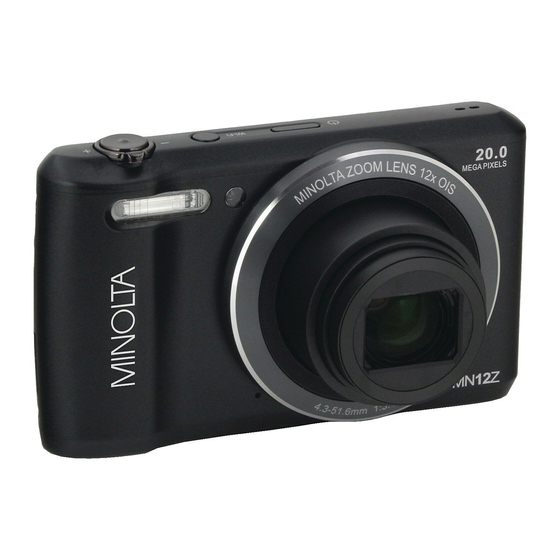
Summary of Contents for Minolta MN12Z
- Page 1 MN12Z USER’S MANUAL...
-
Page 2: Preface
Preface About this Manual • The contents of this manual and the bundled Basic Reference are subject to change without notice. • Note that the example screens and product illustrations shown in this User’s Guide may differ somewhat from the screens and configuration of the actual camera. -
Page 3: Federal Communication Commission Interference Statement
Federal Communication Commission Interference Statement This device complies with Part 15 of the FCC Rules. Operation is subject to the following two conditions: (1) This device may not cause harmful interference, and (2) this device must accept any interference received, including interference that may cause undesired operation. -
Page 4: Industry Canada Statement
IMPORTANT NOTE: In the event that these conditions can not be met (for example certain laptop configurations or co-location with another transmitter), then the FCC authorization is no longer considered valid and the FCC ID can not be used on the final product. In these circumstances, the OEM integrator will be responsible for re-evaluating the end product (including the transmitter) and obtaining a separate FCC authorization. - Page 5 Cet appareil est conçu uniquement pour les intégrateurs OEM dans les conditions suivantes: (Pour utilisation de dispositif module) 1) L'antenne doit être installée de telle sorte qu'une distance de 20 cm est respectée entre l'antenne et les utilisateurs, et 2) Le module émetteur peut ne pas être coï mplanté avec un autre émetteur ou antenne.
-
Page 6: Safety And Handling Precautions
Manuel d'information à l'utilisateur final L'intégrateur OEM doit être conscient de ne pas fournir des informations à l'utilisateur final quant à la façon d'installer ou de supprimer ce module RF dans le manuel de l'utilisateur du produit final qui intègre ce module. Le manuel de l'utilisateur final doit inclure toutes les informations réglementaires requises et avertissements comme indiqué... -
Page 7: Using This Menu
• The type of battery and the battery power level may cause the lens to be stuck up. Ensure you use the correct battery type and use a fully charged battery. • Risk of explosion if battery is replaced by an incorrect type. Dispose of used batteries according to the instructions. -
Page 8: Table Of Contents
Table of Contents Preface ..................1 About this Manual ..............1 Federal Communication Commission Interference Statement ..2 Industry Canada statement ............3 Safety and Handling Precautions ..........5 Using this Menu ............... 6 Introduction ................10 System Requirements ............. 10 Main Features ................ - Page 9 Using Flash ................29 Using Self-timer ..............30 Setting the Focus Mode ............31 Using the AE/AF LOCK/Delete Button ........32 Recording Videos ..............35 Using the Record Menu ............47 Using the Movie Menu ............56 Playback ..................58 Viewing in Single Navigation ...........
- Page 10 Setting the Print Mode Menu ..........85 Appendix ..................87 About Folder and File Names ..........87 Troubleshooting ................87 Specifications ................89...
-
Page 11: Introduction
Introduction Congratulations on your purchase of the new digital camera. Capturing high-quality digital images is fast and easy with this state-of-the-art smart camera. System Requirements In order to get the most out of your camera, your computer must meet the following system requirements: For Windows: •... -
Page 12: Package Contents
Package Contents Please check the contents of your camera package. It should contain: Digital camera Rechargeable battery USB adapter x 1 pcs (The type of plug may vary depending on the country or region) USB cable Wrist strap Camera pouch (optional) CD-Rom (optional) Quick Start Guide/... -
Page 13: Camera Views
Camera Views Front View Flash Self-timer LED/AF Assist Lamp Lens Microphone Back View LCD monitor LED indicator light Movie button AE/AF LOCK button/Delete button/4-way navigation control 10. Menu button 11. Playback button... - Page 14 Top View 12. Shutter button 13. Wi-Fi button 14. Power button 15. Speaker 16. Zoom dial Bottom View 17. Battery/Memory card compartment 18. Tripod screw hole Right View 19. Strap ring 20. USB...
-
Page 15: Camera Buttons
Camera Buttons Your camera is equipped with different buttons for ease of use. Button Description Power Press the Power button to turn the power on/off. Shutter Press to capture an image. In Photo mode and Recording video, spin the zoom dial to left to zoom out, right to zoom in. -
Page 16: Navigation Control
Navigation Control The 4-way Navigation Control and the OK button allow you to access the various menus available from the On Screen Display (OSD). You can configure a wide range of settings to ensure maximum results from your images and videos. Further functions of these buttons are as follows: Description EV/Rotate Button... - Page 17 1. In Photo Mode, press to scroll through Focus options. (AF, Macro, Super Macro, Infinity, MF) 2. In Playback mode, press to view the previous image or video clip. Focus/Left 3. In Playback movie mode, press to Rewind video playback. 4.
-
Page 18: Getting Started
Getting Started Attach the Camera Strap Wrist strap Inserting the Battery Follow these instructions to insert the rechargeable battery into the battery/memory card compartment. Please read "Battery Information" on page 5 before inserting/removing batteries. 1. Make sure the power is off before inserting the battery. -
Page 19: Camera Memory
3. Insert the batteries into the compartment with the terminal facing inside the camera with correct orientation as shown. 4. Close and lock the battery/memory card compartment. In order to prevent the battery from dropping, please make sure the compartment is locked firmly. Camera Memory Internal memory Your camera is equipped with 64 MB of internal memory. -
Page 20: Inserting A Micro Sd/Sdhc/Sdxc Memory Card
Inserting a Micro SD/SDHC/SDXC Memory Card Expand your camera’s storage by using Micro SD, SDHC or SDXC memory cards. 1. Unlock and open the Battery/memory card compartment at the bottom of the camera. 2. Insert the Micro SD/SDHC/SDXC card into the memory card slot with the metallic part facing the back side of the camera. -
Page 21: Charging The Battery By Usb
Charging the Battery by USB In other way charging the battery, you can use the USB cable to connect the camera with PC or USB adapter. 1. Connect the camera with the USB cable as shown. 2. Connect the other end with the USB adapter and plug it into a power outlet or with the USB port of PC directly for charging. -
Page 22: Initial Settings
Initial Settings When you turn on your camera for the first time, you will be asked to do the initial settings of your camera. First is the setup of language menu. Specify in which language menus and messages are to be displayed on the LCD monitor. Setting the Language 1. -
Page 23: Using The Lcd Monitor
Using the LCD monitor The LCD monitor shows all important information regarding camera settings as well as the visual image of your image or video. The display on the LCD monitor is called the On Screen Display or OSD. LCD Monitor Layout Photo Mode Screen Layout Item Description... - Page 24 Indicates the light is not enough and the camera is shaking, which may cause the captured image blurred. If the shake warning appears, you can still capture Shake warning images. However, enable Stabilizer, flashlight or use tripod is recommended, these ways will stabilize the camera.
- Page 25 Movie Mode Screen Layout Recording Layout Item Description Indicates that you can capture screenshot without PIV available stopping movie recording. Recording Indicates recording status. status Recorded Displays recorded time. time AE/AF lock Indicates AE/AF Lock is enabled. Displays the commands on 4-way Navigation Control Key indicator button.
- Page 26 Playback Mode Screen Layout The Playback mode display varies depending on the type of image being viewed. Playback mode display of still images: Item Description Playback Indicates playback mode. mode Protect Indicates file is protected. Voice memo Indicates voice memo is attached. Indicates the button to press on the camera to play a Button intro video file.
- Page 27 Playback mode of videos: Item Description Playback mode Indicates playback mode. Protect Indicates file is protected. Video clip Indicates the file is a video. Button indicator Displays the button info of Playback mode. Indicates the file number over the total number of File no./Total no.
-
Page 28: Recording Images And Videos
Recording Images and Videos Taking Images Now that you are familiar with your camera, you are now ready to take your images. Taking images with your camera is very simple. 1. Turn on the camera by pressing the Power button. 2. -
Page 29: Using Ev Compensation
3. Release the Zoom dial. 12x optical zoom 8x digital zoom Using EV Compensation Images can be captured with the overall scene intentionally made brighter or darker. These settings are used when a suitable brightness (exposure) cannot otherwise be obtained in circumstances where the difference in brightness between the subject and the background (the contrast) is large, or when the subject that you wish to capture is very small within the scene. -
Page 30: Using Flash
Using Flash When taking pictures in difficult lighting conditions, use the Flash/Right button to get correct exposure. This function cannot be activated in recording videos or continuous shooting. To activate Flash: • Press the Flash/Right button on your camera to launch the Flash function. Flash/Right button •... -
Page 31: Using Self-Timer
Using Self-timer The Self-timer allows you to take images after a pre-defined delay. While burst lets you take consecutive shots. This function is only available in recording still images. The Self-timer setting is automatically set to off when you turn off the camera. -
Page 32: Setting The Focus Mode
Setting the Focus Mode This function allows users to define the type focus when recording a still image. To set the Focus mode • Press the Focus/Left button on your camera to launch the Focus function. • To select focus options, press the keys. -
Page 33: Using The Ae/Af Lock/Delete Button
Using the AE/AF LOCK/Delete Button Use the AE/AF LOCK/Delete button on your camera to lock focus and exposure, or delete an image/video clip. AE/AF LOCK function 1. To lock AE/AF, press the AE/AF LOCK button during movie recording or half press the shutter button then press the AE/AF LOCK button in Photo mode. - Page 34 To delete a single file: 1. After a confirmation selection appears on screen. Select Single. 2. Press the OK button and select Yes to delete. 3. The next image is displayed on the LCD monitor. To delete another file, use the keys to scroll through the images/videos clip.
- Page 35 4. When the desired image/video clip is highlighted, use the keys to mark/unmark image/video clip for deletion. 5. Repeat step 4 until all desired images for deletion are marked. 6. Press the OK button. A confirmation selection appears. 7. Select Yes to confirm. 8.
-
Page 36: Recording Videos
Recording Videos You can record videos with the camera, the available recording time depends on the capacity of the memory card. Videos can be recorded until the maximum memory capacity has been reached. However the length of a single video may be limited (the limitation depends on the camera model). - Page 37 Setting the Scene Mode By simply selecting one of the following 26 modes, you can capture the image with the most appropriate settings. 1. From the Record Menu, press to select Scene Mode. 2. Use the navigation controls to move through the selection.
- Page 38 This feature is used for wedding or indoor party Party settings. This feature is used to capture warm candle light Candlelight effects. Night This feature is used to capture portrait pictures with Portrait night or dark background. This feature enhances skin tone thus facial skin Soft Skin appears smooth.
- Page 39 Use this feature to take a specific number of images in a specific shooting interval. The taken images will be GIF Capture combined into a GIF file and no longer exist individually. See "Using GIF Capture" on page 46 for more details.
- Page 40 Using Kids Mode Tactically, kids are the most difficult to photograph. They tend to be highly animated and can be a real challenge to make them pay attention for more than just a second or two. To capture a great moment for your kids, just keep the camera in kid mode.
- Page 41 Using Self Portrait When you are the one taking the picture for yourself, then self portrait mode is necessary besides the tripod. With your long arm’s help, the camera begin face tracking in self portrait mode. If a face had been recognized, the camera performs 2-second countdown with a beep notice then take a shot without pressing the Shutter button.
- Page 42 Using Panorama Mode Use this feature to create a panoramic photo from multiple shots. You can combine several shots into one single image quickly and easily. • The actual size of stitched image may be different due to the panoramic angle and stitching result as well as the level of camera shaking.
- Page 43 3. Full press the shutter button to start 4. If you move camera without shooting. When shooting starts, a keeping straight, the yellow line white-cross locates on the center and will move with the moving scene. a yellow line displays horizontally (or vertically) through the screen.
- Page 44 Using Art Effect Effect that cannot be presented on Preview does not apply to movie recording and continuous shooting. Press keys to select between the following settings: Icon Item Description This feature is used to capture images with Stylish over-saturated colors, off-kilter exposure or blurring.
- Page 45 B&W Images are captured in black and white. Sepia Images are captured in sepia tones. Retains red tone while the rest of the scene Color Accent (Red) becomes black and white. Color Accent Retains orange tone while the rest of the scene (Orange) becomes black and white.
- Page 46 Using Burst/Speedy Burst Burst and Speedy Burst allow you to easily capture fast-moving targets, for example children playing, running dogs or exciting sport events. Icon Item Description Full press and hold the shutter button to take a Burst continuous shooting until release the shutter button or memory card is full.
- Page 47 Using GIF Capture Use this feature to take a specific number of images in a specific shooting interval. The taken images will be combined into a GIF file and no longer exist individually. Press OK button in Preview could launch the GIF Setting.
-
Page 48: Using The Record Menu
Using the Record Menu If you are in Photo Mode, you can access the Record menu simply by pressing the MENU button on your camera. When the menu is displayed, use the 4-way navigation control and the OK button to move through menu selections and apply your desired settings. To close the menu anytime, press the menu button again. - Page 49 The table below shows the Photo Size values for still images. Printing Size Printing Size Icon Pixel Size Icon Pixel Size Suggestion Suggestion 5152 x 5152 x Standard print A2 Size 3864 3435 paper 3264 x 5152 x A3 Size HDTV 2448 2898...
- Page 50 White Balance This sets the white balance for a variety of lighting conditions and permits images to be captured that approach the conditions that are seen by the human eye. • As you move through the selection, you can see the preview on the LCD monitor synchronously.
- Page 51 This sets the sensitivity for capturing images. When the sensitivity is raised (and the ISO figure is increased), photography will become possible even in dark locations, but the more pixelated (grainier) the image will appear. Use a higher ISO setting in dim conditions •...
- Page 52 Setting the Exposure Bracketing Use this feature to take photos with different exposure compensation. Bracketing records 3 continuous images in the following order: Standard exposure, Underexposure and Overexposure. Available settings are: Off, ± 0.3, ± 0.7 and ± 1.0. Setting the AF Area AF stands for Automatic Focus.
- Page 53 Setting the AF Lamp The AF Lamp function allows you to record images even low light conditions. If AF Lamp is set to Auto, the AF lamp located in the front of the camera, see "Front View" on page 12, emits an red light by half pressing the Shutter button allowing the camera to focus easily.
- Page 54 Setting the Digital Zoom This feature controls the digital zoom mode of your camera. Your camera enlarges an image using the optical zoom first. When the zoom scale exceeds 12x, the camera uses digital zoom. To set Digital Zoom 1. From the Record menu, select Digital Zoom.
- Page 55 Setting the Date Stamp The date of recording can be printed directly on the still images. This function must be activated before the image is captured. Once date and time are stamped on an image, they can no longer be edited or deleted. Limitations of Date Stamp functions are as follows: Available for still images only.
- Page 56 allowing you to re-take the shot before your subject or subjects move on. To activate Blink Detection 1. Enable Blink Detection from Record menu. 2. Half press the Shutter button to focus the subject. The frame turns green to indicate focus is set. 3.
-
Page 57: Using The Movie Menu
Using the Movie Menu You can access the Movie menu simply by pressing the MENU button on your camera. When the menu is displayed, use the 4-way navigation control and the OK button to move through menu selections and apply your desired settings. To close the menu anytime, press the menu button again. - Page 58 Prerecord function will be disabled in the following situations: The prerecord time is less than 2 seconds. • There is not enough internal memory to enable this function unless • an additional memory card is inserted to the camera. Setting Wind Cut This feature reduces wind noise during movie recording.
-
Page 59: Playback
Playback You can playback the still images, video clips on the LCD monitor. Viewing in Single Navigation The Single navigation mode displays the image one by one on the LCD monitor. To view images/video clips, follow the steps below. 1. Press the Playback button on the camera. -
Page 60: Magnify
Scroll bar. If scroll bars appear, it indicates that the screen can be scrolled. It can be displayed 9 images (3x3) or 36 images (6x6) at one time in Thumbnail Screen. Use the 4-way navigation control to select the file and press the OK button to display the selected file in Single Navigation. -
Page 61: Playing Videos
Playing Videos 1. Press the Playback button on the camera. 2. Use the navigation controls to scroll through the saved images. A video clip has a video icon displayed on screen. 3. Press the OK button to play the video. 4. -
Page 62: Playing Voice Memo
Playing Voice Memo Voice memo is separately recorded and attached to a captured image. See "Voice Memo" on page 65 on how to record voice memo. 1. Press the Playback button on the camera. 2. Use the navigation controls to scroll through the saved images. -
Page 63: Playback Menu
Playback Menu The Playback menu allows you to edit images, record voice memo, and setup playback settings. To go to Playback Menu: 1. Press the Playback button on the camera. 2. Press Menu button to launch the Playback Menu. 3. Use the keys to move through the menu selections. - Page 64 Protect Set the data to read-only to prevent images from being erased by mistake. A protected file has a lock icon when viewed on Playback mode. To protect files: 1. From the Playback menu, select Protect. 2. The Protect submenu is displayed on the LCD monitor.
- Page 65 To protect all files: 1. Select Lock all in the Protect submenu. A confirmation message appears. 2. Select Yes. 3. Press the OK button to lock all files. To unlock all files: 1. Select Unlock all in the Protect submenu. A confirmation message appears.
- Page 66 Voice Memo A maximum of 30 seconds of audio can be recorded as a memo for captured still images. To record voice memo: 1. Press the Playback button on the camera. 2. Press the keys to scroll and select an image to attach voice memo to. 3.
- Page 67 5. Press the keys to scroll and OK button to select an option. The succeeding table shows the available settings. Item Description Soft Image is applied with soft effect. Color Retains the color tone you choose while the rest of the scene Emphasis becomes black and white.
- Page 68 Trimming The Trim function allows you to trim an image to another image size. This function is only available for still images. To trim an image: 1. Press the Playback button on the camera. 2. Press the keys to scroll and select an image to trim.
- Page 69 Resize Resizes a previously saved image to create a small copy photo and only resizing to a smaller size is available. To resize an image: 1. Press the Playback button on the camera. 2. Use the keys to scroll and select an image to resize.
- Page 70 DPOF DPOF is the abbreviation for Digital Print Order Format, which allows you to embed printing information on your memory card. You can select the images to be printed and how many prints to make with the DPOF menu in the camera and insert the memory card to the card compatible printer.
- Page 71 Copy Use this feature to copy images between internal memory and memory card. To copy images between internal memory and memory card: 1. Press the Playback button on the camera. 2. Press Menu button to launch the Playback Menu. 3. Select Copy and choose a method you want to copy images to.
- Page 72 Movie Paste Use this feature to combine two videos with the same specification (movie size and fps) into one video. To combine two videos: 1. Press the Playback button on the camera. 2. Use the keys to scroll and select the original video.
- Page 73 Face Retouch This function is only applicable to still images that captured with Face Tracking. When enter the Face Retouch menu, locate the cursor on the picture if it has over two faces, or locate the cursor on function at the right side of the menu if only one face on the picture.
-
Page 74: Using The Setup Menu
Using the Setup Menu You can access the Setup menu whether you are in Record or Playback mode. The Setup menu allows to configure general camera settings. To go to Setup Menu: 1. Press Menu button to launch the Record/Playback Menu. 2. -
Page 75: Setting Power Save
Setting Power Save The Power Save function allows you to set an idle time after which the camera automatically sets to sleep mode to save power. After a minute of being in sleep mode, the camera eventually turns off power. This function is not available in the following instances: Recording a video file... -
Page 76: Setting Language
Setting Language Specify in which language menus and messages are to be displayed on the LCD monitor. 1. Use the navigation control to scroll through the list and select the desired language. 2. Press the OK button to confirm and apply settings. -
Page 77: Setting Format
Setting Format This utility formats current used memory (Internal memory or Memory card) and erases all stored images and data. If a locked card has been inserted, the option would be gray. Reset All Use this function to reset the camera to its factory settings. -
Page 78: Wi-Fi Settings
Wi-Fi Settings The Wi-Fi Settings contains Camera Name and Password. You can use the 4-way navigation control to move the cursor and press OK button to enter the selected letter or numbers. The default Camera Name is "Wi-Fi Camera", you can change it with 1~32 alphanumeric characters (case-sensitive). -
Page 79: Using Wi-Fi Function
Using Wi-Fi function With Wi-Fi function, you can immediately transfer photos and videos in this camera to other smart devices and even share them to social networking sites when it is connected. In addition, those smart devices are also used as remote controls. - Page 80 3. Turn on Wi-Fi network. Then choose and connect to the hotspot titled with the name of camera (the default is "Wi-Fi Camera") in the list of discovered networks. 4. Please enter the default password of hotspot "12345678" for the first time. 5.
- Page 81 Make the Wi-Fi connection between camera and smart device If you would like to perform "Remote Control" or "Download GPS Data" function on the smart device, please make the Wi-Fi connection between camera and smart device. First of all, set a Wi-Fi option on camera and make sure the smart device is within Wi-Fi range.
- Page 82 Geotag Recording 1. Select "Remote Control" from Wi-Fi Menu of the camera. 2. Select "Geotagging" from App menu on the smart device. 3. Turn on your GPS in the smart device. 4. Run the "Link123" application on the smart device and click on the "Geotagging" option.
- Page 83 Download GPS Data Please refer to the following steps to launch Download GPS Data function: 1. Select "Download GPS Data" from the Wi-Fi menu of the camera. 2. Tap the Camera Name from Network List on the smart device. 3. Tap "Upload to Camera" on the smart device.
- Page 84 6. Tap Start to start receiving images on the smart device. 7. The camera will enter Sending Screen to start sending images. 8. The received images will be displayed on the smart device. 9. Wi-Fi will be disconnected automatically when the sending is finished. Then, the iOS Notice camera will return to Preview mode or Playback mode.
-
Page 85: Making Connections
Making Connections You can connect your camera to: Computer or a printer. Connecting the Camera to a PC You can transfer images and video files to your PC. 1. Connect one end of the USB cable to an available USB port on your computer 2. -
Page 86: Connecting The Camera To A Printer
Connecting the Camera to a Printer You can print your images directly using a PictBridge compatible printer. 1. Turn on your Printer. Check that the printer is turned on, there is paper in the printer, and there are no printer error messages. 2. - Page 87 To set Printer Settings 1. Use the key to specify a print option. 2. Modify paper size, quality, date and info by keys. Available setting: Paper size: Default / A4 / 4"x6" Quality: Default / Fine / Normal Capture Date: Yes / No ...
-
Page 88: Appendix
Appendix About Folder and File Names Your camera automatically creates specific directory of folder in the internal memory cards to organize captured image and video files. File Naming File names begin with "DSCI" and followed by a 4-digit number that increases in sequence. - Page 89 Problem Cause and/or Action LCD monitor The memory card is protected. Remove the card and slide displays "Card the write-protect switch to its unlock position. locked". Memory card may be format is not supported by the LCD monitor camera. displays "Card error".
-
Page 90: Specifications
Specifications Sensor 20M Pixels Focal Length: 24 mm ~ 288 mm Lens 12x optical zoom, 8x digital zoom LCD monitor 2.7" Color LCD Normal: Wide: 40 cm ~ infinity Tele: 150 cm ~ infinity Macro: Focusing Range Wide: 5 cm ~ 100 cm Tele: 150 cm ~ 200 cm Super Macro: Wide: 3 cm... - Page 91 Intelligent Scene, Program, Portrait, Landscape, Sunset, Backlight, Kids, Night Scene, Fireworks, Snow, Sports, Scene Mode Party, Candlelight, Night Portrait, Soft Skin, Flowing Water, Food, Love Portrait, Self Portrait, D-Lighting, Time Lapse, Panorama, Art Effect, Burst, Speedy Burst, GIF Capture Auto, ISO 100, ISO 200, ISO 400, ISO 800, ISO 1600, ISO ISO Equivalent 3200, ISO 6400 Maximum ISO...
- Page 92 Temperature Operating 0% - 90% Humidity Microphone Built-in Speaker Built-in Dimensions 100.9 x 61.1 x 26.7 mm (L / H / D) Weight 127 g (no battery)
Need help?
Do you have a question about the MN12Z and is the answer not in the manual?
Questions and answers