
Related Manuals for Minolta MN4K30NV


Summary of Contents for Minolta MN4K30NV
-
Page 2: Federal Communications Commission Interference Statement
1. About Your Camcorder About this Manual Congratulations on purchasing the Minolta MN4K30NV Camcorder! The contents of this manual are subject to change without notice. Note that the example screens and product illustrations shown in this User’s Guide may differ somewhat from the screens and configuration of the actual camcorder. - Page 3 1. About Your Camcorder conditions for satisfying RF exposure compliance. FCC: SAR standard Value: 1.6 W/Kg, Maximal Measure: 0.4 W/kg CE Mark Warning This is a Class B product, in a domestic environment, this product may cause radio interference, in which case the user may be required to take adequate measures.
- Page 4 1. About Your Camcorder batteries, which might cause poisoning. • Once the battery's color changes or its shape is twisted, please stop using it. USB adapter Information • Do not expose the adapter to high temperatures or moisture places. Otherwise, it may cause fire or electric shock.
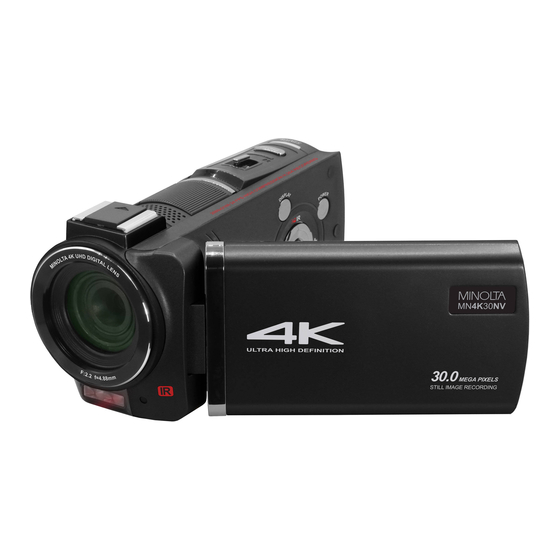
- Page 5 1. About Your Camcorder 1.1 Camcorder Interface 1. Touch LCD Screen 8. Power Button 15. Down/Delete Button 2. Hot Shoe Mount 9. LED Mode Indicator 16. Right/Exposure Button 3. Speaker 10. Mode Button 17. Left/Exposure Button 4. Display Button 11. Record Button 18.
- Page 6 1. About Your Camcorder 1. Tripod Mount 2. Battery Compartment 3. Memory Card Slot...
- Page 7 1. About Your Camcorder 1.2 Button Function Description Function Description Press and hold for 2 seconds to power on, tap Power once to power off. Tap to cycle between Video, Photo, and Mode Settings modes. Tap to access and exit all menus and Menu submenus.
- Page 8 1. About Your Camcorder In Video, Photo and Playback: Press to delete the last image or video. Down | Delete In Menus: Press to select the desired submenu. In Photo and Video: Press to increase the exposure. In Video Playback: Press to go to the next video.
- Page 9 2. First Use 2. First Use 2.1 Inserting the Memory Card Insert the included SD memory card to record and store your videos and photos. When the battery is low, media stored on the memory card will not be erased. Please insert the SD memory card by following the steps below: 1.
-
Page 10: First Use
2. First Use inserted one way. Push the battery in until it locks into place. Open the battery door by sliding the battery door towards the rear of the camcorder, the door will then flip open. 1. Insert the battery. Ensure that the metal contacts are inserted first. Push the down until you hear an audible click. - Page 11 2. First Use screen and it will automatically shut down within a few seconds to prevent memory corruption or loss. 2.5 Switching Modes Press the MODE button to view the different mode options. Press the ZOOM, RIGHT or LEFT button to cycle between Video, Photo, and Setup Modes and press the PHOTO or OK button to enter that mode.
- Page 12 2. First Use 2.8 Video Mode Press the MODE button to switch to Video Mode. The meaning of each icon within Video Mode is explained in the table below: 1. Video Mode 9. Zoom Level 2. Video Size (Resolution) 10. Menu 3.
- Page 13 2. First Use 2.9 Photo Mode Press the MODE button to switch to Photo Mode. The meaning of each icon within Photo Mode is explained in the table below: 1. Photo Mode 11. Zoom Level 2. Photo Size (Resolution) 12. Menu 3.
- Page 14 2. First Use 2.10 Using the Zoom Function This camcorder has a digital zoom function. To operate the zoom function, slide the ZOOM button to the right to zoom in closer to the subject, and to the left to zoom away from the subject. 2.11 Using the IR Night Vision Mode This camcorder has built-in infrared (IR) LEDs for night vision recording - giving you the ability to capture photos and videos in a dark environment.
- Page 15 2. First Use 2.13 Remote Control Zoom In Video Note: Before using the remote, remove Pause the battery tab on the Zoom Out Photo back. LED Light Delete Mode When using the Volume Up remote, it should be Left Right pointed towards the remote control receiver Play/Stop...
- Page 16 3. Using Your Camcorder 3. Using the Camcorder 3.1 Video Recording Power the camcorder on and it will be ready to record clips right away. You may press the MODE button to switch to another mode. A camcorder icon will appear in the top left corner of the screen when you are in Video mode. 1.
- Page 17 3. Using Your Camcorder 3.1.3 Settings – Color Effect This function sets the color filter effect of a video. 1. In Video Mode press the MENU button. 2. Use the ZOOM, LEFT or RIGHT buttons to select Settings and press the PHOTO or OK button to enter the menu.
- Page 18 3. Using Your Camcorder Multi setting measures the light at several points on the screen. 1. In Video Mode press the MENU button. 2. Use the ZOOM, LEFT or RIGHT buttons to select Settings and press the PHOTO or OK button to enter the menu. 3.
- Page 19 3. Using Your Camcorder 3.2 Photo Shooting Power the camcorder on and press the MODE button or press the icon in the top left corner of the touch screen to switch to Photo mode. 1. Line up your shot by looking at the LCD screen to see what is in the shot. 2.
- Page 20 3. Using Your Camcorder 3.2.3 Settings – Color Effect This function sets the color filter effect of a video. 1. In Photo Mode press the MENU button. 2. Use the ZOOM, LEFT or RIGHT buttons to select Settings and press the PHOTO or OK button to enter the menu.
- Page 21 3. Using Your Camcorder 3.2.6 Settings – Sharpness This function adjusts the visible detail of a photograph. 1. In Photo Mode press the MENU button. 2. Use the ZOOM, LEFT or RIGHT buttons to select Settings and press the PHOTO or OK button to enter the menu. 3.
- Page 22 3. Using Your Camcorder 2. Use the ZOOM, LEFT or RIGHT buttons to select Function and press the PHOTO or OK button to enter the menu. 3. Select ‘Anti-Shake’ using the ZOOM, UP or DOWN buttons and press the PHOTO or OK button to enter the ‘Anti-Shake’ submenu. 4.
- Page 23 3. Using Your Camcorder 3. Select ‘Date Stamp’ using the ZOOM, UP or DOWN buttons and press the PHOTO or OK button to enter the ‘Date Stamp’ submenu. 4. Press the ZOOM, LEFT or RIGHT button to navigate the menu, and press the PHOTO or OK button to confirm your selected exposure mode (Off, On).
- Page 24 3. Using Your Camcorder 3.3 Playback Mode Videos and photos captured on your camcorder can be easily played back. 3.3.1 Video Playback Follow the steps below to enter the Video Playback mode. 1. In Video Mode press the MENU button. 2.
- Page 25 3. Using Your Camcorder 1. In Video Playback Mode press the MENU button, and use the ZOOM, UP or DOWN buttons to select ‘Protect’. Press the PHOTO or OK button to enter the ‘Protect’ submenu. 2. Press the ZOOM, LEFT or RIGHT button to navigate the menu, and press the PHOTO or OK button for your selected setting (Lock Current, Unlock Current, Lock All, Unlock All).
- Page 26 3. Using Your Camcorder 3.3.2.2 Protect This function protects the photo file. The file will be protected from being deleted accidentally. Files must be unprotected to be deleted. 1. In Photo Playback Mode press the MENU button, and use the ZOOM, UP or DOWN buttons to select ‘Protect’.
- Page 27 3. Using Your Camcorder 3.4 Setup Mode Basic settings can be changed in the Setup menu. These include date & time, language and sound options. Power the camcorder on and press the MODE button. Use the ZOOM or LEFT and RIGHT buttons to select Setup. Press the PHOTO or OK buttons to enter Setup Mode.
- Page 28 3. Using Your Camcorder 3.4.4 Frequency This function sets the frequency of the camcorder from 50Hz to 60Hz. Please check the frequency of your location and set accordingly. 1. In Setup Mode use the ZOOM, UP or DOWN buttons to select ‘Frequency’ and press the PHOTO or OK button to enter the ‘Frequency’...
- Page 29 3. Using Your Camcorder 2. Press the ZOOM, LEFT or RIGHT button to select your desired option, then press the PHOTO or OK button to confirm your selection (Yes, No). 3. Press the MENU button to exit the submenu without making a selection. Alternatively, your camcorder’s menus can be navigated via the touch screen.
- Page 30 4. Appendix 4.1 Technical Specifications Model Number Minolta MN4K30NV Fixed Focus • f=4.88mm • F/2.2 • 37mm Front Lens Threading for Lens Accessory Attachments Zoom 16X Digital Zoom Image Sensor 13MP CMOS Sensor Electronic • Anti-Shake Image Stabilization Shutter JPEG: 30MP • 24MP • 16MP • 10MP • 5MP •...
- Page 31 Minolta is a registered trademark of JMM Lee Properties, LLC and is used in the United States by Elite Brands Inc. under license. 40 Wall Street, 61st Floor, New York, NY 10005 USA • Tel: 800-441-1100 www.minoltadigital.com • www.elitebrands.com Copyright © 2022 Elite Brands Inc.
Need help?
Do you have a question about the MN4K30NV and is the answer not in the manual?
Questions and answers