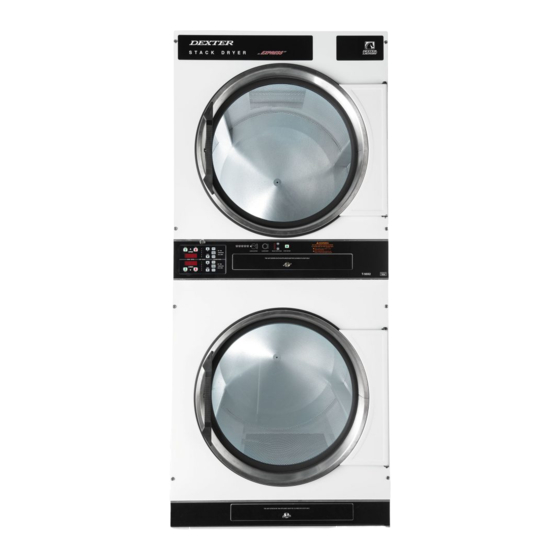
Dexter Laundry T-50X2 Operators Manual Installation & Operation Instructions
Commercial dryer reversing vended c-series control, natural gas/lp heated
Hide thumbs
Also See for T-50X2:
- Service and parts data (88 pages) ,
- Troubleshooting, fault codes, and schematics (8 pages) ,
- Operators manual installation & operation instructions (71 pages)
Table of Contents
Advertisement
Quick Links
COMMERCIAL DRYER
MODEL T-50X2 REVERSING VENDED
C-SERIES CONTROL, NATURAL GAS/LP HEATED
The dryer must not be stored or installed where it will be exposed to water and/or weather.
WARNING: For your safety the
information in this manual must be
followed to minimize the risk of fire
or explosion or to prevent property
damage, personal injury or loss of
life.
Do not store or use gasoline or other flammable
vapors and liquids in the vicinity of this or any
other appliance.
– WHAT TO DO IF YOU SMELL GAS
• Do not try to light any appliance.
• Do not touch any electrical switch; do
not use any phone in your building.
• Clear the room, building or area of all
occupants.
• Immediately call your gas supplier from
a neighbor's phone. Follow the gas
supplier's instructions.
• If you cannot reach your gas supplier,
call the fire department.
– Installation and service must be performed by
a qualified installer, service agency or the
gas supplier.
Post the following "For Your Safety" caution in a
prominent location:
FOR YOUR SAFETY
Do not store or use gasoline or other flammable
vapors or liquids in the vicinity of this or any other
appliance.
It is important that you read this Manual and retain it
for future reference. For service or replacement parts,
contact
the
distributor
manufacturer.
8514-271-001 REV B
page 1
OPERATOR'S MANUAL
INSTALLATION & OPERATION INSTRUCTIONS
in
your
area
or
Dexter Laundry, Inc.
2211 W. Grimes
Fairfield, Iowa 52556
AVERTISSEMENT.
de bien suivre les instructions
données dans cette notice pour
réduire au minimum le risque
d'incendie ou d'explosion ou pour
éviter tout dommage matérial,
toute blessure ou la mort.
Ne pas entreposer ni utiliser d'essence ni d'autres
vapeurs ou liquides inflammables dans le voisinage
de cet appareil ou de tout autre appareil.
– QUE FAIRE SI VOUS SENTEZ UNE ODEUR DE
GAZ:
• Ne pas tenter d'allumer d'appareil.
• Ne touchez à aucun interrupteur. Ne pas
vous servir des téléphones se trouvant
dans le bâtiment où vous vous trouvez.
• Évacuez la pièce, le bâtiment ou la zone.
• Appelez immédiatement votre
fournisseour de gaz depuis un voisin.
Suivez les instructions du fournisseur.
• Si vous ne pouvez rejoindre le fournisseur
de gaz, appelez le service des incendies.
– L'installation et l'entretien doivent être assurés par
un installateur ou un service d'entretien qualifié
ou
POUR VOTRE SÉCURITÉ
Ne pas enteposer ni utiliser d'essence ni d'autres
vapeurs ou liquides inflammables dans le voisinage
de cet appareil ou de tout autre appareil.
You, the purchaser, must post in a prominent loca-
tion instructions to be followed in the event the user
smells gas. Consult your local gas supplier for
the
procedure to be followed if the odor of gas is
present.
Assurez-vouz
Advertisement
Table of Contents

Related Manuals for Dexter Laundry T-50X2


Summary of Contents for Dexter Laundry T-50X2
- Page 1 COMMERCIAL DRYER MODEL T-50X2 REVERSING VENDED C-SERIES CONTROL, NATURAL GAS/LP HEATED OPERATOR’S MANUAL INSTALLATION & OPERATION INSTRUCTIONS The dryer must not be stored or installed where it will be exposed to water and/or weather. WARNING: For your safety the AVERTISSEMENT.
-
Page 2: Table Of Contents
TABLE OF CONTENTS Page No. Warnings about use and operation Dryer Specifications Dryer Dimensions 4 - 6 Installation and Operating Instructions Dryer Shutdown Description of Dryer Control Operating Instructions Programming the Dryer Control Reversing Options Servicing and Troubleshooting Preventative Maintenance Instructions WARNINGS ABOUT USE AND OPERATION DO NOT MODIFY THIS APPLIANCE. -
Page 3: Dryer Specifications
SPECIFICATIONS 50 lb. Commercial Stack Dryer: T-50x2 Reversing Tumbler DC50X2NC-11EC2R (60 Hz), DC50X2NC-49AC2R (50 Hz) Cabinet Height 79 1/4” 2012 mm. (Assumes minimum leveling leg adjustment) Cabinet Width 34 1/2” 876 mm. Cabinet Depth 54 3/4” 1391 mm. Floor to Bottom of Door- Bottom Dryer 7”... -
Page 4: Dryer Dimensions
T-50X2 DRYER DIMENSIONS- FRONT VIEW 8514-271-001 REV B page 4... - Page 5 T-50X2 DRYER DIMENSIONS - SIDE VIEW 8514-271-001 REV B page 5...
- Page 6 T-50X2 DRYER DIMENSIONS - REAR VIEW 8 INCH [203] VENT 8514-271-001 REV B page 6...
-
Page 7: Installation And Operating Instructions
INSTALLATION AND OPERATING INSTRUCTIONS UNCRATING AND PLACING DRYER Tools Required: 3/4" (19 mm) hex socket & ratchet driver, wood block 4" (100 mm) or 5" (125 mm) thick, a knife and a groove joint pliers, which will open to 1 3/8" (35 mm). 1. - Page 8 VERTICAL CLEARANCE DIMENSIONS 3. MAKE-UP AIR: Adequate make-up air must be supplied to replace air exhausted by dryers on all types of installations. Refer to specifications for the minimum amount of make-up air opening to outside for each dryer. This is a net requirement of effective area.
- Page 9 components are helped to have a longer useful life when they are supplied with the clean stable electrical power they like. We are including the following names and phone numbers of a few suppliers of these devices for those who don’t currently have a source.
- Page 10 limits. For the most efficient operation, it is recommended that no more than 14 ft. (4.25 m) of straight 8 in. diameter pipe with two right angle elbows be used for each cylinder. Maintain a minimum of 1” (25mm) clearance between duct and combustible material. If the exhaust pipe passes through a wall, a metal sleeve of slightly larger diameter should be set in the wall and the exhaust pipe passed through this sleeve.
-
Page 11: Dryer Shutdown
7. DRYER IGNITION (SOLID STATE IGNITION): The solid state ignition system lights the main burner gas by spark. The gas is ignited and burns only when the gas-valve relay (in the electronic controller) calls for heat. The procedure for first-time starting of a dryer is as follows. A. -
Page 12: Description Of Dryer Control
DESCRIPTION OF DRYER CONTROL Both dryers are operated by the controller at the left midpoint of the dryer. The controller is two-in-one with the upper display and lights dedicated to the upper dryer and lower display and lights dedicated to the lower dryer. When money has been deposited, the control will prompt the user to choose a drying temperature and press the “start”... -
Page 13: Programming The Dryer Control
PROGRAMMING THE DRYER CONTROL The dryer control can be programmed to prompt the user for alternate vend prices, change dryer cycle times, temperatures and many other options. This can be accomplished in two ways: 1. Manual programming utilizing the “Start”, “High”, “Medium” and “Low” buttons for the bottom dryer. 2. - Page 14 Button Name Alternate Function in Programming Mode Becomes the action to accept the displayed option or the “Enter” Start Becomes the action to move UP through displayed options (Press High & hold for accelerated scrolling) Becomes the action to move DOWN through displayed options Medium (Press &...
- Page 15 Error Code Historical Log: The last five occurring error codes will be stored in the control with a time and date stamp. The purpose of this option is only to observe the history of these code occurrences (no changes can be made). The time is based off the Real Time Clock, but potentially shifted by the user’s manual programming changes (Shift Hours option) and/or network time override.
- Page 16 The figure below shows the sub menu options for Prices: 8514-271-001 REV B page 16...
- Page 17 Cycles Option: This option allows the user to set temperature and cooldown information for the drying cycle. It also allows the user to return the values to factory defaults. 1. “TEMP SETTINGS” allows the user to make adjustments, within a designated range, to the cycling temperature for each of the “Low”, “Medium”...
- Page 18 The figure below shows the sub menu options for Cycles: 8514-271-001 REV B page 18...
- Page 19 Temperature Pricing Option: This option allows the user to require additional vend amounts be added based on the drying temperature chosen by the customer. This pricing adder is effective only for the Base Vend Price (it does not affect the Extend Dry Price). It allows a pricing adder separate for “Medium” and “Hot” temperature settings. Example- A store owner has programmed the control for the following: Vend Price $1.00...
- Page 20 Settings Options: The Settings options allow for the user to make various programming changes to change how the control operation affects the customer. See below for detailed information on each next level option. 1. “Decimal Point”: If the user programs the Decimal Point to “OFF”, control display will not show a decimal point on any vend price values.
- Page 21 Once the hours and minute are both chosen, the “Enter” button must be held down for 3 seconds to confirm that RTC is meant to be reset to the complete entry. 10. “Date”: Similar to “Time”, if a problem occurs and the RTC date is not accurate, it can be reset to the current date using this option.
- Page 22 The figure below shows the sub menu options for Settings: 8514-271-001 REV B page 22...
- Page 23 Usage Menu: The Usage menu allows for the user to track data about machine usage. See below for detailed information on each sub menu option. 1. “Coin Audit”: The coin audit field shows the accumulation of coin pulses that were sent to the control over each of the left and right coin inputs.
- Page 24 Control Menu: The Control menu allows for the user to observe important technical information for the control. No changes can be made at this menu. See below for detailed information on each sub menu. 1. “Serial Number”: This is the control serial number. 2.
-
Page 25: Reversing Options
REVERSING OPTIONS The dryer can be set to reverse at different intervals dependent on owner’s preference. The style of operation is determined by the location of the BROWN jumper wire located in the rear control box, on the frequency drive. (see image for jumper location) Dryer Jumper Locations STYLE... -
Page 26: Servicing And Troubleshooting
SERVICING AND TROUBLESHOOTING CAUTION: Label all wires prior to disconnection when servicing controls. Wiring errors can cause improper and dangerous operation. Verify proper operation after servicing. ATTENTION. Lors des opérations d'entretien des commandes, étiqueter tous les fils avant de les déconnecter. Toute erreur de câblage peut être une source de danger et de panne. -
Page 27: Preventative Maintenance Instructions
For service and parts information, contact your local Dexter agent. To find your local Dexter agent, use the Distributor Locator at the website shown below. If a Dexter agent is not available, contact Dexter Laundry, Inc. directly as listed below:...
Need help?
Do you have a question about the T-50X2 and is the answer not in the manual?
Questions and answers