Table of Contents
Advertisement
Quick Links
Advertisement
Table of Contents
Troubleshooting

Subscribe to Our Youtube Channel
Related Manuals for Dexter Laundry DDBD T-50-2 Series


Summary of Contents for Dexter Laundry DDBD T-50-2 Series
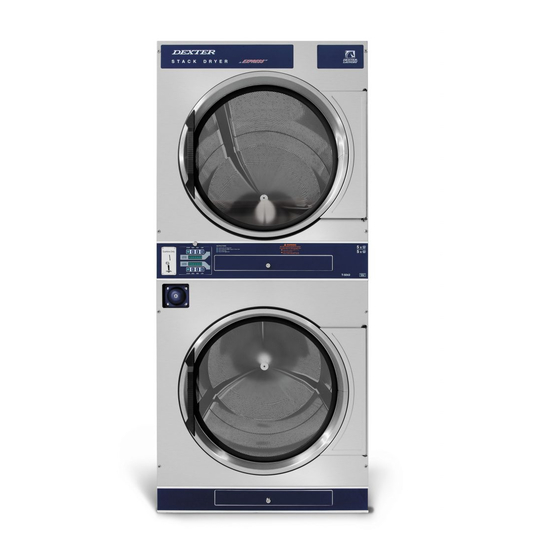
- Page 2 DDBD T-50X2 Models 50 Pound Stacked Commercial Dryer Service and Parts Manual DDBD 50KC_ - 65, DDBD 50KC_ - 59, DDBD 50KC_ - 39 Starting serial number 213052 8533-068-001 9/21...
- Page 3 Equipment Safety Warnings Symbols and Terminology Used in this Equipment Indicates an imminently hazardous situation, which if not avoided, will result in death or serious injury. Indicates a potentially hazardous situation, which if not avoided could result in death or serious injury. Indicates a potentially hazardous situation which, if not avoided, may result in minor or moderate injury.
- Page 4 Equipment Safety Warnings Symbols and Terminology Used in this Equipment Warning! Do not operate equipment if door glass is damaged in any way. Warning! Keep clear of rotating parts. Prohibited! Do not enter this equipment or space. Prohibited! Do not step or stand on this equipment. Prohibited! Do not operate without all guards and covers in place.
- Page 5 Indicates an imminently hazardous situation, which if not avoided, will result in death or seri- ous injury. Indicates a potentially hazardous situation, which if not avoided could result in death or serious injury. Indicates a potentially hazardous situation which, if not avoided, may result in minor or moderate injury.
- Page 6 WARNING • All Dryers must be installed in accordance to all applicable electrical, plumbing and all other local codes. • These installation and operation instructions are for use by qualified personnel only. To avoid injury and electrical shock, do not perform any servicing other than that contained in the installation and op- eration instructions, unless qualified.
- Page 7 WARNING Children should be supervised to ensure they do not operate or play in or around equipment. Keep all panels in place to protect against electrical shock and injury and add rigidity to washer. This appliance is not intended for use by persons (including children) with reduced physical, sensory or mental capabilities, or lack of experience and knowledge, unless they have been given supervision or instruction concerning use of the appliance by a...
- Page 8 Warning! Do not operate equipment if door glass is damaged in any way. Warning! Keep clear of rotating parts. Prohibited! Do not enter this equipment or space. Prohibited! Do not step or stand on this equip- ment. Prohibited! Do not operate without all guards and covers in place.
- Page 9 Prohibited! Do not attempt to open, touch, or pro- ceed before referring to the manual or unless quali- fied. Mandatory! Read all supporting documentation be- fore operating or maintaining equipment. Mandatory! Disconnect power before servicing equipment. Mandatory! Lock out and tag out before servicing this equipment.
- Page 10 Notes Part # 8533-068-001 9/21...
-
Page 11: Table Of Contents
Dexter Safety Guidelines Table of Contents Section 1: WARNING Specifications ..........6 Section 2: For your safety, the information in this manual Installation and Operation must be followed to minimize the risk of fire or explosion or to prevent property damage, personal injury or loss of life. - Page 12 Section 4: Section 6: Service Procedures Parts Data Clothes Door Removal ......... 24 Clothes Door Latch Adjustment ....24 Door Switch Removal and Installation ... 24 Cabinet Group ........40-43 Installation of Clothes Door Window and Gasket . 24 Door Switch Group ........44 High Limit Thermostat Locations and Functions ..
- Page 13 Notes Part # 8533-068-001 9/21...
-
Page 14: Specifications
Section 1: Specifications Part # 8533-068-001 9/21... - Page 15 Specifications 50 lb. Comm.ercial Stack Dryer Model: T50x2 - DDBD50 Cabinet Height 79.625” 2023 mm. Cabinet Width 34.5” 877 mm. Overall Depth 53” 1346 mm. Floor to Door Bottom 7.27” 185 mm. Door Opening 25.69” 653 mm. Dry Wt. Capacity 50 x 2 lbs.
- Page 16 Section 2: Installation & Operation Part # 8533-068-001 9/21...
-
Page 17: Installation And Operation
Installation and Operation All commercial dryer installations must conform with local applicable local codes or in the absence of lo- cal codes, with the National Fuel Gas Code ANSI Z223.1A-1988. Canadian installations must comply with current standard CAN/CGA-B149(.1 or .2) Installation Code for Gas Burning Appliances or Equipment, and local codes if applicable. -
Page 18: Electrical Requirements
NOTE: The following considerations must be observed for gas dryer instal- lations where dry cleaners are installed. The sources of all makeup air and room ventilation air movement to all dryers must be located away from any dry cleaners. This is necessary so that solvent vapors will not be drawn into the dryer inlet ducts. - Page 19 From an operational standpoint, incorrect or inadequate exhausting can cause cycling of the high limit thermostat which shuts off the main burners and results in inefficient drying. Individual exhausting of the dryer is recomm.ended. All heat, moisture, and lint should be exhausted outside by attaching a pipe of the proper diameter to the dryer adapter collars and extending it out through an outside wall.
- Page 20 TRANSIENT VOLTAGE SURGE SUPPRESSORS Like most electrical equipment your new machine can be damaged or have its life shortened by voltage surges due to lightning strikes which are not covered by factory warranty. Local power distribution problems also can be detrimental to the life of electrical components. We recommend the installation of transient voltage surge suppressors for your new equipment.
- Page 21 Dexter Commercial 50 Pound Stacked Dryer Mounting Dimensions Part # 8533-068-001 9/21...
-
Page 22: Description Of Control
Description Of Control The single electronic control unit controls all coin counting, timing, temperature control and displaying of information for both tumblers. Each digital display shows vend price when its particular tumbler is waiting for coins to be inserted. When 0102 304357892 7 a tumbler is in use, the display shows the number of minutes remaining to be used on that tumbler. - Page 23 PROGRAMMED DATA DEFAULT SETTINGS Adjustable parameters are vend price, temperatures, and cool-down times. Hours run and money count information can be displayed and these registers are resettable to zero. There are eighteen programming steps. These eighteen steps are: (all temperatures are degrees Fahrenheit).
-
Page 24: Operating Instructions
DDBD-50 Dryer Operation Description of Electronic Control The single electronic control unit controls the coin count, dry time, temperature and information display. The digital display shows vend price when waiting for coins to be inserted and time purchased after coins have been deposited. - Page 25 Remove jumper to activate Last Temper- ature Used feature Remove jumper to activate Anti- Wrinkle feature Battery Program Button Part # 8533-068-001 9/21...
-
Page 26: Programm.ed Data
Changing Programmed Data Entering Program Mode The controller is put into the programm.ing mode by opening both dryer doors and pushing the program switch (shown in a previous picture) on the back of the controller circuit board. The switch is accessed by unlocking the controller and sliding it out just enough to reach the switch. - Page 27 Notes Part # 8533-068-001 9/21...
-
Page 28: Wiring Schematics
Section 3: Wiring Schematics Coin Dryer Part # 8533-068-001 9/21... -
Page 29: Coins Added-Motor Starting And Running
120VAC 60 HZ Wiring Schematic Dryer Idle - No Coins Added : Top Dryer Used For This Example 120-208-240 VAC 60 HZ (Neutral required must be MID POINT OF PHASE) is supplied to the Main Power Terminal Block and comes out on BLK / RED and BLK / BLU wire to the Motor Control Relay (R1 & R2). 120 VAC is supplied to Main Computer Board and both Door Switches on the black wire from L1 terminal off the Main Power Terminal Block. -
Page 30: Over Temperature Thermostat
Over Temperature Thermostat is a safety backup for the entire Heat Circuit and located in the recirculation chamber area on the side of the burner housing. If the dryer over heats this Over Temperature Thermostat it opens the line to turn off the heat but leaves the Computer Board lighted and the drive motor powered and turning so the basket will cool down. -
Page 31: Wiring Diagram For Ddad Dryer
Wiring Diagram for DDBD Dryer Part # 8533-068-001 9/21... -
Page 32: Wiring Schematic For Ddad Dryer
Wiring Schematic for DDBD Dryer Part # 8533-068-001 9/21... - Page 33 Notes Part # 8533-068-001 9/21...
- Page 34 Section 4: Service Procedures Coin Part # 8533-068-001 9/21...
-
Page 35: Service Procedures
Service Procedures Clothes Door Removal 1. The clothes door may be removed from the hinge bracket by unscrewing and removing the allen- head pivot screw located at the door upper hinge point. 2. Next lean the door out of the top of the hinge bracket and lift the door from the bottom hinge pin. -
Page 36: Pressure Regulator Adjustment
B. Manual Reset Over temperature Safety Thermostats- The second hi-limit thermostat is located on the right side of each burner housing as you view from the back of the machine. It is just above the gas valve and covered by a guard with a small access hole. 1. -
Page 37: Electronic Control Test Cycle
cated. 1. When either dryer door is closed, the appropriate door light on the computer should be illuminated indicating that the door is closed. 2. When either dryer is running, the appropriate motor light on the computer should be illuminated indicating that the computer is calling for the motor to operate. -
Page 38: Upper Front Panel Removal
Upper Front Panel Removal The loading door does not have to be removed to remove the front panels on this model. 1. Remove the left two screws with finish washers. 2. Remove the right two screws with finish washers, at this time the front panel is loose but connected by the harness to the door switch. -
Page 39: Air Flow Switch Operation And Adjustment
3. Remove Tumbler belt and Idler belts, and remove Idler tension chain and spring. 4. Lift idler pulley straight up and block up or tie up in the extended position. 5. Remove the seven 7/16 nuts holding the blower motor assembly. Rocking the assembly to the left should allow you to remove the assembly. -
Page 40: Ignition System Function And Sequence
NOTE: Proper grounding of the ignition system (yellow wires) is very critical for proper ignition sequence. Ignition System-Function & Sequence During normal dryer operation, the following occurs: 1. The dryer electronic control calls for heat. 2. If the drive motor is running, the motor safety circuit provides power to the electronic control. If the control senses that the heat should be on, a circuit is closed allowing power through the high limit thermostat and air flow switch to the ignition transformer. -
Page 41: Main Burner Orifice Removal
Main Burner Orifice Removal 1. Remove manifold and gas valve assembly as above. 2. Using an open end wrench, remove orifices from manifold. Main Burner Removal 1. Remove the 4 screws securing the cover for the burner housing and the one screw mounting the high limit cover. -
Page 42: Troubleshooting
Section 5: Troubleshooting Part # 8533-068-001 9/21... - Page 43 Coin Dryer Quick Troubleshooting Guide Dryer Symptom Probable Cause - Solution Basket Does Not Turn 1, 2, 4, 10, 21 No Flame On Burner 2, 3, 5, 6, 7, 8, 9,10,12,14,18,19,20,22 Flame on BUT Takes To Long To Dry 9, 10, 11, 13, 22 Display Fades Out On Display Sudden Loss Of Customer Time, or FREE Displays 9, 17, 10...
-
Page 44: Electronic Control Diagnostic Lights
Trouble Shooting Electronic Control Diagnostic Lights The electronic control has 6 diagnostic lights to aid in service of the dryer. Each pocket has indicator lights for the motor circuit, door switch circuit, and the heat circuit. When the electronic control is carefully unlocked and moved forward these lights are visible on the circuit board. -
Page 45: Trouble Shooting Fault Codes
Trouble Shooting Fault Codes Shorted sensor or shorted sensor wire harness Open sensor or sensor wire harness disconnected Possible grounding problem. Try powering down and repowering and then push programming button to start dryer. Try resetting with Palm Pilot (extra utilities file). If no success. Try removing battery and reinstall battery. - Page 46 Probable Symptom Suggested Remedy Cause Tumbler turns Glass fuse Check small glass control fuse in back of dryer. Replace but no spark at if failed. burner Temperature The temperature sensor should have between 30,000 Sensor ohms and 60,000 ohms resistance at room temperature if okay.
- Page 47 Symptom Probable Cause Suggested Remedy Tumbler turns, Gas supply Make sure gas supply is working. ignition sparks, no flame Gas pressure Make manometer check of gas pressure. Adjust if necessary. Spark Electrode Sensor Check for damage to electrode or mounting. Replace if necessary.
- Page 48 Probable Symptom Suggested Remedy Cause Erratic display Initial Start-up If erratic on initial start-up, leave power on for approximately one hour and check machine operation again. Grounding Machine must be grounded by separate conductor back to neutral bar in breaker box. Program Check program and make corrections if necessary.
- Page 49 Notes Part # 8533-068-001 9/21...
- Page 50 Notes Part # 8533-068-001 9/21...
-
Page 51: Parts Data
Section 6: Parts Data 60Hz DDBD50KC_- Part # 8533-068-001 9/21... - Page 52 Kits, Assemblies, & Common Parts DDBD50KC_- Description Part Number LINER-BAFFLE,RIGHT(DDBD50 & newer),PTD 9354-013-002 LINER-BAFFLE,LEFT(DDBD50 & newer),PTD 9354-014-002 Kit - 8650-012-004 Lock with spacer 9732-344-002 Kit - A to C series Conversion, Black, 120v 9732-307-002 Kit - A to C series Conversion, Blue, 120v 9732-307-001 LP to NG Conversion Kit for 9857-134-001 &...
- Page 53 Part # 8533-068-001 9/21...
-
Page 54: Cabinet Group
Cabinet Group Part Number Description Quantity 9960-285-003 Door Assy., Loading Complete-Alm ........2 9960-285-002 Door Assy., Loading Complete-Wht ........2 9960-285-001 Door Assy., Loading Complete-SS ........2 9960-285-007 Door Assy., Loading Complete-Chrome/BLK/SS ....2 9960-284-002 Door Assy., Loading-SS(ring only) ........2 9960-284-004 Door Assy., Loading-Chrome(ring only) ...... - Page 55 Cabinet Group Continued Part Number Description Quantity 9994-032-001 Escutcheon, Upper ............1 9435-022-001 Trim, Overlay-Upper Blue ..........1 9435-030-001 Trim, Overlay-Upper Black ..........1 9994-033-001 Escutcheon, Lower ............1 9435-023-001 Trim, Overlay-Lower Blue ..........1 9435-031-001 Trim, Overlay-Lower Black ..........1 9545-020-009 Screw ................20 9412-154-001...
- Page 56 Part # 8533-068-001 9/21...
-
Page 57: Door Switch Group
Door Switch Group Part Number Description Quantity 9539-487-001 Door Switches ..............2 Hinge Plate Cover (after Serial # 220625 ) 9074-340-002 Cover-Hinge, Black ..............2 Note: Before Serial # 220625 Holes can be drilled in hinge plate to install (#18 Drill bit). 8636-018-001 Screw-TRHDCR, 10B x 3/8, Black............4 Part # 8533-068-001 9/21... -
Page 58: Bearing Housing Group
Bearing Housing Group Part Number Description Quantity 9241-189-002 Housing, Bearing ...............2 9036-159-003 Bearing, Ball Rear..............2 9538-183-001 Spacer, Bearing ................ 2 9036-159-001 Bearing, Ball Front ..............2 9545-017-017 Bolt, 1/2 x 3/4 ................8 8640-417-002 Nut, 1/2 ..................8 9803-201-001 Bearing Housing Complete Ass’y (includes bearings,spacer) ..2 9545-017-018 Screw 1/2 x 1 1/2 ..............4 Part # 8533-068-001 9/21... -
Page 59: Burner Housing Group
Burner Housing Group Part Number Description Quantity 9803-207-001 Housing Assembly, Burner ..........2 9452-730-001 Service Burner Plate Front… ..........2 9452-729-001 Service Plate baffle Recirculation Chamber Clean Out ..2 9545-008-006 Screws ................8 9545-008-001 Screw ................16 9003-220-001 Angle, Burner Support ............. 2 9545-008-006 Screw ................ - Page 60 Burner Housing Group Photos Part # 8533-068-001 9/21...
-
Page 61: Rear View
Rear View Part Number Description Quantity 9627-861-001 Wire Harness Overtemperature Switch/Air Switch ....2 9801-098-001 Switch Assy, Air Flow ............2 9539-461-009 Switch, Air Flow ............... 2 9029-200-001 Bracket, Switch- Air Flow ..........2 9008-007-001 Actuator, Switch ............... 2 9451-169-002 Pin, Cotter .............. - Page 62 Rear View Photos 34, 35, 36 Motor Part # 8533-068-001 9/21...
-
Page 63: Rear Panel & Cover Group
Rear Panel & Cover Group Part Number Description Quantity 9208-090-001 Rear Guard Side Panel 1 ........... 2 9545-008-024 Screws 10 AB x 3/8 ............30 8502-649-001 Label - Connection Electrical ..........1 9208-089-001 Rear Guard Back Panel ............. 2 8502-600-001 Label Warning & Notice ............ 1 8502-645-001 Label - Instructions ............ - Page 64 Tumbler Group Part Number Description Quantity 9848-131-001 Tumbler Assembly Galvanized w/spider ......2 9568-013-001 Spider Assembly ............. 2 9497-226-002 Rod, Tumbler ..............6 8640-417-005 Nut, 1/2 - 13 ..............6 8641-590-002 Washer, Special .............. 6 9552-013-003 Shim ................AR 9848-130-002 Tumbler Assembly Stainless Steel........
-
Page 65: Control Assembly Group
Control Assembly Group Part Number Description Quantity 9857-189-001 Control Assmbly Complete (all below included) ......1 9108-117-001 Control Box Cover ..............1 8220-001-478 Wire Assembly Green 7” ............1 8639-621-007 Screw #10-32 x 12 Green............1 8641-582-006 Lockwasher Ext Tooth #10 ............1 9897-026-002 Terminal Block Main Power Middle .......... - Page 66 Control Assembly Group 13, 14 13, 14 Part # 8533-068-001 9/21...
-
Page 67: Coin Handling Group
Coin Handling Group COIN ACCEPTOR - right side COIN ACCEPTOR - left side Part # 8533-068-001 9/21... - Page 68 Coin Handling Group Part Number Description Quantity 9942-038-002 Vault, Assembly Gray ( SS front panel ) ......1 9942-038-004 Vault, Assembly Almond ..........1 9942-038-003 Vault, Assembly White ............. 1 9942-038-005 Vault, Assembly Black Large Vault ( SS front panel ) ...1 Note Large Vault after S/N 9807-099-002 Box Assembly, Coin ............
- Page 69 Notes Part # 8533-068-001 9/21...
- Page 70 Intergrated EasyCard Ready Machine Part # Description Quantity 9989-517-009 Panel Assy-Front Lower EC/OPL (SS) ......... 1 9989-517-011 Panel Assy-Front Lower EC/OPL (Wht) ....... 1 9989-517-012 Panel Assy-Front Lower EC/OPL (AL) ......... 1 9506-450-001 Wiring-Schematic ............. 1 9506-451-001 Wiring-Diagram ............... 1 9627-731-001 Harness, Reader ..............
- Page 71 Part # 8533-068-001 9/21...
- Page 72 Part # 8533-068-001 9/21...
- Page 73 Notes Part # 8533-068-001 9/21...
-
Page 74: Voltage Conversion
Section 7: Voltage Conversion Part # 8533-068-001 9/21... - Page 75 ...
- Page 76 Part # 8533-068-001 9/21...
- Page 77 Notes Part # 8533-068-001 9/21...
-
Page 78: 50Hz Models
Section 8: 50 hZ Models Part # 8533-068-001 9/21... -
Page 79: 50 Hz Wiring Schematic
50HZ Wiring Schematic Dryer Idle - No Coins Added : Top Dryer Used For This Example 230 VAC 50 HZ is supplied to the Main Power Terminal Block and passes through a In- line Noise Filter and comes out on BLK/RED and BLK/BLU wire. 230 VAC now passes to a Mulit-tap Control Step Down Trans- former and also passes to the Motor Control Relay (R1&R2). - Page 80 Heat Circuit Top Dryer Used For This Example With the Drive Motor running and 24 VAC provided to the Computer Board Gas Relay, it will close if Com- puter Board senses programmed temperature is needed. The violet wire changes to an orange wire out of the Computer Board Gas Relay.
- Page 81 Part # 8533-068-001 9/21...
- Page 82 Part # 8533-068-001 9/21...
- Page 83 DDBD50KC_-59 Electrical Group Part Number Description Quantity 5192-295-017 Relay ..................2 8220-065-006 Wire Asy-BLK/RED, 11” ............... 2 8220-065-007 Wire Asy-BLK/BLU, 11” ............... 2 8220-065-032 Wire Asy-BLK, 11” ..............2 8220-065-033 Wire Asy-WHT, 11” ..............2 8220-095-043 Wire Asy-BRN, 81”..............2 8502-730-001 Label-Warning, Elecronic Coin Acceptor ........
- Page 84 Part # 8533-068-001 9/21...
-
Page 85: Gas Control Parts
DDBD50KC -59 Gas Control Parts Part Number Description Quantity 9732-162-001 Kit-Honeywell VR86 Valve Flange ..........4 9791-001-001 Adapter Assembly-Gas Inlit ............. 1 9857-132-004 Gas Control Valve ..............2 Part # 8533-068-001 9/21... -
Page 86: Maintenance
Section 9: Maintenance Part # 8533-068-001 9/21... - Page 87 Step 3: Grease the bearings and the shaft of the intermediate pulley. Use an Alemite grease gun and Molykote BR2-S grease. (Where applicable) Dexter reserves the right to change part numbers and/or specifications Part # 8533-068-001 11/11 without notice. © 2010 Dexter Laundry, Inc. | 2211 W. Grimes Ave, Fairfield, IA 52556, U.S.A. | 1-800-524-2954 | www.dexter.com...
Need help?
Do you have a question about the DDBD T-50-2 Series and is the answer not in the manual?
Questions and answers