
Related Manuals for Logik LBIDOX16


Summary of Contents for Logik LBIDOX16
- Page 1 Instruction Manual Electric Built-in Double Oven LBIDOX16 LBIDOX16_IB.indd 1 27/07/2016 13:18...
- Page 2 LBIDOX16_IB.indd 2 27/07/2016 13:18...
-
Page 3: Table Of Contents
Contents Safety Warnings ..........................4 Unpacking ............................. 6 Installation ............................ 7 Making an Electrical Connection....................8 Terminal Box Connections ............................8 Installing the Built-in Oven ......................9 Product Overview ........................10 Front View ................................10 Control Panel ................................10 Setting The Clock ........................11 First Time Use of the Oven/Grill .................... -
Page 4: Safety Warnings
Safety Warnings IMPORTANT SAFETY INSTRUCTIONS READ CAREFULLY AND KEEP FOR FUTURE REFERENCE • It is recommended that this appliance is installed by a qualified electrical engineer. The manufacturer is not responsible for any damage caused by incorrect installation. • Check whether there is any damage to the appliance after you have unpacked it. - Page 5 • The appliance and its accessible parts become hot during use. Young children should be kept away. • Danger of fire: Do not store items in the oven other than the accessories supplied. • When the oven is hot never touch the oven glass or any other parts that get hot.
-
Page 6: Unpacking
Thank you for purchasing your new Logik Electric Built-in Oven. You must read this manual in order to fully understand how to install and operate it correctly. Read all the safety warnings carefully before use and keep this manual for future reference. -
Page 7: Installation
Installation • The electrical connection of this oven should be carried out by a qualified electrician. Following the instructions in the installation section of this manual and in compliance with the current regulations. • The oven is intended for household use only. • This oven must be installed in compliance with local safety regulations. -
Page 8: Making An Electrical Connection
Making an Electrical Connection An approved suitable cable must be connected from the Consumer Unit (main fuse box)and be protected by its own 30amp fuse or Micro Circuit Breaker (MCB). The electrician must provide a fused double-pole isolation switch, which disconnects both the line (live) and neutral conductors, with a contact separation of at least 3 mm incorporated into the fixed wiring. -
Page 9: Installing The Built-In Oven
Installing the Built-in Oven The space where the oven will be placed needs to be at least 600mm wide, 550mm deep and 880mm high. Ensure the electrical connections have been made. Insert the oven into the cabinet by pushing it back into the space within the cabinet. -
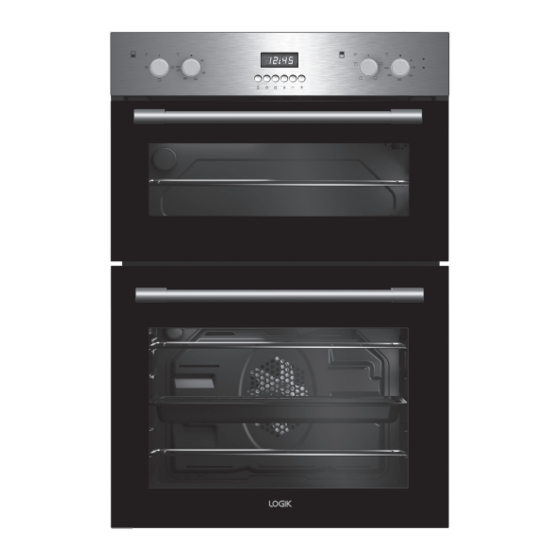
Page 10: Product Overview
Product Overview Front View Control Panel Fan Motor (behind steel plate) Handle Ring Heater Top Oven Grill Heating Element Main Oven Shelf Positions (2 in the top oven and 5 in the main oven) Lamp Control Panel Main Oven Controls Top Oven Controls 4 5 6 7 Function Selector Control Main Oven... -
Page 11: Setting The Clock
Setting The Clock Before you can use the oven the time must be set. If the time is not set you’re oven will NOT operate. When the power is first switched on the clock will flash. Press and hold the buttons together. -
Page 12: First Time Use Of The Oven/Grill
First Time Use of the Oven/Grill • Unpack the oven. Remove any insert cards or plastic bags. Use a damp cloth to carefully wipe the inner cavity wall and housing. Clean all the detachable parts in hot, soapy water before using. • Ensure the appliance is installed correctly before turning it on. -
Page 13: Using The Oven
Using the Oven • Under no circumstances should the oven be lined with aluminium foil as overheating may occur. • Do not place dishes or baking trays directly onto the base of the oven as it becomes very hot and damage may occur. -
Page 14: Using The Functions And Temperature Controls
Using the Functions and Temperature Controls Symbol Oven Function Description The oven light will be turned on. No heating will take place. Main Top and bottom heating Top and bottom heating are in operation. Food is heated simultaneously from the top and bottom. -
Page 15: Automatic Cooking
Press and hold Automatic cooking (main oven only) The automatic cooking mode lets you set your oven to cook your meal so its ready for when you require. Remember your clock needs to be set correctly for this cooking mode to work properly. Place your dish into the oven. -
Page 16: Semi-Automatic Cooking
Semi-automatic cooking (main oven only) The semi-automatic cooking mode lets you set the cooking time, it will then switch off after the time set. Cooking will start from the minute the cooking time is set. Remember your clock needs to be set correctly for this cooking mode to work properly. -
Page 17: Setting An Alarm
Setting an alarm The clock on your oven can be used to set an alarm. The maximum alarm time is 23 hours 59 minutes. Press and hold the button, 00.00 will be displayed. Press and hold button press the +/- buttons to set While holding the your desired alarm time. -
Page 18: Baking Tips
Baking Tips • Always place baking tins in the centre of the wire shelf. • Make sure you use bakeware that is oven proof. • Do not place bakeware too close to the rear of the oven wall. • You can influence the degree of browning by changing the temperature setting or by re-positioning the shelves closer to the top element if it is active. -
Page 19: Cleaning Tips
Cleaning Tips Ensure that the appliance is switched off and isolated before cleaning the oven to avoid the possibility of electric shock. Allow the oven to fully cool before cleaning. Remove the wire shelves, wash them separately in hot soapy water and dry thoroughly. -
Page 20: Replacing The Oven Lamp
Replacing the Oven Lamp Ensure that the appliance is switched off before replacing the light to avoid the possibility of electric shock. Turn off the oven and make sure that it is cold. Switch off its isolation switch. Turn the bulb cover anti-clockwise to remove the cover then take out the bulb by turning anti-clockwise. -
Page 21: Removing The Top Oven Door Glass For Cleaning
Removing the top Oven Door Glass for Cleaning Open the top oven door. Remove the plastic vent on top of the door by gently pulling at each end. Carefully slide the glass out. Be aware that once the glass is removed the door may spring up. -
Page 22: Energy Saving Tips And Energy Label
Energy Saving Tips and Energy Label Top and Main Oven • Cook the meals together, if possible. • Keep the pre-heating time short. • Do not elongate cooking time. • Do not forget to turn off the oven at the end of cooking. -
Page 23: Product Fiche And Specifications
Product Fiche and Specifications Brand Logik Model LBIDOX16 Type of Oven Electric Mass of the appliance 52 Kg Top Oven Energy Efficiency Index - Conventional 105.5 Energy Efficiency Index - Fan Forced Energy Class Energy Consumption (electricity) - Conventional 0.74 kWh/cycle... - Page 24 For more information about where you can drop off your waste for recycling, please contact your local authority, or where you purchased your product. DSG Retail Ltd. (co. no. 504877) 1 Portal Way, London, W3 6RS, UK IB-LBIDOX16-160727V1 LBIDOX16_IB.indd 24 27/07/2016 13:18...
Need help?
Do you have a question about the LBIDOX16 and is the answer not in the manual?
Questions and answers