Table of Contents
Advertisement
Advertisement
Table of Contents

Related Manuals for Logik LCPCKX11


Summary of Contents for Logik LCPCKX11
- Page 1 Electric Multifunction Fan Oven Instruction / Installation Manual LCPCKX11...
-
Page 3: Table Of Contents
Contents Unpacking ............................. 4 Product Overview ......................... 5 Front View ...................................5 Control Panel ................................5 First Time Use of the Oven ......................6 Function Selector Control ......................6 Thermostat Control ........................7 Timer Control ..........................7 Using the Oven ..........................8 Cooking Table .......................... -
Page 4: Unpacking
Thank you for purchasing your new Logik Electric Multi-function Fan Oven. We recommend that you spend some time to read this manual in order to fully understand how to install and operate it correctly. Read all the safety warnings carefully before use and keep this manual for future reference. -
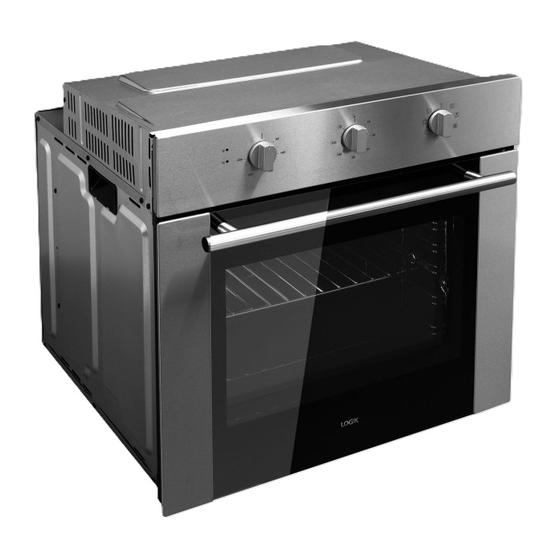
Page 5: Product Overview
Product Overview Front View ºC Control Panal Oven Door Handle Oven Door Control Panel ºC Thermostat Control Timer Control Function Control... -
Page 6: First Time Use Of The Oven
First Time Use of the Oven Unpack the oven. Remove any insert cards or plastic bags. Use a damp cloth to carefully wipe the inner cavity wall and housing. Clean all the detachable parts in hot, soapy water before using. Heat the oven on maximum for 45 minutes. -
Page 7: Thermostat Control
Thermostat Control The temperature can be set from 50°C - 250°C. Select the desired temperature, as follows: To keep food warm 50 - 100°C position For traditional oven cooking 50 - 250°C position To toast 250°C position ºC For all types of grilling 250°C position Timer Control • The oven will not turn on without the timer being set. -
Page 8: Using The Oven
Using the Oven To get the best results, the smallest distance allowed between the food and the upper heating element is 30 mm. On the wall of the inner cavity there are 5 different Guide 1 rack guide slots. You can place the rack at different Guide 2 heights to achieve the best cooking performance depending on the heat of the oven and the size of... -
Page 9: Cooking Table
Cooking Table Time Shelf Cooking Food Weight Temp. °C Dish 1st Side 2nd Side Position Method (min.) (min.) Biscuits — 1 + 3 15 - 30 — Deep drip pan Rich biscuits — 15 - 25 — Deep drip pan Bread (pieces) —... -
Page 10: General Advice
General Advice • Wipe the oven after every use. • Wipe up spills. Avoid leaving alkaline or acidic substances (such as lemon juice or vinegar) on the oven surfaces. • Do not use cleaning products with a chlorine or acidic base. Before you start cleaning your oven please: • Read these cleaning instructions and the ‘Safety Warnings’... -
Page 11: Removing The Oven Door
Removing the Oven Door The oven door can easily be removed as follows: Open the door completely. The swivel retainers of the right hand and left hand hinges are hooked onto the metal bar above them. Lift the retainers as shown. Lift the oven door slightly. -
Page 12: Specification
Specification Model LCPCKX11 (Oven) Rated Voltage 230 – 240 V~ Rated Frequency 50 Hz Power 3100 – 3400W Top Element 950 W Bottom Element 1100 W Grill Heating Element 2100 W Ring Heating Element 2200 W Lamp Power 25 W Thermostat 50 - 250°C... -
Page 13: Installation
Installation • The electrical connection of this oven should be carried out by a qualified electrician. Following the instructions in the installation section of this manual and in compliance with the current regulations. • The oven is intended for housedhold use only. Use a Competent Person or Qualified Electrician • This oven must be installed in compliance with local safety standards. - Page 14 The mains connection for this product must have an all pole disconnection provided in the fixed wiring in accordance with the local wiring regulations. To avoid any potential hazard, you must follow these instructions when you install your appliance. • The kitchen area should be dry and aired and equipped with sufficient ventillation. • When installing the oven, easy access to all control elements should be ensured.
-
Page 15: Electrical Connection
Electrical Connection Fitting Guidelines The oven is manufactured to work with single-phase alternating current (220V- 240V/50Hz). The connection diagram is also found on the cover of the connection box. Remember that the connection wire should match the connection type and the power rating of the oven. • All electrical work should be carried out by a competent person, if in doubt use a qualified electrician. -
Page 16: Safety Warnings
Safety Warnings Installation General Warnings • The appliance must be installed by a competent • If the mains power cable is damaged, it must be person or a qualified electrician in compliance with replaced by the manufacturer, its service agent the instructions provided. - Page 17 • Accessible parts will also become hot when in use. • To avoid burns and scalds children should be kept away. Oven • During use the appliance becomes hot. Care should be taken to avoid touching the hot surfaces inside the oven. • Switch the appliance off before removing the oven lamp protective cover for lamp replacement.
- Page 18 If you require a replacement for any of the items listed below, please quote their corresponding part numbers: Replacement Part Part Number Deep drip pan 261504403500 Wire rack with stopper 261568901100 Pan handle 261554300200 Visit Partmaster.co.uk today for the easiest way to buy electrical spares and accessories.
Need help?
Do you have a question about the LCPCKX11 and is the answer not in the manual?
Questions and answers
I need to replace element in oven but doesn't appear to be screws but nails that are attached. How do.i remove it?