Table of Contents
Advertisement
Advertisement
Table of Contents

Subscribe to Our Youtube Channel
Related Manuals for Logik LBMULB13


Summary of Contents for Logik LBMULB13
- Page 1 Instruction / Installation Manual Built-in Multi-Function Oven LBMULB13...
-
Page 3: Table Of Contents
Contents Safety Warnings ..........................4 Unpacking ............................. 7 Product Overview ......................... 8 Front View ...................................8 Control Panel ................................8 Connecting to the Mains ......................9 Setting the Clock .......................... 9 First Time Use of the Oven ......................9 Using the Controls ........................10 Oven On and Off ......................... -
Page 4: Safety Warnings
Safety Warnings Installation • The appliance must be installed by a competent person or a qualified electrician in compliance with the instructions provided. Incorrect installation may cause harm to persons, animals or may damage property. • Before using the appliance, ensure that all packing materials are removed from the appliance. - Page 5 General Warnings • If the mains power cable is damaged, it must be replaced by a qualified electrician, manufacturer’s service agent or similarly qualified persons in order to avoid a hazard. • This product has not been designed for any uses other than those specified in this booklet.
- Page 6 • To avoid burns and scalds children should be kept away. • Take care when handling parts with glass, knocks, chips, heavy handling and dropping could cause the glass to shatter. • The glass oven door uses toughened glass and is designed to break into many ‘nugget’...
-
Page 7: Unpacking
Unpacking Remove all pac kaging from the unit. Retain the packaging. If you dispose of it please do so according to local regulations. The following items are included: The Main Unit Baking Tray x 1 Grill/Oven Rack x 2 Grill Tray x 1 Grill Rack x 1 Grill Handle x 1 Fixing Screws x 2... -
Page 8: Product Overview
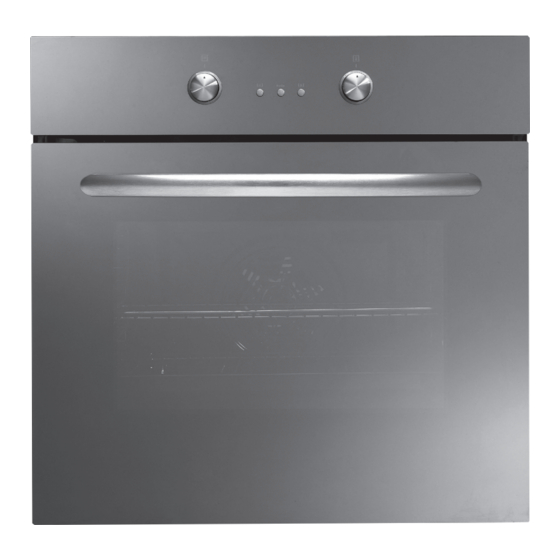
Product Overview Front View Control Panel Oven Door Handle Oven Door Control Panel Function Indicator Increase Button Function Control Knob Thermostat Control Knob Display Panel Thermostat Indicator Decrease Button Mode Button * All images are for indication only; please refer to your individual unit for actual item. -
Page 9: Connecting To The Mains
Connecting to the Mains When you first connect the oven to the mains supply, the unit will be in Standby Mode. In Standby Mode, the clock will blink but the oven cannot be used. Function symbols will also not be lit and dials will be inactive. Setting the Clock The time must be set before you can use the oven: On first connection to the mains supply, or just after reconnection from a... -
Page 10: Using The Controls
Using the Controls The oven can be warmed up using the bottom and top heaters, as well as the grill. Operation of the oven is controlled by the oven Function Control knob and the temperature regulator Thermostat Control knob as well. Press the Function Control and Temperature Function Control Thermostat Control... -
Page 11: Settings Of The Function Control
Settings of the Function Control This control used to select the available cooking functions, which are: Symbol Function Description Oven Light Switches on the top fan and the internal light. (During cooking the interior light will automatically turn on.) Defrost Switches on the oven fan and light. -
Page 12: Thermostat Control
Thermostat Control The temperature can be set from 50˚C - 250˚C. Select the desired temperature as needed. The table below contains suggestions only: To keep food warm and slow cook 50 - 100°C position For traditional oven cooking 50 - 250°C position For all types of grilling 190°C position When the temperature LED lights up, the oven is heating up. -
Page 13: Use Of Oven
Use of Oven To save energy and to help protect the environment, we recommend these hints: • Use the oven efficiently, by cooking multiple trays of food at the same time. • Select the correct shelf location for the food being cooked. • Do not open the oven door more than necessary. -
Page 14: Kitchen Timer
Kitchen Timer While the oven is not in use and in Manual mode, this feature allows you to use the oven as a timer. Press the MODE button. The timer indicator “ ” will flash, and “0.30” will show on the display. Press the + / - buttons to set the hour. -
Page 15: Full Automatic Programming
Full Automatic Programming You can use this function to time your cooking to end at a certain time. This allows you to programme a cooking duration time and an end time. The oven will calculate and switch on automatically when required. Ensure the oven is in manual mode Press the MODE button until “dur”... -
Page 16: Questions And Answers
Questions and Answers In the event of unexpected operation, you should: • Switch off the oven and if possible, disconnect it from the mains supply. Make sure all control knobs are set to the “0” position. • Call the customer support centre. • Some minor faults can be fixed by referring to the instructions given in the table below. -
Page 17: Replacement Of The Oven Lamp
Replacement of the Oven Lamp Ensure that the oven is switched off from the mains socket before replacing the lamp to avoid the possibility of electric shock. • Set all control knobs to the ”0” position. • Allow the oven to completely cool down. • Turn the lamp cover anti-clockwise to unscrew. - Page 18 Slightly close the door and lift. The notch on the bottom of the hinge will disengage. Now pull the door forward off the oven. Releasing both hinge sections from the slots. To replace the door, repeat the above steps on reverse order.
-
Page 19: Specifications
Specifications Model LBMULB13 Voltage Rating 220 - 240V Power Rating 3000W (MAX) Cooker Dimensions H/W/D 59.5 (H) x 59.5 (W) x 57.5 (D) cm Usable Capacity of the Oven 65 L Energy Efficiency Class Forced Air : 0.99kwh Energy Consumption Convectional : 0.99kwh... - Page 20 The mains connection for this product must have an all pole disconnection provided in the fixed wiring in accordance with the local wiring regulations. To avoid any potential hazard, you must follow these instructions when you install your appliance. Cabinet 1 • The kitchen area should be dry and equipped with sufficient ventilation.
-
Page 21: Electrical Connection
Electrical Connection Fitting Guidelines The oven is manufactured to work with single-phase alternating current (230V – 240V/50Hz). The connection diagram is also found next to the cover of the connection box. • All electrical work should be carried out by a suitably qualified and authorised electrician. -
Page 22: Wiring Instructions
Wiring Instructions This connection is only for cables 4mm – 6mm thick. To connect to a mains power supply of 220-240~V, follow the instructions below: a) Unscrew the cable bracket. b) Connect the LIVE wire to L. c) Connect the NEUTRAL wire to N. d) Connect the EARTH wire (normally yellow/green) to the EARTHING connector. - Page 24 Visit Partmaster.co.uk today for the easiest way to buy electrical spares and accessories. With over 1 million spares and accessories available we can deliver direct to your door the very next day. Visit www.partmaster.co.uk or call 0844 800 3456 (UK customers only) Calls charged at National Rate. This symbol on the product or in the instructions means that your electrical and electronic equipment should be disposed at the end of its life separately from your household waste.
Need help?
Do you have a question about the LBMULB13 and is the answer not in the manual?
Questions and answers