Table of Contents
Advertisement
Quick Links
Advertisement
Table of Contents
Troubleshooting

Related Manuals for LSIS LSLV-H100


Summary of Contents for LSIS LSLV-H100
- Page 2 This operation manual is intended for users with basic knowledge of electricity and electric devices. * LSLV-H100 is the official name for the H100 series inverters. * The H100 series software may be updated without prior notice for better performance. To check...
- Page 3 Safety Information Safety Information Read and follow all safety instructions in this manual precisely to avoid unsafe operating conditions, property damage, personal injury, or death. Safety symbols in this manual Indicates an imminently hazardous situation which, if not avoided, will result in severe injury or death. Indicates a potentially hazardous situation which, if not avoided, could result in injury or death.
- Page 4 Maximum allowed prospective short-circuit current at the input power connection is defined in IEC 60439-1 as 100 kA. LSLV-H100 is suitable for use in a circuit capable of delivering not more than 100kA RMS at the drive’s maximum rated voltage, depending on the selected MCCB. RMS symmetrical amperes for recommended MCCB are the following table.
- Page 5 Quick Reference Table Quick Reference Table The following table contains situations frequently encountered by users while working with inverters. Refer to the typical and practical situations in the table to quickly and easily locate answers to your questions. Situation Reference I want to configure the inverter to start operating as soon as the power source is p.17 applied.
-
Page 6: Table Of Contents
Table of Contents Table of Contens Preparing the Installation ....................1 Product Identification ........................1 Part Names ............................3 Installation Considerations ..................... 10 Selecting and Preparing a Site for Installation .............. 11 Cable Selection ..........................14 Installing the Inverter ....................17 Mounting the Inverter ...................... - Page 7 Table of Contents Switching between the Operation Modes (HAND / AUTO / OFF) ...... 83 Setting Frequency Reference ....................88 4.2.1 Keypad as the Source (KeyPad-1 setting) ............89 4.2.2 Keypad as the Source (KeyPad-2 setting) ............89 4.2.3 V1 Terminal as the Source ..................89 4.2.4 Setting a Frequency Reference with Input Voltage (Terminal I2) ..
- Page 8 Table of Contents 4.16 Start Mode Setting........................132 4.16.1 Acceleration Start ..................... 132 4.16.2 Start After DC Braking .................... 132 4.17 Stop Mode Setting ........................133 4.17.1 Deceleration Stop ....................133 4.17.2 Stop After DC Braking .................... 134 4.17.3 Free Run Stop ......................135 4.17.4 Power Braking ......................
- Page 9 Table of Contents 5.14 Pump Clean Operation ......................200 5.15 Start & End Ramp Operation ....................204 5.16 Decelerating Valve Ramping ....................206 5.17 Load Tuning ..........................207 5.18 Level Detection........................... 209 5.19 Pipe Break Detection ....................... 213 5.20 Pre-heating Function ....................... 216 5.21 Auto Tuning ..........................
- Page 10 Table of Contents 5.44.3 Auto Change ......................280 5.44.4 Interlock ........................286 5.44.5 Aux Motor Time Change ..................290 5.44.6 Regular Bypass ......................291 5.44.7 Aux Motor PID Compensation ................292 5.44.8 Master Follower......................294 5.45 Multi-function Output On/Off Control ................300 5.46 Press Regeneration Prevention ..................
- Page 11 Table of Contents 6.3.6 Operation Mode for Option Card Trip ............344 6.3.7 No Motor Trip ......................345 6.3.8 Broken Belt ........................346 Parts Life Expectancy ....................... 347 6.4.1 Main Capacitor Life Estimation ................. 347 6.4.2 Fan Life Estimation ....................349 Fault/Warning List ........................
- Page 12 Table of Contents Expanded Function Group (ADV) ..................427 Control Function Group (CON) ................... 433 Input Terminal Group (IN) ..................... 436 Output Terminal Block Function Group (OUT) ............445 Communication Function Group (COM) ............... 451 Advanced Function Group(PID Functions) ..............458 EPID Function Group (EPID) ....................
- Page 13 Table of Contents 10.3 Storage and Disposal ....................... 584 10.3.1 Storage .......................... 584 10.3.2 Disposal ......................... 584 11 Technical Specification .................... 585 11.1 Input and Output Specifications ..................585 11.2 Product Specification Details ....................591 11.3 External Dimensions ......................595 11.4 Peripheral Devices ........................
-
Page 14: Preparing The Installation
the Installation Preparing 1 Preparing the Installation This chapter provides details on product identification, part names, correct installation and cable specifications. To install the inverter correctly and safely, carefully read and follow the instructions. 1.1 Product Identification The H100 Inverter is manufactured in a range of product groups based on drive capacity and power source specifications. - Page 15 the Installation Preparing Note The H100 75/90 kW, 400 V inverters satisfy the EMC standard EN61800-3 without installation of optional EMC filters.
-
Page 16: Part Names
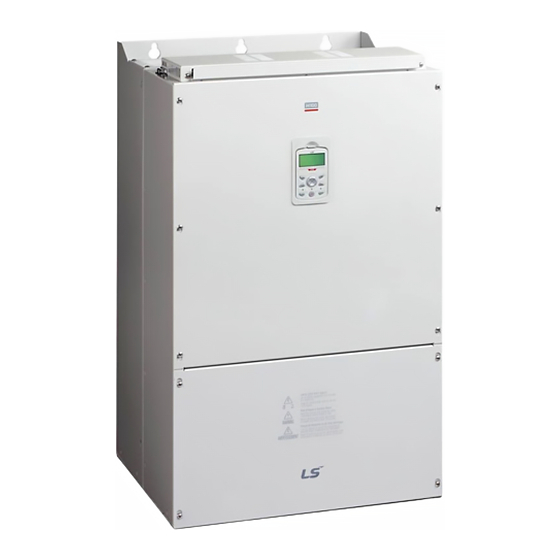
the Installation Preparing 1.2 Part Names The illustration below displays part names. Details may vary between product groups. 0.75–30 kW (3-Phase) - Page 17 the Installation Preparing 37–90 kW (3-Phase)
- Page 18 the Installation Preparing 110–132 kW (3-Phase)
- Page 19 the Installation Preparing 160–185 kW (3-Phase)
- Page 20 the Installation Preparing 220–250 kW (3-Phase)
- Page 21 the Installation Preparing 315–400 kW (3-Phase)
- Page 22 the Installation Preparing 500 kW (3-Phase)
-
Page 23: Installation Considerations
the Installation Preparing 1.3 Installation Considerations Inverters are composed of various precision, electronic devices, and therefore the installation environment can significantly impact the lifespan and reliability of the product. The table below details the ideal operation and installation conditions for the inverter. Items Description -10 ℃–50 ℃... -
Page 24: Selecting And Preparing A Site For Installation
the Installation Preparing 1.4 Selecting and Preparing a Site for Installation When selecting an installation location consider the following points: • The inverter must be installed on a wall that can support the inverter’s weight. • The location must be free from vibration. Vibration can adversely affect the operation of the inverter. - Page 25 the Installation Preparing • Ensure sufficient air circulation is provided around the inverter when it is installed. If the inverter is to be installed inside a panel, enclosure, or cabinet rack, carefully consider the position of the inverter’ s cooling fan and the ventilation louver. The cooling fan must be positioned to efficiently transfer the heat generated by the operation of the inverter.
- Page 26 the Installation Preparing Note • The vent covers must be removed for side-by-side installations. • Side-by-side installation cannot be used for the H100 inverters rated for 37 kW and above. • For the H100 inverters rated for 37 kW and above, if the installation site satisfies the UL Open Type requirements and there is no danger of foreign objects getting inside the inverter and causing trouble, the vent cover may be removed to improve cooling efficiency.
-
Page 27: Cable Selection
the Installation Preparing 1.5 Cable Selection When you install power and signal cables in the terminal blocks, only use cables that meet the required specification for the safe and reliable operation of the product. Refer to the following information to assist you with cable selection. •... - Page 28 the Installation Preparing Ground Wire Input/Output Power Wire Load (kW) R/S/T U/V/W R/S/T U/V/W 18.5 70X2 70X2 50X2 95X2 95X2 50X2 1/0 x2 95X2 95X2 70X2 70x2 3/0 x2 120X2 120X2 95x2 250x2 150X2 150X2 95x2 300 x2 185X2 185X2 60X4 120X4, 120X4,...
- Page 29 the Installation Preparing Signal (Control) Cable Specifications Wire thickness Terminals P1–P7/CM/VR/V1/I2/24/TI 0.33–1.25 16–22 AO1/AO2/CM/Q1/EG 0.33–2.0 14–22 A1/B1/C1/A2/C2/A3/C3/A4/C4/A5/C5 0.33–2.0 14–22 S+,S-,SG 0.75 1) Use STP (shielded twisted-pair) cables for signal wiring.
-
Page 30: Installing The Inverter
the Inverter Installing 2 Installing the Inverter This chapter describes the physical and electrical installation of the H100 series inverters, including mounting and wiring of the product. Refer to the flowchart and basic configuration diagram provided below to understand the procedures and installation instructions to be followed to install the product correctly. - Page 31 the Inverter Installing Basic configuration diagram The reference diagram below shows a typical system configuration showing the inverter and peripheral devices. Prior to installing the inverter, ensure that the product is suitable for the application (power rating, capacity, etc). Ensure that all of the required peripherals and optional devices (resistor brakes, contactors, noise filters, etc.) are available.
-
Page 32: Mounting The Inverter
the Inverter Installing • Figures in this manual are shown with covers or circuit breakers removed to show a more detailed view of the installation arrangements. Install covers and circuit breakers before operating the inverter. Operate the product according to the instructions in this manual. •... - Page 33 the Inverter Installing 400[V] : 220~500kW Install the two lower mounting bolts. Ensure that the inverter is placed flat on the mounting surface, and that the installation surface can securely support the weight of the inverter. 200[V] : 0.75~18.5kW, 400[V] : 0.75~185kW...
- Page 34 the Inverter Installing 400[V] : 220~500kW...
- Page 35 the Inverter Installing • Do not transport the inverter by lifting with the inverter’s covers or plastic surfaces. The inverter may tip over if covers break, causing injuries or damage to the product. Always support the inverter using the metal frames when moving it. •...
-
Page 36: Enabling The Rtc (Real-Time Clock) Battery
the Inverter Installing 2.2 Enabling the RTC (Real-Time Clock) Battery The H100 series inverter comes from the factory with a CR2032 lithium-manganese battery pre- installed on the I/O PCB. The battery powers the inverter’s built-in RTC. The battery is installed with a protective insulation strip to prevent battery discharge;... - Page 37 the Inverter Installing Remove the keypad from the inverter body. 0.75–30 kW Models 37–90 kW Models...
- Page 38 the Inverter Installing Loosen the screws securing the front cover, and remove the front cover by lifting it. The main PCB is exposed. 0.75–30 kW Models 37–90 kW Models Locate the RTC battery holder on the I/O PCB, and remove the protective insulation strip by gently pulling it.
-
Page 39: Cable Wiring
the Inverter Installing 2.3 Cable Wiring Open the terminal cover, remove the cable guides, and then install the ground connection as specified. Complete the cable connections by connecting an appropriately rated cable to the terminals on the power and control terminal blocks. Read the following information carefully before carrying out wiring connections to the inverter. - Page 40 the Inverter Installing Step 1 Terminal Cover and Cable Guide The terminal cover and cable guide must be removed to install cables. Refer to the following procedures to remove the covers and cable guide. The steps to remove these parts may vary depending on the inverter model.
- Page 41 the Inverter Installing Remove the terminal cover(s) and cable guide. Then follow the instructions below to install the ground connection for the inverter. Locate the ground terminal and connect an appropriately rated ground cable to the terminals. Refer to 1.5 Cable Selection on page 14 to find the appropriate cable specification for your installation.
- Page 42 the Inverter Installing 315~500kW (3-Phase) Connect the other ends of the ground cables to the supply earth (ground) terminal Note • 200 V products require Class 3 grounding. Resistance to ground must be ≤ 100 . • 400 V products require Special Class 3 grounding. Resistance to ground must be ≤ 10 . Install ground connections for the inverter and the motor by following the correct specifications to ensure safe and accurate operation.
- Page 43 the Inverter Installing • Apply rated torques to the terminal screws. Loose screws may cause short circuits and malfunctions. Tightening the screw too much may damage the terminals and cause short circuits and malfunctions. • Use copper wires only with 600 V, 75 ℃ rating for the power terminal wiring, and 300 V, 75 ℃ rating for the control terminal wiring.
- Page 44 the Inverter Installing 0.75–30 kW (3-Phase) Power Terminal Labels and Descriptions Terminal Labels Name Description R(L1)/S(L2)/T(L3) AC power input terminal Mains supply AC power connections. + DC voltage terminal. P1(+) + DC link terminal Used for connecting an external reactor. P2(+) + DC link terminal Used for DC power inverter DC (+) connection.
- Page 45 the Inverter Installing 37–90 kW (3-Phase) 3-phase AC input Motor Power Terminal Labels and Descriptions Terminal Labels Name Description R(L1)/S(L2)/T(L3) AC power input terminal Mains supply AC power connections. + DC voltage terminal. P2(+) + DC link terminal Used for connecting an external reactor. Used for a DC power inverter DC (+) P3(+) + DC link terminal...
- Page 46 the Inverter Installing 110–250kW (3-Phase) Power Terminal Labels and Descriptions Terminal Labels Name Description R(L1)/S(L2)/T(L3) AC power input terminal Mains supply AC power connections. It can not be used because it does not Brake resistor terminals provide a braking unit P(+) + DC link terminal + DC voltage terminal.
- Page 47 the Inverter Installing 315–500kW (3-Phase) Terminal Labels Name Description R(L1)/S(L2)/T(L3) AC power input terminal Mains supply AC power connections. P(+) + DC link terminal + DC voltage terminal. - DC voltage terminal. - DC link terminal Used for a DC power inverter DC (-) connection.
- Page 48 the Inverter Installing Note • Apply a DC input to the P2 (+) and N (-) terminals to operate the inverter on DC current input. • Use STP (Shielded Twisted Pair) cables to connect a remotely located motor with the inverter. Do not use 3 core cables.
- Page 49 the Inverter Installing Step 4 Control Terminal Wiring The illustrations below show the detailed layout of control wiring terminals and control board switches. Refer to the detailed information provided below and 1.5 Cable Selection on page 14 before installing control terminal wiring and ensure that the cables used meet the required specifications.
- Page 50 the Inverter Installing Input and Output Control Terminal Block Wiring Diagram 5.5~90kW...
- Page 51 the Inverter Installing 110~500kW Input Terminal Labels and Descriptions Function Label Name Description Configurable for multi-function input terminals. Factory default terminals and setup are as follows : P1: Fx P1–P5 P2: Rx Multi-function Input 1-7 Multi-function P3: BX terminal P4: RST configuration P5: Speed-L P6: Speed-M...
- Page 52 the Inverter Installing Function Label Name Description Used to setup or modify a frequency reference via analog voltage or current input terminals. Voltage/current input for Switch between voltage (V2) and current (I2) V2/I2 frequency reference input modes using a control board switch (SW4). Input current: 0–20 mA Maximum Input current: 24 mA Input resistance 249...
- Page 53 the Inverter Installing Function Label Name Description -Maximum output current: 100 mA -Do not use this terminal for any purpose other than 24 V power supply supplying power to a PNP mode circuit configuration (e.g. supplying power to other external devices). Sends out alarm signals when the inverter’s safety features are activated.
- Page 54 the Inverter Installing Step 5 PNP/NPN Mode Selection The H100 inverter supports both PNP (Source) and NPN (Sink) modes for sequence inputs at the terminal. Select an appropriate mode to suit requirements using the PNP/NPN selection switch (SW2) on the control board. Refer to the following information for detailed applications. PNP Mode (Source) Select PNP using the PNP/NPN selection switch (SW2).
- Page 55 the Inverter Installing NPN Mode (Sink) Select NPN using the PNP/NPN selection switch (SW2). Note that the factory default setting is NPN mode. CM is the common ground terminal for all analog inputs at the terminal, and P24 is 24 V internal source.
- Page 56 the Inverter Installing Step 6 Disabling the EMC Filter for Power Sources with Asymmetrical Grounding H100, 400 V 0.75–55 kW, 110~500kW(3 phase) inverters have EMC filters built-in and activated as a factory default design. An EMC filter prevents electromagnetic interference by reducing radio emissions from the inverter.
- Page 57 the Inverter Installing Disabling the Built-in EMC Filter for 0.75–30 kW (3–Phase) Inverters Refer to the figures below to locate the EMC filter on/off terminal and replace the metal bolt with the plastic bolt. If the EMC filter is required in the future, reverse the steps and replace the plastic bolt with the metal bolt to reconnect the EMC filter.
- Page 58 the Inverter Installing Disabling the Built-in EMC Filter for 37–55 kW (3–Phase) Inverters Follow the instructions listed below to disable the EMC filters for the H100 inverters rated for 37– 55 kW. Remove the EMC ground cover located at the bottom of the inverter. Remove the EMC ground cable from the right terminal (EMC filter-ON / factory default), and connect it to the left terminal (EMC filter-OFF / for power sources with asymmetrical grounding).
- Page 59 the Inverter Installing Note The terminal on the right is used to ENABLE the EMC filter (factory default). The terminal on the left is used to DISABLE the EMC filter (for power sources with asymmetrical grounding). EMC Filter OFF (W/ asymetrically grounded PWR) EMC Filter ON (Factory default) Disabling the Built-in EMC Filter for 110–500 kW (3–Phase) Inverters...
- Page 60 the Inverter Installing 220–250 kW (3-Phase) 315~500 kW(3-Phase) Step 7 Re-assembling the Covers and Routing Bracket Re-assemble the cable routing bracket and the covers after completing the wiring and basic configurations. Note that the assembly procedure may vary according to the product group or frame size of the product.
-
Page 61: Post-Installation Checklist
the Inverter Installing 2.4 Post-Installation Checklist After completing the installation, check the items in the following table to make sure that the inverter has been safely and correctly installed. Items Check Point Ref. Result Is the installation location appropriate? p.10 Does the environment meet the inverter’s operating p.11 conditions? - Page 62 the Inverter Installing Items Check Point Ref. Result Are advanced-phase capacitors, surge protection and electromagnetic interference filters installed correctly? p.29 (These devices MUST not be installed on the output side of the inverter.) Are STP (shielded twisted pair) cables used for control terminal wiring? Is the shielding of the STP wiring properly grounded? If 3-wire operation is required, are the multi-function input...
-
Page 63: Test Run
the Inverter Installing 2.5 Test Run After the post-installation checklist has been completed, follow the instructions below to test the inverter. Turn on the power supply to the inverter. Ensure that the keypad display light is on. Select the command source. Set a frequency reference, and then check the following: •... - Page 64 the Inverter Installing Remarque Si la commande avant (Fx) est activée, le moteur doit tourner dans le sens anti-horaire si on le regarde côté charge du moteur. Si le moteur tourne dans le sens inverse, inverser les câbles aux bornes U et V. Verifying the Motor Rotation On the keypad, set DRV-07 to ‘1 (Keypad)’...
-
Page 65: Perform Basic Operations
Perform Basic Operations 3 Perform Basic Operations This chapter describes the keypad layout and functions. It also introduces parameter groups and codes required to perform basic operations. The chapter also outlines the correct operation of the inverter before advancing to more complex applications. Examples are provided to demonstrate how the inverter actually operates. - Page 66 Perform Basic Operations...
- Page 67 Perform Basic Operations Name Description [MODE] Key Used to switch between modes. MODE [PROG / Ent] Key Used to select, confirm, or save a parameter value. PROG /ENT [Up] key Switch between codes or increase or decrease parameter values. [Down] key [Left] key Switch between groups or move the cursor during parameter [Right] key...
-
Page 68: About The Display
Perform Basic Operations 3.1.2 About the Display Monitor mode display Status bar The following table lists display icons and their names/functions. No. Name Description Displays one of the following inverter modes: Mon: Monitor mode PAR: Parameter mode Operation mode U&M: User defined and Macro mode TRP: Trip mode CNF: Config mode Rotational direction... - Page 69 Perform Basic Operations No. Name Description J: Jog frequency R: Built-in RS-485 frequency 1–7: Multi-step frequency The multi function key (the [MULTI] key) on the keypad is Multi-function key (UserGrp used to register or delete User group parameters in SelKey) configuration Parameter mode.
- Page 70 Perform Basic Operations Parameter edit mode display The following table lists display icons and their names/functions. Name Description Displays one of the following inverter modes: Mon: Monitor mode Operation mode PAR: Parameter mode U&M: User defined and Macro mode TRP: Trip mode CNF: Config mode Rotational direction Displays the motor’s rotational direction: - Fx or Rx.
- Page 71 Perform Basic Operations Name Description Multi-function key (UserGrp Used to register or delete User group parameters in Parameter SelKey)configuration mode. Displays one of the following operation states: STP: Stop FWD: Forward operation REV: Reverse operation : Forward command given : Reverse command given DC: DC output WAN: Warning STL: Stall...
-
Page 72: Display Modes
Perform Basic Operations 3.1.3 Display Modes The H100 inverter uses 5 modes to monitor or configure different functions. The parameters in Parameter mode and User & Macro mode are divided into smaller groups of relevant functions. Press the [MODE] key to navigate between groups Con g Trip User &Macro... - Page 73 Perform Basic Operations Table of Display Modes The following table lists the 5 display modes used to control the inverter functions. Mode Name Keypad Display Description Displays the inverter’s operation status information. In this mode, information including the inverter’s frequency Monitor mode reference, operation frequency, output current, and voltage may be monitored.
- Page 74 Perform Basic Operations Parameter Setting Mode The following table lists the functions groups under Parameter mode. Function Group Name Keypad Display Description Configures basic operation parameters. These Drive include jog operation, motor capacity evaluation, and torque boost. Configures basic operation parameters. These Basic parameters include motor parameters and multi-step frequency parameters.
- Page 75 Perform Basic Operations Function Group Name Keypad Display Description Configures the HVAC features by setting the features Application 2 such as load tuning, pump cleaning, and pay back counter. Application 3 Configures the time event-related features. Protection Configures motor and inverter protection features. Motor 2 (Secondary Configures the secondary motor-related features.
-
Page 76: Learning To Use The Keypad
Perform Basic Operations User & Macro Mode Function Group Name Keypad Display Description Used to put the frequently accessed function parameters together into a group. User parameter User groups can be configured using the multi-function key on the keypad. Provides different factory-preset groups of functions based on the type of load. -
Page 77: Operation Modes
Perform Basic Operations User & Macro mode and Trip mode are not displayed when all the inverter settings are set to the factory default (User & Macro mode must be configured before it is displayed on the keypad, and Trip mode is displayed only when the inverter is at fault, or has previous trip fault history). Monitor Con g Parameter... - Page 78 Perform Basic Operations Operating the inverter in AUTO Mode In OFF mode (when the OFF LED is on), move to Parameter mode and configure the command source at DRV-07 (frequency reference source). Press the [AUTO] key to enter AUTO mode. In AUTO mode, the inverter operates based on the input from the command source set at DRV-07.
-
Page 79: Switching Between Groups In Parameter Display Mode
Perform Basic Operations 3.2.3 Switching between Groups in Parameter Display Mode After entering Parameter mode from Monitor mode, press the [Right] key to move to the next code. Press the [Left] key to go back to the previous code. The keypad OFF LED is turned OFF, and the keypad displays Monitor mode. -
Page 80: Switching Between Groups In User & Macro Mode
Perform Basic Operations • The Drive group is selected again. 3.2.4 Switching between Groups in User & Macro Mode User & Macro mode is accessible only when the user codes are registered or when the macro features are selected. Refer to 8.16 Macro Groups on page 516 for details about user code registration or macro group selection. -
Page 81: Navigating Through The Codes (Functions)
Perform Basic Operations • User (USR) group in User & Macro mode is displayed again. 3.2.5 Navigating through the Codes (Functions) Code Navigation in Monitor mode The display items in Monitor mode are available only when the inverter is in AUTO mode. In Monitor mode, press the [Up] or [Down] key to move the cursor up or down. - Page 82 Perform Basic Operations • Information about the third item in Monitor mode (Output Voltage) is displayed. • Wait for 2 seconds until the information on the display disappears. • Information about the third item in Monitor mode (Output Voltage) disappears and the cursor appears to the left of the third item.
-
Page 83: Navigating Directly To Different Codes
Perform Basic Operations Code Navigation in Parameter mode The following examples show you how to move through codes in different function groups (Drive group and Basic group) in Parameter mode. In Parameter mode, press the [Up] or [Down] key to move to the desired functions. - Page 84 Perform Basic Operations The following example shows how to navigate directly to code DRV- 09 from the initial code (DRV- 00 Jump Code) in the Drive group. • The Drive group (DRV) is displayed in Parameter mode. Make sure that the fist code in the Drive group (DRV 00 Jump Code) is currently selected.
-
Page 85: Parameter Settings Available In Monitor Mode
Perform Basic Operations 3.2.7 Parameter Settings available in Monitor Mode The H100 inverter allows basic parameters, such as the frequency reference, to be modified in Monitor mode. When the inverter is in Hand or OFF mode, the frequency reference can be entered directly from the monitor screen. -
Page 86: Setting The Monitor Display Items
Perform Basic Operations Parameter setting in AUTO mode • Ensure that the cursor is at the frequency reference item. If not, move the cursor to the frequency reference item. • While the cursor is at the frequency reference monitor item, press the [PROG/ENT] key to edit the frequency reference. - Page 87 Perform Basic Operations corner of the keypad display’s status bar, another frequency item is displayed. This item refers to the frequency reference when the inverter is not operating and the output frequency when the inverter is operating. The following example shows how to configure the display items in HAND mode. •...
-
Page 88: Selecting The Status Bar Display Items
Perform Basic Operations 3.2.9 Selecting the Status Bar Display Items On the top-right corner of the display, there is a monitoring display item. This monitoring item is displayed as long as the inverter is turned on, regardless of the mode the inverter is operating in. Configure this monitoring item to display the type of information that suits your needs. - Page 89 Perform Basic Operations • Press the [Down] key twice to move to ‘2 (Output Current)’ , and then press the [PROG/ENT] key to select it. • The currently selected item is highlighted at CNF- 20 (the display item is changed from ‘Frequency’ to ‘Output Current’).
-
Page 90: Fault Monitoring
Perform Basic Operations 3.3 Fault Monitoring 3.3.1 Monitoring Faults during Inverter Operation The following example shows how to monitor faults that occurred during inverter operation. • If a fault trip occurs during inverter operation, the inverter enters Trip mode automatically and displays the type of fault trip that occurred. -
Page 91: Monitoring Multiple Fault Trips
Perform Basic Operations 3.3.2 Monitoring Multiple Fault Trips The following example shows how to monitor multiple faults that occur at the same time. • If multiple fault trips occur at the same time, the number of fault trips occurred is displayed on the right side of the fault trip type. -
Page 92: Parameter Initialization
Perform Basic Operations 3.4 Parameter Initialization The following example demonstrates how to revert all the parameter settings back to the factory default (Parameter Initialization). Parameter initialization may be performed for separate groups in Parameter mode as well. • Monitor mode is displayed. •... -
Page 93: Learning Basic Features
Learning Basic Features 4 Learning Basic Features This chapter describes the basic features of the H100 inverter. Check the reference page in the table to see the detailed description for each of the advanced features. Basic Tasks Description Ref. Operation mode selection Used to select the operation mode. - Page 94 Learning Basic Features Basic Tasks Description Ref. block inputs Command source Configures the inverter to accept communication signals configuration for RS-485 p.109 from upper level controllers, such as PLCs or PCs. communication Motor rotation control Configures the inverter to limit a motor’s rotation direction. p.109 Configures the inverter to start operating at power-on.
- Page 95 Learning Basic Features Basic Tasks Description Ref. Configures the inverter to run a motor at a constant Linear V/F pattern operation torque. To maintain the required torque, the operating p.125 frequency may vary during operation. Configures the inverter to run the motor at a square Square reduction V/F pattern reduction V/F pattern.
-
Page 96: Switching Between The Operation Modes (Hand / Auto / Off)
Learning Basic Features Basic Tasks Description Ref. reaches the defined frequency, DC braking is applied. Configures the inverter to stop output to the motor using Free-run stop a stop command. The motor will free-run until it slows p.135 down and stops. Configures the inverter to provide optimal, motor Power braking p.136... - Page 97 Learning Basic Features Press the [OFF] key. The OFF LED turns on and the inverter stops operating. AUTO Mode Operation Follow the instructions listed below to operate the inverter in AUTO mode. Press the [AUTO] key to switch to AUTO mode. Operate the inverter using the terminal block input, commands via communication, or keypad input.
- Page 98 Learning Basic Features Basic HAND/AUTO/OFF Mode Operations Mode Description In HAND mode, operation is available only by the keypad input. In Monitor mode, the currently set frequency reference is displayed at all times. Also, in HAND mode: • The first monitoring item is used to adjust the frequency with the up/down and left/right keys.
- Page 99 Learning Basic Features Function Codes related to HAND/AUTO/OFF Operation Modes Codes / Functions Description DRV-01 Frequency reference in AUTO mode when DRV-07 is set to’ KeyPad’ . Cmd Frequency DRV-02 Rotation direction of the keypad command in the HAND or AUTO mode. KeyPad Run Dir Settings Description...
- Page 100 Learning Basic Features Mode Description set at DRV-25 (HAND Cmd Freq). Follow Auto The inverter takes over the operation direction and the frequency reference from the settings for AUTO mode and keeps performing the same operation. If the inverter was stopped in AUTO mode, the operation direction is set as Fx and the frequency reference is set as 0 (no inverter output).
-
Page 101: Setting Frequency Reference
Learning Basic Features OFF mode. • If a fault trip occurs during an operation in the AUTO or HAND mode, the inverter can be reset using the reset signal from the multi-function input terminal as well. In this case, the inverter turns back on in AUTO mode after the fault trip is released. -
Page 102: Keypad As The Source (Keypad-1 Setting)
Learning Basic Features 4.2.1 Keypad as the Source (KeyPad-1 setting) You can modify frequency reference by using the keypad and apply changes by pressing the [ENT/PROG] key. To use the keypad as a frequency reference input source, go to DRV-07 (Frequency reference source) and change the parameter value to ‘0 (Keypad-1)’... - Page 103 Learning Basic Features terminal. Use voltage inputs ranging from 0–10 V (unipolar) for forward only operation. Use voltage inputs ranging from -10 to +10 V (bipolar) for both directions, where negative voltage inputs are used in reverse operations. 4.2.3.1 Setting a Frequency Reference for 0–10 V Input Set IN-06 (V1 Polarity) to ‘0 (unipolar)’...
- Page 104 Learning Basic Features Group Code Name LCD Display Parameter Setting Setting Range Unit Rotation direction V1 Inverting 0–1 options 0.00*, 0.04– V1 Quantizing level 0.04 Quantizing 10.00 * Quantizing is disabled if ‘0’ is selected. Code Description Configures the frequency reference at the maximum input voltage when a potentiometer is connected to the control terminal block.
- Page 105 Learning Basic Features These parameters are used to configure the gradient level and offset values of the Output Frequency, based on the Input Voltage. IN-08 V1 volt x1– IN-11 V1 Perc y2 Inverts the direction of rotation. Set this code to ‘1 (Yes)’ if you need the motor to IN-16 V1 Inverting run in the opposite direction from the current rotation.
- Page 106 Learning Basic Features [V1 Quantizing] 0–10 V Input Voltage Setting Details...
- Page 107 Learning Basic Features...
- Page 108 Learning Basic Features 4.2.3.3 Setting a Frequency Reference for -10–+10 V Input Set DRV-07 (Frequency reference source) to ‘2 (V1)’ , and then set IN- 06 (V1 Polarity) to ‘1 (bipolar)’ . Use the output voltage from an external source to provide input to V1. [V1 terminal wiring] [Bipolar input voltage and output frequency] Group Code Name...
- Page 109 Learning Basic Features Group Code Name LCD Display Parameter Setting Setting Range Unit V1 output at -100.00– maximum voltage V1- Perc y2 -100.00 0.00% Rotational Directions for Different Voltage Inputs Input voltage Command / Voltage Input 0–10 V -10–0 V Forward Reverse Reverse...
- Page 110 Learning Basic Features 4.2.3.4 Setting a Reference Frequency using Input Current (I2) You can set and modify a frequency reference using input current at the I2 terminal after selecting current input at SW4. Set DRV-07 (Frequency reference source) to ‘5 (I2)’ and apply 0–20 mA input current to I2.
- Page 111 Learning Basic Features Input Current (I2) Setting Details Code Description Configures the frequency reference for operation at the maximum current (when IN-55 is set to 100%). • If IN-01 is set to 40.00, and default settings are used for IN-53–56, 20 mA IN-01 Freq at input current (max) to I2 will produce a frequency reference of 40.00 Hz.
-
Page 112: Setting A Frequency Reference With Input Voltage (Terminal I2)
Learning Basic Features 4.2.4 Setting a Frequency Reference with Input Voltage (Terminal I2) Set and modify a frequency reference using input voltage at I2 (V2) terminal by setting SW2 to V2. Set the DRV-07 (Frequency reference source) to 4 (V2) and apply 0–12 V input voltage to I2 (=V2, Analog current/voltage input terminal). -
Page 113: Setting A Frequency With Ti Pulse Input
Learning Basic Features 4.2.5 Setting a Frequency with TI Pulse Input Set a frequency reference by setting the Frq (Frequency reference source) code (code 07) in DRV group to 9 (Pulse) and provide 0–32.00 kHz pulse frequency to TI terminal. Group Code Name... - Page 114 Learning Basic Features TI Pulse Input Setting Details Code Description Configures the frequency reference at the maximum pulse input. The frequency reference is based on 100% of the value set with IN-96. • If IN-01 is set to 40.00 and codes IN-93–96 are set at default, 32 kHz IN-01 Freq at 100% input to TI yields a frequency reference of 40.00 Hz.
-
Page 115: Setting A Frequency Reference Via Rs-485 Communication
Learning Basic Features 4.2.6 Setting a Frequency Reference via RS-485 Communication Control the inverter with upper-level controllers, such as PCs or PLCs, via RS-485 communication. Set the Frq (Frequency reference source) code (code 07) in the DRV group to 6 (Int 485) and use the RS-485 signal input terminals (S+/S-/SG) for communication. -
Page 116: Frequency Hold By Analog Input
Learning Basic Features 4.3 Frequency Hold by Analog Input If you set a frequency reference via analog input at the control terminal block, you can hold the operation frequency of the inverter by assigning a multi-function input as the analog frequency hold terminal. -
Page 117: Changing The Displayed Units (Hz↔Rpm)
Learning Basic Features 4.4 Changing the Displayed Units (Hz↔ ↔ ↔ ↔ Rpm) You can change the units used to display the operational speed of the inverter by setting DRV- 21 (Speed unit selection) to 0 (Hz Display) or 1 (Rpm Display). Group Code Name LCD Display... - Page 118 Learning Basic Features Multi-step Frequency Setting Details Code Description BAS Group 50–56 Configure multi-step frequency 1–7. Choose the terminals to setup as multi-step inputs, and then set the relevant codes (IN-65–71) to 7 (Speed-L), 8 (Speed-M), or 9 (Speed-H). Provided that terminals P5, P6, and P7 have been set to Speed-L, Speed-M and Speed-H respectively, the following multi-step operation will be available.
-
Page 119: Command Source Configuration
Learning Basic Features 4.6 Command Source Configuration Various devices can be selected as command input devices for the H100 inverter. Input devices available to select include keypad, multi-function input terminal, RS-485 communication and field bus adapter. Group Code Name LCD Display Parameter Setting Setting Range Unit... -
Page 120: Commands)
Learning Basic Features 4.6.2 Terminal Block as a Command Input Device (Fwd/Rev run commands) Multi-function terminals can be selected as a command input device. This is configured by setting DRV-06 (command source) in the Drive group to ‘1 (Fx/Rx)’ . Select 2 terminals for the forward and reverse operations, and then set the relevant codes (2 of the 7 multi-function terminal codes, IN- 65–71 for P1–P7) to ‘1 (Fx)’... -
Page 121: Terminal Block As A Command Input Device (Run And Rotation Direction Commands)
Learning Basic Features 4.6.3 Terminal Block as a Command Input Device (Run and Rotation Direction Commands) Multi-function terminals can be selected as a command input device. This is configured by setting DRV-06 (command source) in the Drive group to 2(Fx/Rx-2). Select 2 terminals for run and rotation direction commands, and then select the relevant codes (2 of the 5 multi-function terminal codes, IN-65–71 for P1–P7) to 1 (Fx) and 2 (Rx) respectively. -
Page 122: Communication As A Command Input Device
Learning Basic Features 4.6.4 RS-485 Communication as a Command Input Device Internal RS-485 communication can be selected as a command input device by setting DRV-06 (command source) in the Drive group to ‘3 (Int 485)’ . This configuration uses upper level controllers such as PCs or PLCs to control the inverter by transmitting and receiving signals via the S+, S-, and RS-485 signal input terminals at the terminal block. -
Page 123: Forward Or Reverse Run Prevention
Learning Basic Features 4.7 Forward or Reverse Run Prevention The rotation direction of motors can be configured to prevent motors to only run in one direction. Pressing the [REV] key on the keypad when direction prevention is configured, will cause the motor to decelerate to 0 Hz and stop. -
Page 124: Power-On Run
Learning Basic Features 4.8 Power-on Run A power-on run feature can be setup to start an inverter operation after powering up based on the run commands by terminal inputs or communication (if they are configured). In AUTO mode, the inverter starts operating at power-on when the following conditions are met. Terminal block input as the command source (If they have been configured). - Page 125 Learning Basic Features Communication as the command source To enable power-on resume, set COM-96 (PowerOn Resume) to ‘YES’ , and set DRV-06 to ‘3 (Int 485)’ or ‘4 (Field Bus). ’ If the power input to the inverter is cut off due to a power interruption, the inverter memorizes the run command, frequency reference, and the acc/dec time settings at the time of power interruption.
-
Page 126: Reset And Restart
Learning Basic Features 4.9 Reset and Restart Reset and restart operations can be setup for inverter operation following a fault trip, based on the terminal block operation command (if it is configured). When a fault trip occurs, the inverter cuts off the output and the motor will free-run. -
Page 127: Setting Acceleration And Deceleration Times
Learning Basic Features Note • To prevent a repeat fault trip from occurring, set CON-71 (speed search options) bit 2 the same as bit 1. The inverter will perform a speed search at the beginning of the operation. • If the speed search is not enabled, the inverter will start its operation in a normal V/F pattern and accelerate the motor. - Page 128 Learning Basic Features Group Code Name LCD Display Parameter Setting Setting Range Unit Maximum Max Freq 60.00 40.00–400.00 frequency Acc/Dec Ramp T reference Max Freq 0–1 Mode frequency Time scale Time scale 0.1 sec 0–2 Acc/Dec Time Based on Maximum Frequency – Setting Details Code Description Set the parameter value to 0 (Max Freq) to setup Acc/Dec time based on...
- Page 129 Learning Basic Features second to 0.01 second will result in a modified acceleration time of 60.00 seconds.
-
Page 130: Acc/Dec Time Based On Operation Frequency
Learning Basic Features 4.10.2 Acc/Dec Time Based on Operation Frequency Acc/Dec times can be set based on the time required to reach the next step frequency from the existing operation frequency. To set the Acc/Dec time values based on the existing operation frequency, set BAS-08 (acc/dec reference) in the Basic group to ‘1 (Delta Freq)’... -
Page 131: Multi-Step Acc/Dec Time Configuration
Learning Basic Features 4.10.3 Multi-step Acc/Dec Time Configuration Acc/Dec times can be configured via a multi-function terminal by setting the ACC (acceleration time) and DEC (deceleration time) codes in the DRV group. Group Code Name LCD Display Parameter Setting Setting Range Unit 20.0 0.75~90KW... - Page 132 Learning Basic Features Acc/Dec Time Setup via Multi-function Terminals – Setting Details Code Description BAS-70–82 Set multi-step acceleration time1–7. Acc Time 1–7 BAS-71–83 Set multi-step deceleration time1–7. Dec Time 1–7 Choose and configure the terminals to use for multi-step Acc/Dec time inputs Configuration Description...
-
Page 133: Configuring Acc/Dec Time Switch Frequency
Learning Basic Features 4.10.4 Configuring Acc/Dec Time Switch Frequency You can switch between two different sets of Acc/Dec times (Acc/Dec gradients) by configuring the switch frequency without configuring the multi-function terminals. Group Code Name LCD Display Parameter Setting Setting Range Unit 20.0 0.75~90KW... -
Page 134: Acc/Dec Pattern Configuration
Learning Basic Features Code Description 4.11 Acc/Dec Pattern Configuration Acc/Dec gradient level patterns can be configured to enhance and smooth the inverter’s acceleration and deceleration curves. Linear pattern features a linear increase or decrease to the output frequency, at a fixed rate. For an S-curve pattern a smoother and more gradual increase or decrease of output frequency, ideal for lift-type loads or elevator doors, etc. - Page 135 Learning Basic Features Code Description Sets the gradient level as acceleration starts when using an S-curve, Acc/Dec pattern. ADV-03 defines S-curve gradient level as a percentage, up to half of total acceleration. If the frequency reference and maximum frequency are set at 60 Hz and ADV- ADV-03 Acc S Start 03 is set to 50%, ADV-03 configures acceleration up to 30 Hz (half of 60 Hz).
- Page 136 Learning Basic Features [Acceleration / deceleration S-curve pattern configuration] Note The Actual Acc/Dec time during an S-curve application Actual acceleration time = user-configured acceleration time + user-configured acceleration time x starting gradient level/2 + user-configured acceleration time x ending gradient level/2. Actual deceleration time = user-configured deceleration time + user-configured deceleration time x starting gradient level/2 + user-configured deceleration time x ending gradient level/2.
-
Page 137: Stopping The Acc/Dec Operation
Learning Basic Features 4.12 Stopping the Acc/Dec Operation Configure the multi-function input terminals to stop acceleration or deceleration and operate the inverter at a fixed frequency. Group Code Name LCD Display Parameter Setting Setting Range Unit Px terminal Px Define 65–71 XCEL Stop 0–55... -
Page 138: V/F (Voltage/Frequency) Control
Learning Basic Features 4.13 V/F (Voltage/Frequency) Control Configure the inverter’s output voltages, gradient levels, and output patterns to achieve a target output frequency with V/F control. The amount of torque boost used during low frequency operations can also be adjusted. 4.13.1 Linear V/F Pattern Operation A linear V/F pattern configures the inverter to increase or decrease the output voltage at a fixed rate for different operation frequencies based on V/F characteristics. -
Page 139: Square Reduction V/Fpattern Operation
Learning Basic Features 4.13.2 Square Reduction V/FPattern Operation Square reduction V/F pattern is ideal for loads such as fans and pumps. It provides non-linear acceleration and deceleration patterns to sustain torque throughout the whole frequency range. Group Code Name LCD Display Parameter Setting Setting Range Unit... -
Page 140: User V/F Pattern Operation
Learning Basic Features 4.13.3 User V/F Pattern Operation The H100 inverter allows the configuration of user-defined V/F patterns to suit the load characteristics of special motors. Group Code Name LCD Display Parameter Setting Setting Range Unit V/F pattern V/F Pattern User V/F 0–3 0–Maximum... - Page 141 Learning Basic Features • When a normal induction motor is in use, care must be taken not to configure the output pattern away from a linear V/F pattern. Non-linear V/F patterns may cause insufficient motor torque or motor overheating due to over-excitation. •...
-
Page 142: Torque Boost
Learning Basic Features 4.14 Torque Boost 4.14.1 Manual Torque Boost Manual torque boost enables users to adjust output voltage during low speed operation or motor start. Increase low speed torque or improve motor starting properties by manually increasing output voltage. Configure manual torque boost while running loads that require high starting torque, such as lift-type loads. -
Page 143: Auto Torque Boost
Learning Basic Features 4.14.2 Auto Torque Boost Set DRV-15 to ‘Auto 1’ or ‘Auto 2’ to select the type of torque boost. While manual torque boost adjusts the inverter output based on the setting values regardless of the type of load used in the operation, auto torque boost enables the inverter to automatically calculate the amount of output voltage required for torque boost based on the entered motor parameters. -
Page 144: Output Voltage Setting
Learning Basic Features 4.15 Output Voltage Setting Output voltage settings are required when a motor’s rated voltage differs from the input voltage to the inverter. Set BAS-15 to configure the motor’ s rated operating voltage. The set voltage becomes the output voltage of the inverter’s base frequency. When the inverter operates above the base frequency, and when the motor’s voltage rating is lower than the input voltage at the inverter, the inverter adjusts the voltage and supplies the motor with the voltage set at BAS-15 (motor rated voltage). -
Page 145: Start Mode Setting
Learning Basic Features 4.16 Start Mode Setting Select the start mode to use when the operation command is input with the motor in the stopped condition. 4.16.1 Acceleration Start Acceleration start is a general acceleration mode. If there are no extra settings applied, the motor accelerates directly to the frequency reference when the command is input. -
Page 146: Stop Mode Setting
Learning Basic Features The amount of DC braking required is based on the motor’s rated current. Do not use DC braking resistance values that can cause current draw to exceed the rated current of the inverter. If the DC braking resistance is too high or brake time is too long, the motor may overheat or be damaged 4.17 Stop Mode Setting Select a stop mode to stop the inverter operation. -
Page 147: Stop After Dc Braking
Learning Basic Features 4.17.2 Stop After DC Braking When the operation frequency reaches the set value during deceleration (DC braking frequency) the inverter stops the motor by supplying DC power to the motor. With a stop command input, the inverter begins decelerating the motor. When the frequency reaches the DC braking frequency set at ADV-17, the inverter supplies DC voltage to the motor and stops it. -
Page 148: Free Run Stop
Learning Basic Features ADV-14 ADV-15 ADV-17 Frequency Voltage Current ADV-16 Run cmd • Note that the motor can overheat or be damaged if excessive amount of DC braking is applied to the motor or DC braking time is set too long. •... -
Page 149: Power Braking
Learning Basic Features 4.17.4 Power Braking When the inverter’s DC voltage rises above a specified level due to motor regenerated energy a control is made to either adjust the deceleration gradient level or reaccelerate the motor in order to reduce the regenerated energy. Power braking can be used when short deceleration times are needed without brake resistors, or when optimum deceleration is needed without causing an over voltage fault trip. -
Page 150: Frequency Limit
This restriction also applies when you in input a frequency reference using the DRV-20 Max Freq keypad. If you use a high speed motor over 60Hz, there will be individual response due to the difference in characteristics. Please contact LSIS. 4.18.2 Frequency Limit Using Upper and Lower Limit Frequency Values Group Code... - Page 151 Learning Basic Features Group Code Name LCD Display Parameter Setting Setting Range Unit frequency...
- Page 152 Learning Basic Features Frequency Limit Using Upper and Lower Limit Frequencies - Setting Details Code Description The initial setting is ‘0 (No)’ . Changing the setting to ‘1 (Yes)’ allows the setting ADV-24 Freq Limit of frequencies between the lower limit frequency (ADV-25) and the upper limit frequency (ADV-26).
-
Page 153: Frequency Jump
Learning Basic Features 4.18.3 Frequency Jump Use frequency jump to avoid mechanical resonance frequencies. The inverter will avoid identified ranges during acceleration and deceleration. Operation frequencies cannot be set within the pre- set frequency jump band. When a frequency setting is increased, while the frequency parameter setting value (voltage, current, RS-485 communication, keypad setting, etc.) is within a jump frequency band the frequency will be maintained at the lower limit value of the frequency band. -
Page 154: Nd Operation Mode Setting
Learning Basic Features Parameter Group Code Name LCD Display Setting Range Unit Setting frequency 4.19 2 Operation Mode Setting Apply two types of operation modes and switch between them as required. For both the first and second command source, set the frequency after shifting operation commands to the multi- function input terminal. -
Page 155: Multi-Function Input Terminal Control
Learning Basic Features • When setting the multi-function terminal to the 2nd command source (2nd Source) and input (On) the signal, operation state is changed because the frequency setting and the Operation command will be changed to the 2nd command. Before shifting input to the multi-function terminal, ensure that the 2nd command is correctly set. - Page 156 Learning Basic Features Multi-function Input Terminal Control Setting Details Code Description IN-85 DI On Delay, If the input terminal’s state is not changed during the set time, when the terminal IN-86 DI Off Delay receives an input, it is recognized as On or Off. Select terminal contact types for each input terminal.
-
Page 157: Multi-Function Input Terminal On/Off Delay Control
Learning Basic Features 4.21 Multi-function Input Terminal On/Off Delay Control Availability of using On/Off Delay about Multi-function Input Terminal can be set Parameter Group Code Name LCD Display Setting Range Unit Setting Availability of applying DI On 111 1111 000 0000 ~ DI On Delay. -
Page 158: Learning Advanced Features
Learning Advanced Features 5 Learning Advanced Features This chapter describes the advanced features of the H100 inverter. Check the reference page in the table to see the detailed description for each of the advanced features. Advanced Tasks Description Ref. Use the main and auxiliary frequencies in the predefined formulas Auxiliary frequency to create various operating conditions. - Page 159 Learning Advanced Features Advanced Tasks Description Ref. Auto restart configuration is used to automatically restart the Auto restart inverter when a trip condition is released, after the inverter stops p.248 operation operating due to activation of protective devices (fault trips). Used to switch equipment operation by connecting two motors to Second motor one inverter.
-
Page 160: Operating With Auxiliary References
Learning Advanced Features Advanced Tasks Description Ref. Operates the inverter in a way to cope with emergency situations, Fire mode operation such as fire, by controlling the operation of ventilation (intake and p.240 exhaust) fans. 5.1 Operating with Auxiliary References Frequency references can be configured with various calculated conditions that use the main and auxiliary frequency references simultaneously. - Page 161 Learning Advanced Features Auxiliary Reference Setting Details Code Description Set the input type to be used for the auxiliary frequency reference. Configuration Description None Auxiliary frequency reference is disabled Sets the V1 (voltage) terminal at the control terminal block as the source of auxiliary frequency reference.
- Page 162 Learning Advanced Features M+M*G*2*(A- Main reference + Main reference x BAS-03x2x(BAS- 01–50) M: Main frequency reference (Hz or rpm) G: Auxiliary reference gain (%) A: Auxiliary frequency reference (Hz or rpm) or gain (%) BAS-03 Aux Ref Adjust the size of the input (BAS-01 Aux Ref Src) configured for auxiliary Gain frequency.
- Page 163 Learning Advanced Features Auxiliary Reference Operation Ex #1 Keypad Frequency Setting is Main Frequency and V1 Analog Voltage is Auxiliary Frequency • Main frequency: Keypad (operation frequency 30 Hz) • Maximum frequency setting (DRV-20): 400 Hz • Auxiliary frequency setting (BAS-01): V1[Display by percentage(%) or auxiliary frequency (Hz) depending on the operation setting condition] •...
- Page 164 Learning Advanced Features Auxiliary Reference Operation Ex #2 Keypad Frequency Setting is Main Frequency and I2 Analog Voltage is Auxiliary Frequency • Main frequency: Keypad (Operation frequency 30 Hz) • Maximum frequency setting (BAS-20): 400 Hz • Auxiliary frequency setting (BAS-01): I2 [Display by percentage (%) or auxiliary frequency (Hz) depending on the operation setting condition] •...
- Page 165 Learning Advanced Features Auxiliary Reference Operation Ex #3 V1 is Main Frequency and I2 is Auxiliary Frequency • Main frequency: V1 (frequency command setting to 5 V and is set to 30 Hz) • Maximum frequency setting (DRV-20): 400 Hz •...
-
Page 166: Jog Operation
Learning Advanced Features 5.2 Jog Operation The jog operation allows for a temporary control of the inverter. You can enter a jog operation command using the multi-function terminals or by using the [ESC] key on the keypad. The jog operation is the second highest priority operation, after the dwell operation. If a jog operation is requested while operating the multi-step, up-down, or 3-wire operation modes, the jog operation overrides all other operation modes. -
Page 167: Jog Operation 2-Forward/Reverse Jog By Multi-Function Terminal
Learning Advanced Features Code Description DRV-11 JOG Frequency Set the operation frequency. DRV-12 JOG Acc Time Set the acceleration speed. DRV-13 JOG Dec Time Set the deceleration speed. If a signal is entered at the jog terminal while an FX operation command is on, the operation frequency changes to the jog frequency and the jog operation begins. -
Page 168: Up-Down Operation
Learning Advanced Features Group Code Name LCD Display Parameter setting Setting Range Unit FWD JOG 65– Px terminal Px Define 0-55 configuration (Px: P1–P7) REV JOG DRV-12 DRV-13 DRV-12 DRV-11 DRV-11 Frequency DRV-11 DRV-12 DRV-13 REV Jog FWD Jog 5.3 Up-down Operation The Acc/Dec time can be controlled through input at the multi-function terminal block. - Page 169 Learning Advanced Features Up-down Operation Setting Details Code Description Select two terminals for up-down operation and set them to ‘19 (Up)’ and ‘20 (Down)’ , respectively. With the operation command input, acceleration begins when the Up terminal signal is on. Acceleration stops and constant speed operation begins when the signal is off.
-
Page 170: 3- Wire Operation
Learning Advanced Features 5.4 3- Wire Operation The 3-wire operation latches the signal input (the signal stays on after the button is released), and is used when operating the inverter with a push button. Group Code Name LCD Display Parameter Setting Setting Range Unit Command source... -
Page 171: Safe Operation Mode
Learning Advanced Features 5.5 Safe Operation Mode When the multi-function terminals are configured to operate in safe mode, operation commands can be entered in the Safe operation mode only. Safe operation mode is used to safely and carefully control the inverter through the multi-function terminals. Setting Group Code... - Page 172 Learning Advanced Features Code Description operation mode. It stops after deceleration and then the operation can resume only when the operation command is entered again. The operation will not begin if only the multi-function terminal is on. Q-Stop The inverter decelerates to the deceleration time Resume (Q-Stop Time) in safe operation mode.
-
Page 173: Dwell Operation
Learning Advanced Features 5.6 Dwell Operation The dwell operation is used to maintain torque during the application and release of the mechanical brakes on lift-type loads. Inverter dwell operation is based on the Acc/Dec dwell frequency and the dwell time set by the user. The following points also affect dwell operation. •... - Page 174 Learning Advanced Features • Re-acceleration is attempted from stop or during deceleration, as only the first acceleration dwell operation command is valid. [Acceleration dwell operation] • Although deceleration dwell operation is carried out whenever stop commands are entered and the deceleration dwell frequency is passed through, it does not work during a deceleration by simple frequency change (which is not a deceleration due to a stop operation), or during external brake control applications.
-
Page 175: Slip Compensation Operation
Learning Advanced Features 5.7 Slip Compensation Operation Slip refers to the variation between the setting frequency (synchronous speed) and motor rotation speed. As the load increases there can be variations between the setting frequency and motor rotation speed. Slip compensation is used for loads that require compensation of these speed variations. -
Page 176: Pid Control
Learning Advanced Features Code Description = Number of motor poles BAS-13 Rated Curr Enter the rated current from the motor rating plate. Enter the measured current when the load on the motor axis is removed and when the motor is operated at the rated frequency. If no-load BAS-14 Noload Curr current is difficult to measure, enter a current equivalent to 30-50% of the rated motor current. -
Page 177: Pid Basic Operation
Learning Advanced Features Purpose Function Controls temperature by monitoring the current temperature levels Temperature Control of the equipment or machinery to be controlled. Control maintains a consistent temperature or operates at a target temperature. 5.8.1 PID Basic Operation PID operates by controlling the output frequency of the inverter, through automated system process control to maintain speed, pressure, flow, temperature or tension. - Page 178 Learning Advanced Features Group Code Name LCD Display Parameter Setting Setting Range Unit selection PID reference 2 Unit Min–Unit PID Ref 2 Set Unit Default Unit keypad setting PID reference 2 auxiliary source None 0–13 Ref2AuxSrc selection PID reference 2 auxiliary mode M+(G*A) 0–12...
- Page 179 Learning Advanced Features Group Code Name LCD Display Parameter Setting Setting Range Unit PID output lower -100.00–PID PID Limit Lo 0.00 Unit limit Limit Hi PID proportional PID P-Gain 2 0.0–300.00 Unit gain 2 PID integral time 2 PID I-Time 2 10.0 0.0–200.0 PID differential...
- Page 180 Learning Advanced Features Group Code Name LCD Display Parameter Setting Setting Range Unit Differ PID control 100% PID Unit 100% 100.00 depending on setting figure PID-50 setting 65– Px circuit function Px Define(Px: none 0–55 setting P1–P7) Note • Normal PID output (PID OUT) is bipolar and is limited by PID-46 (PID Limit Hi) and PID-47 (PID Limit Lo) settings.
- Page 181 Learning Advanced Features Code Description feedback source. Setting Function Keypad Keypad -10-10 V input voltage terminal I2 analog input terminal When the analog voltage/current input terminal selection switch (SW4) at the terminal block is set to I (current), input 0-20 mA current. If it is set to V (voltage), input 0–10 V.
- Page 182 Learning Advanced Features Code Description Output EPID1 Fdb External PID 1 feedback value V3 analog input terminal of Extension IO option When the analog voltage/current input terminal selection switch (SW2) at the terminal block is set to I3 (current), input 0-20 mA current. If it is set to V3 (voltage), input 0–10 V.
- Page 183 Learning Advanced Features Code Description [If the analog voltage/current input terminal selection switch (SW4) at the terminal block is set to I (current), input 0-20 mA current. If it is set to V (voltage), input 0– 10 V] Int. 485 RS-485 input terminal FieldBus Communication command via a communication...
- Page 184 Learning Advanced Features Code Description M/(G*A) M+(M*(G*A)) M+G*2*(A-50) M*(G*2*(A-50)) M/(G*2*(A-50)) M+M*G*2*(A-50) (M-A)^2 M^2+A^2 MAX(M,A) MIN(M,A) (M+A)/2 Square Root(M+A) M= Value by the source set at PID-30 G= Gain value set at PID-33 A= Value by the source set at PID-31 PID-23 PID Fdb Aux G Gain value used a formula set at PID-22.
- Page 185 Learning Advanced Features Code Description Sets the ratio that adds the target to the PID output. Adjusting this value PID-28 PID FF-Gain leads to a faster response. Used when the PID controller output changes too quickly or the entire system is unstable, due to severe oscillation. In general, a lower value (default PID-29 value=0) is used to speed up response time, but in some cases a higher value PID Out LPF...
- Page 186 Learning Advanced Features Code Description mBar gl/s gl/m gl/h ft/s f3/s(ft3/min) f3/h (ft3/h) lb/s lb/m lb/m lb/h m3/s(m 3/S) PID-51 Adjusts the scale to fit the unit selected at PID-50 PID Unit Sel. PID Unit Scale PID-52 PID Unit 0 % Sets the Unit 0% and Unit 100% values as the minimum and maximum PID-53 values set at PID-50.
- Page 187 Learning Advanced Features PID Command Block...
- Page 188 Learning Advanced Features...
- Page 189 Learning Advanced Features PID Feedback Block...
- Page 190 Learning Advanced Features PID Output Block...
- Page 191 Learning Advanced Features PID Output Mode Block...
-
Page 192: Soft Fill Operation
Learning Advanced Features 5.8.2 Soft Fill Operation A soft fill operation is used to prevent excessive pressure from building in the pipe system at the initial stage of a pump operation. When the operation command is given, a general acceleration (without PID control) begins and continues until the output reaches the frequency set at AP1-21, for the time set at AP1-22. - Page 193 Learning Advanced Features Code Description Delay variables) of PID controller exceeds the value set at AP1-23. However, if AP1-22 AP1-23 (Pre-PID Delay) is set, the feedback after the set time becomes the default value Soft Fill Set for the soft fill PID reference, and the inverter starts the soft fill operation. When the feedback or the Soft Fill PID Reference exceeds the Soft Fill Set value, the soft fill operation ends and a normal process PID operation begins.
-
Page 194: Pid Sleep Mode
Learning Advanced Features 5.8.3 PID Sleep Mode If an operation continues at a frequency lower than the PID operation conditions, a boost operation is performed to extend sleep mode by raising the PID Reference, and then the inverter enters PID sleep mode. In PID sleep mode, the inverter resumes PID operation when the PID feedback falls below the PID Wakeup level and maintains the condition for the time set at AP1-09 (PID WakeUp1 DT) or AP1-13 (PID WakeUp2DT). - Page 195 Learning Advanced Features Group Code Name LCD Displays Parameter Setting Setting Range Unit PID wakeup 2 delay PID WakeUp2 20.0 0–6000.0 time PID wakeup 2 value 20.00 0–Unit Band Unit WakeUp2Dev Soft Fill options Soft Fill Sel 0–1 PID Operation Sleep Mode Setting Details Code Description Sets the sleep boost volume.
-
Page 196: Pid Switching (Pid Openloop)
Learning Advanced Features 5.8.4 PID Switching (PID Openloop) When one of the multi-function terminals (IN-65–71) is set to ‘25 (PID Openloop)’ and is turned on, the PID operation stops and is switched to general operation. When the terminal turns off, the PID operation starts again. -
Page 197: External Pid
Learning Advanced Features 5.9 External PID External PID refers to the PID features other than the basic PID features required to control the inverter. The following table shows the areas where external PID controls can be applied. Purpose Function Controls speed by monitoring the current speed levels of the equipment or Speed Control machinery being controlled. - Page 198 Learning Advanced Features Group Code Name LCD Display Parameter Setting Setting Range Unit EPID1 feedback EPID1 Fdb 0–9 source selection EPID1 proportional EPID1 P-Gain 50.0 0.0–300.0% Unit gain EPID1 integral time EPID1 I-Time 10.0 0.0–200.0 EPID1 differentiation EPID1 D-Time 0.00 0–0.00 time EPID1 feed-forward...
- Page 199 Learning Advanced Features Group Code Name LCD Display Parameter Setting Setting Range Unit X100: Unit 0%– 32000 X10: Unit 0%–3200.0 EPID1 EPID1 unit 100% Differs depending X1: Unit Unit100% value on the unit setting 0%–320.00 X0.1: Unit 0%–32.000 X0.01: Unit 0%– 3.2000 EPID2 Mode EPID2 Mode...
- Page 200 Learning Advanced Features Group Code Name LCD Display Parameter Setting Setting Range Unit EPID2 output upper EPID2 Limit EPID2 Limit Lo– 100.00 limit 100.00 EPID2 output lower EPID2 Limit -100.00–EPID2 0.00 limit Limit Hi EPID2 output EPID2 Out 0: No inverse EPID2 Unit Refer to EPID unit...
- Page 201 Learning Advanced Features Unit MAX = EPID1 (EPID2) Unit 100% (PID-68 ) Unit Min = (2xEPID1 (EPID2) Unit0%-EPID1 (EPID2) Unit 100%) Unit Default = (EPID1 (EPID2) Unit 100%-EPID1 (EPID2) Unit 0%)/2...
- Page 202 Learning Advanced Features EPID Basic Operation Setting Details Code Description Sets the EPID1 modes. Setting Function None EPID1 is not used. EPI-01 EPID1 Mode Always On EPID1 operates at all times. During Run Operates only when the inverter is running. DI Dependent Operates when terminal input (EPID1 Run) is Displays the existing output value for the EPID controller.
- Page 203 Learning Advanced Features Code Description Set the EPI control reference type (EPI-06) to ‘0 (Keypad)’ to enter the EPI-07 EPID1 Ref Set reference value. Sets the output ratio for differences (errors) between the reference and EPI-09 EPID1 P-Gain feedback. If the P-Gain x 2 is set to 50%, then 50% of the error is output. The setting range for P-Gain is 0.0-1,000%.
- Page 204 Learning Advanced Features Code Description stable the EPID controller output is, but the slower the response time. EPI-14 EPID1 Limit Hi, Limits the output of the controller. EPI-15 EPID1 Limit Lo EPI-16 If EPID Out Inv is set to ‘Yes, ’ the difference (error) value between the EPID1 Out Inv reference and the feedback is set as the feedback–reference value.
- Page 205 Learning Advanced Features EPID1 Control block...
- Page 206 Learning Advanced Features EPID2 Control block...
-
Page 207: Damper Operation
Learning Advanced Features 5.10 Damper Operation A damper is a device that controls the flow in a ventilation system. If a fan and a damper are used together in a system, the inverter may be configured to operate according to the damper’s operation status. - Page 208 Learning Advanced Features Note Damper operation is one of the essential system features that are available in both HAND and AUTO modes.
-
Page 209: Lubrication Operation
Learning Advanced Features 5.11 Lubrication Operation During a lubrication operation, the inverter outputs the lubrication signal through one of the output relays when the inverter receives a run command. The inverter does not start operating until the time set at AP2-46 (Lub Op Time) has elapsed and the Lubrication signal is turned off. Group Code Name... -
Page 210: Flow Compensation
Learning Advanced Features 5.12 Flow Compensation In a system with a pipeline, longer pipes and higher flow rate cause greater pressure loss. A flow compensation operation can compensate for pressure loss by increasing the volume of the PID reference. Group Code Name LCD Display... -
Page 211: Payback Counter
Learning Advanced Features below. PID-53: PID Output Maximum value 5.13 Payback Counter The payback counter displays energy savings information by comparing the average energy efficiency for operations with and without the inverter. The energy savings information is displayed as kWh, saved energy cost, and CO2 emission level. Group Code Name LCD Display... - Page 212 Learning Advanced Features Group Code Name LCD Display Parameter Setting Setting Range Unit conversion Factor Reduced CO2 (Ton) Saved CO2 - 1 -9999–9999 Reduced CO2 Saved CO2 - 2 -160–160 (1000 Ton) 0 No Reset Energy Reset Energy payback parameter 1 Yes Energy Payback Value Function Setting Details Code...
-
Page 213: Pump Clean Operation
Learning Advanced Features 5.14 Pump Clean Operation The pump clean operation is used to remove the scales and deposits attached on the impeller inside a pump. This operation keeps the pump clean by performing a repetitive run-and-stop operation of a pump. This prevents loss in pump performance and premature pump failures. Group Code Name... - Page 214 Learning Advanced Features Group Code Name LCD Display Parameter Setting Setting Range Unit Forward step 0.00, Low Freq– run frequency SteadyFreq High Freq Reverse step run Rev Steady T 10.0 1.0–6000.0 time Reverse step run 0.00, Low Freq– frequency SteadyFreq High Freq Number of PC Num of...
- Page 215 Learning Advanced Features elapses, accelerates by the acceleration time set at AP2-22, and operates at the frequency set at AP2-25. The pump runs for the time set at AP2-24, decelerates by the time set at AP2-23, and then stops. This operation repeats in the forward and reverse directions (one after another) for the number of times set at AP2-28 (PC Num of Step).
- Page 216 Learning Advanced Features Code Description motor x AP2-18 setting value) to the pump clean load curve calculated by AP2-17 to calculate the final pump clean load curve. The inverter performs pump clean operation when the inverter continues operating for the time set at AP2-19. When AP2-15 is set to ‘Power’...
-
Page 217: Start & End Ramp Operation
Learning Advanced Features Code Description exceeds the number set at AP2-33 within the time period set at AP2-32. Note • When the run prevent feature is active and an operation in the prevented direction is required to perform a pump clean operation, the inverter operates at the 0 speed for the time set at AP2-24 and AP2-26 (Steady Time). - Page 218 Learning Advanced Features Group Code Name LCD Display Parameter Setting Setting Range Unit Frequency limit Freq Limit 0: No options Low Freq Start Freq– Freq Limit Lo 30.00 minimum value Max Freq Low Freq Freq Limit Lo– Freq Limit Hi 60.00 maximum value Max Freq...
-
Page 219: Decelerating Valve Ramping
Learning Advanced Features 5.16 Decelerating Valve Ramping This function is used to prevent pump damage due to abrupt deceleration. When the pump operation frequency reaches the valve ramp frequency ( AP2-38 Dec Valve Freq) while decelerating rapidly based on the deceleration ramp time (set at AP2-42), it begins to slow down the deceleration based on the deceleration valve ramp time (set at AP2-39 DecValve Time). -
Page 220: Load Tuning
Learning Advanced Features The time set at AP2-39 refers to the absolute time that it takes for the pump to decelerate from the frequency set at AP2-38 to the frequency limit set at ADV-25. 5.17 Load Tuning Load tuning refers to an operation that detects the load applied to a specific section of the inverter operation (current and voltage) and creates an ideal load curve for the under load and pump clean operations. - Page 221 Learning Advanced Features Load Tuning Setting Details Code Description The inverter performs an automatic tuning to generate an ideal system load curve. Setting Function AP2-01 Load Tune None Load tuning is not used. Load Tune Start load tuning. AP2-02 Load Fit LFreq Defines the first frequency set point for load tuning (user definable).
-
Page 222: Level Detection
Learning Advanced Features • If the frequencies for AP2-02 (Low Freq) and AP2-08 (High Freq) are set too close to each other, the resulting load curve may not reflect the actual (ideal) load curve. Therefore, it is recommended that you keep the AP2-02 and AP2-08 frequencies as close to the factory defaults as possible. •... - Page 223 Learning Advanced Features Group Code Name LCD Display Parameter Setting Setting Range Unit cycle count LDT Auto restart LDT Cnt Clr T 0~6000 cycle Initialization time Level Detection Setting Details Code Description Determines the inverter operation when a level detection trip occurs. Setting Functions PRT-70 LDT Sel...
- Page 224 Learning Advanced Features Code Description Selects a source for level detection. Setting Function Output Current Sets the output current as the source. DC Link Voltage Sets the DC link voltage as the source. Output Voltage Sets the output voltage as the source. Sets the output power as the source.
- Page 225 Learning Advanced Features Code Description EPID2 Fdb EPID2 Unit Min–EPID2 Unit Max If the source is detected below the set level, it must be adjusted to be above the ‘LDT Level + LDT Band Width’ value to release the level detection fault trip. PRT-75 LDT Band If the source is detected above the set level, it must be adjusted to be below Width...
-
Page 226: Pipe Break Detection
Learning Advanced Features <An example of PRT-71 set to (1: Above Level )> As shown in the figure above, level detection can be carried out (relay output is ‘on’) as the output frequency is above PRT-76 and the detection value is greater than the value of PRT-74. The LDT operation is released if the value is less than the value subtracted from the value of band of, when the value of the feedback is set from PRT-74 to PRT-75. - Page 227 Learning Advanced Features Group Code Name LCD Display Parameter Setting Setting Range Unit 3 Dec Pipe Break PipeBroken 97.5 0–100 Detection variation Pipe Break PipeBroken 10.0 0–6000.0 Detection time 31–36 Relay output 1–5 Relay1–5 Pipe Broken Pipe Break Detection Details Code Description Select the operation while detecting Pipe Breaks...
- Page 228 Learning Advanced Features...
-
Page 229: Pre-Heating Function
Learning Advanced Features In the graph above, Pipe Break occurs if the feedback is smaller than the value calculated by multiplying the two values set at PID-04 and PRT-61(PID-04 x PRT-61) at the inverter’s maximum output (when PID output is the maximum set value, or the inverter is running at the frequency set at DRV-20). - Page 230 Learning Advanced Features The initial heating operation starts to run after an inverter operation stops, when the initial heating function’s terminal input is on after the inverter operation command is off.
- Page 231 Learning Advanced Features • If the value for AP2-48 Pre Heat Curr is above the rated motor current value, it is limited by the rated motor current value. • If the value for AP2-48 Pre Heat Curr is too high or the DC current output time is too long, the motor may overheat or be damaged and the Inver IOLT may also malfunction.
-
Page 232: Auto Tuning
Learning Advanced Features 5.21 Auto Tuning The motor parameters can be measured automatically and can be used for an auto torque boost. Example - Auto Tuning Based on 5.5 kW, 200 V Motor Group Code Name LCD Display Parameter Setting Setting Range Unit Motor... - Page 233 Learning Advanced Features Auto Tuning Default Parameter Setting Rated No-load Rated Slip Stator Leakage Motor Capacity Current Current Frequency Resistance Inductance (kW) (Ω Ω Ω Ω ) (Hz) (mH) 0.75 3.00 2.60 17.94 2.67 1.17 2.29 0.84 6.63 13.8 0.50 4.48 200 V 21.0...
- Page 234 Learning Advanced Features Rated No-load Rated Slip Stator Leakage Motor Capacity Current Current Frequency Resistance Inductance (kW) (Ω Ω Ω Ω ) (Hz) (mH) 203.5 48.8 1.00 0.0326 0.585 242.3 58.1 1.00 0.0272 0.488 290.5 69.7 1.00 0.0224 0.403 335.0 77.0 1.00 0.0210...
-
Page 235: Time Event Scheduling
Learning Advanced Features Code Description Note that the rotor time constant (Tr) must be measured in a stopped position. All (static Measures all parameters while the motor is in type) the stopped position, including stator resistance (Rs), no-load current (Noload Curr), rotor time constant (Tr), etc. - Page 236 Learning Advanced Features Time Event function enables the user to operate the inverter using the RTC (Real-Time Clock) feature at certain times that the user would like to set. An RTC battery is installed on the I/O board of the H100 inverter, and it lasts approximately 25,800 hours with the inverter turned off, and 53,300 hours with the inverter turned on.
- Page 237 Learning Advanced Features Group Code Name LCD Display Parameter Setting Setting Range Unit Start time StartT Time Period 2 Period2 Stop Period2 StartT ~ 24: 00 End time 24:00(Min) Time Period 2 Period2 Day 00000000 0000000~1111111 Day of the week Time Period 3 Period3 Start time...
- Page 238 Learning Advanced Features Group Code Name LCD Display Parameter Setting Setting Range Unit None Speed-L Speed-M Speed-H Xcel-L Xcel-M Xcel-H Xcel Stop Run Enable 2nd Source Exchange Analog Hold Time Event 1 Event1Defin 0: None I-Term Clear functions Openloop PID Gain 2 PID Ref Change 2nd Motor...
- Page 239 Learning Advanced Features Group Code Name LCD Display Parameter Setting Setting Range Unit Sleep Wake PID Step Ref L PID Step Ref PID Step Ref Time Event 2–Time Event 8 Parameter 74–87 (The same setting range and initial value as Time Event 1) Time Event Function Setting Details Code Description...
- Page 240 Learning Advanced Features Code Description AP3-11–AP3-20 Period 1–4 The start time for the 4 time periods can be set up to 4. Start T AP3-12–AP3-21 Period 1–4 The end time for the 4 time periods can be set up to 4. Stop T The Time period date for the operation can be set up to 4.
- Page 241 Learning Advanced Features Code Description Select the desired Event. Setting None PID Openloop PID Gain 2 PID Ref Change Speed-L 2nd Motor Speed-M Timer In Speed-H Dias Aux Ref AP3-73–87 T-Event1–8 Xcel-L EPID1 Run Define Xcel-M EPID1 Openloop Xcel-H Pre Heat Xcel Stop EPID2 Run Run Enable...
- Page 242 Learning Advanced Features AP3-13 Period1 Day 1101110 Every Sunday and Saturday for 24 hours (On) Time Schedule Code Function Setting Time Period 2 AP3-14 Period2 StartT 00: 00 AP3-15 Period2 StopT 24: 00 AP3-16 Period2 Day 1000001 Every Sunday, Thursday, Friday, and Saturday at 10: 00 (On) and 14: 00 (Off) Time Schedule Code Function...
- Page 243 Learning Advanced Features dates can be set redundantly with the Time periods. If the Time Periods and the Exception Dates are set redundantly, the inverter operates on the Exception Dates set. Title Setting Range Description Except1–8 Start T 00: 00–24: 00 Hour: Minutes (by the minute) Except1–8 Stop T 00: 00–24: 00...
- Page 244 Learning Advanced Features <The Time Chart for the Exception Day>...
- Page 245 Learning Advanced Features The connection settings for Time Period and Time Event There are 8 Time event modules in the Time Event function. The parameters for T-Events 1–8 are used to set the connections to each module for the Time Period and the Exception Date. The parameters for T-Event 1–8 are used to specify the operation on particular days.
- Page 246 Learning Advanced Features Example of the Time Event operations If the Time events are set as the parameters below, the inverter operates as illustrated. Group Code Name LCD Display Parameter Setting Setting Range Unit Command Cmd Ref Src 5: Time Event 0–9 Source Frequency...
- Page 247 Learning Advanced Features Xcel-L Xcel-M Xcel-H 10 Xcel Stop 11 Run Enable 12 2nd Source 13 Exchange 14 Analog Hold 15 I-Term Clear Openloop 17 PID Gain 2 PID Ref Change 19 2nd Motor 20 Timer In 21 Dias Aux Ref 22 EPID1 Run EPID1 ITerm 24 Pre Heat...
- Page 248 Learning Advanced Features Time Event 2 000000000001– T-Event1Period 00000000010 connection 111111111111 Time Event 2 T-Event2Define 3: Speed-L Refer to AP3-73 functions The parameters in the table above shows the frequency command sources for the keypad and the operation command sources for the Time Event. The following is an example of an inverter operation utilizing the Time Period modules 1 and 2 with Time Events 1 and 2: Time Period 1 is used to operate the inverter on Mondays and Tuesdays from 10AM to 8PM.
- Page 249 Learning Advanced Features <An example of Time Event> Note When repetitive frequency commands related to the frequency input command occur while the Time Event function is performing, Time Event performs its function in the order of the frequency command sources set in Freq Ref Src for DRV-07 (followed by Jog operation and multi-step acc/dec). If a fault trip occurs during a time event operation, the inverter stops the operation and stays in a trip state.
-
Page 250: Kinetic Energy Buffering
Learning Advanced Features 5.23 Kinetic Energy Buffering When the input power supply is disconnected, the inverter’ s DC link voltage decreases, and a low voltage trip occurs blocking the output. A kinetic energy buffering operation uses regenerative energy generated by the motor during the blackout to maintain the DC link voltage. This extends the time for a low voltage trip to occur, after an instantaneous power interruption. - Page 251 Learning Advanced Features Code Description CON-78 Sets the start and stop points of the kinetic energy buffering operation. The set KEB Start Lev, values must be based on the low voltage trip level at 100%, and the stop level CON-79 (CON-79) must be set higher than the start level (CON-78).
-
Page 252: Anti-Hunting Regulation (Resonance Prevention)
Learning Advanced Features 5.24 Anti-hunting Regulation (Resonance Prevention) This function is used to prevent the hunting of a V/F controlled fan or motor caused by current distortion or oscillation, due to mechanical resonance or other reasons. Group Code Name LCD Display Parameter Setting Setting Range Unit... -
Page 253: Fire Mode Operation
Learning Advanced Features 5.25 Fire Mode Operation This function is used to allow the inverter to ignore minor faults during emergency situations, such as fire, and provides continuous operation to protect other systems, such as ventilating fans. In Fire mode, the inverter continues to operate based on the Fire mode run direction and frequency set at PRT-46 and PRT-47. - Page 254 Learning Advanced Features Fire Mode Function Setting Details Code Description Fire mode password is 3473. PRT-44 Fire Mode PW A password must be created to enable Fire mode. PRT-45 (Fire Mode Sel) can be modified only after the password is entered. Sets the Fire Mode.
-
Page 255: Energy Saving Operation
Learning Advanced Features 5.26 Energy Saving Operation 5.26.1 Manual Energy Saving Operation If the inverter output current is lower than the current set at BAS-14 (Noload Curr), the output voltage must be reduced as low as the level set at ADV-51 (Energy Save). The voltage before the energy saving operation starts will become the base value of the percentage. -
Page 256: Speed Search Operation
Learning Advanced Features Group Code Name LCD Display Parameter Setting Setting Range Unit Energy saving E-Save Det T 20.0 0.0–100.0 point search time If the operation frequency is changed, or acceleration or deceleration is carried out during an energy saving operation, the actual Acc/Dec time may take longer than the set time due to the time required to return to general operations from the energy saving operation. - Page 257 Learning Advanced Features Code Description Select a speed search type. Setting Function 0 Flying Start-1 The speed search is carried out as it controls the inverter output current during idling below the CON- 72 (SS Sup-Current) parameter setting. If the direction of the idling motor and the direction of operation command at restart are the same, a stable speed search function can be performed at about 10...
- Page 258 Learning Advanced Features Speed search for general acceleration Initialization after a fault trip Restart after instantaneous power interruption Starting with power-on Speed search for general acceleration: If bit 1 is set to ‘1’ and the inverter operation command runs, acceleration starts with the speed search operation.
- Page 259 Learning Advanced Features Starting with power-on: Set bit 4 to ‘1’ and ADV-10 (Power-on Run) to ‘1 (Yes)’ . If inverter input power is supplied while the inverter operation command is on, the speed search operation will accelerate the motor up to the frequency reference.
- Page 260 Learning Advanced Features Speed Search Operation Setting Details...
-
Page 261: Auto Restart Settings
Learning Advanced Features 5.28 Auto Restart Settings When inverter operation stops due to a fault and a fault trip is activated, the inverter automatically restarts based on the parameter settings. Parameter Group Code Name LCD Display Setting Range Unit Setting Select start at trip reset RST Restart Auto restart count... - Page 262 Learning Advanced Features Code Description bottom segment is turned on, it indicates the function is off. Type Bit On Bit Off LCD Display Reset Restart function Setting Function Bit1 Bit 0 For fault trips other than LV For LV fault trips For fault trips other than LV: If the Bit 0 is turned on, the inverter restarts after a trip occurs and triggers a reset.
-
Page 263: Operational Noise Settings (Carrier Frequency Settings)
Learning Advanced Features • If the auto restart number is set, be careful when the inverter resets from a fault trip. The motor may automatically start to rotate. • In HAND mode, auto restart resets the trip condition but it does not restart the inverter operation. •... -
Page 264: Nd Motor Operation
Learning Advanced Features Code Description phase PWM modulation mode, which helps minimize degradation and reduces switching loss by approximately 30%. Item Carrier Frequency 1.0 kHz 15 kHz LowLeakage PWM Normal PWM Motor noise ↑ ↓ Heat generation ↓ ↑ Leakage current ↓... - Page 265 Learning Advanced Features Group Code Name LCD Display Parameter Setting Setting Range Unit Px terminal Px Define 65–71 28 2nd Motor 0-55 configuration (Px: P1–P7) Motor Operation Setting Details Code Description Set one of the multi-function input terminals (P1–P5) to 26 (2nd Motor) to display the M2 (2nd motor group) group.
-
Page 266: Supply Power Transition
Learning Advanced Features Example - 2nd Motor Operation Use the 2nd motor operation when switching operation between a 7.5 kW motor and a secondary 3.7 kW motor connected to terminal P3. Refer to the following settings. Parameter Setting Group Code Name LCD Display Unit... -
Page 267: Cooling Fan Control
Learning Advanced Features Supply Power Transition Setting Details Code Description When the motor power source changes from inverter output to main supply IN-65–71 power, select a terminal to use and set the code value to ‘18 (Exchange)’ . Power Px Define will be switched when the selected terminal is on. -
Page 268: Input Power Frequency And Voltage Settings
Learning Advanced Features Code Description Settings Description During Run The cooling fan runs when the power is supplied to the inverter and the operation command is on. The cooling fan stops when the power is supplied to the inverter and the operation command is off. -
Page 269: Read, Write, And Save Parameters
Learning Advanced Features voltage standard. Group Code Name LCD Display Parameter Setting Setting Range Unit 200 Type 170–240 Input power AC Input Volt 320–480 0.75~90kW 400 Type voltage 320-550 110~500kW 5.34 Read, Write, and Save Parameters Use read, write, and save function parameters on the inverter to copy parameters from the inverter to the keypad or from the keypad to the inverter. -
Page 270: Parameter Initialization
Learning Advanced Features Code Description 5.35 Parameter Initialization User changes to parameters can be initialized (reset) to factory default settings on all or selected groups. However, during a fault trip situation or operation, parameters cannot be reset. Group Code Name LCD Display Parameter Setting Setting Range... -
Page 271: Parameter View Lock
Learning Advanced Features 5.36 Parameter View Lock Use parameter view lock to hide parameters after registering and entering a user password. Group Code Name LCD Display Parameter Setting Setting Range Unit Parameter view lock View Lock Set Un-locked 0–9999 Parameter view lock View Lock Pw Password 0–9999... -
Page 272: Changed Parameter Display
Learning Advanced Features Group Code Name LCD Display Parameter Setting Setting Range Unit Parameter lock Key Lock Set Un-locked 0–9999 Parameter lock Key Lock Pw Password 0–9999 password Parameter Lock Setting Details Code Description Register a password to prohibit parameter modifications. Follow the procedures below to register a password. -
Page 273: User Group
Learning Advanced Features Group Code Name LCD Display Parameter Setting Setting Range Unit Changed parameter Changed Para View All display Changed Parameter Display Setting Details Code Description Setting Function CNF-41 View All Display all parameters Changed Para View Changed Display changed parameters only 5.39 User Group Create a user defined group and register user-selected parameters from the existing function groups. -
Page 274: Easy Start On
Learning Advanced Features Code Description need to register and press the [MULTI] key. For example, if the [MULTI] key is pressed in the frequency reference in DRV-01 (Cmd Frequency), the screen below will be displayed. 40 CODE Group name and code number of the parameter Name of the parameter Code number to be used in the user group. - Page 275 Learning Advanced Features Run Easy Start On to easily setup the basic motor parameters required to operate a motor in a batch. Set CNF-61 (Easy Start On) to ‘1 (Yes)’ to activate the feature, initialize all parameters by setting CNF-40 (Parameter Init) to ‘1 (All Grp)’ , and restart the inverter to activate Easy Start On. Group Code Name LCD Display Parameter Setting...
-
Page 276: Config (Cnf) Mode
Learning Advanced Features can be operated with the command source set at DRV-06. Easy Start On Setting Details Use caution when turning on the inverter after Easy Start On configuration. If codes such as PRT-08 (Reset Restart), COM-96 (PowerOn Resume), or CON-71 (SpeedSearch) are configured in Easy Start On, the inverter may start operating as soon as it is powered on. -
Page 277: Macro Selection
Learning Advanced Features Config Mode Parameter Setting Details Code Description CNF-2 LCD Contrast Adjusts LCD brightness/contrast on the keypad. CNF-10 Inv S/W Ver, Checks the OS version in the inverter and on the keypad. CNF-11 Keypad S/W Ver CNF-12 KPD Title Ver Checks the title version on the keypad. -
Page 278: Timer Settings
Learning Advanced Features Constant Torq The Macro selection function is used to put various application functions together in a group. For applications with the H100 series inverters, 7 basic Macro configurations are currently available. Macro functions cannot be added by the user, but the data can be modified. Macro Selection Details Code Description... -
Page 279: Multiple Motor Control (Mmc)
Learning Advanced Features Code Description OUT-31 Relay 1, Set the multi-function output terminal or relay to be used as a timer to ’22 OUT-36 Q1 Define (Timer out)’ . OUT-55 Input a signal (On) to the timer terminal to operate a timer output (Timer TimerOn Delay, out) after the time set at OUT-55 has passed. - Page 280 Learning Advanced Features Group Code Name LCD Display Parameter Setting Setting Range Unit 1 – Number of Num of Aux auxiliary motors AuxMaxMotor Auxiliary starting Starting Aux 1–5 motor selection Number of Aux Motor operating auxiliary motors Auxiliary motor Aux Priority 1 - (#1–...
- Page 281 Learning Advanced Features Group Code Name LCD Display Parameter Setting Setting Range Unit deceleration Time time when auxiliary motor is added Auxiliary motor Aux Start DT 0.0–999.9 start delay time Auxiliary motor Aux Stop DT 0.0–999.9 stop delay time None Auto change Auto Ch 0: None...
- Page 282 Learning Advanced Features Group Code Name LCD Display Parameter Setting Setting Range Unit frequency #4 auxiliary Low Freq–High motor start Start Freq 4 Freq frequency #5 auxiliary Low Freq–High motor start Start Freq 5 Freq frequency #6 auxiliary Low Freq–High motor start Start Freq 6 Freq...
- Page 283 Learning Advanced Features Group Code Name LCD Display Parameter Setting Setting Range Unit #6 auxiliary Low Freq–High motor stop Stop Freq 6 Freq frequency #7 auxiliary Low Freq–High motor stop Stop Freq 7 Freq frequency #8 auxiliary Low Freq–High motor stop Stop Freq 8 Freq frequency...
- Page 284 Learning Advanced Features Group Code Name LCD Display Parameter Setting Setting Range Unit Delay time before an operation for the next motor when Interlock DT 0–360.0 an interlock or an auto change on the main motor occur. Aux 1 Aux 2 Aux 3 Selecting auxiliary motor...
- Page 285 Learning Advanced Features Group Code Name LCD Display Parameter Setting Setting Range Unit Aux 1 Aux 2 Aux 3 Aux 4 Aux 5 Aux 6 Aux 7 Aux 8...
- Page 286 Learning Advanced Features MMC Setting Details Code Description Selects the MMC operation settings. -None : Deactivates MMC function -Single Ctrl : Activates general MMC function AP1-40 MMC Sel -Multi Follower : Activates Master Follower as Multi Follower mode -Multi Master: Activates Master Follower as Multi Master mode -Serve Drv: Sets Serve Drv used at Master Follower.
-
Page 287: Multiple Motor Control (Mmc) Basic Sequence
Learning Advanced Features Parameters used when AP1-40 is set to ‘Single Ctrl’ When an auxiliary motor starts or stops, the main motor stops the PID control, and performs general acceleration and deceleration. When an auxiliary motor starts, the main motor decelerates to the AP1-51 Acc Time auxiliary motor deceleration frequency set at AP1-70–74 (Stop Freq AP1-52 Dec Time... - Page 288 Learning Advanced Features Group Code Name LCD Display Parameter Setting Setting Range Unit #1–5 auxiliary Frequency value Low Freq– 61–65 motor start Start Freq 1–5 within the range High Freq frequency Auxiliary motors Percentage value pressure Actual Pr Diff 0–100 (%) within the range difference #1–5 auxiliary...
- Page 289 Learning Advanced Features The following diagram describes the MMC basic sequence based on FILO and FIFO settings. Frequency Max Freq Output frequency AP1-65 AP1-64 AP1-74 AP1-63 AP1-74 AP1-73 AP1-73 AP1-62 AP1-72 AP1-72 AP1-61 AP1-71 AP1-71 AP1-70 AP1-70 Time Aux Motor 1 Aux Motor 2 Aux Motor 3 Aux Motor 4...
- Page 290 Learning Advanced Features Frequency Output AP1-65 AP1-65 frequency AP1-64 AP1-64 AP1-63 AP1-63 AP1-74 AP1-74 AP1-62 AP1-73 AP1-73 AP1-62 AP1-61 AP1-72 AP1-72 AP1-61 AP1-71 AP1-71 AP1-70 AP1-70 Aux Motor 1 Aux Motor 2 Aux Motor 3 Aux Motor 4 Aux Motor 5 AP1-59 PID Reference AP1-50...
- Page 291 Learning Advanced Features Priority at the moment Priority at the moment M1 / M1 / Priority at the moment M3 / Frequency Priority at the moment M3 / Output Max Freq frequency AP1-65 AP1-64 AP1-63 AP1-63 AP1-62 AP1-62 AP1-61 AP1-72 AP1-61 AP1-72 AP1-71...
-
Page 292: Standby Motor
Learning Advanced Features starts or stops. 5.44.2 Standby Motor In case that the number set to MMC in [Relay 1~5] of OUT group is lower than the number of [Num of Aux], auxiliary motor becomes Standby motor state as much as the difference. Ex) In case that Replay1, 2, 3 and 4, and 5 are set to MMC and the number of [Num of Aux] is 3. -
Page 293: Auto Change
Learning Advanced Features 5.44.3 Auto Change The auto change function enables the inverter to automatically switch operations between main and auxiliary motors. Prolonged continuous operation of a motor deteriorates motor capabilities. The auto change function switches the motors automatically when certain conditions are met to avoid biased use of certain motors and protect them from deterioration. - Page 294 Learning Advanced Features Code Description Indicates time to activate Auto Change. In case that other conditions for Auto Change are not met in spite of meeting the condition of AP1-56, AP1-58 Auto Op Time the value of time in AP1-58 might be bigger than the value set at Auto Ch Time of AP1-56 because of the failure of Auto Change.
- Page 295 Learning Advanced Features Output Option 1: [AP1-58 Auto Op Time] >= [AP1-56: Auto Ch Time] frequency [Aux Start DT] [Aux Stop DT] Max Freq AP1-65 AP1-65 AP1-65 Perform Aux_Exch Reset the [Auto Op Time] AP1-64 AP1-64 AP1-64 AP1-63 AP1-63 AP1-63 AP1-74 AP1-62 AP1-73...
- Page 296 Learning Advanced Features Priority of the moment M1 / Priority of the moment M3 / Priority of the moment M1 / Pr iority of the moment M3 / Inverter Out Freq Priority of the moment M3 / Option 1: [AP1-58 Auto Op Time] >= [AP1-56: Auto Ch Time] Max Freq AP1-65 AP1-65...
- Page 297 Learning Advanced Features NOTE Auto change does not work while the auxiliary motors are operating. Auto change is operated only when all the auxiliary motors are stopped and if all the conditions set for the auto change are met. When the inverter stops, all motors stop operating, and the auxiliary motor with the highest priority becomes the starting auxiliary motor.
- Page 298 Learning Advanced Features Freqency Max Freq Output frequency Main Main Main Main_ _ _ _ Exch occurs Exch occurs Exch occurs Exch occurs AP1-70 AP1-70 Option 3: AP1-91: [Interlock DT] Inv State Stop Main Motor Main Auto Change operation(FILO) Frequency Max Freq Output frequency...
-
Page 299: Interlock
Learning Advanced Features Priori ty at the moment Pr iority at the moment M2 / M3 / Pr iori ty at the moment M3 / Frequency Max Freq AP1-65 Per form Main_Exch AP1-65 Reset the [Auto Op Time] AP1-64 AP1-63 AP1- AP1-63 AP1-62... - Page 300 Learning Advanced Features motor is excluded from the MMC operation. This causes the priority level of the auxiliary motors with lower priority level than the interlocked motor to be increased by 1. The interlock is released when the input terminals (IN-65–71) are turned off, and the relevant auxiliary motor is included in the MMC operation again, with lowest priority.
- Page 301 Learning Advanced Features The figure below shows the motor operating as a sequence by FILO. The motor turns on from the starting auxiliary motor (Starting Aux) by order, and turns off depending on the rise of PID feedback. At this point, the interlock occurs at auxiliary motor #2 by multi-function input, the auxiliary motor turns off.
- Page 302 Learning Advanced Features Frequency Max Freq AP1-65 AP1-65 AP1-64 AP1-64 AP1-63 AP1-74 AP1-62 AP1-73 AP1-62 AP1-61 AP1-72 AP1-71 AP1-71 AP1-70 Aux Motor 1 Aux Motor 2 Aux Motor 3 Aux Motor 4 Aux Motor 5 Interlock 1 Interlock 3 100% Feedback Interlock operation(Op time Order) when Operable Motor and S tandby Motor are set to 3 and 2 each When interlock is released, the auxiliary motor’s priority becomes different.
-
Page 303: Aux Motor Time Change
Learning Advanced Features 5.44.5 Aux Motor Time Change It is used to set a motor to the smallest number among Drives not inter-locked by [AP1-43 Starting Aux] and place others in order based on it when operating time of every motor is deleted through <1:All>... -
Page 304: Regular Bypass
Learning Advanced Features 5.44.6 Regular Bypass This function controls the motor speed based on the feedback amount instead of using the PID. Auxiliary motors may be controlled with this feature based on the feedback amount. Group Code Name LCD Display Parameter Setting Setting Range Unit... -
Page 305: Aux Motor Pid Compensation
Learning Advanced Features The primary motor reaccelerates when the frequency increases, depending on the feedback increase. If the relevant auxiliary motor is turned off because of the feedback decrease, the primary motor accelerates from the stop frequency to the start frequency. To use the regular bypass function, ‘1 (Yes)’... - Page 306 Learning Advanced Features When the number of operating auxiliary motors increases, the flow rate of the pipe also increases and the pressure of the pipe line decreases. Aux motor PID compensation compensates for this pressure when the number of the auxiliary motor increases. By adding the additional PID reference value (relevant to the auxiliary motor) to the current reference, the loss of pressure can be compensated for.
-
Page 307: Master Follower
Learning Advanced Features When the aux reference value is set to 100%, the final PID reference becomes 100%. In this case, output frequency of the inverter does not decelerate because the PID output does not decelerate even if the input feedback value is 100%. 5.44.8 Master Follower It is used to control multiple inverters with an inverter. - Page 308 Learning Advanced Features Leader Drive Serve Drive Serve Drive Serve Drive Serve Drive Inverter ID 1 ID 2 ID 3 ID 4 ID 8 Setting Communication Line Sensor Main Motor Motor Motor Motor Motor 5.44.8.1 Multi Mater Mode Only Main Motor can be controlled by PID and Aux Motor performs the operating mode with Follower Freq.
- Page 309 Learning Advanced Features A condition that extra Aux Motor is turned on . After a real operating frequency reaches the frequency set in Start Freq belonging to the next priority number and the time set in AP1-53(Aux Start DT) passes, AP1-44(Aux Motor Run) increases (+1) and it becomes Aux Motor, accelerating based on time of [DRV-03 Acc Time]/[DRV-04 Dec Time] until [AP1-60 Follower Freq].
- Page 310 Learning Advanced Features Out Freq PID Limit High High Freq Start Freq 3 Stop Freq 3 M1, M2 M1, M2 Start Freq 2 Stop Freq 2 PID Output Start Freq 1 M1 OutFreq M2 OutFreq M3 OutFreq Run Cmd PID Reference FeedBack Main Motor Aux Motor...
- Page 311 Learning Advanced Features Among operating Motors, Motor with the longest operating time is placed at the last. The moment for the priority arrangement is the time when the number of motor is changed Pr iority at the moment Out Freq Pr iority at the moment M2, M3, M1 M2, M3...
- Page 312 Learning Advanced Features 5.44.8.4 Master Follower Interlock As Interlock signals are sent from Serve Drive, Leader Drive puts together through Communication Line. Every Trip such as HAND State or OFF State of Serve Drive is processed by Interlock in Leader Drive .
-
Page 313: Multi-Function Output On/Off Control
Learning Advanced Features Time to sort the priority Out Freq according to the operation time. M1, M2, M3 M1, M2, M3 M1, M2 M1, M2 M1, M2 PID Limit High Follower Freq Start Freq 3 Stop Freq 3 Start Freq 2 PID Output Stop Freq 2 Start Freq 1... -
Page 314: Press Regeneration Prevention
Learning Advanced Features Multi-function Output On/Off Control Setting Details Code Description ADV-66 OnOff Ctrl Src Select analog input On/Off control. ADV-67 On Ctrl Level , Set On/Off level at the output terminal. ADV-68 Off Ctrl Level 5.46 Press Regeneration Prevention Press regeneration prevention is used during press operations to prevent braking during the regeneration process. - Page 315 Learning Advanced Features Group Code Name LCD Display Parameter Setting Setting Range Unit frequency limit Press regeneration RegenAvd 50.0 (%) 0 .0–100.0% prevention P-Gain Pgain Press regeneration RegenAvd 500 (ms) 20–30000 ms prevention I gain Igain Press Regeneration Prevention Setting Details Code Description Frequent regeneration voltage from a press load during a constant speed...
-
Page 316: Analog Output
Learning Advanced Features may change within the range set at ADV-76 (CompFreq Limit). 5.47 Analog Output An analog output terminal provides an output of 0–10 V voltage, 4–20 mA current, or 0–32 kHz pulse. 5.47.1 Voltage and Current Analog Output An output size can be adjusted by selecting an output option at the AO (Analog Output) terminal. - Page 317 Learning Advanced Features Code Description Select a constant value for output. The following example for output voltage setting. Setting Function Frequency Outputs operation frequency as a standard. 10 V output is made from the frequency set at DRV-20 (Max Freq). Output 10 V output is made from 150% of inverter rated current.
- Page 318 Learning Advanced Features EPID Ref Output is based on the reference value of the external PID1 controller. Outputs 6.6 V in 100%. EPID Fdb Output is based on the feedback amount of the external PID1 controller. Outputs 6.6 V in 100%. Adjusts output value and offset.
-
Page 319: Analog Pulse Output
Learning Advanced Features Monitor percentage (%) with 10 V as the standard. Voltage and Current Analog Output Setting Details 5.47.2 Analog Pulse Output Output item selection and pulse size adjustment can be made for the TO (Pulse Output) terminal. Group Code Name LCD Display... - Page 320 Learning Advanced Features Code Description graph is 50%. OUT-64 TO Filter Sets filter time constant on analog output. If the analog output item is set to constant, the analog pulse output is OUT-65 TO Const % dependent on the set parameter values. Monitors the analog output value.
- Page 321 Learning Advanced Features NOTE OUT-08 AO2 Gain and OUT-09 AO2 Bias Tuning Mode on 0–20 mA output Set OUT-07 (AO2 Mode) to ‘constant’ and set OUT-11 (AO2 Const %) to 0.0 %. Set OUT-09 (AO2 Bias) to 20.0% and then check the current output. 4 mA output should be displayed.
-
Page 322: Digital Output
Learning Advanced Features 5.48 Digital Output 5.48.1 Multi-function Output Terminal and Relay Settings Group Code Name LCD Display Parameter Setting Setting Range Unit Multi-function relay 1 Relay 1 23 Trip setting Multi-function relay 2 Relay 2 14 Run setting Multi-function relay 3 Relay 3 None setting... - Page 323 Learning Advanced Features None No output signal FDT-1 Detects inverter output frequency reaching the user set frequency. Outputs a signal when the absolute value (set frequency–output frequency) < detected frequency width/2. When the detected frequency width is 10 Hz, FDT-1 output is as shown in the graph below.
- Page 324 Learning Advanced Features FDT-4 The output signal can be separately set for acceleration and deceleration conditions. • In acceleration: Operation frequency Detected frequency • In deceleration: Operation frequency > (Detected frequency–Detected frequency width/2) Detected frequency width is 10 Hz. When the detected frequency is set to 30 Hz, FDT-4 output is as shown in the graph below.
- Page 325 Learning Advanced Features Outputs a signal when communication power is present and an I/O expansion card is installed. It also outputs a signal when losing analog input and communication power commands. Outputs a signal when an operation command is entered and the inverter outputs voltage. No signal output during DC braking.
- Page 326 Learning Advanced Features On/Off Control Outputs a signal using an analog input value as a standard. Refer to 5.45 Multi-function Output On/Off Control on page 259 . Fire Mode Outputs a signal when Fire mode is in operation. Pipe Break Outputs a signal when a pipe is broken.
-
Page 327: Fault Trip Output Using Multi-Function Output Terminal And Relay
Learning Advanced Features • If monitoring signals such as ‘Under load’ or’ LDT’ are configured at multi-function output terminals, signal outputs are maintained unless certain conditions defined for signal cutoff are met. 5.48.2 Fault Trip Output using Multi-function Output Terminal and Relay The inverter can output a fault trip state using the multi-function output terminal (Q1) and relay (Relay 1). -
Page 328: Multi-Function Output Terminal Delay Time Settings
Learning Advanced Features Fault Trip Output by Multi-function Output Terminal and Relay - Setting Details Code Description Fault trip relay operates based on the fault trip output settings. Item bit on bit off Keypad display Select a fault trip output terminal/relay and select ‘29’ (Trip Mode) at codes OUT- 31– OUT-30 33. -
Page 329: Operation State Monitor
Learning Advanced Features Output Terminal Delay Time Setting Details Code Description OUT-50 When a relay operation signal (operation set in OUT 31–35, 36) occurs, the relay DO On Delay turns on or the multi-function output operates after the time delay set at OUT-50. OUT-51 When relay or multi-function output is initialized (off signal occurs), the relay turns DO Off Delay... - Page 330 Learning Advanced Features Group Code Name LCD Display Parameter Setting Setting Range Unit Monitor mode Monitor Output display 2 Line-2 Current Monitor mode Monitor Output display 3 Line-3 Voltage Mon Mode Monitor mode initialize Init Operation State Monitor Setting Details Code Description Select items to display on the top-right side of the keypad screen.
-
Page 331: Operation Time Monitor
Learning Advanced Features Code Description Monitor[mA] I2 Monitor[%] Displays input current terminal I2 value as a percentage. PID Output Displays the PID controller output. PID Ref Value Displays the scale of the reference value and sets the value of PID reference. PID Fdb Value Displays the PID controller feedback volume. -
Page 332: Poweron Resume Using The Communication
Learning Advanced Features This feature is used to monitor the inverter and fan operation times. Setting Group Code Name LCD Display Parameter Setting Unit Range Cumulated inverter On-time 00000DAY 00:00 power-on time hh:mm Cumulated inverter Run-time 00000DAY 00:00 operation time hh:mm Inverter operation accumulated time... - Page 333 Learning Advanced Features using communication (BAC net, LonWorks, Modbus RTU), the inverter carries out the run command which was set before the instantaneous power interruption. Group Code Name LCD Display Parameter Setting Setting Range Unit Automatic restart of the PowerOn 0–1 communication restart Resume...
-
Page 334: Learning Protection Features
Learning Protection Features 6 Learning Protection Features Protection features provided by the H100 series inverter are categorized into two types: protection from overheating damage to the motor and protection against the inverter malfunction. 6.1 Motor Protection 6.1.1 Electronic Thermal Motor Overheating Prevention (ETH) ETH is a protective function that uses the output current of the inverter, without a separate temperature sensor, to predict a rise in motor temperature to protect the motor based on its heat characteristics. - Page 335 Learning Protection Features Select the drive mode of the cooling fan, attached to the motor. Setting Function Self-cool As the cooling fan is connected to the motor axis, the cooling effect varies based on motor speed. Most universal induction motors have this design. Forced- Additional power is supplied to operate the cooling fan.
-
Page 336: Motor Over Heat Sensor
Learning Protection Features 6.1.2 Motor Over Heat Sensor To operate the motor overheat protection, connect the overheat protection temperature sensor (PT 100, PTC) installed in the motor to the inverter’ s analog input terminal. Parameter Setting Group Code Name LCD Display Unit Setting Range... - Page 337 Learning Protection Features Code Description connection to terminal block I2. PRT-36 Configure the fault level of the motor overheat detect sensor. Thermal-T Lev Setting Function Operates when the motor overheat sensor input is PRT-37 smaller than PRT-36. Thermal-T Area Operates when the motor overheat sensor input is High bigger that PRT-36.
-
Page 338: Overload Early Warning And Trip
Learning Protection Features To receive PTC signal at V1 input terminal, set PRT-35 (Thermal InSrc) to ‘0 (Thermal In)’ and set the Analog1 input selection switch (SW3) to T1. To receive PTC signal at I2 input terminal, set PRT-35 (Thermal InSrc) to ‘1 (V2)’ and set SW 4 (Analog2 input selection switch) to V2. - Page 339 Learning Protection Features output 1 item A warning or fault trip (cutoff) occurs when the motor reaches an overload state, based on the motor’s rated current. The amount of current for warnings and trips can be set separately. Overload Early Warning and Trip Setting Details Code Description If the overload reaches the warning level, the terminal block multi-function...
-
Page 340: Stall Prevention And Flux Braking
Learning Protection Features 6.1.4 Stall Prevention and Flux Braking The stall prevention function is a protective function that prevents motors from stalling due to overloads. If a motor stall occurs due to an overload, the inverter operation frequency is adjusted automatically. - Page 341 Learning Protection Features Group Code Name LCD Display Parameter Setting Setting range Unit Multi-function Q1 Define output 1 item Code Description Stall prevention can be configured for acceleration, deceleration, or while operating a motor at constant speed.When the LCD segment is on, the corresponding bit is off.
- Page 342 Learning Protection Features 0100 Stall protection The inverter decelerates and keeps the DC link during voltage below a certain level to prevent an over deceleration voltage fault trip during deceleration. As a result, deceleration times can be longer than the set time depending on the load.
- Page 343 Learning Protection Features A gain used to decelerate without over voltage fault trip. It compensates for PRT-59 Flux Brake the inverter output voltage. Stall Prevention Function and Flux Braking Setting Details Note Stall protection and flux braking operate together only during deceleration. Turn on the third and fourth bits of PRT-50 (Stall Prevention) to achieve the shortest and most stable deceleration performance without triggering an over voltage fault trip for loads with high inertia and short deceleration times.
-
Page 344: Inverter And Sequence Protection
Learning Protection Features 6.2 Inverter and Sequence Protection 6.2.1 Open-phase Protection Open-phase protection is used to prevent over current levels induced by the inverter inputs due to an open-phase within the input power supply. Open-phase output protection is also available. An open-phase at the connection between the motor and the inverter output may cause the motor to stall, due to a lack of torque. -
Page 345: External Trip Signal
Learning Protection Features 6.2.2 External Trip Signal Set one of the multi-function input terminals to 4 (External Trip) to allow the inverter to stop operation when abnormal operating conditions arise. Group Code Name LCD Display Parameter Setting Setting range Unit Px terminal setting Px Define 65–71... -
Page 346: Inverter Overload Protection (Iolt)
Learning Protection Features 6.2.3 Inverter Overload Protection (IOLT) When the inverter input current exceeds the rated current, a protective function is activated to prevent damage to the inverter, based on inverse proportional characteristics. Group Code Name LCD Display Parameter Setting Setting range Unit 31–... -
Page 347: Speed Command Loss
Learning Protection Features 6.2.4 Speed Command Loss When setting operation speed using an analog input at the terminal block, communication options, or the keypad, speed command loss setting can be used to select the inverter operation for situations when the speed command is lost due to the disconnection of signal cables. Group Code Name LCD Display Parameter Setting... - Page 348 Learning Protection Features Speed Command Loss Setting Details Code Description Set the operation command source to keypad. If there is a communication error with the keypad or connection problem between the keypad and the inverter, select the inverter’s operation. Setting Function The speed command immediately becomes the None...
- Page 349 Learning Protection Features Code Description Time). For example, set the speed command to ‘2 (V1)’ at DRV-07, and set IN-06 (V1 Polarity) to ‘0 (Unipolar)’ . When the voltage input drops to less than half of the value set at IN-08 (V1 Volt x 1), the protective function is activated.
- Page 350 Learning Protection Features communication, the protection function operates after the command loss decision time set at PRT-13 (Lost Cmd Time) is elapsed.
-
Page 351: Dynamic Braking (Db) Resistor Configuration
Learning Protection Features 6.2.5 Dynamic Braking (DB) Resistor Configuration For H100 series, the braking resistor circuit is integrated inside the inverter. Group Code Name LCD Display Parameter Setting Setting range Unit Braking resistor DB Warn %ED 0–30 configuration 31– Multi-function Relay 1–5 relay 1–5 item DB Warn %ED... -
Page 352: Low Battery Voltage Warning
Learning Protection Features Code Description • T_acc: Acceleration time to set frequency • T_steady: Constant speed operation time at set frequency • T_dec: Deceleration time to a frequency lower than constant speed operation or the stop time from constant speed operation frequency •... -
Page 353: Under Load Fault Trip And Warning
Learning Protection Features • Be careful when replacing the battery. Remaining voltage in the battery may cause electric shock. • Make sure that the battery doesn’t fall inside of the inverter. 6.3 Under load Fault Trip and Warning The following table lists the under load fault trip and warning features of the H100 series inverter. Group Code Name LCD Display Parameter Setting... -
Page 354: Fan Fault Detection
Learning Protection Features Code Description PRT-26 A protect function operates when under load level condition explained above UL Warn Time maintains for the warning time set. Sets the inverter operation mode for situations when an under load trip occurs. If PRT-27 set to ‘1 (Free-Run)’... -
Page 355: Low Voltage Fault Trip
Learning Protection Features Code Description When the code value is set to ‘8 (FAN Warning)’ , the fan error signal is output OUT-36 Q1 Define, and operation continues. However, when the inverter’s inside temperature OUT-31–35 Relay1–5 rises above a certain level, output is blocked due to activation of overheat protection. -
Page 356: Output Block Via The Multi-Function Terminal
Learning Protection Features Group Code Name LCD Display Setting Setting range Unit Low voltage trip decision during Low Voltage2 0–1 operation If input power is disconnected during inverter operation and internal DC voltage decreases lower than a certain voltage, the inverter disconnects the output and displays low voltage ‘2 (Low Voltage 2)' . -
Page 357: Operation Mode For Option Card Trip
Learning Protection Features Group Code Name LCD Display Parameter Setting Setting range Unit Px terminal setting Px Define 65–71 0-55 options (Px: P1–P7) Trip Status Reset Setting Details Code Description Press the [Stop/Reset] key on the keypad or use the multi-function input terminal to IN-65–71 restart the inverter. -
Page 358: No Motor Trip
Learning Protection Features 6.3.7 No Motor Trip If an operation command is run when the motor is disconnected from the inverter output terminal, a ‘no motor trip’ occurs and a protective operation is performed by the system. Group Code Name LCD Display Parameter Setting Setting range... -
Page 359: Broken Belt
Learning Protection Features 6.3.8 Broken Belt It is a function to detect a problem in case that a Belt or Coupling is broken while a pump is used. Parameter Group Code Name LCD Display Setting range Unit Setting None Set broken belt BrokenBelt Sel 0 : None Warning... -
Page 360: Parts Life Expectancy
Learning Protection Features 6.4 Parts Life Expectancy Examine the life cycle of the parts (fan and main capacitor) of the inverter. By examining these parts you can use inverter more safely. 6.4.1 Main Capacitor Life Estimation The life of the main capacitor in the inverter can be predicted by looking at the changes in the capacitance value. - Page 361 Learning Protection Features Main Capacitor Life Estimation Detail Settings Code Description Configure the current level of the inverter’s output when capacitance life PRT-83 CAP. examination is in operation. For life examination, the value must be set higher than Diag Perc Configure the capacitance life examination mode.
-
Page 362: Fan Life Estimation
Learning Protection Features 6.4.2 Fan Life Estimation The inverter records the amount of time the fan is used and sets off the alarm to replace the fan if the fan is used longer than the certain period of time. Group Code Name LCD Display... - Page 363 Learning Protection Features • Fan life examination is only for the reference and cannot be used as an absolute value.
-
Page 364: Fault/Warning List
Learning Protection Features 6.5 Fault/Warning List The following list shows the types of faults and warnings that can occur while using the H100 inverter. For details, refer to 6 Learning Protection Features on page 321. Category LCD Display Details Over Current1 Over current trip Over Voltage Over voltage trip... - Page 365 Learning Protection Features Thermal Trip Motor overheating trip Lost Keypad Lost keypad trip Broken Belt Broken belt trip Pipe Broken Pipe Broken trip Fuse Open Fuse Open trip (315~500kW) InFAN Trip Inner Fan trip (110~500kW) Low Voltage Low voltage fault trip Emergency stop fault trip Level type Lost Command...
- Page 366 Learning Protection Features Broken Belt Broken belt warning ParaWrite Fail Smart copier error warning Rs Tune Err Auto tuning warning(Rs) Lsig Tune Err Auto tuning warning(Lsigma) InFAN Warning Inner Fan Warning (110~500kW) Note • In a latch type trip, the inverter cannot unlock the fault if the user does not reset the inverter, even if the trip state is released after the trip occurs.
-
Page 367: Communication Features
RS-485 Communication Features 7 RS-485 Communication Features This section in the user manual explains how to control the inverter with a PLC or a computer over a long distance using the RS-485 communication features. To use the RS-485 communication features, connect the communication cables and set the communication parameters on the inverter. -
Page 368: Communication System Configuration
RS-485 Communication Features Item Standard Parity check None/Even/Odd 7.2 Communication System Configuration In an RS-485 communication system, the PLC or computer is the master device and the inverter is the slave device. When using a computer as the master, the RS-232 converter must be integrated with the computer, so that it can communicate with the inverter through the RS-232/RS-485 converter. - Page 369 RS-485 Communication Features When wiring the communication line, make sure that the SG terminals on the PLC and inverter are connected. SG terminals prevent communication errors due to electronic noise interference.
-
Page 370: Setting Communication Parameters
RS-485 Communication Features 7.2.2 Setting Communication Parameters Before proceeding with setting communication configurations, make sure that the communication lines are connected properly. Turn on the inverter and set the communication parameters. Parameter Setting Group Code Name LCD Display Unit Setting range 1–... - Page 371 RS-485 Communication Features Code Description The maximum setting range changes depending on the protocol. Setting Communication Speed 1200 bps 2400 bps 4800 bps 9600 bps 19200 bps 38400 bps 56 Kbps (57,600 bps) 76.8 Kbps (76,800 bps) 115 Kbps (115,200 bps) If the COM-02 Int485 Proto setting is BACnet, the available communication speed settings are 9600 bps, 19200 bps, 76.8 kbps.
-
Page 372: Setting Operation Command And Frequency
RS-485 Communication Features Code Description 7.2.3 Setting Operation Command and Frequency After setting the DRV-06 Cmd Source code to ‘3 (Int 485)’ and DRV-07 Freq Ref Src code to ‘6 (Int 485)’ , you can set common area parameters for the operation command and frequency via communication. - Page 373 RS-485 Communication Features Group Code Name LCD Display Parameter Setting Setting range Unit Speed command loss Lost Cmd None 0–5 operation mode Mode Time to determine Lost Cmd 0.1–120.0 speed command loss Time...
- Page 374 RS-485 Communication Features Command Loss Protective Operation Setting Details Code Description Select the operation to run when a communication error has occurred and lasted exceeding the time set at PRT-13. Setting Function None The speed command immediately becomes the operation frequency without any protection function. Free-Run The inverter blocks output.
-
Page 375: Ls Inv 485/Modbus-Rtu Communication
RS-485 Communication Features 7.3 LS INV 485/Modbus-RTU Communication 7.3.1 Setting Virtual Multi-function Input Multi-function input can be controlled using a communication address (0h0385). Set codes COM- 70–77 to the functions to operate, and then set the BIT relevant to the function to 1 at 0h0385 to operate it. - Page 376 RS-485 Communication Features Setting address 0h03E0 to ‘0’ and then setting it again to ‘1’ via communication allows the existing parameter settings to be saved. However, setting address 0h03E0 to ‘1’ and then setting it to ‘0’ does not carry out the same function.
-
Page 377: Total Memory Map For Communication
RS-485 Communication Features 7.3.3 Total Memory Map for Communication Communication Area Memory Map Details Communication common iS5, iP5A, iV5, iG5A, S100, H100 compatible 0h0000–0h00FF compatible area area Areas registered at COM-31–38 and COM-51– 0h0100–0h01FF Parameter registration type 0h0200–0h023F Area registered for User Group area 0h0240–0h027F Area registered for Macro Group... -
Page 378: Parameter Group For Data Transmission
RS-485 Communication Features 7.3.4 Parameter Group for Data Transmission By defining a parameter group for data transmission, the communication addresses registered in the communication function group (COM) can be used in communication. Parameter group for data transmission may be defined to transmit multiple parameters at once, into the communication frame. -
Page 379: Parameter Group For User/Macro Group
RS-485 Communication Features 7.3.5 Parameter Group for User/Macro Group By defining user/macro parameter groups, communication can be carried out using the user defined group (USR Grp) and macro group (MAC Grp) addresses that are registered at the U&M mode. Parameter groups can only be defined when using the keypad. Currently Registered User Group Parameters Address Parameter... -
Page 380: Ls Inv 485 Protocol
RS-485 Communication Features 7.3.6 LS INV 485 Protocol The slave device (inverter) responds to read and write requests from the master device (PLC or PC). Request Station ID Data 1 byte 2 bytes 1 byte n bytes 2 bytes 1 byte Normal Response Station ID Data... - Page 381 RS-485 Communication Features • Data: ASCII-HEX (for example, when the data value is 3000: 3000 → ‘0’’B’’B’’8’h → 30h 42h 42h 38h) • Error code: ASCII-HEX (refer to 7.3.6.4 Error Code on page 371) • Transmission/reception buffer size: Transmission=39 bytes, Reception=44 bytes •...
- Page 382 RS-485 Communication Features Read Normal Response Station ID Data ‘01’–‘FA’ ‘R’ ‘XXXX’ ‘XX’ 1 byte 2 bytes 1 byte n x 4 bytes 2 bytes 1 byte Total bytes= (7 x n x 4): a maximum of 39 Read Error Response Station ID Error code ‘01’-‘FA’...
- Page 383 RS-485 Communication Features Total bytes=9 7.3.6.3 Monitor Registration Detailed Protocol Monitor registration request is made to designate the type of data that requires continuous monitoring and periodic updating. Monitor Registration Request: Registration requests for n addresses (where n refers to the Station ID Number of Addresses Address...
- Page 384 RS-485 Communication Features from a monitor registration request Total bytes=7 Monitor Registration Execution Normal Response Station ID Data ‘01’–‘FA’ ‘Y’ ‘XXXX…’ ‘XX’ 1 byte 2 bytes 1 byte n x 4 bytes 2 bytes 1 byte Totalbytes= (7 + n x 4): a maximum of 39 Monitor Registration Execution Error Response Station ID Error Code...
- Page 385 RS-485 Communication Features Code Abbreviation Description FRAME ERROR The frame size does not match. 7.3.6.5 ASCII Code Character Character Character – space " &...
-
Page 386: Modbus-Rtu Protocol
RS-485 Communication Features Character Character Character < > 7.3.7 Modbus-RTU Protocol 7.3.7.1 Function Code and Protocol In the following section, station ID is the value set at COM-01 (Int485 St ID), and the starting address is the communication address (starting address size is in bytes). For more information about communication addresses, refer to 7.3.8 Compatible Common Area Parameter on page 378. - Page 387 RS-485 Communication Features Request Slave Func. Start Addr Start Addr No of Reg No of Reg Station ID Code (Hi) (Lo) (Hi) (Lo) (Lo) (Hi) 1 byte 1 byte 1 byte 1 byte 1 byte 1 byte 1 byte 1 byte Normal Response Slave Func.
- Page 388 RS-485 Communication Features Slave Func.Code Addr (Hi) Addr(Lo) Value(Hi) Value(Lo) CRC(Lo) CRC(Hi) Station ID 1 byte 1 byte 1 byte 1 byte 1 byte 1 byte 1 byte 1 byte Error Response Slave Station ID Func. Code Except. Code CRC(Lo) CRC (Hi) 1 byte 1 byte...
- Page 389 RS-485 Communication Features Slave Func. Start Addr Start Addr No of Reg. No of Reg. Station ID Code (Hi) (Lo) (Hi) (Lo) (Lo) (Hi) 1 byte 1 byte 1 byte 1 byte 1 byte 1 byte 1 byte 1 byte Error Response Slave Station ID Func.
- Page 390 RS-485 Communication Features Exception Code Code 01: ILLEGAL FUNCTION 02: ILLEGAL DATA ADDRESS 03: ILLEGAL DATA VALUE 06: SLAVE DEVICE BUSY 14: Write-Protection Example of Modbus-RTU Communication In Use When the Acc time (Communication address 0x1103) is changed to 5.0 sec and the Dec time (Communication address 0x1104) is changed to 10.0 sec.
-
Page 391: Compatible Common Area Parameter
RS-485 Communication Features 7.3.8 Compatible Common Area Parameter The following are common area parameters partly compatible with the iS5, iP5A, iV5, iG5A, S100 series inverters. .( Addresses 0h0000-0h0011 are for compatible common area parameters. Addresses 0h0012-0h001B are for H100 series inverter parameters.) Comm. - Page 392 RS-485 Communication Features 2: Fx/Rx-2 3: Built-in 485 4: Communication option 5: Time Event Reserved Emergency stop W: Trip initialization (0 1), R: Trip status Reverse operation (R) Forward operation (F) Stop (S) 0h0007 Acceleration time 0h0008 Deceleration time 0h0009 Output current 0h000A Output frequency...
- Page 393 RS-485 Communication Features Decelerating Accelerating Fault Trip - operates according to OUT-30 setting Operating in reverse direction Operating in forward direction Stopped B15 Reserved B14 Reserved B13 Reserved B12 Reserved B11 Reserved B10 H/W-Diag Reserved Reserved 0h000F Fault trip information Reserved Reserved Reserved...
- Page 394 RS-485 Communication Features B15 Reserved B14 Reserved B13 Reserved B12 Reserved B11 Reserved B10 Q1 Reserved Reserved Output terminal 0h0011 information Reserved Reserved Reserved Relay 5 Relay 4 Relay 3 Relay 2 Relay 1 0h0012 V1 input voltage 0h0013 Thermal Input Thermal 0h0014 V2 input voltage...
-
Page 395: H100 Expansion Common Area Parameter
RS-485 Communication Features 7.3.9 H100 Expansion Common Area Parameter 7.3.9.1 Monitoring Area Parameter (Read Only) Comm. Parameter Scale Unit Assigned content by bit Address 0h0300 Inverter model H100: 000Fh 0.75 kW: 4008h, 1.5 kW: 4015h 2.2 kW: 4022h, 3.7 kW: 4037h 5.5 kW: 4055h, 7.5 kW: 4075h 11 kW: 40B0h, 15 kW: 40F0h 18.5 kW: 4125h, 22 kW: 4160h... - Page 396 RS-485 Communication Features B11– 1: Speed searching 2: Accelerating 3: Operating at constant rate 4: Decelerating 5: Decelerating to stop 6: H/W OCS 7: S/W OCS 8: Dwell operating 0: Stopped 1: Operating in forward direction 2: Operating in reverse direction 3: DC operating Operation command source 0: Keypad...
- Page 397 RS-485 Communication Features 10: Built-in RS 485 11: Communication option 13: Jog 14: PID 25-31: Multi-step speed frequency 0h0307 Keypad S/W version (Ex.) 0h0064: Version 1.00 0h0308 Keypad title version (Ex.) 0h0065: Version 1.01 (Ex.) 0h0064: Version 1.00 0h0309 IO Board Version (Ex.) 0h0065: Version 1.01 0h030A–...
- Page 398 RS-485 Communication Features P7 (I/O board) P6 (I/O board) P5 (I/O board) P4 (I/O board) P3 (I/O board) P2 (I/O board) P1 (I/O board) B15– Reserved B9– Reserved Digital output 0h0321 Relay 5 information Relay 4 Relay 3 Relay 2 Relay 1 B15–...
- Page 399 RS-485 Communication Features 0h0325 0.01 Analog input V2 or I2 (I/O board) 0h0326 Reserved Reserved 0h0327 Reserved Reserved 0h0328 0.01 Analog output 1 (I/O board) 0h0329 0.01 Analog output 2 (I/O board) 0h032A Reserved 0.01 Reserved 0h032B Reserved 0.01 Reserved 0h032C Reserved Reserved...
- Page 400 RS-485 Communication Features information - 2 MMC Interlock Reserved Reserved Reserved Option Trip-1 No Motor Trip Reserved IO Board Trip Broken Belt ParaWrite Trip TB Trip Fan Trip Thermal Trip Level Detect Reserved B15– Reserved Lost Keypad Level type trip 0h0332 information Lost Command...
- Page 401 RS-485 Communication Features Fan Exchange CAP. Warning Level Detect Reserved Lost Keypad Pipe Break Fire Mode DB Warn %ED Fan Warning Lost Command Inv Over Load Under Load Over Load Reserved – Reserved Reserved Latch type trip 0h0335 Overcurrent2 Trip information -3 Overvoltage Trip Overcurrent1 Trip...
- Page 402 RS-485 Communication Features 0h0337– Reserved Reserved 0h0339 0h033A Proc PID Output 0.01 Process PID Output (%) Proc Proc 0h033B Proc PID UnitScale Ref Unit Scaled Process PID reference value Unit Unit Proc Proc 0h033C Proc PID UnitScale Fdb Unit Scaled Process PID feedback value Unit Unit Total number of days the inverter has been...
- Page 403 RS-485 Communication Features 0h0352 E-PID 1 Fdb External PID 1 feedback Proc Proc 0h0353 E-PID 1 Unit Scale Ref Unit Scale External PID 1 Reference Unit Unit Proc Proc 0h0354 E-PID 1 Unit Scale Fdb Unit Scale External PID 1 feedback Unit Unit 0h0355...
- Page 404 RS-485 Communication Features motor running motor running motor running motor running...
- Page 405 RS-485 Communication Features 7.3.9.2 Control Area Parameter (Read/Write)
- Page 406 RS-485 Communication Features Comm. Parameter Scale Unit Assigned Content by Bit Address 0h0380 Frequency command 0.01 Command frequency setting 0h0381 RPM command Command rpm setting B15–B4 Reserved 1: Free-run stop 1: Trip initialization 0: Reverse command, 1: Forward command 0h0382 Operation command 0: Stop command, 1: Run command...
- Page 407 RS-485 Communication Features Relay 3 Relay 2 Relay 1 0h0387 KPD H.O.A Lock 0 : Locked, 1 : During Run, 2 : Unlocked 0h0388 PID reference Process PID reference 0h0389 PID feedback value Process PID feedback 0h038A Motor rated current 0h038B Motor rated voltage 0h038C–...
- Page 408 RS-485 Communication Features Scale Unit Unit Proc PID Fdb Aux Unit Proc Proc 0h03A5 Unit Scale PID Aux feedback Scale Unit Unit 0h03A6– Reserved Reserved 0h03AF 0h03B0 E-PID 1 Ref External PID 1 reference 0h03B1 E-PID 1 Fdb External PID 1 reference Proc Proc 0h03B2...
- Page 409 RS-485 Communication Features 7.3.9.3 Inverter Memory Control Area Parameter (Read and Write) Changeable Comm. Parameter Scale Unit During Function Address Running 0h03E0 Save parameters 0: No, 1: Yes 0h03E1 Monitor mode initialization 0: No, 1: Yes 0: No, 10: EPID Grp 1: All Grp 11: AP1 Grp 2: DRV Grp...
- Page 410 RS-485 Communication Features Initialize inverter operation 0h03EB 0: No, 1: Yes accumulative time Initialize cooling fan 0h03EC 0: No, 1: Yes accumulated operation time Note • When setting parameters in the inverter memory control area, the values are reflected to the inverter operation and saved.
-
Page 411: Bacnet Communication
RS-485 Communication Features 7.4 BACnet Communication 7.4.1 What is BACnet Communication? BACnet (Building Automation and Control network) is a communication network frequently used in building automation. BACnet introduces the concept of object-oriented systems, and defines standardized objects. By exchanging data, this function makes communication possible between products from different companies. - Page 412 RS-485 Communication Features monitors connected to Relay 1,2,3,4,5 (If interlock numbers 1,2,3,4,5 are connected to Relay 1,2,3,4,5 at the inverter output terminal). • If auto change mode selection (AP1-55) is set to ‘2 (Main)’ , and the main and auxiliary motors are connected to the inverter output terminal Relay 1,2,3,4, Interlock 1,2,3,4 are the monitors connected to Relay 1,2,3,4.
- Page 413 RS-485 Communication Features Group Code Name LCD display Parameter Setting Setting Range Unit BACnet device BAC PassWord 0–32767 password 1) 1200 bps, 2400 bps, 4800 bps, 57600 bps, 115200 bps cannot be set in communication speed setting in case of BACnet communication. BACnet Parameter Setting Details Code Description...
-
Page 414: Protocol Implementation
RS-485 Communication Features value as possible, and to set the continuous value for MACID. If the values are set as explained above, efficient Token Passing Configuration is possible because each Master tries to give Token to Device set as its own (MACD+1). 7.4.4 Protocol Implementation The following table sums the information required to implement a BACnet system. - Page 415 RS-485 Communication Features Object Type Property Device Object Identifier Object Name Object Type System Status Vendor Name Vendor Identifier Model Name Firmware Revision Appl Software Revision Location Protocol Version Protocol Revision Services Supported Object Types Supported Object List Max APDU Length APDU Timeout Number APDU Retries Max Master...
- Page 416 RS-485 Communication Features Object Type Property Device Out-of-Service Number of states State text Units Polarity Active Text Inactive Text * BI–Binary Input / BV–Binary Value / AI–Analog Input / AV–Analog Value / MSI–Multistate Input / MSV–Multistate Value You can read/write in Location and Description only if it is the device object. You can write a maximum of 29 words.
- Page 417 RS-485 Communication Features • When PowerOn Resume (COM-96) is set to ‘yes’ , value is saved even if the power of the inverter is disconnected. When PowerOn Resume (COM-96) is set to ‘no’ , value is not saved if the power of the inverter is disconnected.
- Page 418 RS-485 Communication Features Instance ID Object Name Description Active /Inactive Text Relay4Cmd Relay 4 On/Off command False/True BV10 Relay5Cmd Relay 5 On/Off command False/True BV11 Q1Cmd Q 1 On/Off command False/True 7.4.5.4 Analog Input Object Instance Instance ID Object Name Description Units InvCap (kW)
- Page 419 RS-485 Communication Features Instance ID Object Name Description Units (Refer to address 0h0331 in the common area) (Note1) Latch type trip information3 AI16 LatchTripInfo3 (Refer to address 0h0335 in the common area) (Note1) Level type trip information AI17 LevelTripInfo (Refer to address 0h0332 in the common area) (Note1) H/W Diagnosis trip information...
- Page 420 RS-485 Communication Features Tripped Trip occurred Accelerating Accelerating Decelerating Decelerating SteadySpeed Operating at steady speed RunningDC Operating at a 0 step speed Stopping Stopping BI10 FwdRunCommandState Forward run command state BI11 RevRunCommandState Reverse run command state BI12 P1 state BI13 P2 state BI14 P3 state...
- Page 421 RS-485 Communication Features BI30 Warning Warning state 7.4.5.5 Binary Input Object Instance OUT-31–35 (Relay1–5) must be set to ‘0 (none)’ to control outputs via communication. 7.4.5.6 MultiState Input Object Instance Instance ID Object Name Description Units 1 Hz MSI1 UnitsDisplay Displays Unit setting 2 RPM 7.4.5.7 Error Message...
- Page 422 RS-485 Communication Features Display Description clienterror+31 Unknown device resourceserror+0 Resources other clienterror+30 Time out abortreason+4 Segmentation not supported rejectreason+4 Invalid tag clienterror+0xFF No invoke id securityerror+26 Password failure...
-
Page 423: Metasys-N2 Communication
RS-485 Communication Features 7.5 Metasys-N2 Communication 7.5.1 Metasys-N2 Quick Communication Start Follow the instructions below to configure the Metasys-N2 network for a quick start. Set COM-02 (Int485 Proto) to ‘5 (Metasys-N2)’ . Set the network communication speed to ‘9600 bps. ’ Configure the communication modes and make sure that they are fixed to Data Bit 8 / No Parity Bit/ Start Bit 1 / Stop Bit 1. -
Page 424: Metasys-N2 Protocol I/O Point Map
RS-485 Communication Features 7.5.3 Metasys-N2 Protocol I/O Point Map 7.5.3.1 Analog Output The output point map controlling the inverter from the Metasys-N2 master. Name Range Unit Description Command 0.0–Max Freq Command frequency setting** Frequency Accel Time 0.0–600.0 ACC time setting* Decel Time 0.0–600.0 DEC time setting*... - Page 425 RS-485 Communication Features • When PowerOn Resume (COM-96) is set to ‘yes’ , value is saved even if the power of the inverter is disconnected. If PowerOn Resume (COM-96) is set to ‘no’ , value is not saved when the power of the inverter is disconnected.
- Page 426 RS-485 Communication Features Name Unit Description ‘Latch’ type fault trip information 1 Latch Trip Info1 (Refer to Common Area parameter address 0h0330)* ‘Latch’ type fault trip information 2 Latch Trip Info2 (Refer to Common Area parameter address 0h0331)* ‘Latch’ type fault trip information 3 Latch Trip Info3 (Refer to Common Area parameter address 0h0335)* ‘Level’...
- Page 427 RS-485 Communication Features Name Description BI12 P3 Input 1–True / 0–False BI13 P4 Input 1–True / 0–False BI14 P5 Input 1–True / 0–False BI15 P6 Input 1–True / 0–False BI16 P7 Input 1–True / 0–False BI17 Relay1 State 1–On / 0 - Off BI18 Relay2 State 1–On / 0 - Off...
-
Page 428: Table Of Functions
of Functions Table 8 Table of Functions This chapter lists all the function settings for the H100 series inverter. Use the references listed in this document to set the parameters. If an entered set value is out of range, the messages that will be displayed on the keypad are also provided in this chapter. - Page 429 Table of Functions Comm. Prope Code Name LCD Display Setting Range Initial value Ref. Address rty* Locked HAND- KPD H.O.A During 0h1105 OFF-AUTO p.75 Lock Key Lock Unlocked Keypad Fx/Rx-1 Fx/Rx-2 Comman 0h1106 Cmd Source p.106 d source Fx/Rx-1 Int 485 Field Bus Time Event Keypad-1...
- Page 430 of Functions Table Comm. Prope Code Name LCD Display Setting Range Initial value Ref. Address rty* 0.00, Low Freq– 0h110B 10.00 p.153 frequency Frequency High Freq Jog run Jog Acc 0h110C accelerati 0.0–600.0 (sec) 20.0 p.153 Time on time Jog run Jog Dec 0h110D decelerati...
- Page 431 Table of Functions Comm. Prope Code Name LCD Display Setting Range Initial value Ref. Address rty* 11.0 kW (15.0HP) 15.0 kW (20.0HP) 18.5 kW (25.0HP) 22.0 kW (30.0HP) 30.0 kW (40.0HP) 37.0 kW (50.0HP) 45.0 kW (60.0HP) 55.0 kW (75.0HP) 75.0kW (100.0HP) 90.0kW...
- Page 432 of Functions Table Comm. Prope Code Name LCD Display Setting Range Initial value Ref. Address rty* (350.0HP) 250.0kW (400.0HP) 315.0kW (500.0HP) 355.0kW (550.0HP) 400.0kW (650.0HP) 500.0kW (800.0HP) Torque Manual boost Torque Auto 1 0h110F 0: Manual p.129 options Boost Auto 2 0.75~ Forward 90kW...
-
Page 433: Basic Function Group (Bas)
Table of Functions Comm. Prope Code Name LCD Display Setting Range Initial value Ref. Address rty* Hz Display Select 0h1115 Hz/Rpm Sel 0: Hz Display p.104 speed unit Display Hand mode HAND Cmd 0.00, Low Freq- 0h1119 0.00 p.83 operation Freq High Freq frequency... - Page 434 of Functions Table Comm. Prope Code Name Setting Range Initial value Ref. Address Display rty* Jump Jump Code 1-99 p.70 Code None Pulse Int 485 Auxiliary Aux Ref 0h1201 reference 0: None p.147 FieldBus source EPID1 Output EPID1 Fdb M+(G*A) Mx (G*A) M/(G*A) Auxiliary...
- Page 435 Table of Functions Comm. Prope Code Name Setting Range Initial value Ref. Address Display rty* 50%)] M+M*G*2 (A-50%) Auxiliary Aux Ref 0h1203 command -200.0-200.0 (%) 100.0 p.147 Gain gain Keypad Fx/Rx-1 Second Fx/Rx-2 Cmd 2nd 0h1204 command 1: Fx/Rx-1 p.141 Int 485 source FieldBus...
- Page 436 of Functions Table Comm. Prope Code Name Setting Range Initial value Ref. Address Display rty* User V/F Square 2 Acc/Dec Max Freq Ramp T 0h1208 standard 0: Max Freq p.114 Mode Delta Freq frequency 0.01 sec Time scale 0h1209 Time Scale 0.1 sec 1: 0.1 sec p.114...
- Page 437 Table of Functions Comm. Prope Code Name Setting Range Initial value Ref. Address Display rty* 528V 90kW 320~ 110~ 550V 500kW None All (Rotation type) Auto Auto 0: None p.219 Tuning Tuning All (Static type) Rs+ Lsigma (Rotation type) Stator 0.000-9.999 ( ) p.219 resistor...
- Page 438 of Functions Table Comm. Prope Code Name Setting Range Initial value Ref. Address Display rty* Multi-step Step Freq- 0h1232 speed Low Freq- High Freq 10.00 p.104 frequency1 Multi-step Step Freq- 0h1233 speed Low Freq- High Freq 20.00 p.104 frequency2 Multi-step Step Freq- Low Freq- High 0h1234...
- Page 439 Table of Functions Comm. Prope Code Name Setting Range Initial value Ref. Address Display rty* Multi-step Dec Time- 0h1249 deceleratio 0.0-600.0 (sec) 30.0 p.118 n time2 Multi-step 0h124A deceleratio Acc Time-3 0.0-600.0 (sec) 40.0 p.118 n time3 Multi-step Dec Time- 0h124B deceleratio 0.0-600.0 (sec)
-
Page 440: Expanded Function Group (Adv)
of Functions Table 8.3 Expanded Function Group (ADV) Data in the following table will be displayed only when the related code has been selected. *O: Write-enabled during operation, : Write-enabled when operation stops, X: Write-disabled Comm. Prope Code Name Setting Range Initial Value Ref. - Page 441 Table of Functions Comm. Prope Code Name Setting Range Initial Value Ref. Address Display rty* Free-Run Power Braking Selection of None prohibited 0h1309 Forward Prev 0: None p.110 rotation Prevent direction Reverse Prev Starting with Power- 0h130A 0: No p.111 power on on Run Power-on...
- Page 442 of Functions Table Comm. Prope Code Name Setting Range Initial Value Ref. Address Display rty* frequency Brake 60 Hz Freq Dwell Start frequency- 0h1314 frequency on Dwell Maximum 5.00 p.160 acceleration Freq frequency (Hz) Dwell operation 0h1315 Dwell 0.0-60.0 (sec) p.160 time on Time...
- Page 443 Table of Functions Comm. Prope Code Name Setting Range Initial Value Ref. Address Display rty* upper limit1 Maximum frequency (Hz) Jump 0.00-Jump Jump Lo 0h131E frequency frequency upper 20.00 p.140 lower limit2 limit2 (Hz) Jump frequency Jump Jump Hi lower limit2- 0h131F frequency 25.00...
- Page 444 of Functions Table Comm. Prope Code Name Setting Range Initial Value Ref. Address Display rty* control Control Always ON p.254 Temp Control Up/Down operation U/D Save 0h1341 0: No p.155 frequency Mode save None Output contact On/Off 0h1342 On/Off 0: None p.294 Ctrl Src Pulse...
- Page 445 Table of Functions Comm. Prope Code Name Setting Range Initial Value Ref. Address Display rty* stop options Q-Stop Resume Safe operation Q-Stop 0h1348 0.0-600.0 (sec) p.158 deceleration Time time Selection of regeneration RegenAv 0h134A evasion 0: No p.301 dSel function for press Voltage level 200 V: 300-400 V...
-
Page 446: Control Function Group (Con)
of Functions Table 8.4 Control Function Group (CON) Data in the following table will be displayed only when the related code has been selected. *O: Write-enabled during operation, : Write-enabled when operation stops, X: Write- disabled Comm. Prope Code Name Setting Range Initial Value Ref. - Page 447 Table of Functions Comm. Prope Code Name Setting Range Initial Value Ref. Address Display rty* regulator compensatio n voltage limit rate Auto torque ATB Filt 1 – 9999 0h1415 boost filter p.130 Gain (msec) gain Auto torque ATB Volt 0h1416 boost 0.0-300.0% 100.0...
- Page 448 of Functions Table Comm. Prope Code Name Setting Range Initial Value Ref. Address Display rty* Power-on 0.75~ Speed search 250kW SS Sup- 0h1448 reference 50–120 (%) p.243 Current 315~ current 500kW Flying Start-1 : 100 Speed search 0h1449 proportional SS P-Gain 0-9999 p.243 Flying Start-2...
-
Page 449: Input Terminal Group (In)
Table of Functions Comm. Prope Code Name Setting Range Initial Value Ref. Address Display rty* 500 kW KEB Slip Energy Gain 0h1450 buffering slip 0-20000 p.197 buffering gain slip gain Energy 0h1451 buffering P- KEB P Gain 0-20000 1000 p.197 Gain Energy 0h1452... - Page 450 of Functions Table Comm. Initial Prope Code Name LCD Display Setting Range Ref. Address Value rty* voltage display Monitor(V) -12.00~12.00 (V) V1 input Unipolar 0h1506 polarity V1 Polarity p.90 Unipolar Bipolar selection Time constant 0h1507 of V1 input V1 Filter 0–10000 (ms) p.90 filter...
- Page 451 Table of Functions Comm. Initial Prope Code Name LCD Display Setting Range Ref. Address Value rty* direction change V1quantizatio 0.00 , 0.04-10.00 0h1511 0.04 p.90 n change Quantizing Temperature 0h1514 T1 Monitor 0.00 - 100.00 (%) p.323 monitor V2 input rate V2 Monitor 0h1523 0.00-12.00 (V)
- Page 452 of Functions Table Comm. Initial Prope Code Name LCD Display Setting Range Ref. Address Value rty* 0.04- 10.00 (%) I2 input I2 Monitor 0h1532 0–24 (mA) p.96 monitor (mA) I2 input filter 0h1534 I2 Filter 0–10000 (msec) p.96 time I2 minimum 0h1535 input power I2 Curr x1...
- Page 453 Table of Functions Comm. Initial Prope Code Name LCD Display Setting Range Ref. Address Value rty* configuration Trip P5 Px terminal 0h1545 P5 Define 7: Sp-L p.342 configuration P6 Px terminal 0h1546 P6 Define 8: Sp-M p.153 configuration P7 Px terminal 0h1547 P7 Define Speed-L...
- Page 454 of Functions Table Comm. Initial Prope Code Name LCD Display Setting Range Ref. Address Value rty* PID Gain2 p.164 PID Ref p.124 Change p.251 Motor Interlock p.286 Interlock p.286 Interlock p.286 Interlock p.286 Interlock p.286 Pre Excite Timer In p.265 dis Aux p.147 FWD JOG...
- Page 455 Table of Functions Comm. Initial Prope Code Name LCD Display Setting Range Ref. Address Value rty* PumpCle p.200 EPID2 p.184 EPID2 p.184 ItermClr Sleep Wake p.184 PID Step p.164 Ref L PID Step p.164 Ref M PID Step p.164 Ref H Interlock Interlock Interlock...
- Page 456 of Functions Table Comm. Initial Prope Code Name LCD Display Setting Range Ref. Address Value rty* Multi-function 0h1556 input terminal DI Off Delay 0–10000 (msec) p.142 Off filter P7 – P1 Multi-function A Terminal DI NC/NO 0h1557 input terminal (NO) 000 0000 p.142 selection...
- Page 457 Table of Functions Comm. Initial Prope Code Name LCD Display Setting Range Ref. Address Value rty* direction p.100 change TI quantization 0.00 0h1562 0.04 p.100 level Quantizing 0.04-10.00 (%) Quantizing is disabled if ‘0’ is selected.
-
Page 458: Output Terminal Block Function Group (Out)
of Functions Table 8.6 Output Terminal Block Function Group (OUT) Data in the following table will be displayed only when the related code has been selected. *O: Write-enabled during operation, : Write-enabled when operation stops, X: Write-disabled Comm. Prope Code Name Parameter Setting Initial Value... - Page 459 Table of Functions Comm. Prope Code Name Parameter Setting Initial Value Ref. Address Display rty* output1 bias Analog 0h1604 output1 0–10000 (msec) p.303 Filter filter Analog 0h1605 constant 0.0-100.0 (%) p.303 Const % output1 Analog 0h1606 output1 0.0-1000.0 (%) p.303 Monitor monitor Identical to the OUT-...
- Page 460 of Functions Table Comm. Prope Code Name Parameter Setting Initial Value Ref. Address Display rty* voltage Automatic restart final failure None FDT-1 FDT-2 FDT-3 FDT-4 Over Load Under Load Fan Warning Stall Over Voltage Multi- Low Voltage 0h161F function Relay 1 23:Trip p.308 relay1...
- Page 461 Table of Functions Comm. Prope Code Name Parameter Setting Initial Value Ref. Address Display rty* Trip Lost Keypad DB Warn%ED On/Off Control Fire Mode Pipe Broken Damper Err Lubrication Pump Clean Level Detect Damper Control CAP.Warning Fan Exchange Multi- 0h1620 function Relay 2 AUTO State...
- Page 462 of Functions Table Comm. Prope Code Name Parameter Setting Initial Value Ref. Address Display rty* function Status output monitor Multi- function DO On 0h1632 0.00-100.00 (sec) 0.00 p.315 output Delay On delay Multi- function DO Off 0h1633 0.00-100.00 (sec) 0.00 p.315 output Delay...
- Page 463 Table of Functions Comm. Prope Code Name Parameter Setting Initial Value Ref. Address Display rty* item Current Output Voltage DCLink Voltage Output Power Target Freq Ramp Freq PID Ref Value PID Fdb Value PID Output Constant EPID1 Output EPID1 RefVal EPID1 FdbVal EPID2 Output EPID2 RefVal...
-
Page 464: Communication Function Group (Com)
of Functions Table Comm. Prope Code Name Parameter Setting Initial Value Ref. Address Display rty* Pulse 0h1642 output 0.0-1000.0 (%) p.306 Monitor monitor 8.7 Communication Function Group (COM) Data in the following table will be displayed only when the related code has been selected. *O: Write-enabled during operation, : Write-enabled when operation stops, X: Write-disabled Comm. - Page 465 Table of Functions Comm. Prope Code Name Parameter Setting Initial Value Ref. Address Display rty* ation 4800 bps speed 9600 bps 19200 bps 38400 bps 56 Kbps 76.8 kbps 115.2 Kbps D8/PN/S1 Built-in communic D8/PN/S2 Int485 0h1704 ation 0: D8/PN/S1 O p.357 Mode D8/PE/S1...
- Page 466 of Functions Table Comm. Prope Code Name Parameter Setting Initial Value Ref. Address Display rty* Communic ation FieldBus 0h1709 option LED status BACnet maximum BAC Max 0h1714 1~127 p.398 master Master number BACnet BAC Dev 0h1715 device 0~4194 p.398 Inst1 number1 BACnet BAC Dev...
- Page 467 Table of Functions Comm. Prope Code Name Parameter Setting Initial Value Ref. Address Display rty* ation address4 Output Communic Para 0h1723 0000-FFFF Hex 0000 p.366 ation Status-5 address5 Output Communic Para 0h1724 0000-FFFF Hex 0000 p.366 ation Status-6 address6 Output Communic Para 0h1725...
- Page 468 of Functions Table Comm. Prope Code Name Parameter Setting Initial Value Ref. Address Display rty* address 4 Input Communic Para 0h1737 0000-FFFF Hex 0000 p.366 ation Control-5 address 5 Input Communic Para 0h1738 0000-FFFF Hex 0000 p.366 ation Control-6 address 6 Input Communic Para...
- Page 469 Table of Functions Comm. Prope Code Name Parameter Setting Initial Value Ref. Address Display rty* input 4 Communic ation Virtual DI 0h174A multi- External Trip 0: None p.393 function input 5 Communic ation Virtual DI 0h174B multi- 0: None p.393 function input 6 Communic...
- Page 470 of Functions Table Comm. Prope Code Name Parameter Setting Initial Value Ref. Address Display rty* U/D Clear Analog Hold I-Term Clear PID Openloop PID Gain 2 PID Ref Change Motor Interlock1 Interlock2 Interlock3 Interlock4 Interlock5 Pre Excite Timer In dis Aux Ref FWD JOG REV JOG Fire Mode...
-
Page 471: Advanced Function Group(Pid Functions)
Table of Functions Comm. Prope Code Name Parameter Setting Initial Value Ref. Address Display rty* EPID2 Run EPID2 ItermClr Sleep Wake Chg PID Step Ref L PID Step Ref M PID Step Ref H Interlock6 Interlock7 Interlock8 Communic ation multi- Virt DI 0000 0000 0h1756... - Page 472 of Functions Table Unit MAX = PID Unit100%(PID-68) Unit Min = (2xPID Unit 0%(PID-67)-PID Unit 100%) Unit Default = (PID Unit 100%-PID Unit 0%)/2 Unit Band = Unit 100%-Unit 0% *O /X: Write-enabled during operation, : Writing available when operation stops Comm.
- Page 473 Table of Functions Comm. Prope Code Name LCD Display Parameter Setting Initial Value Ref. Address rty* Fieldbus Pulse EPID1 Output reference 1 PID Ref 1 Unit 0h180B Unit Min–Unit Max p.164 keypad Default value None Pulse reference 1 PIDRef1Au Int 485 0h180C auxiliary 0: None...
- Page 474 of Functions Table Comm. Prope Code Name LCD Display Parameter Setting Initial Value Ref. Address rty* 13 I3 M+(G*A) M*(G*A) M/(G*A) M+(M*(G*A)) M+G*2*(A-50) M*(G*2*(A- 50)) M/(G*2*(A- reference 1 50)) 0h180D auxiliary Ref1AuxM 0: M+(G*A) p.164 mode M+M*G*2*(A- selection (M-A)^2 M^2+A^2 10 MAX(M,A) 11 MIN(M,A) 12 (M + A)/2...
- Page 475 Table of Functions Comm. Prope Code Name LCD Display Parameter Setting Initial Value Ref. Address rty* E-PID Output 11 I3 reference 2 PID Ref 2 Unit 0h1810 Unit Min–Unit Max p.164 keypad Default setting None Pulse Int 485 reference 2 0h1811 auxiliary 0: None...
- Page 476 of Functions Table Comm. Prope Code Name LCD Display Parameter Setting Initial Value Ref. Address rty* auxiliary M/(G*A) mode M+(M*(G*A)) selection M+G*2*(A-50) M*(G*2*(A- 50)) M/(G*2*(A- 50)) M+M*G*2*(A- (M-A)^2 M^2+A^2 10 MAX(M,A) 11 MIN(M,A) 12 (M + A)/2 13 Root(M+A) reference 2 PID Ref2 0h1813 -200.0–200.0 (%)
- Page 477 Table of Functions Comm. Prope Code Name LCD Display Parameter Setting Initial Value Ref. Address rty* 11 I3 None Pulse Int 485 feedback PID Fdb 0h1815 auxiliary 0: None p.164 FieldBus Aux Src source EPID1 selection Output 11 EPID1 Fdb Val 13 I3 M+(G*A) M*(G*A)
- Page 478 of Functions Table Comm. Prope Code Name LCD Display Parameter Setting Initial Value Ref. Address rty* M/(G*2*(A- 50)) M+M*G*2*(A- (M-A)^2 M^2+A^2 10 MAX(M,A) 11 MIN(M,A) 12 (M+A)/2 13 Root(M+A) feedback PID Fdb 0h1817 -200.0–200.0 (%) p.164 auxiliary Aux G gain PID feed PID Fdb 0h1818...
- Page 479 Table of Functions Comm. Prope Code Name LCD Display Parameter Setting Initial Value Ref. Address rty* upper limit 100.00 PID output PID Limit -100.00–PID Limit 0h181F 0.00 p.164 lower limit controller PID P-Gain 0h1820 0.00–300.00 (%) 50.0 p.164 proportiona l gain 2 controller PID I-Time 0h1821...
- Page 480 of Functions Table Comm. Prope Code Name LCD Display Parameter Setting Initial Value Ref. Address rty* reference setting 2 PID multi- step PID Step Unit 0h182A Unit Min–Unit Max p.164 reference Ref 3 Default setting 3 PID multi- step PID Step Unit 0h182B Unit Min–Unit Max...
- Page 481 Table of Functions Comm. Prope Code Name LCD Display Parameter Setting Initial Value Ref. Address rty* 10 kPa 11 Hz 12 rpm 13 V 14 A 15 kW 16 HP 17 mpm 18 ft 19 m/s 20 m3/s 21 m3/m 22 m 3/h 23 l/s 24 l/m...
- Page 482 of Functions Table Comm. Prope Code Name LCD Display Parameter Setting Initial Value Ref. Address rty* 35 f3/h 36 lb/s 37 lb/m 38 lb/h 39 ppm 40 pps x100 PID unit PID Unit 0h1833 2: x 1 p.164 scale Scale x 0.1 x0.01 -30000–...
-
Page 483: Epid Function Group (Epid)
Table of Functions 8.9 EPID Function Group (EPID) Data in the following table will be displayed only when the related code has been selected. Unit MAX = EPID1 (EPID2) Unit 100% Unit Min = (2xEPID1 (EPID2) Unit0%-EPID1 (EPID2) Unit100%) Unit Default = (EPID1 (EPID2) Unit 100%-EPID1 (EPID2) Unit 0%)/2 *O/X : Write-enabled during operation, : Writing available when operation stops Comm. - Page 484 of Functions Table Comm. Prope Code Name Setting Range Initial Value Ref. Address Display rty* Keypad EPID1 command EPID1 Ref Int 485 0h1906 0: KeyPad p.184 source FieldBus selection Pulse EPID1 EPID1 Ref keypad 0h1907 Unit Min–Unit Max Unit Min p.184 command value...
- Page 485 Table of Functions Comm. Prope Code Name Setting Range Initial Value Ref. Address Display rty* EPID1 EPID1 I- 0h190A integral 0.0–200.0 (sec) 10.0 p.184 Time time EPID1 EPID1 D- 0h190B differentiati 0.00–1.00 (sec) 0.00 p.184 Time on time EPID1 feed- EPID1 FF- 0h190C forward...
- Page 486 of Functions Table Comm. Prope Code Name Setting Range Initial Value Ref. Address Display rty* -300.00–Unit -30.000–Unit -3.0000–Unit 0.01 Unit Min– 30000 Unit Min– 3000.0 Values vary EPID1 unit EPID1 Unit Min– depending 0h1914 100% value Unit100% p.184 300.00 on the unit setting Unit Min–...
- Page 487 Table of Functions Comm. Prope Code Name Setting Range Initial Value Ref. Address Display rty* EPID2 feedback EPID2 0h1922 p.184 monitor Fdb Val value EPID2 error EPID2 Err 0h1923 monitor p.184 value Keypad EPID2 command EPID2 Ref Int 485 0h1924 0: Keypad p.184 source...
- Page 488 of Functions Table Comm. Prope Code Name Setting Range Initial Value Ref. Address Display rty* EPID2 EPID2 P- 0h1927 proportion 0.00–300.00 (%) 50.0 p.184 Gain al gain EPID2 EPID2 I- 0h1928 integral 0.0–200.0 (sec) 10.0 p.184 Time time EPID2 EPID2 D- 0h1929 differentiati 0.00–1.00 (sec)
- Page 489 Table of Functions Comm. Prope Code Name Setting Range Initial Value Ref. Address Display rty* X0.1 X0.01 -30000–Unit -3000.0– Unit Max Values vary EPID2 unit EPID2 -300.00–Unit depending 0h1931 p.184 0% value Unit0% on the unit setting -30.000– Unit Max -3.0000–Unit 0.01 Unit Min–...
-
Page 490: Application 1 Function Group (Ap1)
of Functions Table 8.10 Application 1 Function Group (AP1) Data in the following table will be displayed only when the related code has been selected. Unit MAX = PID Unit 100% Unit Min = (2xPID Unit 0%-PID Unit 100%) Unit Default = (PID Unit 100%-PID Unit 0%)/2 Unit Band = Unit 100%-Unit 0% *O/X: Write-enabled during operation, : Writing available when operation stops Comm. - Page 491 Table of Functions Comm. Prope Code Name Setting Range Initial Value Ref. Address Display rty* PID wakeup 2 0h1A0D WakeUp2 0.0–6000.0 (sec) 20.0 p.180 delay time PID wakeup 2 0h1A0E WakeUp2 0.00–Unit Band 20.00 p.180 value Soft Fill function Soft Fill 0h1A14 0: No p.179...
- Page 492 of Functions Table Comm. Prope Code Name Setting Range Initial Value Ref. Address Display rty* Follower Multi Master Serve Drv Regul 0h1A29 Bypass selection 0: No p.38 Bypass Number of Num of 0h1A2A 1–5 p.266 auxiliary motors Select starting Starting 0h1A2B 1–5 p.266...
- Page 493 Table of Functions Comm. Prope Code Name Setting Range Initial Value Ref. Address Display rty* Auxiliary motors Aux Start 0h1A32 pressure 0–100 (%) p.266 Diff difference Main motor acceleration time when the Aux Acc 0h1A33 0.0–600.0 (sec) p.266 number of Time auxiliary motors is reduced...
- Page 494 of Functions Table Comm. Prope Code Name Setting Range Initial Value Ref. Address Display rty* Target frequency of Follower Low Freq ~ High 0h1A3C Aux motor 60.00 Freq Freq during Multi Master #1 auxiliary Freq Low Limit– Start Freq 0h1A3D 45.00 motor start Freq High limit...
- Page 495 Table of Functions Comm. Prope Code Name Setting Range Initial Value Ref. Address Display rty* #5 auxiliary Stop Freq Low Freq– 0h1A4A motor stop 20.00 p.266 High Freq frequency #1 auxiliary Aux1 Ref motor’s 0h1A50 0.00–Unit Band 0.00 p.266 Comp reference compensation #2 auxiliary...
-
Page 496: Application 2 Function Group (Ap2)
of Functions Table Comm. Prope Code Name Setting Range Initial Value Ref. Address Display rty* to display [AP1- Aux 3 96] [AP1-97] Aux 4 Aux 5 Operation time(Day) of AuxRunTi 0h1A60 Auxiliary motor 65535 – me Day selected in [AP1-95] Operation time of Auxiliary AuxRunTi... - Page 497 Table of Functions Data In the following table will be displayed only when the related code has been selected. *O/X: Write-enabled during operation, : Writing available when operation stops Comm. Prope Code Name Setting Range Initial Value Ref. Address Display rty* Jump Jump Code...
- Page 498 of Functions Table Comm. Prope Code Name Setting Range Initial Value Ref. Address Display rty* Mode1 Dependent Output Power Output Current None Start Pump Pump clean 0h1B10 Clean 0: None p.200 Stop setting2 Mode2 Start and Stop Pump clean PC Curve 0h1B11 0.1–200.0 (%) 100.0...
- Page 499 Table of Functions Comm. Prope Code Name Setting Range Initial Value Ref. Address Display rty* step Freq High Freq maintaining frequency Reverse step 0h1B1A SteadyTim 0.0–600.0 (sec) 10.0 p.200 running time Reverse step 0.00, Low Freq– 0h1B1B running 30.00 p.200 SteadyFreq High Freq frequency...
- Page 500 of Functions Table Comm. Prope Code Name Setting Range Initial Value Ref. Address Display rty* End ramp Ramp settings Start Ramp Start Ramp 0h1B29 0.0–600.0 (sec) 10.0 p.204 Acc time End Ramp End Ramp 0h1B2A 0.0–600.0 (sec) 10.0 p.204 Dec time Damper Damper 0h1B2D...
- Page 501 Table of Functions Comm. Prope Code Name Setting Range Initial Value Ref. Address Display rty* Saved Cost Saved 0h1B5D over 1000 p.198 Cost2 unit Saved CO2 0h1B5E CO2 Factor 0.0–5.0 p.198 conversion Factor Saved CO2 Saved CO2 0h1B5F p.198 (Ton) –...
-
Page 502: Application 3 Function Group (Ap3)
of Functions Table 8.12 Application 3 Function Group (AP3) Data In the following table will be displayed only when the related code has been selected. *O/X: Write-enabled during operation, : Writing available when operation stops Comm. Prope Code Name Setting Range Initial Value Ref. - Page 503 Table of Functions Comm. Prope Code Name Setting Range Initial Value Ref. Address Display rty* Time Period1 Period1 0000000– Day of the 0h1C0D 0000000 p.222 week 1111111 (Bit) configuration Time Period2 Period2 0h1C0E 0: 00–24: 00 (min) 24: 00 Start time p.222 Start T configuration...
- Page 504 of Functions Table Comm. Prope Code Name Setting Range Initial Value Ref. Address Display rty* Except1 Date Except1 0h1C1E 0: 00–24: 00 (min) 24: 00 Start time p.222 Start T configuration Except1 Date Except1 Except1 StartT – 0h1C1F 24: 00 End time p.222 Stop T...
- Page 505 Table of Functions Comm. Prope Code Name Setting Range Initial Value Ref. Address Display rty* Start time Start T configuration Except5 Date Except5 Except5 StartT – 0h1C2B End time 24: 00 p.222 Stop T 24: 00 (min) configuration Except5 01/01–12/31 Except5 Date 0h1C2C 01/01...
- Page 506 of Functions Table Comm. Prope Code Name Setting Range Initial Value Ref. Address Display rty* function Event En configuration Time Event T-Event 0h1C47 configuration p.222 Status status Time Event 1 T-Event1 000000000000 – 00000000000 0h1C48 connection p.222 Period 111111111111 status None Speed-L Speed-M...
- Page 507 Table of Functions Comm. Prope Code Name Setting Range Initial Value Ref. Address Display rty* Timer In Dias Aux Ref EPID1 Run EPID1 ITermClr Pre Heat EPID2 Run EPID2 ITermClr Sleep Wake PID Step Ref PID Step Ref PID Step Ref Time Event 2 T-Event2 000000000000 –...
- Page 508 of Functions Table Comm. Prope Code Name Setting Range Initial Value Ref. Address Display rty* Identical to the T-Event4 Time Event 4 0h1C4F setting range for 0: None p.222 functions Define AP3-73 Time Event 5 T-Event5 000000000000 – 00000000000 0h1C50 connection p.222 Period...
-
Page 509: Protection Function Group (Prt)
Table of Functions 8.13 Protection Function Group (PRT) Data In the following table will be displayed only when the related code has been selected. O : Write-enabled during operation, : Write-enabled when stopped, X: Write disabled Comm. Prope Code Name Setting Range Initial Value Ref. - Page 510 of Functions Table Comm. Prope Code Name Setting Range Initial Value Ref. Address Display rty* operation Free-Run 0: None mode None Free-Run Speed command loss Lost Cmd 0h1D0C 0: None p.334 Hold Input operation Mode mode Hold Output Lost Preset Time to determine Lost Cmd...
- Page 511 Table of Functions Comm. Prope Code Name Setting Range Initial Value Ref. Address Display rty* Overload trip OL Trip 0h1D15 30–150 (%) p.323 level Level Overload trip OL Trip 0h1D16 0.0–60.0 (sec) 60.0 p.323 time Time Output Under load Current 0: Output 0h1D17 detection...
- Page 512 of Functions Table Comm. Prope Code Name Setting Range Initial Value Ref. Address Display rty* Thermal In Thermal Thermal 0h1D23 0: Thermal In p.323 sensor input In Src Thermal Thermal- 0h1D24 sensor fault 0.0–100.0 (%) 50.0 p.323 T Lev level Thermal Thermal- 0h1D25...
- Page 513 Table of Functions Comm. Prope Code Name Setting Range Initial Value Ref. Address Display rty* Fire Mode Fire mode Fire 0h1D2D 0: None p.334 setting Mode Sel Test Mode Fire mode Reverse Fire 0h1D2E direction 1: Forward p.334 Mode Dir Forward setting Fire mode...
- Page 514 of Functions Table Comm. Prope Code Name Setting Range Initial Value Ref. Address Display rty* Stall frequency1- Stall frequency Stall Freq 0h1D35 Stall frequency3 60.00 p.327 (Hz) Stall 0h1D36 Stall level 2 30-150 (%) p.327 Level 2 Stall frequency2- Stall frequency Stall Freq 0h1D37 Stall frequency 4...
- Page 515 Table of Functions Comm. Prope Code Name Setting Range Initial Value Ref. Address Display rty* Warning Level detect 0h1D46 mode LDT Sel 0: None Free-Run p.209 selection Below Level Level detect LDT Area 0h1D47 0: Below Level p.209 range setting Above Level Output...
- Page 516 of Functions Table Comm. Prope Code Name Setting Range Initial Value Ref. Address Display rty* Level detect LDT Band 0h1D4B Source setting Source setting p.209 band width width Level detect 0.00–High Freq 0h1D4C LDT Freq 20.00 p.209 frequency (Hz) Level detect 0h1D4D 0.0–3000.0 (Min) 60.0...
- Page 517 Table of Functions Comm. Prope Code Name Setting Range Initial Value Ref. Address Display rty* Capacitor life CAP. 0h1D55 50.0–95.0 (%) diagnosis level p.346 Level1 Capacitor life CAP. 0h1D56 diagnosis level p.346 Level2 accumulated Fan Time 0h1D57 p.348 operating time Perc operation % 0h1D58...
- Page 518 of Functions Table Comm. Prope Code Name Setting Range Initial Value Ref. Address Display rty* 0h1D60 LDT Rst LDT Auto Δ 0~6000 P205 restart count 0h1D61 LDT Rst LDT Auto 0~6000 Cnt M restart cycle P205 count 0h1D62 LDT Cnt LDT Auto Δ...
-
Page 519: 2Nd Motor Function Group (M2)
Table of Functions 8.14 2nd Motor Function Group (M2) The second motor function group is displayed when one or more of the IN-65–71 codes is set to ‘28 (2nd MOTOR)’ . Data in the following table will be displayed only when the related code has been selected. - Page 520 of Functions Table Comm. Prope Code Name Setting Range Initial Value Ref. Address Display rty* 2.2 kW (3.0HP) 3.0 kW (4.0HP) 3.7 kW (5.0HP) 4.0 kW (5.5HP) 5.5 kW (7.5HP) 7.5 Kw (10.0HP) 11.0 kW (15.0HP) 15.0 kW (20.0HP) 18.5 kW (25.0HP) 22.0 kW (30.0HP)
- Page 521 Table of Functions Comm. Prope Code Name Setting Range Initial Value Ref. Address Display rty* 75.0kW (100.0HP) 90.0kW (125.0HP) 110.0kW (150.0HP) 132.0kW (200.0HP) 160.0kW (250.0HP) 185.0kW (300.0HP) 220.0kW (350.0HP) 250.0kW (400.0HP) 315.0kW (500.0HP) 355.0kW (550.0HP) 400.0kW (650.0HP) 500.0kW (800.0HP) Base M2-Base 30.00–400.00 0h1E07...
- Page 522 of Functions Table Comm. Prope Code Name Setting Range Initial Value Ref. Address Display rty* Number of M2-Pole 0h1E0A motor 2–48 p.251 poles Rated slip M2-Rated 0h1E0B 0–3000 (RPM) p.251 speed Slip Motor M2-Rated 0h1E0C rated 1.0–1000.0 (A) p.251 Curr current Motor no- Dependent on...
-
Page 523: Trip (Trip Last-X) And Config (Cnf) Mode
Table of Functions Comm. Prope Code Name Setting Range Initial Value Ref. Address Display rty* 500kW Stall M2-Stall 0h1E1C prevention 30–150 (%) p.251 level Electronic thermal 1 M2-ETH 1 0h1E1D 100–150 (%) p.251 minute rating Electronic thermal M2-ETH 0h1E1E 50–120 (%) p.251 continuous Cont... -
Page 524: Config Mode (Cnf)
of Functions Table Code Name LCD Display Setting Range Initial Value Ref. Output terminal state DO State Trip time after Power on Trip On Time 00/00/00 00: 00 Trip time after operation Trip Run Time 00/00/00 00: 00 start Delete trip history Trip Delete? 8.15.2 Config Mode (CNF) Code... - Page 525 Table of Functions Code Name LCD Display Setting Range Initial Value Ref. WHour Counter DCLink Voltage DI State DO State V1 Monitor(V) V1 Monitor(%) V2 Monitor(V) V2 Monitor(%) I2 Monitor(mA) I2 Monitor(%) PID Output PID Ref Value PID Fdb Value EPID1 Out EPID1 Ref Val EPID1 Fdb Val...
- Page 526 of Functions Table Code Name LCD Display Setting Range Initial Value Ref. All Grp DRV Grp BAS Grp ADV Grp CON Grp IN Grp OUT Grp Parameter Parameter Init 0: No p.257 initialization COM Grp PID Grp EPI Grp AP1 Grp AP2 Grp AP3 Grp PRT Grp...
- Page 527 Table of Functions Code Name LCD Display Setting Range Initial Value Ref. Trip history Erase All Trip 0: No p.263 deletion User registration UserGrpAllDel 0: No p.260 code deletion Read parameters Parameter Read 0: No p.256 Parameter Write parameters 0: No p.256 Write Save parameters...
- Page 528 of Functions Table Code Name LCD Display Setting Range Initial Value Ref. Accumulated On-time 00000DAY 00:00 p.318 inverter motion time Accumulated Run-time 00000DAY 00:00 inverter operation p.318 time 0: No Accumulated inverter operation Time Reset p.318 time initialization Real Time Real Time Date-Format Accumulated...
-
Page 529: Macro Groups
Table of Functions 8.16 Macro Groups The following table lists detailed parameter settings for each macro configuration. 8.16.1 Compressor (MC1) Group... - Page 530 of Functions Table Macro Macro Code Initial Value Code Initial Value Code Display Code Display 0.75~90k 10.0 Jump 110~250 1: CODE DRV-3 Acc Time 30.0 Code 315~500 50.0 0.75~90k 20.0 110~250 Freq Ref DRV-4 60.0 DRV-7 1: Keypad-2 Time 315~500 100.0 Control DRV-...
- Page 531 Table of Functions PID- PID Ref PID- PID P- 0.5000 70.00 1 Set Gain 1 PID- PID I- PID- PID Unit 5: inWC Time 1 Macro Macro Code LCD Display Initial Value Code LCD Display Initial Value Code Code PID Unit PID-51 4: x0.01 AP-1 8...
-
Page 532: Supply Fan (Mc2) Group
of Functions Table Macro Macro Code LCD Display Initial Value Code LCD Display Initial Value Code Code PID Unit PID-51 4: x0.01 AP-1 8 5.00 Scale Sleep1Freq AP1-21 Pre-PID Freq 30.00 AP1-22 Pre-PID Delay 120.0 Retry PRT-8 RST Restart PRT-9 Number PRT- Lost KPD... - Page 533 Table of Functions Macro Macro Code Initial Value Code Initial Value Code Display Code Display 0.75~90 20.0 Jump 110~250k 1: CODE DRV-3 60.0 Code Time 315~500k 100.0 0.75~90 30.0 110~250k Freq Ref DRV-4 90.0 DRV-7 Time Keypad-2 315~500k 150.0 DRV-11 Frequen 15.00 BAS-7...
-
Page 534: Exhaust Fan (Mc3) Group
of Functions Table Retry Retry PRT-9 PRT-10 20.0 Number Delay Lost Lost PRT-11 3: Dec PRT-12 3: Hold Input Mode Mode ETH Trip ETH 1 PRT-40 1: Free Run PRT-42 Stall PRT-52 PRT-70 LDT Sel 1: Warning Level 1 LDT Source PRT-72 0: Output Current PRT-75... - Page 535 Table of Functions Macro Macro Code Displa Initial Value Code Initial Value Code Code Display 0.75~90 20.0 Jump 110~250k 1: CODE DRV-3 Acc Time 60.0 Code 315~500k 100.0 0.75~90 30.0 110~250k Freq Ref DRV-4 90.0 DRV-7 1: Keypad-2 Time 315~500k 150.0 DRV-11 Frequ...
- Page 536 of Functions Table Macro Macro Code Displa Initial Value Code Initial Value Code Code Display 0.75~90 20.0 Jump 110~250k 1: CODE DRV-3 Acc Time 60.0 Code 315~500k 100.0 0.75~90 30.0 110~250k Freq Ref DRV-4 90.0 DRV-7 1: Keypad-2 Time 315~500k 150.0 DRV-11 Frequ...
- Page 537 Table of Functions Macro Macro Code Displa Initial Value Code Initial Value Code Code Display 0.75~90 20.0 Jump 110~250k 1: CODE DRV-3 Acc Time 60.0 Code 315~500k 100.0 0.75~90 30.0 110~250k Freq Ref DRV-4 90.0 DRV-7 1: Keypad-2 Time 315~500k 150.0 DRV-11 Frequ...
- Page 538 of Functions Table Macro Macro Code Displa Initial Value Code Initial Value Code Code Display 0.75~90 20.0 Jump 110~250k 1: CODE DRV-3 Acc Time 60.0 Code 315~500k 100.0 0.75~90 30.0 110~250k Freq Ref DRV-4 90.0 DRV-7 1: Keypad-2 Time 315~500k 150.0 DRV-11 Frequ...
- Page 539 Table of Functions Macro Macro Code Displa Initial Value Code Initial Value Code Code Display 0.75~90 20.0 Jump 110~250k 1: CODE DRV-3 Acc Time 60.0 Code 315~500k 100.0 0.75~90 30.0 110~250k Freq Ref DRV-4 90.0 DRV-7 1: Keypad-2 Time 315~500k 150.0 DRV-11 Frequ...
- Page 540 of Functions Table Macro Macro Code Displa Initial Value Code Initial Value Code Code Display 0.75~90 20.0 Jump 110~250k 1: CODE DRV-3 Acc Time 60.0 Code 315~500k 100.0 0.75~90 30.0 110~250k Freq Ref DRV-4 90.0 DRV-7 1: Keypad-2 Time 315~500k 150.0 DRV-11 Frequ...
- Page 541 Table of Functions Macro Macro Code Displa Initial Value Code Initial Value Code Code Display 0.75~90 20.0 Jump 110~250k 1: CODE DRV-3 Acc Time 60.0 Code 315~500k 100.0 0.75~90 30.0 110~250k Freq Ref DRV-4 90.0 DRV-7 1: Keypad-2 Time 315~500k 150.0 DRV-11 Frequ...
- Page 542 of Functions Table Macro Macro Code Displa Initial Value Code Initial Value Code Code Display 0.75~90 20.0 Jump 110~250k 1: CODE DRV-3 Acc Time 60.0 Code 315~500k 100.0 0.75~90 30.0 110~250k Freq Ref DRV-4 90.0 DRV-7 1: Keypad-2 Time 315~500k 150.0 DRV-11 Frequ...
- Page 543 Table of Functions Macro Macro Code Displa Initial Value Code Initial Value Code Code Display 0.75~90 20.0 Jump 110~250k 1: CODE DRV-3 Acc Time 60.0 Code 315~500k 100.0 0.75~90 30.0 110~250k Freq Ref DRV-4 90.0 DRV-7 1: Keypad-2 Time 315~500k 150.0 DRV-11 Frequ...
- Page 544 of Functions Table Macro Macro Code Displa Initial Value Code Initial Value Code Code Display 0.75~90 20.0 Jump 110~250k 1: CODE DRV-3 Acc Time 60.0 Code 315~500k 100.0 0.75~90 30.0 110~250k Freq Ref DRV-4 90.0 DRV-7 1: Keypad-2 Time 315~500k 150.0 DRV-11 Frequ...
- Page 545 Table of Functions Macro Macro Code Displa Initial Value Code Initial Value Code Code Display 0.75~90 20.0 Jump 110~250k 1: CODE DRV-3 Acc Time 60.0 Code 315~500k 100.0 0.75~90 30.0 110~250k Freq Ref DRV-4 90.0 DRV-7 1: Keypad-2 Time 315~500k 150.0 DRV-11 Frequ...
- Page 546 of Functions Table Macro Macro Code Displa Initial Value Code Initial Value Code Code Display 0.75~90 20.0 Jump 110~250k 1: CODE DRV-3 Acc Time 60.0 Code 315~500k 100.0 0.75~90 30.0 110~250k Freq Ref DRV-4 90.0 DRV-7 1: Keypad-2 Time 315~500k 150.0 DRV-11 Frequ...
- Page 547 Table of Functions Macro Macro Code Displa Initial Value Code Initial Value Code Code Display 0.75~90 20.0 Jump 110~250k 1: CODE DRV-3 Acc Time 60.0 Code 315~500k 100.0 0.75~90 30.0 110~250k Freq Ref DRV-4 90.0 DRV-7 1: Keypad-2 Time 315~500k 150.0 DRV-11 Frequ...
- Page 548 of Functions Table Macro Macro Code Displa Initial Value Code Initial Value Code Code Display 0.75~90 20.0 Jump 110~250k 1: CODE DRV-3 Acc Time 60.0 Code 315~500k 100.0 0.75~90 30.0 110~250k Freq Ref DRV-4 90.0 DRV-7 1: Keypad-2 Time 315~500k 150.0 DRV-11 Frequ...
- Page 549 Table of Functions Macro Macro Code Displa Initial Value Code Initial Value Code Code Display 0.75~90 20.0 Jump 110~250k 1: CODE DRV-3 Acc Time 60.0 Code 315~500k 100.0 0.75~90 30.0 110~250k Freq Ref DRV-4 90.0 DRV-7 1: Keypad-2 Time 315~500k 150.0 DRV-11 Frequ...
- Page 550 of Functions Table Macro Macro Code Displa Initial Value Code Initial Value Code Code Display 0.75~90 20.0 Jump 110~250k 1: CODE DRV-3 Acc Time 60.0 Code 315~500k 100.0 0.75~90 30.0 110~250k Freq Ref DRV-4 90.0 DRV-7 1: Keypad-2 Time 315~500k 150.0 DRV-11 Frequ...
- Page 551 Table of Functions Macro Macro Code Displa Initial Value Code Initial Value Code Code Display 0.75~90 20.0 Jump 110~250k 1: CODE DRV-3 Acc Time 60.0 Code 315~500k 100.0 0.75~90 30.0 110~250k Freq Ref DRV-4 90.0 DRV-7 1: Keypad-2 Time 315~500k 150.0 DRV-11 Frequ...
- Page 552 of Functions Table Macro Macro Code Displa Initial Value Code Initial Value Code Code Display 0.75~90 20.0 Jump 110~250k 1: CODE DRV-3 Acc Time 60.0 Code 315~500k 100.0 0.75~90 30.0 110~250k Freq Ref DRV-4 90.0 DRV-7 1: Keypad-2 Time 315~500k 150.0 DRV-11 Frequ...
- Page 553 Table of Functions Macro Macro Code Displa Initial Value Code Initial Value Code Code Display 0.75~90 20.0 Jump 110~250k 1: CODE DRV-3 Acc Time 60.0 Code 315~500k 100.0 0.75~90 30.0 110~250k Freq Ref DRV-4 90.0 DRV-7 1: Keypad-2 Time 315~500k 150.0 DRV-11 Frequ...
- Page 554 of Functions Table PID Unit PID-50 PID Unit Sel 5: inWC PID-51 4: x0.01 Scale AP1- Pre-PID Freq 30.00 PRT-8 Restart Retry Retry PRT-9 PRT-10 10.0 Number Delay Lost KPD Lost Cmd PRT-11 3: Dec PRT-12 3: Hold Input Mode Mode PRT-40 ETH Trip Sel 1:Free-Run...
-
Page 555: Cooling Tower (Mc4) Group
Table of Functions 8.16.4 Cooling Tower (MC4) Group... - Page 556 of Functions Table Macro Macro Code LCD Display Initial Value Code Initial Value Code Code Display 0.75~90 20.0 DRV- 110~250 Jump Code 1: CODE Acc Time 60.0 315~500 100.0 0.75~90 30.0 DRV- 110~250 DRV- Freq Ref Dec Time 90.0 1: Keypad-2 315~500 150.0 DRV-...
- Page 557 Table of Functions CON- CON- SS Mode 1: Flying Start-2 KEB Select 1: Yes OUT- Relay 2 10: Over Voltage PID-1 PID Sel 1: Yes PID-3 PID Output PID-4 PID Ref Value PID Fdb PID -5 PID-10 PID Ref 1 Src 4: I2 Value PID-11...
-
Page 558: Circululation Pump (Mc5) Group
of Functions Table 8.16.5 Circulation Pump (MC5) Group... - Page 559 Table of Functions Macro Macro Code Initial Value Code LCD Display Initial Value Code Display Code 0.75~90 30.0 Jump 110~250 1:CODE DRV-3 Acc Time 90.0 Code 315~500 150.0 0.75~90 50.0 DRV- 110~250 Dec Time 150.0 DRV-7 Freq Ref Src 1: Keypad-2 315~500 250.0 DRV-...
- Page 560 of Functions Table ADV- Power-on ADV- 1: Yes Freq Limit Lo 20.00 ADV- E-Save ADV- 2: Auto FAN Control 2: Temp Control Mode ADV- U/D Save 1: Yes CON-4 Carrier Freq Mode CON- SS Mode 0: Flying Start-1 CON-77 KEB Select 1: Yes OUT- Relay 2...
- Page 561 Table of Functions PRT- 0: Output LDT Band LDT Source/10% LDT Source PRT-75 Current Width of the Max. value PRT-76 LDT Freq 10.00 PRT-77 LDT Restart DT 100.0 M2-Acc M2-4 10.0 M2-5 M2-Dec Time 20.0 Time M2-V/F Patt 1: Square M2-Stall Lev M2-ETH 1...
-
Page 562: Vacuum Pump (Mc6) Group
of Functions Table 8.16.6 Vacuum Pump (MC6) Group... - Page 563 Table of Functions Macro Macro Code Initial Value Code Initial Value Code Display Code Display 0.75~90 30.0 Jump DRV- 110~250 1: CODE Acc Time 90.0 Code 315~500 150.0 0.75~90 60.0 DRV- 110~250 DRV- Freq Ref Dec Time 180.0 1: Keypad-2 315~500 300.0 DRV-...
- Page 564 of Functions Table Macro Macro Code Initial Value Code Initial Value Code Display Code Display 0.75~90 30.0 Jump DRV- 110~250 1: CODE Acc Time 90.0 Code 315~500 150.0 0.75~90 60.0 DRV- 110~250 DRV- Freq Ref Dec Time 180.0 1: Keypad-2 315~500 300.0 DRV-...
- Page 565 Table of Functions Macro Macro Code Initial Value Code Initial Value Code Display Code Display 0.75~90 30.0 Jump DRV- 110~250 1: CODE Acc Time 90.0 Code 315~500 150.0 0.75~90 60.0 DRV- 110~250 DRV- Freq Ref Dec Time 180.0 1: Keypad-2 315~500 300.0 DRV-...
- Page 566 of Functions Table Macro Macro Code Initial Value Code Initial Value Code Display Code Display 0.75~90 30.0 Jump DRV- 110~250 1: CODE Acc Time 90.0 Code 315~500 150.0 0.75~90 60.0 DRV- 110~250 DRV- Freq Ref Dec Time 180.0 1: Keypad-2 315~500 300.0 DRV-...
- Page 567 Table of Functions Macro Macro Code Initial Value Code Initial Value Code Display Code Display 0.75~90 30.0 Jump DRV- 110~250 1: CODE Acc Time 90.0 Code 315~500 150.0 0.75~90 60.0 DRV- 110~250 DRV- Freq Ref Dec Time 180.0 1: Keypad-2 315~500 300.0 DRV-...
- Page 568 of Functions Table Macro Macro Code Initial Value Code Initial Value Code Display Code Display 0.75~90 30.0 Jump DRV- 110~250 1: CODE Acc Time 90.0 Code 315~500 150.0 0.75~90 60.0 DRV- 110~250 DRV- Freq Ref Dec Time 180.0 1: Keypad-2 315~500 300.0 DRV-...
- Page 569 Table of Functions Macro Macro Code Initial Value Code Initial Value Code Display Code Display 0.75~90 30.0 Jump DRV- 110~250 1: CODE Acc Time 90.0 Code 315~500 150.0 0.75~90 60.0 DRV- 110~250 DRV- Freq Ref Dec Time 180.0 1: Keypad-2 315~500 300.0 DRV-...
- Page 570 of Functions Table Macro Macro Code Initial Value Code Initial Value Code Display Code Display 0.75~90 30.0 Jump DRV- 110~250 1: CODE Acc Time 90.0 Code 315~500 150.0 0.75~90 60.0 DRV- 110~250 DRV- Freq Ref Dec Time 180.0 1: Keypad-2 315~500 300.0 DRV-...
-
Page 571: Constant Torque (Mc7) Group
Table of Functions 8.16.7 Constant Torque (MC7) Group Macro Macro Code LCD Display Initial Value Code LCD Display Initial Value Code Code 0.75~90 30.0 110~250 Jump Code 1:CODE DRV-3 Acc Time 90.0 315~500 150.0 0.75~90 32.0 110~250 DRV-4 Dec Time 60.0 DRV-7 Freq Ref Src 1: Keypad-2... - Page 572 of Functions Table Macro Macro Code LCD Display Initial Value Code LCD Display Initial Value Code Code 0.75~90 30.0 110~250 Jump Code 1:CODE DRV-3 Acc Time 90.0 315~500 150.0 0.75~90 32.0 110~250 DRV-4 Dec Time 60.0 DRV-7 Freq Ref Src 1: Keypad-2 315~500 100.0 Control...
- Page 573 Table of Functions Macro Macro Code LCD Display Initial Value Code LCD Display Initial Value Code Code 0.75~90 30.0 110~250 Jump Code 1:CODE DRV-3 Acc Time 90.0 315~500 150.0 0.75~90 32.0 110~250 DRV-4 Dec Time 60.0 DRV-7 Freq Ref Src 1: Keypad-2 315~500 100.0 Control...
-
Page 574: Troubleshooting
This chapter explains how to troubleshoot a problem when inverter protective functions, fault trips, warning signals, or faults occur. If the inverter does not work normally after following the suggested troubleshooting steps, please contact the LSIS customer service center. 9.1 Trip and Warning When the inverter detects a fault, it stops the operation (trips) or sends out a warning signal. - Page 575 Troubleshooting LCD Display Type Description Displayed when the motor underload trip is activated and the Under Load Latch actual load level is less than the set level. Operates when PRT-27 is set to a value other than ‘0’ . Displayed when inverter output current exceeds 180% of the rated Over Current1 Latch current.
- Page 576 Troubleshooting LCD Display Type Description the specified value. Displayed when the DC circuit in the inverter detects a specified Over Current2 Latch level of excessive, short circuit current. Displayed when an external fault signal is provided by the multi- External Trip Latch function terminal.
- Page 577 Troubleshooting General Fault Trips LCD Display Type Description Triggered when the damper open signal or run command signal is Damper Err Latch longer than the value set at AP2-45 (Damper Check T) during a fan operation. Triggered when AP1-55 is set to ‘2’ and all auxiliary motors are MMC Interlock Latch interlocked during an MMC operation.
-
Page 578: Warning Message
Troubleshooting 9.1.2 Warning Message LCD Display Description Displayed when a motor is overloaded. Set PRT-17 to ‘1’ to enable. Set OUT- Over Load 31–35 or OUT-36 to ‘5 (Over Load)’ to receive the overload warning output signals. Displayed when the motor is underloaded. Set PRT-25 is to ‘1’ . Set the digital Under Load output terminal or relay (OUT-31–35 or OUT-36) to’... -
Page 579: Troubleshooting Fault Trips
Troubleshooting LCD Display Description user. Set the digital output terminals or relay (OUT-31–35 or OUT-36) to ‘34 (CAPWarning)’ to receive the capacitor life warning output signals. Displayed when the cooling fans need replacing. Set the digital output Fan ExChange terminals or relay (OUT-31–35 or OUT-36) to ‘35 (FanExChange)’ to receive the fan replacement warning output signals. - Page 580 Troubleshooting Type Cause Remedy problem. models with lower capacity. The set value for underload level (PRT- Reduce the set value for the underload 24) is less than the system’s minimum level. load. Acc/Dec time is too short, compared to Increase Acc/Dec time. load inertia (GD The inverter load is greater than the Replace the inverter with a model that has...
- Page 581 Open The DC link capacitor needs to be Replace the DC link capacitor. Contact the replaced. retailer or the LSIS customer service center. The load is greater than the rated motor Replace the motor and inverter with capacity. models that have increased capacity.
-
Page 582: Troubleshooting Other Faults
Troubleshooting Type Cause Remedy There is a fault with the internal Contact the retailer or the LSIS customer temperature sensor. service center. A foreign object is obstructing the fan’s Remove the foreign object from the air Fan Lock air vent. - Page 583 Troubleshooting Type Cause Remedy level. The load is too high. Operate the motor independently. An emergency stop signal is input. Reset the emergency stop signal. The wiring for the control circuit terminal Check the wiring for the control circuit is incorrect. terminal.
- Page 584 Troubleshooting Type Cause Remedy overheating. Increase the Acc/Dec time. Check the motor parameters and set the correct values. Replace the motor and the inverter with models with appropriate capacity for the load. The ambient temperature of the motor Lower the ambient temperature of is too high.
- Page 585 Troubleshooting Type Cause Remedy not accelerate. Reduce the load and increase the /The The load is too high. acceleration time. Check the acceleration mechanical brake status. time is too long. The acceleration time is too long. Change the acceleration time. The combined values of the motor Change the motor related properties and the inverter parameter...
- Page 586 Troubleshooting Type Cause Remedy Connect the inverter to a ground terminal. Check that the ground resistance is less than 100Ω for 200 V inverters and When the less than 10Ω for 400 V inverters. inverter is An earth leakage breaker will interrupt Check the capacity of the earth operating, the the supply if current flows to ground...
- Page 587 Troubleshooting Type Cause Remedy not come to a because DC braking is not operating Increase the set value for the DC complete stop normally. braking current. when the Increase the set value for the DC inverter output braking stopping time. stops.
- Page 588 Troubleshooting...
-
Page 589: Maintenance
Maintenance 10 Maintenance This chapter explains how to replace the cooling fan, the regular inspections to complete, and how to store and dispose of the product. An inverter is vulnerable to environmental conditions and faults also occur due to component wear and tear. To prevent breakdowns, please follow the maintenance recommendations in this section. -
Page 590: Annual Inspection
Maintenance Inspection Inspection Inspection Inspection Inspection Inspection details area item method standard equipment phases in. the page 585 inverter terminal block. Is there any leakage from the Smoothin Visual Input/Outp inside? inspection No abnormality ut circuit capacitor Is the capacitor swollen? Turn off the Is there any... - Page 591 Maintenance Inspection Inspection Inspection Judgment Inspection Inspection details area item method standard equipment terminal to the ground terminal using a Megger. Is there anything Tighten all loose in the screws. device? abnormality Is there any Visual evidence of parts inspection overheating? Are there any corroded cables?
-
Page 592: Bi-Annual Inspection
Maintenance Inspection Inspection Inspection Judgment Inspection Inspection details area item method standard equipment Protection while the inverter between the between DC voltmeter circuit is in operation. inverter phases: within output 4 V for 200 V terminal U/ V/ series and within 8 V for 400 V series. -
Page 593: Real Time Clock (Rtc) Battery Replacement
Maintenance Do not run an insulation resistance test (Megger) on the control circuit as it may result in damage to the product. 10.2 Real Time Clock (RTC) Battery Replacement A CR2032 Lithium-Manganese battery to power the inverter’s built-in RTC (real time clock) is installed on the main PCB. - Page 594 Maintenance Turn off the inverter and make sure that DC link voltage has dropped to a safe level. Loosen the screw on the power cover then remove the power cover. 0.75–30 kW Models 37–90 kW Models 220~500kW Models 110~185kW Models...
- Page 595 Maintenance Remove the keypad from the inverter body. 0.75–30 kW Models 37–90 kW Models Loosen the screws securing the front cover, and remove the front cover by lifting it. The main PCB is exposed. 0.75–30 kW Models 37–90 kW Models...
- Page 596 Maintenance Locate the RTC battery holder on the main PCB, and replace the battery. Reattach the front cover, the power cover, and the keypad back onto the inverter body Ensure that the inverter is turned off and DC link voltage has dropped to a safe level before opening the terminal cover and installing the RTC battery.
-
Page 597: Storage And Disposal
Maintenance 10.3 Storage and Disposal 10.3.1 Storage If you are not using the product for an extended period, store it in the following way: • Store the product in the same environmental conditions as specified for operation (Refer to Installation Considerationson page 10). •... -
Page 598: Technical Specification
Specification Technical 11 Technical Specification 11.1 Input and Output Specifications Three Phase 200 V (0.75–3.7 kW) Model H100 XXXX–2 0008 0015 0022 0037 Applied Motor 0.75 Rated Capacity (kVA) Three-Phase Rated Rated Current (A) Single-Phase output Output Frequency 0–400 Hz Output Voltage (V) 3-Phase 200–240 V Three-Phase... - Page 599 Specification Technical Three Phase 200 V (5.5–18.5 kW) Model H100 XXXX–2 0055 0075 0110 0150 0185 Applied Motor 18.5 Rated Capacity (kVA) 11.4 16.0 21.3 26.3 Three-Phase Rated Rated Current (A) Single-Phase output Output Frequency 0–400 Hz Output Voltage (V) 3-Phase 200–240 V Three-Phase 3-Phase 200–240 VAC (-15%–+10%)
- Page 600 Specification Technical Three Phase 400 V (0.75–3.7 kW) Model H100 XXXX–4 0008 0015 0022 0037 Applied Motor 0.75 Rated Capacity (kVA) Three-Phase Rated Rated Current (A) Single-Phase output Output Frequency 0–400 Hz Output Voltage (V) 3-Phase 380–480 V Three-Phase 3-Phase 380–480 VAC (-15%–+10%) Working Voltage (V) Single-Phase 1-Phase 480 VAC (-5%–+10%)
- Page 601 Specification Technical Three Phase 400 V (5.5–22 kW) Model H100 XXXX–4 0055 0075 0110 0150 0185 0220 Applied Motor 18.5 Rated Capacity(kVA) 12.2 18.3 23.0 29.0 34.3 Three-Phase Rated Rated Current(A) Single-Phase output Output Frequency 0–400 Hz Output Voltage(V) 3-Phase 380–480 V Three-Phase 3-Phase 380–480 VAC (-15%–+10%) Working...
- Page 602 Specification Technical Three Phase 400 V (30.0–90.0 kW) Model H100 XXXX–4 0300 0370 0450 0550 0750 0900 Applied Motor Rated Capacity (kVA) 46.5 57.1 69.4 82.0 108.2 128.8 Three-Phase Rated Rated Current (A) Single-Phase output Output Frequency 0–400 Hz Output Voltage (V) 3-Phase 380–480 V Three-Phase 3-Phase 380–480 VAC (-15%–+10%)
- Page 603 Specification Technical Three Phase 400 V (110.0–500.0 kW) Model H100 XXXX–4 1100 1320 1600 1850 2200 2500 3150 3550 4000 5000 Applied Motor Rated Capacity (kVA) Rated Rated Three outpu Current (A) Phase Output Frequency 0–400 Hz Output Voltage (V) 3-Phase 380–500 V Working Three...
-
Page 604: Product Specification Details
Specification Technical 11.2 Product Specification Details Items Description Control method V/F control, Slip compensation. Frequency settings Digital command: 0.01 Hz power resolution Analog command: 0.06 Hz (60 Hz standard) Frequency accuracy 1% of maximum output frequency. Control V/F pattern Linear, square reduction, user V/F. 0.75~90kW Rated current: 120% 1 min. - Page 605 Specification Technical Items Description (7EA) Forward P1-P7 direction operation Reset Reverse direction operation Emergency External trip stop Jog operation Multi step Multi step acc/dec-high/med/low speed Second motor selection frequency- Frequency reduction high/med/low Fix analog command frequency DC braking Transtion from PID to general operation Pre during stop Heat Frequency...
- Page 606 Specification Technical Items Description Over current trip External signal trip ARM short circuit current trip Over voltage trip Over heat trip Temperature sensor trip Input imaging Inverter over heat trip Option trip Ground trip Output imaging trip Motor over Inverter overload trip heat trip Fan trip I/O board link...
- Page 607 Specification Technical Items Description option.) -10 ℃–50 ℃ (2.5% current derating is applied above 40 ℃) Ambient No ice or frost should be present. temperature Working under normal load at 50 ℃ (122 °F), it is recommended that less than 75% load is applied. Relative humidity less than 95% RH (to avoid condensation Ambient humidity forming)
-
Page 608: External Dimensions
Specification Technical 11.3 External Dimensions 0.75–30 kW (3-phase) 37–90 kW (3-phase) - Page 609 Specification Technical 110–185 kW (3-phase)
- Page 610 Specification Technical 220–500 kW (3-phase) Units: mm Items Φ 0008H100-2 216.5 10.5 0015H100-2 216.5 10.5 0022H100-2 216.5 10.5 0037H100-2 216.5 10.5 phase 0055H100-2 216.5 10.5 200 V 0075H100-2 216.5 10.5 0110H100-2 216.5 10.5 0150H100-2 273.7 11.3 205.3 0185H100-2 193.8 223.2...
- Page 611 Specification Technical Items Φ 0008H100-4 216.5 10.5 0015H100-4 216.5 10.5 0022H100-4 216.5 10.5 0037H100-4 216.5 10.5 0055H100-4 216.5 10.5 0075H100-4 216.5 10.5 0110H100-4 216.5 10.5 0150H100-4 273.7 11.3 205.3 0185H100-4 273.7 11.3 205.3 0220H100-4 193.8 223.2 0300H100-4 193.8 223.2 0370H100-4 428.5 0450H100-4 486.5...
- Page 612 Specification Technical Units : inches Items Φ 0008H100-2 6.30 5.39 9.13 8.52 0.41 7.13 0.20 0.20 - 0015H100-2 6.30 5.39 9.13 8.52 0.41 7.13 0.20 0.20 - 0022H100-2 6.30 5.39 9.13 8.52 0.41 7.13 0.20 0.20 - 0037H100-2 6.30 5.39 9.13 8.52 0.41...
-
Page 613: Peripheral Devices
5000H100-4 30.55 19.69 41.50 40.20 0.79 19.69 0.55 0.55 - 11.4 Peripheral Devices Compatible Circuit Breaker, Leakage Breaker and Magnetic Contactor Models (manufactured by LSIS) Circuit Breaker Leakage Breaker Magnetic Contactor Product (kW) Rated Rated Rated Rated Model Model Model... - Page 614 Specification Technical Circuit Breaker Leakage Breaker Magnetic Contactor Product (kW) Rated Rated Rated Rated Model Model Model Model Current Current Current Current 400 V MC-6a MC-9a MC-12a MC-22b ABS53c EBS33C MC-32a ABS63c UTE100 EBS53c MC-50a ABS63c EBS63c MC-65a 18.5 ABS103c MC-85a ABS103c EBS103c...
- Page 615 Maximum allowed prospective short-circuit current at the input power connection is defined in IEC 60439-1 as 100 kA. LSLV-H100 is suitable for use in a circuit capable of delivering not more than 100kA RMS at the drive’ s maximum rated voltage, depending on the selected MCCB. RMS symmetrical amperes for recommended MCCB are the following table.
-
Page 616: Fuse And Reactors Specifications
Specification Technical 11.5 Fuse and Reactors Specifications AC Input Fuse AC reactor DC Reactor Products(kW) Current Voltage Inductance Current Inductance Current (mH) (mH) 0.75 2.02 4.04 1.26 2.53 0.78 1.68 0.59 1.26 3-Phase 0.43 0.93 200 V 0.31 0.73 0.22 0.53 0.16 0.32... -
Page 617: Terminal Screw Specifications
Specification Technical AC Input Fuse AC reactor DC Reactor Products(kW) Current Voltage Inductance Current Inductance Current (mH) (mH) 0.08 0.07 0.06 0.05 0.05 0.04 1000 0.03 1100 0.03 Use Class H or RK5 UL Listed Input Fuse and UL Listed Breaker Only. See the table above for the Voltage and Current rating of the fuse and the breaker. - Page 618 Specification Technical Product (kW) Terminal Screw Size Screw Torque (Kgf c m/Nm) 24.5~31.8/2.4~3.1 18.5 0.75 7.1–12.2/0.7–1.2 18.5 24.5~31.8/2.4~3.1 3-Phase 400 V 61.2–91.8/6–9 89.7~122.0/8.8~11.96 182.4~215.0/17.87~21.07 M8 X 2 61.2–91.8/6–9 M12 X 1 182.4~215.0/17.87~21.07 M10 X 2 89.7~122.0/8.8~11.96...
-
Page 619: Dynamic Breaking Unit (Dbu) And Resistors
Specification Technical Product (kW) Terminal Screw Size Screw Torque (Kgf c m/Nm) M16 X 1 490.9~511.0/48.05~50.11 Control Circuit Terminal Screw Specification Terminal Terminal Screw Size Screw Torque(Kgf cm/Nm) P1–P7/ CM/VR/V1/I2/AO/Q1/EG/24/TI/ 2.2–2.5/0.22–0.25 TO/SA,SB,SC/S+,S-,SG A1/B1/C1 Apply rated torques to the terminal screws. Loose screws may cause short circuits and malfunctions. Tightening the screw too much may damage the terminals and cause short circuits and malfuctions. - Page 620 Specification Technical (Resistance 45, 55 kW SV550DBU-2U appearance of of DB Group 1. 75 kW SV370DBU-2U, 2Set Resistor 30, 37 kW SV370DBU-4U refer to the 45, 55 kW SV550DBU-4U table of 75 kW SV750DBU-4U 400V “11.7.6 DB 90 kW SV550DBU-4U, 2Set Resistors”) 110, 132kW SV750DBU-4U, 2Set...
-
Page 621: Terminal Arrangement
Specification Technical LSLV2200DBU-4HN, 250~355kW 2Set LSLV2200DBU-4HN, 400, 500kW 2Set Note • It is not necessary to use option type dynamic braking unit for H100 0.75~18.5kW(200V) and 0.75~30kW(400V) because basically the dynamic braking unit is built in. • You must refer to dynamic braking unit manual for usage recommended dynamic braking unit in the table above due to changeable table. - Page 622 Specification Technical Group 4: Terminals Functions Ground Terminal Terminal for connection with B2 of DBU Terminal for connection with B1 of DBU Terminal for connection with N of Inverter Terminal for connection with P of Inverter Group 5: P(+) N( N( N( N(- - - - ) ) ) ) P(+) P(+) P(+)
- Page 623 Specification Technical Terminals Functions Terminal for connection with B2 of DBU Unused Ground Terminal Group6: A Frame (37kW, 75kW-4) P(+) P(+) P(+) P(+) N( N( N( N(- - - - ) ) ) ) B /C Frame (75kW-2, 90~220kW) P(+) P(+) P(+) P(+)
- Page 624 Specification Technical Note You must refer to dynamic braking unit manual for choice the braking resistor to use the dynamic braking unit.
-
Page 625: Dynamic Breaking (Db)Unit & Db Resistor Basic Wiring
Specification Technical 11.7.3 Dynamic Breaking (DB)Unit & DB resistor basic wiring 0.75~90kW 110~500kW DBU Terminals Description Wire correctly referring to wiring diagram. DB Resistors connect with B1,B2 B1, B2 of DB Unit. In case of large capacity, it may be necessary to connect more than 2 sets of DB Unit according to the usage environment. -
Page 626: Dimensions
Specification Technical 11.7.4 Dimensions -Group1 - Group2 80 80 80 80 2 2 2 2 - - - - Dynamic RESE RESE RESE RESE POWE POWE POWE POWE 166.2 5. 5. 5. 5. 15 15 15 15 80 80 80 80 27 27 27 27 -Group3 - Group4... - Page 627 Specification Technical Group5 Hole position Capacity Hole size for Voltage of applied Dimension (mm) Weight installation installation motor (mm) (φ φ φ φ ) (kW) (kg) 1.50 1.55 1.57 1.84 227.4 76.4 215.4 1.53 1.55 1.56 1.85...
- Page 628 Specification Technical Group6 Hole Hole size position for Weig Capacity Dimension (mm) Volta installation installati (mm) applied motor (φ φ φ φ ) (Kg) 37 [kW] 3.77 Fram 208.5 37 [kW] 3.84 75 [kW] 3.98 165.2 75 [kW] 8.26 Fram 90 [kW] 329.5 8.48...
-
Page 629: Display Functions
Specification Technical 132 [kW] 8.40 160 [kW] 9.40 Fram 369.5 220 [kW] 9.70 11.7.5 Display Functions DB Resistors connect with B1, B2 of DB Unit. DBU has 3 LEDs. Red LED which is located in middle displays supplying main power, one Green LED which is right side displays under breaking and another green LED which is left side displays Over Heat Trip(OHT). - Page 630 Specification Technical Torque 100% Torque 150% Product Wattage Wattage Wattage Wattage DB unit Resistor Resistor (kW) (%ED=5%) (%ED=10%) (%ED=5%) (%ED=10%) 18.5 2400 4800 2600 5200 0.75 1200 2000 1400 1000 1000 2000 1200 2400 1200 2400 2000 4000 2000 4000 2400 4800 18.5...
-
Page 631: Inverter Continuous Rated Current Derating
Specification Technical Torque 100% Torque 150% Product Wattage Wattage Wattage Wattage DB unit Resistor Resistor (kW) (%ED=5%) (%ED=10%) (%ED=5%) (%ED=10%) 26000 52000 30000 60000 LSLV-DB 132kW DB Unit and Resistor * 2 Set (Parallel) 160kW DB Unit and Resistor * 2 Set (Parallel) 185kW DB Unit and Resistor * 2 Set (Parallel) 220kW DB Unit and Resistor * 2 Set (Parallel) 185kW DB Unit and Resistor * 3 Set (Parallel) - Page 632 Specification Technical <400[V] 37–500[kW] Current Derating Rate >...
- Page 633 Specification Technical 200 V 400 V Item Unit 0.75– 0.75– 22– 37– 75– 110- 400 kW 500 kW 18.5 kW 18.5 kW 30 kW 55 kW 90 kW 355 kW fs,def fs,c fs,max kHz DR1 % % DR2 % % *fs,def: Switching frequency for continued operation fs,c: Switching frequency where the first current derating ends.
- Page 634 Specification Technical Derating by Input Voltage The continuous rated current of the inverter is limited based on the input voltage. Refer to the following graph. 정격 전류[%] 100% 입력전압 200[V] 240[V] 264[V] 380[V] 480[V] 528[V] 380[V] 500[V] 550[V] 110[kW] 이상만 해당 Derating by Ambient Temperature and Installation Type Ambient temperature and installation type determine the constant-rated current of the inverter.
-
Page 635: Applying Drives To Single-Phase Input Application
Application 12.1 Introduction LSLV-H100 is a three-phase standard variable frequency drive(VFD). When applying single-phase power to a three-phase VFD, there are several constraints that need to be considered. Standard Pulse-Width-Modulated (PWM) VFDs use a 6-pulse diode rectifier. The 6-pulse rectification results in 360 Hz DC bus ripple when used with a three-phase 60 Hz supply. -
Page 636: Power(Hp), Input Current And Output Current
Drives to Single-phase Applying Input Application Figure-2 Typical Single-Phase Configuration 12.2 Power(HP), Input Current and Output Current When using a three-phase VFD with single-phase input, derating the drive’s output current and horsepower will be necessary because of the increase in DC bus ripple voltage and current. In addition, the input current through the remaining two phases on the diode bridge converter will approximately double, creating another derating consideration for the VFD. -
Page 637: Input Frequency And Voltage Tolerance
Drives to Single-phase Applying Input Application 12.3 Input Frequency and Voltage Tolerance The single-phase current ratings are valid for 60Hz input only. For single-phase input AC voltage, products with 90 kW or less are within -5% to + 10% of 240/480 Vac. -
Page 638: Wiring
Drives to Single-phase Applying Input Application 12.4 Wiring Please connect single-phase input to R(L1) and T(L3). Figure-3 Terminal Wiring Diagram 12.5 Precautions for 1–phase input to 3-phase drive • Please connect single-phase input to R(L1) and T(L3). • AC or DC reactor is necessary to reduce DC ripple. Please select built-in reactor type for 37~500kW. -
Page 639: Product Warranty
Warranty Service Information During the product warranty period, warranty service (free of charge) is provided for product malfunctions caused under normal operating conditions. For warranty service, contact an official LSIS agent or service center. - Page 640 • acts of nature (fire, flood, earthquake, gas accidents, etc.) • modifications or repair by unauthorized persons • missing authentic LSIS rating plates • expired warranty period Visit Our Website for detailed service information. Visit us at http: //www.lsis.com...
-
Page 641: Ul Mark
UL mark The UL mark applies to products in the United States and Canada. This mark indicates that UL has tested and evaluated the products and determined that the products satisfy the UL standards for product safety. If a product received UL certification, this means that all components inside the product had been certified for UL standards as well. - Page 642 It indicates the compliance of the products with the following technical regulations and requirements of the Eurasian Customs Union: Technical Regulations of the Customs Union 004/2011 “On safety of low voltage equipment” Technical Regulations of the Customs Union 020/2011 “On electromagnetic compatibility of technical products”...
-
Page 646: Index
Index A [AUTO] key ..................53 A terminal (Normally Open) ..........138 [DOWN] key ..................53 A1/C1/B1 terminal ............... 40 [ESC] key ..................... 53 AC power input terminal ..Refer to R/S/T terminal [HAND] key ..................53 Acc/Dec pattern ..............79, 117 [LEFT] key.................... - Page 647 auxiliary reference ..............142 analog input selection switch (SW2)......96 auxiliary reference gain ............143 analog input selection switch (SW4)......36 final command frequency calculation ......144 analog output ..............39, 288 main reference ................. 142 AO terminal ...................39 auxiliary motor PID compensation ....279, 280 pulse output ................
- Page 648 RS-485 ................... 106 bit 138 commercial power source transition ......241 bit (Off) ..................138 bit (On) ..................138 common terminal ......Refer to EG terminal bit setting ..................138 communication ................335 multi-function input setting ........138, 139 BACnet ..................373 multi-function output setting..........
- Page 649 cumulated fan operation time ........302 Drive group......Refer to DRV (Drive group) fan control ................... 242 DRV (Drive function group) ..........60 fan malfunctions ..............323 DRV (Drive group) ..............389 initialize cumulated fan operation time ..... 302 dwell operation ................154 Cooling Tower (MC4) .............
- Page 650 Low Battery Warning ............332 external 24V power terminal..Refer to 24 terminal Low Voltage ................332 External Trip ................... 507 Low Voltage2 ................332 external trip signal ..............315 No Motor Trip ................332 NTC Open ..................332 Option Trip-x ................332 F...
- Page 651 I2 voltage input ................96 function) ..................349 keypad .....................87 IN (Input terminal function group) ....60, 411 RS-485 ....................99 In Phase Open ................506 TI pulse input ................97 initializing accumulated electric energy count ... 250 V1 voltage input .................88 frequency setting (Pulse train) terminal... Refer to input and output specifications ..529, 564, 565, 566 terminal In Phase...
- Page 652 Inv Over Load Warning ............509 operation mode .................56 parameter group ...............56 Inverter OLT ................... 506 parameter mode ................59 inverter overload protection (IOLT) ......316 parameter value .................57 Inverter overload warning ..........332 rotational direction ..............56 IO Board IO Board connection fault trip ..Refer to S/W version ................
- Page 653 linear V/F operation ..............80 motor-related features) group ........60 linear V/F pattern operation ..........121 Macro base frequency ................ 121 Circulation Pump (MC5) ............499 start frequency ................. 121 Constant Torque (MC7) ............503 Cooling Tower (MC4) ............497 load tuning..................
- Page 654 Metasys-N2 I/O map mounting bolt ................19 analog input ................386 Multi Key analog output ................385 Multi key item ................489 binary input ................387 Multi Key Sel ................489 binary output ................386 multi-drop link system ............335 MMC ....................
- Page 655 Normal PWM ................238 Over Heat ..................506 NPN mode (Sink) ................. 42 over heat fault trip ......Refer to Over Heat NTC Open ..................507 Over Load ..................505 Over Load Warning ..............509 number of motor poles ............156 overload fault trip ..............
- Page 656 capacitor life estimation ............329 power terminals ..............32, 33 fan life .................... 331 N- terminal .............. 31, 32, 33, 34 password ..............245, 246, 372 P(+) terminal ................. 33, 34 P(+)/B terminal ................33 payback counter ................ 190 P1+ terminal .................31 peripheral devices ..............
- Page 657 R/S/T terminals ................35 S rating S/W version ................... 250 derating ..................561 rated motor current ............... 156 inverter ..................250 rated motor voltage .............. 208 keypad ..................250 rated slip frequency ............... 156 S+/S-/SG terminal ............... 40 rated slip speed ................ 156 safe operation mode .............
- Page 658 square reduction................80 T square reduction load ............122 V/F pattern operation ............122 target frequency stall ....................... 310 Cmd frequency ................ 389 bit On/Off ..................311 NTC Open Temperature sensor fault trip ......stall prevention ................ 310 terminal start after DC braking ............... 80 A terminal.................
- Page 659 trip no motor trip ............326, 328 square reductionV/F pattern operation ..... 122 trip status reset ................. 325 user V/F pattern operation ..........123 troubleshooting ..............510 V/F pattern configuration .............80 Trip mode ................... 59 V1 terminal................38, 88 Trip mode ..................486 V1/T1 (PTC) mode selection switch (SW3) ....
Need help?
Do you have a question about the LSLV-H100 and is the answer not in the manual?
Questions and answers