Table of Contents
Advertisement
Quick Links
Advertisement
Table of Contents

Related Manuals for Element RW-337D


Summary of Contents for Element RW-337D
- Page 1 RW-337D Receipt Printer User Manual Rev 1.01...
- Page 2 Declaration Information in this document is subject to change without notice. Element LTD. (hereinafter referred to as “element”) reserves the right to improve product as new technology, components, software, and firmware become available. If users need further data about this product or have any doubt about safety issues that might arise from using it, please feel free to contact your dealer.
- Page 3 Connect the power adapter to an appropriate grounded outlet. Avoid sharing a single electrical outlet with large power motors and other RW-337D User Manual I Page 2 of 69...
- Page 4 14) Do not disassemble the printer without guidance from a technician, even for the purpose of repair. 15) Keep this manual safe and at hand for reference purpose. RW-337D User Manual I Page 3 of 69...
- Page 5 THIS PAGE INTENTIONALLY LEFT BLANK RW-337D User Manual I Page 4 of 69...
-
Page 6: Table Of Contents
..................20 S AND UZZER 4 INSTALLING ............21 4.1 U ....................21 NPACKING 4.2 M ................21 OUNTING THE RINTER 4.2.1 Horizontal mounting ...............21 4.2.2 Wall-mounting (optional) ...............22 4.3 C ................23 ONNECTING POWER CORD RW-337D User Manual I Page 5 of 69... - Page 7 6 INTERFACE SIGNAL ..........59 6.1 USB ..................59 INTERFACE 6.2 P ..................59 ARALLEL INTERFACE 6.3 S ..................61 ERIAL INTERFACE 6.4 E ....................61 THERNET 6.5 C ................63 ASH DRAWER DEFINITION 7 TROUBLESHOOTING ..........65 RW-337D User Manual I Page 6 of 69...
- Page 8 7.1 C ..............65 UTTER ERROR TROUBLESHOOTING 7.2 P ’ ................65 RINTER DOESN 7.3 E ................66 RROR UZZER 7.4 P ................66 ROBLEMS DURING RINTING 7.5 P ................68 ROBLEMS SING RIVER RW-337D User Manual I Page 7 of 69...
-
Page 9: Outline
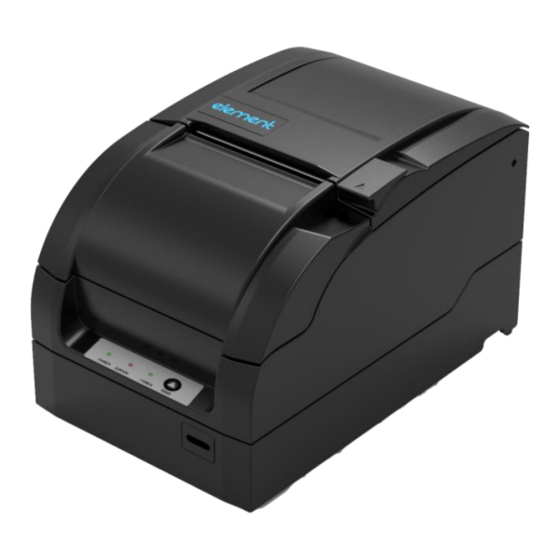
1 OVERVIEW 1.1 Outline The RW-337D is a 9-pin serial impact dot matrix receipt printer offering high quality, high speed, and stable performance. It is widely used in POS system, kitchen and finance applications, etc. The RW-337D can be connected with other devices via USB, parallel, serial, and Ethernet interface, and it can provide drivers for operating systems such as Windows 2003 /XP / 7 / 8.1 / 10. -
Page 10: Specifications
ERC-38 (P) 4,000,000 characters ERC-38 (B) 3,000,000 characters Ribbon lifetime ERC-38 Black: 1,500,000 characters (B/R) Red: 750,000 characters Communication interface USB / IEEE1284/RS-232 / Ethernet interface Cash drawer connector 1~2 cash drawers RW-337D User Manual I Page 9 of 69... -
Page 11: Cutter Specification
2.3 Paper Specification 2.3.1 Continuous paper Normal paper ➢ Paper width: 80±0.5mm / 76±0.5mm / 69.5±0.5mm / 57.5±0.5mm ➢ Max. paper roll O/D: Φ83mm ➢ Paper roll core: ID Φ12.5mm; OD Φ16mm RW-337D User Manual I Page 10 of 69... -
Page 12: Marked Paper
Mark position ➢ RW-337D printer reserves 8 positions for mark sensor, which can detect marks on either the front side or the reverse side of paper. Position of the sensor is as shown in the figure. -
Page 13: Recommended Paper
Caution: To ensure quality print and normal lifetime of print head and cutter, please use recommended paper or its equivalent; Do not stick paper to the paper roll core shaft. RW-337D User Manual I Page 12 of 69... -
Page 14: Ribbon Specification
2.4 Ribbon specification 2.4.1 Ribbon model Model Color ERC-38(P) Purple ERC-38(B) Black ERC-38(B/R) Black / Red 2.4.2 Dimensions Unit:mm RW-337D User Manual I Page 13 of 69... -
Page 15: Print And Tear-Off Position
Please use the recommended original ribbon to ensure the printing quality and lifetime of the printer transmission part. 2.5 Print and Tear-off Position 2.5.1 Print position L1: Paper width L2: Print width RW-337D User Manual I Page 14 of 69... -
Page 16: 2Tear-Off Position
Print width (L2) Left margin (L3) Right margin (L4) 80mm 63.4mm 6.8mm 9.8mm 76mm 63.4mm 6.8mm 5.8mm 69.5mm 57mm 6.8mm 5.7mm 57.5mm 47.5mm 6.8mm 3.2mm 2.5.2Tear-off position L1: About 21.5mm L2: About 34mm RW-337D User Manual I Page 15 of 69... -
Page 17: Outline And Parts
3 Outline and Parts 3.1 Outline and Parts 1—Rear cover 2—Tear-off bar 3—Front cover 4—POWER LED 5—ERROR LED RW-337D User Manual I Page 16 of 69... - Page 18 POWER LED is always off. ERROR LED(5) Indicate all error status. Under normal conditions, ERROR LED is always off; under error conditions, ERROR LED will flash RW-337D User Manual I Page 17 of 69...
- Page 19 Latch for opening rear cover(9) Pull the latch to open the rear cover. Paper near end sensor(18) Detect the status of paper roll. If paper near end, the PAPER LED will RW-337D User Manual I Page 18 of 69...
- Page 20 80±0.5 mm paper width. Caution: The paper guide is a necessary part of the printer for adjusting paper width, please keep it carefully. RW-337D User Manual I Page 19 of 69...
-
Page 21: Leds And Buzzer
Paper near end* One time Pause to wait Flash Caution: The printer checks the print head temperature via thermal resistor. If the print head is extremely overheated, the printer will stop printing. RW-337D User Manual I Page 20 of 69... -
Page 22: Installing
4.2 Mounting the Printer RW-337D has two mounting modes: horizontal mounting and wall-mounting. 4.2.1 Horizontal mounting The printer should be mounted on a flat and stable surface. For operation and maintenance, we suggest user reserve space as below to ensure the printer’s reliability and easy operation. -
Page 23: Wall-Mounting (Optional)
Put the screws into plastic plugs with screwdriver, keeping a distance of 10mm between screw head and wall side. Install the printer according to the arrowhead. RW-337D User Manual I Page 22 of 69... -
Page 24: Connecting Power Cord
1) With the flat side of the power adapter’s cable connector facing downward, insert the cable connector into the power connector on the rear of the printer. 2) Turn on the input power source of the adaptor. RW-337D User Manual I Page 23 of 69... -
Page 25: Connecting Optional Interface Cable
1) Turned off the printer. 2) Put the interface cable into suitable connector and fix it with plug screw (or clip spring). 3) Connect other end of the interface cable to host. RW-337D User Manual I Page 24 of 69... -
Page 26: Connecting Cash Drawer
4.5 Connecting cash drawer 1) Turned off the printer. 2) Insert the cash drawer cable into the cash drawer connector on the rear of printer. RW-337D User Manual I Page 25 of 69... -
Page 27: Installing Ribbon
2) Ensure that ribbon type is standard ERC-38 3) Turn the ribbon knob for two or three times according to the mark to tighten the ribbon. 4) Refer to the figure to install ribbon to the correct position. RW-337D User Manual I Page 26 of 69... -
Page 28: Loading Paper Roll
The default paper type is continuous paper. If marked paper will be used, please contact your local dealer for assistance. 4.7.2 Loading/replacing paper roll 1) Pull the rear cover latch to open the rear cover of printer. RW-337D User Manual I Page 27 of 69... - Page 29 Notes: With paper guide: A: 76±0.5mm; B: 69.5±0.5mm; C: 57.5±0.5mm Without paper guide: 80±0.5mm 3) Ensure the paper head is trimmed, and drop the paper roll into the paper cabinet. RW-337D User Manual I Page 28 of 69...
- Page 30 Paper should be loaded in paper cabinet firmly and straight; otherwise, paper auto-load and print will be affected. The edge of the paper head is not allowed to deviate from the paper path. RW-337D User Manual I Page 29 of 69...
-
Page 31: Printer Self-Test
4.9 Installing the Printer Driver RW-337D printer offers the drivers under Windows 2000 / Windows XP / Windows server 2003 / Windows Vista / Windows Server 2008 / Windows 7 / Windows 8 with the installing steps as below. -
Page 32: Typical Installation
Steps for typical installation are as following: 1) Run “Setup.exe” in the driver installing package and read the relative software licensing protocol carefully. If you accept it, please click “I Accept”, and then click “Next” button. RW-337D User Manual I Page 31 of 69... - Page 33 2) Select the model and the name of the printer to be installed. If you want to set it as default printer, please select “Set As Default Printer”, and then click “Next” button. 3) Select the setup type “Typical”, then click “Next” button. RW-337D User Manual I Page 32 of 69...
- Page 34 4) Set printer port, and click “install” to complete the installation. The default port is “LPT1”, user can select and install port based on actual situation. Please select “BYCOMx” for serial driver (x equals to 1,2,3,4,5,6,7 or 8). RW-337D User Manual I Page 33 of 69...
-
Page 35: Advanced Installation
2) Select the model and the name of the printer to be installed. If you want to set it as default printer, please select “Set As Default Printer”, and then click “Next” button. RW-337D User Manual I Page 34 of 69... - Page 36 3) Select the setup type “Advanced”, and then click “Next” button. RW-337D User Manual I Page 35 of 69...
-
Page 37: Usb Device Driver Installation
Connect the printer USB interface with idle USB PC interface using USB cable. System will recognize USB device automatically and popup "Add New Hardware Wizard". Select "Install from a list or specific location", and then click "Next". RW-337D User Manual I Page 36 of 69... - Page 38 RW-337D User Manual I Page 37 of 69...
- Page 39 Click "Browse..." to browse the driver document. Default directory is “Driver installing package\USBDRV. Then click "Next". Click "Continue Anyway" on the digital signature interface. Click on "Finish" to end the installation. RW-337D User Manual I Page 38 of 69...
- Page 40 Using USB cable. Click "Start" - "Control Panel" - "System" - "Device Manager", select "Unknown device" in "Other devices" and right-click "unknown device", then select "Update Driver Software". Please refer to the following figure: RW-337D User Manual I Page 39 of 69...
- Page 41 Click “Browse my computer for driver software” as following figure: Click the "Browse" button to find the driver through browser. Default directory of the 32-bit system is: Setup_RW-337D RW-337D User Manual I Page 40 of 69...
- Page 42 V1.0\USBDrv\USBDriver; default directory of the 64-bit system is: Setup_RW-337D V1.0\USBDrv\USBDriver_x64. Then click "Next". Please refer to the following figure: Click "Close" to complete the installation of USB driver. RW-337D User Manual I Page 41 of 69...
- Page 43 RW-337D User Manual I Page 42 of 69...
- Page 44 Click on "Browse..." to browse the driver program. Default directory is “Driver installing package\USBDRV. Then click "Next". Click "Continue Anyway" on the digital signature interface. Click "Finish" to end the installation. RW-337D User Manual I Page 43 of 69...
-
Page 45: How To Use The Driver
Click “Start” button. Click “Printers and faxes” in “Settings” item; or first click “Control panel” button, and then click “Printers and other hardware” in “Control panel”, next click “Printers and faxes” button. RW-337D User Manual I Page 44 of 69... - Page 46 After selecting RW-337D, click “File” menus, then click “Server Properties” submenus In “Forms” item, select “Create a new form”. Define a name of user-defined paper in “Form name”. Take metric CM as measurement units. Define paper width, length, right/left and up/down margin of the printing area according to user’s own need.
- Page 47 Click “Apply” button to finish paper self-definition Caution: Before setting user-defined page, please ensure that the printer driver has been installed properly. In application, you can select the page in varieties of official software RW-337D User Manual I Page 46 of 69...
-
Page 48: Parameter Explanation
Users can configure the parameters according to their needs. Take Windows XP system as an example to describe how to set the driver parameters. ➢ Setting paper type This item sets paper type: “roll paper” and “marked paper”. RW-337D User Manual I Page 47 of 69... - Page 49 ➢ Color choose In this option, user can choose “Color” or “black & white”. Two color printing is supported only when user chooses “Color”. RW-337D User Manual I Page 48 of 69...
- Page 50 ➢ Setting resolution parameter RW-337D driver supports three kinds of resolutions: 160 x 144 dpi, 160 x 72 dpi, 80 x 72 dpi. Users can select it according to their own need. High resolution has clear printing while lower print speed; low resolution has higher print speed while less clear printing.
- Page 51 ➢ Single/ Bi-directional print setting Set single/bi-directional print settings via this option. RW-337D User Manual I Page 50 of 69...
- Page 52 ➢ Operation option User can set different setting of page via this option: start of document, start of page, end of page, end of document. RW-337D User Manual I Page 51 of 69...
- Page 53 Cash drawer2, Cash drawer1+2,print messenger Herald) and Cash drawer pulse width; Buzzer (Buzz 200ms, 600ms, 1s, 2s, 4s); paper feed; paper cut (paper cut by hand, partial cut, full cut), print Logo bitmap. RW-337D User Manual I Page 52 of 69...
- Page 54 ➢ Utility User can print self test page via this option, at the same time user can set user-defined page size. RW-337D User Manual I Page 53 of 69...
- Page 55 ➢ Download User can download firmware and Logo via this option. RW-337D User Manual I Page 54 of 69...
- Page 56 ➢ Font User can select driver supported font and font size via this option. RW-337D User Manual I Page 55 of 69...
- Page 57 ➢ Version information User can see the printer driver version information via this option. RW-337D User Manual I Page 56 of 69...
-
Page 58: Maintenance
Keep the rear cover open, clean the dust and stains on the platen roller using a soft cotton cloth with little moderate cleanser. Wait until the cleanser is completely evaporated then close the rear cover and finish roller cleaning. RW-337D User Manual I Page 57 of 69... -
Page 59: Mark Sensor Cleaning
Pull the latch to open the rear cover of the printer Check if there is any jammed paper in the paper path, if necessary, clear the jammed paper. Close the rear cover and finish clearing paper jam. RW-337D User Manual I Page 58 of 69... -
Page 60: Interface Signal
6 Interface Signal The RW-337D can be connected with other devices via USB, parallel, serial, Ethernet interfaces. 6.1 USB interface USB interface supports USB2.0 (full speed) protocol, of which the outlet is USB B type. Interface signal is defined as below:... - Page 61 Signal Ground Signal Ground Signal Ground Signal Ground nInit nFault Signal Ground Not defined Not defined nSelectIn Caution: H means signal source from a host, and P means signal source from RW-337D User Manual I Page 60 of 69...
-
Page 62: Serial Interface
Stop bit: 1 bit Flow control: DTR/DSR 6.4 Ethernet 1) Interface features ➢ Support of 10BASE-T communication ➢ Compatible with Ethernet II standard frame type. ➢ Indicator shows network connecting status and data transmission RW-337D User Manual I Page 61 of 69... - Page 63 The common mode AC peak voltage is ≤ 2.5V. ➢ Input signal: The differential mode voltage that more than 160mV is identified as available signal. 4) Interface shall use RJ45 outlet which accord with 10BASE-T standard of IEEE802.3. RW-337D User Manual I Page 62 of 69...
-
Page 64: Cash Drawer Definition
Driving current: Max 0.8 A (within 510 ms) ➢ Cash drawer status inspection signal: “L” = 0~0.5 V “H” = 3~5 V Cash drawer interface outlet uses RJ11 6P connector. Interface signal definition Items Signal Functions Frame Ground RW-337D User Manual I Page 63 of 69... - Page 65 Caution: Do not connect or disconnect signal cable when printer power is on. Signal cable should be far away from strong current sources. Communication cable should adopt shield cable. RW-337D User Manual I Page 64 of 69...
-
Page 66: Troubleshooting
Make sure that printer cable has Power switch is Printer has no power been connected properly on both turned on, but ends. printer doesn’t work Circuit is damaged Contact your local dealer. RW-337D User Manual I Page 65 of 69... -
Page 67: Error Led And Buzzer
Clean print head or paper feed or dirty feed platen is dirty platen. Paper cannot be fed Check paper path and remove Paper jam normally jammed paper. Horizontal printout Ribbon is damaged Replace ribbon. RW-337D User Manual I Page 66 of 69... - Page 68 Contact your local dealer or the Print head error manufacturer. RW-337D User Manual I Page 67 of 69...
-
Page 69: Problems Using Driver
Printer can not work parallel communication referring to is too short the help file in the package. normally under serial, parallel interface Current port is Close other programs which use the occupied. port. RW-337D User Manual I Page 68 of 69...
Need help?
Do you have a question about the RW-337D and is the answer not in the manual?
Questions and answers