Table of Contents
Advertisement
Advertisement
Table of Contents

Subscribe to Our Youtube Channel
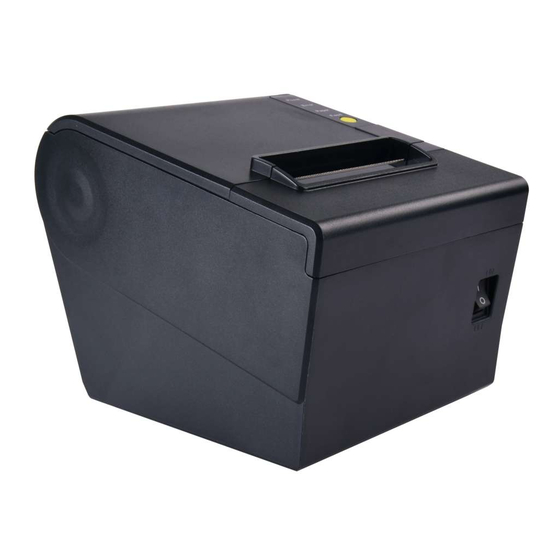
Summary of Contents for Element RW973
- Page 1 Windows Driver Manual Rev. 1.0 POS Printer...
-
Page 2: Table Of Contents
POS Windows Driver Manual CONTENTS 1.Manual Information........................1 2.Operating System(OS) Environment..................... 1 3.Windows Driver Preparation......................1 4.Windows Driver Installation......................2 5.Detailed Windows Driver Setting....................7 5.1 Printing Preferences......................7 5.2 Other Settings........................14 6.Uninstall Windows Driver......................16 7.Specification..........................18... -
Page 3: Manual Information
Microsoft Windows 7 SPI (32 bit/64 bit) Microsoft Windows XP Professional SP3 (32 bit) 3.Windows Driver Preparation The Windows Driver is included in the enclosed CD. The installation file name is Element Printer Driver-V-X.X.X.X.exe eg : Element Printer Driver-v-2.5.3.5.exe... -
Page 4: Windows Driver Installation
POS Windows Driver Manual 4.Windows Driver Installation Warning: Under different operating system, the screen has slight difference. Please operate it according to the tips. Take RW973 (Windows 7) as example. 1.Double click Windows Driver. 2.Choose “English” and click “OK”. - Page 5 POS Windows Driver Manual 3.Choose “I accept the agreement”, then click “Next”.
- Page 6 POS Windows Driver Manual 4. Click “Next”.
- Page 7 POS Windows Driver Manual 5.Choose the matched type and port (USBxxx is for USB port, COMx is for serial port, LPTx is for parallel port). Choose the type of driver, port, such as “RW973”, “USB003” as port. Click “Next”. NOTE: If printer is already connected with computer by USB port, it only needs to click “Install”, then it will be installed automatically.
- Page 8 POS Windows Driver Manual 6.Click ”Finish”. RW973 printer driver installed successfully. 7.After installation, the icon will be found in ”Start”→“Devices and Printers”. NOTE: If you already installed the driver (No matter what kind of port), when you connect the printer with computer, it will create a USB port automatically.
-
Page 9: Detailed Windows Driver Setting
POS Windows Driver Manual 5.Detailed Windows Driver Setting 5.1 Printing Preferences 1.Click ”Start”→“Devices and Printers”. Right click “RW973” and choose “Printing preferences”. - Page 10 POS Windows Driver Manual 2.According to the different needs, choose “Paper”\“Offset”\”Rotate”\”Effect” in “Paper”.
- Page 11 POS Windows Driver Manual ●Click on “Manager”, add or delete paper. ●Click on “Advanced”to set “Save Paper”、 “Cut Paper”、 “Feed Paper”、 “Cash Drawer”、 “Custom Command”、“Logo”、“Buzzer”.
- Page 12 POS Windows Driver Manual 3.Click “Watermark”. Set watermark to print.
- Page 13 POS Windows Driver Manual 4.Click “Halftone” to set the halftone.
- Page 14 POS Windows Driver Manual 5.Click “Printer Setting” to set “Language For Properties Display” and “Font Substitution”.
- Page 15 POS Windows Driver Manual 6.Click “Barcode”, and you can choose the “Add Barcode”/“Edit Barcode”/“Delete Barcode” button to add/edit/delete barcode. 7. After all the settings, click “OK” to save it.
-
Page 16: Other Settings
POS Windows Driver Manual 5.2 Other Settings 1.Click ”Start”→“Devices and Printers”. Right click “RW973” and choose “Printer properties”. - Page 17 POS Windows Driver Manual 2.Choose “General”, click on “Print Test Page”, then it will print the current settings.
-
Page 18: Uninstall Windows Driver
POS Windows Driver Manual 6.Uninstall Windows Driver 1.Double click Windows Driver. 2.Choose “English” and click “OK”. 3.Choose “Uninstall printer driver” and click “Next”. - Page 19 POS Windows Driver Manual 4.Choose “Delete all printer drivers and its components”, then click “Next”. 5.Choose “Yes”. Then it is complete to uninstall.
-
Page 20: Specification
POS Windows Driver Manual 7.Specification Resolution: POS Printer: 203×203dpi Paper Size: Custom(72.0mm * 297.0mm)


Need help?
Do you have a question about the RW973 and is the answer not in the manual?
Questions and answers