Table of Contents
Advertisement
Advertisement
Table of Contents
Troubleshooting

Related Manuals for Element RW80L


Summary of Contents for Element RW80L
- Page 1 RW80L User Manual...
-
Page 2: Table Of Contents
RW80L User Manual Content Statement ............................5 Important Safety Instructions ......................6 1 OVERVIEW ............................. 8 1.1 Introductions ........................8 1.2 The Main Features ......................8 2 GETTING STARTED ......................... 9 2.1 Packing List ......................... 9 2.2 Appearance ........................10 2.3 Dimensions ........................ - Page 3 RW80L User Manual 4.5.2 Printing of Windows Driver Program ..............20 5 INTERFACES ..........................21 5.1 USB ........................... 21 5.2 Cash Drawer Interface ...................... 21 5.3 Power Port Connector ...................... 22 5.4 Serial Interface ......................... 22 5.5 Ethernet Interface ......................23 6 TROUBLESHOOTING ........................
- Page 4 RW80L User Manual 8.2.2.2 Command Test .................... 43 8.2.2.3 Manage Images ..................45 8.2.2.5 Download Fonts ..................49 8.2.2.6 Parameter Setting ..................50 8.2.2.7 Advanced Setting ..................62 8.3 Firmware Update......................66 9 WINDOWS DRIVER MANUAL ....................... 68 9.1 Manual Information ......................68 9.2 Operating System (OS) Environment................
-
Page 5: Statement
RW80L User Manual Statement Copyright This manual is printed in 2020. Printed in China. 1.1 Version. Warnings This must be complied with in order to avoid any damage to the human body and to the equipment. This is showing the important information and tips for the printer operating. -
Page 6: Important Safety Instructions
RW80L User Manual Important Safety Instructions ◆ Safety Warning Warnings: The print head will become very hot during printing; avoid contact with the print head after printing has finished. Warnings: Do not touch the printer head and connector in case static damage the printer head. - Page 7 RW80L User Manual ◆ Other Precautions The copyright for this user manual and various other manuals is property of our company. Any copying or conversion into electronic form and saving of this material without the express written permission is strictly prohibited. Use of the information contained in this manual is not subject to any patent liability.
-
Page 8: Overview
RW80L User Manual 1 OVERVIEW 1.1 Introductions RW80L is a thermal receipt printer, featured by high print quality, high print speed, high stability, etc. It can be used in commercial POS system, food industry and occasions which need real-time field print receipts. -
Page 9: Getting Started
RW80L User Manual 2 GETTING STARTED 2.1 Packing List After receiving your printer, please check for possible shipping damage: 1) Inspect the outside of both the box and the printer for possible damage. 2) Check whether you have received the following accessories together with the printer, if there are any items missing, please contact your local dealer. -
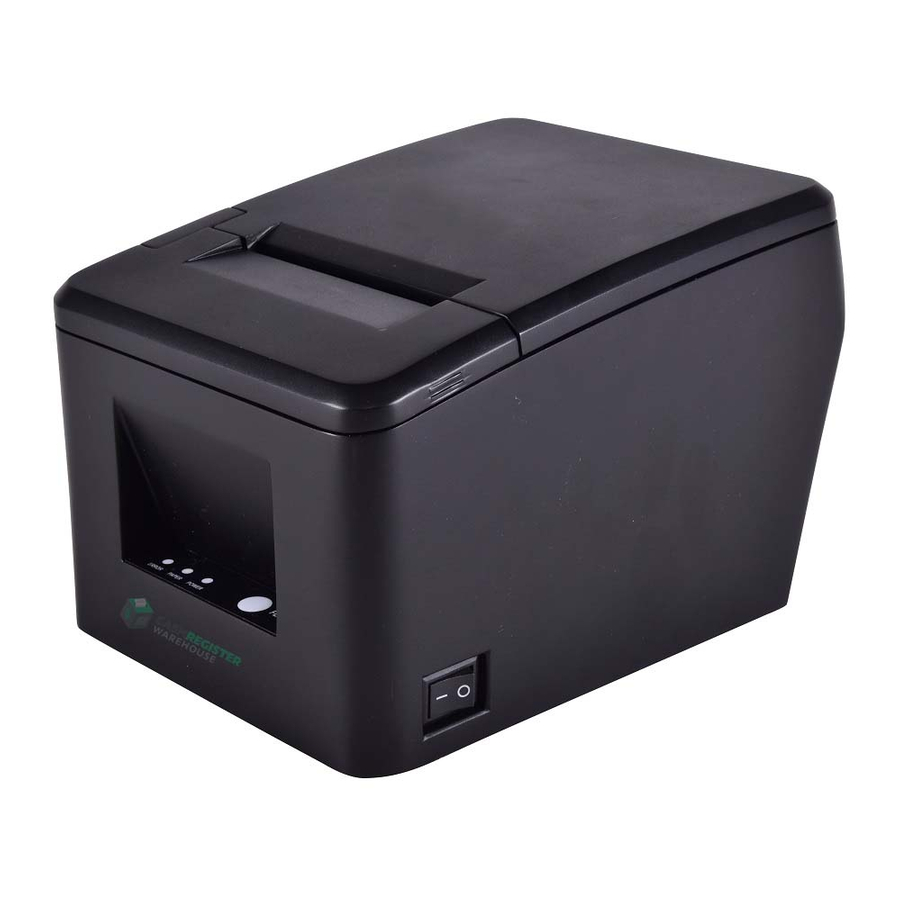
Page 10: Appearance
RW80L User Manual 2.2 Appearance... -
Page 11: Dimensions
RW80L User Manual 2.3 Dimensions Unit: mm... -
Page 12: Specification
RW80L User Manual 3 SPECIFICATION 3.1 Printer Specification Item Parameter Printing Method Direct thermal line printing Resolution Default 203 dpi, 180 dpi can be emulated Printing Printing Width 72mm / 48mm Parameter Printing Speed Max. 230mm/s Printing density Adjustable from degree 1 to degree 4... - Page 13 RW80L User Manual Item Parameter Easy-loading structure of upward open cover Paper Loading Standard thermal paper Paper Type 79.5±0.5mm Paper Paper Width 0.056~0.13mm Paper Thickness 83mm Max. Paper Roll Diameter 0~45℃/10~85%RH No condensation Operating Condition -20~60℃/10~90%RH No condensation Storage 150km...
-
Page 14: Printing Media Specification
RW80L User Manual 3.2 Printing Media Specification 3.2.1 Continuous Thermal Paper Specification Paper Type : Standard thermal paper Paper Width :79.5±0.5mm Paper Outer Diameter : Max. 83 mm Paper Thickness : 0.056~0.13mm 3.2.2 Notices Notes: 1) Please use the recommended thermal paper or same quality paper, otherwise it will influence the printing quality and decrease the thermal printer head life;... -
Page 15: Printing And Cutting Position
RW80L User Manual 3.3 Printing and Cutting Position 3.3.1 Printing position 79.5±0.5 mm Print Paper 3.3.2 Cutting Position Printing Position Type Paper Cutting Position(L1) RW80L 8.5mm... -
Page 16: Installation And Usage
RW80L User Manual 4 INSTALLATION AND USAGE 4.1 Media Loading 1) Press the cover open button to open the top cover. 2) Remove the used roll paper core, if any. 3) In the correct direction of the roll paper, insert the paper. - Page 17 RW80L User Manual 4) Pull out some roll paper and close the top cover. 5) Tear the extra paper of the printer.
-
Page 18: Power Connection
RW80L User Manual 4.2 Power Connection 1) Make sure the printer power is turned off. 2) Connect power adapter with printer 3) Connect power adapter with power cord. 4) Plug the other side of power cord into the socket outlet. -
Page 19: Cash Drawer Connection
RW80L User Manual 4.3 Cash Drawer Connection 1) Make sure the printer's power switch is turned off; 2) Connect the cash drawer cable into the cash drawer interface on the rear side of the printer. Warning: Cash drawer interface can only be connected to a voltage of 24V cash drawer device (can’t connect to the phone line, etc.) -
Page 20: Print Test
RW80L User Manual 4.5 Print Test 4.5.1 Print Self-Test The self-test checks the printer’s current settings, status and whether the printer has any problem. 1) Make sure the power is connected and paper is loaded properly. 2) Make sure the printer is off and top cover is closed properly. -
Page 21: Interfaces
RW80L User Manual 5 INTERFACES RW80L supports serial interface, Ethernet interface, cash drawer interface and USB interface. 5.1 USB Figure 5-1 PIN NO. SIGNAL NAME VBUS 5.2 Cash Drawer Interface Figure 5-2 PIN NO. SIGNAL NAME Drawer 1 DRSW Drawer 2 Electrical characteristics Driving voltage:DC 24V... -
Page 22: Power Port Connector
2) When arranging the line of communication, you must avoid paralleling with the strong current. 3) Do use the communication line with shielding function. 5.4 Serial Interface Printer RW80L serial interface is compatible with RS-232 standard, with 9 pin sockets. Figure 5.4 PIN NO. SIGNAL NAME... -
Page 23: Ethernet Interface
RW80L User Manual 5.5 Ethernet Interface PIN NO. SIGNAL NAME Note: The printer is equipped with an Ethernet interface, and use the network connection router, switch and other network communication equipment which meet RJ45 interface standard. When connecting directly with PC, it is suggested that the cross-network line in accordance... -
Page 24: Troubleshooting
RW80L User Manual 6 TROUBLESHOOTING Your printer is very reliable, but occasionally problems may occur. This chapter provides information on some common problems you may encounter and how to solve them. If you encounter problems that you can not resolve, contact with your dealer for assistance. -
Page 25: Troubles Occur During Printing
RW80L User Manual 6.3 Troubles Occur During Printing Problem Description Probable Reason Solution Incorrect roll paper loading Check if the roll paper is loaded Use recommended thermal roll Unqualified roll paper paper Blurred printing or spot Dirty thermal head or print... -
Page 26: Troubleshooting For Cutter Jam
RW80L User Manual 6.5 Troubleshooting for Cutter Jam 1) When cutter jam occurs, do not press the cover open button to avoid damaging the blade. 2) Fix the printer by one hand and press either side of the convex bars by the other hand. Push... - Page 27 RW80L User Manual 3) Please rotate the gear until the blade returns to its normal position, as shown in Figure 2.
-
Page 28: Printer Cleaning And Maintenance
RW80L User Manual 7 PRINTER CLEANING AND MAINTENANCE Print quality might be degraded by dust, foreign substance, adhesive substance, or other polluted materials stuck on the printer head or inside the printer. When printer is dirty, clean the print head as follows: ※... -
Page 29: Utility Tool For Pos Instruction
RW80L User Manual 8. UTILITY TOOL FOR POS INSTRUCTION Utility Tool is applicable to the following operating system: Microsoft Windows 10 (32 bit/64 bit) ⚫ Microsoft Windows 8 (32 bit/64 bit) ⚫ Microsoft Windows 7 SPI (32 bit/64 bit) ⚫... -
Page 30: Utility Tool Installation
RW80L User Manual 8.1 Utility Tool Installation The following screens take Win 7 for example. 1) Open the installation package. 2) Choose “English” and click “OK”. 3) Choose “I accept the agreement”, then click “Next”. - Page 31 RW80L User Manual 4) Click “Next”. 5) Select start menu folder. Click “Next”.
- Page 32 RW80L User Manual 6) Click “Install”. 7) Click “Finish”. Utility is installed successfully.
-
Page 33: Using Utility Tool
RW80L User Manual 8.2 Using Utility Tool Warning: In different operating system, screen has a slight difference. Please operate it according to the tips. Take RW80L (Windows 7) for example. 8.2.1 Add/Modify/Delete/Connect Printer 8.2.1.1 Add printer 1) Click ”Add Printer”. -
Page 34: Modify Printer
RW80L User Manual 2) Choose the appropriate printer type and port. Then click “OK”. (Take RW80L for example.) 8.2.1.2 Modify printer 1) Choose the printer you want to modify in the list. Click “Modify Printer”. - Page 35 RW80L User Manual 2) Choose the new printer and new port. Then click “OK”. 3) The new printer is added successfully.
-
Page 36: Delete Printer
RW80L User Manual 8.2.1.3 Delete printer 1) Choose the printer you want to delete in the list and click “Delete Printer”. 2) Click “Yes”, then the printer is deleted. -
Page 37: Connection Test
RW80L User Manual 8.2.1.4 Connection Test Make sure printer is connected to computer and it is powered on. 1) Choose the printer. Click “Connection Test”. - Page 38 RW80L User Manual 2) If the connection is successful, it will appear the following window. If the connection is unsuccessful, please connect the printer with computer. Notes: 1) Make sure printer is connected to computer and power on. 2) Make sure printer is loaded with paper.
-
Page 39: Functions
RW80L User Manual 8.2.2 Functions Printer Test contains the following items: ⚫ Printer Test ⚫ Command Test ⚫ Manage Images ⚫ Download Image in Compatible Mode ⚫ Download Fonts ⚫ Parameter Setting ⚫ Advanced Settings 8.2.2.1 Printer Test 1) Self Test... - Page 40 RW80L User Manual 2) Cutter Test Click the cutter test and the paper will be cut automatically. Cutting method is partial cut (Partial cut: Not fully cut off, leave a connection point between the two sheets of paper). As shown in the figure: 3) Print Test Text Click "Print Test Text", input the text you want to print.
- Page 41 RW80L User Manual 4) 2D Code Click the QRCode mode. ▲Model: 1~2 ▲Module size: 1~16 The larger the module value, the larger the printed QR code is, and the smaller the opposite. ▲Error correction level: 7%~30% The higher the error correction level, the more intensive the module graphics.
- Page 42 RW80L User Manual Click the PDF417 mode. ▲Columns: 0~30 ▲Rows: 0~90 ▲Width of the module: 2~6 The larger the module value, the wider the width of the printed PDF417 barcode, and the smaller the opposite. ▲Row height: 2~8 The larger the module value, the...
-
Page 43: Command Test
RW80L User Manual 8.2.2.2 Command Test In the command test, you can send command to the printer. Input text or hexadecimal data. Select a file or enter a command in the input box. 1)Click “Send by Text”, input text content. - Page 44 RW80L User Manual ▲Sending Recycle: When the interval is set to 3000ms (you can set the interval as needed), then click “Send”, the printer starts to recycle printing. Click “Stop” to stop the recycle printing.
-
Page 45: Manage Images
RW80L User Manual 2) Click “Send by Hex”, input the content. (Convert text to HEX or send ESC command) 8.2.2.3 Manage Images... - Page 46 RW80L User Manual 1) Click "Download" to add the image, if you want to print the picture, set the print location before clicking "Download mode of G" to print the picture. (It is recommended to use a picture in BMP format)
- Page 47 RW80L User Manual C:\Users\1993\Desktop\01.bmp...
- Page 48 RW80L User Manual 3) Delete Image. Note: Each time click "Download mode of G", an image list number will be generated. Total space:1024KB. Free space:1020KB; Already loaded:2 Click the image list, select "Delete selected image" will delete the image, click "Delete all...
-
Page 49: Download Fonts
RW80L User Manual 8.2.2.5 Download Fonts Select the font from the existing file and click "Download". Note: After downloading the font successfully, you need to restart the printer to take effect. -
Page 50: Parameter Setting
RW80L User Manual 8.2.2.6 Parameter Setting Note: This step needs to restart the printer to take effect. 1) Click “Parameter Setting” to set “COM Config” (Only support the printers configured with serial interface), “Language and Charset Config”, “Cut Paper”, “Buzzer” and “Other Config”. - Page 51 RW80L User Manual ◆ COM Config Click the items to set “Baud Rate”, “Data Bits”, “Stop Bits”, “Parity Check”, and “Flow Control”. • Baud Rate • Data Bits • Stop Bits • Parity Check...
- Page 52 RW80L User Manual • Flow Control Note: The value of the serial port parameter can be obtained according to the value of the Self-test page information. ① After setting the parameters as required, click "Set" and restart the printer. ② After restarting the printer, open the main menu screen of the tool and click "Modify...
- Page 53 RW80L User Manual ③ Select the port category "COM" and set the baud rate to the value "9600" as shown above, and parity "None". This port allows you to print after setup is complete. 9600 ◆ Language And Charset Config Click the items to set “Codepage”, “International Character”, “Language Mode”, “Chinese...
- Page 54 RW80L User Manual • International Character • Language Mode ( The default mode is “Chinese/Japanese/Korean”) • Chinese Mode...
- Page 55 RW80L User Manual • Arabic Transform • Vietnamese transform ◆ Cut Paper Enable or disable “Cut paper after the cover is closed” / “Cut paper when power on”. Enable “Cut paper after the cover is closed”: When the printer closes the cover, it will automatically cut the paper.
- Page 56 RW80L User Manual Enable “Cut paper when power on”: The printer will automatically cut paper when it is powered on. Disable “Cut paper when power on”: The printer does not cut paper automatically after it is powered on. ◆ Buzzer Buzzer Volume: Very Low/Low/Standard/loud Tick “Beeping after cutting”...
- Page 57 RW80L User Manual ◆ Other Config Click the items to set “Print Density”, Paper Width”, “Auto Line Feed”, “DPI Mode”, and “USB Port Mode” • Print Density (default “level 2”) The print density value varies according to the paper material and it can be adjusted to suit your needs.
- Page 58 RW80L User Manual • DPI Mode (Default “203DPI”) • USB Port Mode...
- Page 59 RW80L User Manual • Check the Virtual Serial Port ① Right-click the computer and select “Manage”. ② Click "Device Manager" to view the virtual port. (such as: COM2). (COM2)
- Page 60 RW80L User Manual ③ Return to the printer utility and click "Modify Printer". ④ Change the port to "COM2". COM2...
- Page 61 RW80L User Manual 2)After finishing setting all the above parameters, click "Set", and restart the printer, then the setting would take effect.
-
Page 62: Advanced Setting
RW80L User Manual 8.2.2.7 Advanced Setting Advanced Settings contain following items. Click the button and printer will execute the appropriate action. The change will take into effect after restarting the printer. ◆ Reduction Paper Setting Choose the item and click “Setting”. - Page 63 RW80L User Manual ④ Reduction Line Feeds: 25%~75% The higher the reduction line feeds, the narrower the interval between two lines of characters. ⑤ Reduction Height of Barcode: 25%~75% The bigger the reduction height of barcode, the smaller the height of the barcode.
- Page 64 RW80L User Manual ● Static IP Mode 1)Change the printer IP address so that the printer IP address (such as: 192.168.0.33) is the same segment as the host IP address (such as: 10.0.21.89). Here is the illustration: Figure ■ Printer IP Address...
- Page 65 RW80L User Manual 2)Set the same network segment. Figure ■ Printer IP Address ● Auto Assignment IP This mode automatically assigns the IP address to the printer. When the settings are complete, click "Write", then restart the printer.
-
Page 66: Firmware Update
RW80L User Manual 8.3 Firmware Update 1) Click “FW Update”. - Page 67 RW80L User Manual 2) Add the “bin” file, and click “Update”. 3) Click “Update”. 4) Update success. 5) Restart the printer to take effect.
-
Page 68: Windows Driver Manual
Microsoft Windows XP Professional SP3 (32 bit) ⚫ Microsoft Windows Server 2012(64 bit) ⚫ Microsoft Windows Server 2008 R2 ⚫ 9.3 Windows Driver Preparation The Windows Driver is included in the enclosed CD. The installation file name is Element Printer Driver v2.7.1.0... -
Page 69: Windows Driver Installation
Warning: Under different operating system, the screen has slight difference. Please operate it according to the tips. Take RW80L (Windows 7) as example. 1) Double click Windows Driver, and choose the language. Choose “I accept the agreement” and click “Next”. - Page 70 RW80L User Manual Click “Next” 4) Choose the matched type and port (USBxxx is for USB port, COMx is for serial port, LPTx is for parallel port). Choose the type and port of driver, such as “RW80L”, “USB001” . Click “Next”.
- Page 71 RW80L User Manual Note: If printer is already connected with computer by USB port, it only needs to click “Install”, then it will be installed automatically. Otherwise, proceed to the next step. 5) Click “Finish”. POS printer driver is installed successfully.
-
Page 72: Detailed Windows Driver Setting
RW80L User Manual 9.5 Detailed Windows Driver Setting 9.5.1 Printing Preferences 1) Click “Start” → “Devices and Printers”. Right click “RW80L” and choose “Printing preferences”. 2) According to the different needs, choose “Paper”\“Offset”\“Rotate”\“Effect”\“Copies” in “Paper”. - Page 73 RW80L User Manual ●Click on “Manager”, add or delete paper. ●Click on “Advanced” to set “Custom Command”, “Logo”, “Buzzer”, “Code Page”, “Save Paper”, “Cut Paper”, “Feed Paper”, “Cash Drawer”. ■ Save paper...
- Page 74 RW80L User Manual ■ Cut Paper...
- Page 75 RW80L User Manual ■ Feed paper ■ Cash drawer...
- Page 76 RW80L User Manual ■ Custom command...
- Page 77 RW80L User Manual ■ Logo Note: this setting needs to be set in utility. ① Open the utility and click "Manage Images".
- Page 78 RW80L User Manual ② Click “Download”. ③ Click "Add" to add a logo. (BMP format is recommended)
- Page 79 RW80L User Manual Picture.bmp ④ Select the print location, and then click "Download mode of G". (Such as: left print) ⑤ Return to image list to view the image number. Note: each time click "Download mode of G", an image list number will be generated.
- Page 80 RW80L User Manual ⑥ Select Printer properties, click “Print Test Page” to view the printing effect.
- Page 81 RW80L User Manual ⑦ Click the “Advanced”, then click “Logo”.
- Page 82 RW80L User Manual ⑧ Set the printing time to print and click "OK". (Such as: Start Document) ⑨ Return to the logo setting in driver, also select "Print left". ⑩ Set the key Code according to the image number. (Such as: 0 0)
- Page 83 RW80L User Manual ⑪Then click “OK”.
- Page 84 RW80L User Manual ⑫ Click “Print Test Page” to view the printing effect.
- Page 85 RW80L User Manual ■ Buzzer Note: this setting need to be set in utility. ■ Code Page...
- Page 86 RW80L User Manual 3) Click “Watermark”. Set watermark to print (Only BMP file can be selected).
- Page 87 RW80L User Manual Click “Halftone” to set the halftone.
- Page 88 RW80L User Manual 5) Set up the “Barcode”. Assuming the font type of the main document is “Italics”, if you want to convert the data “123456”to the barcode printing, the steps are as follows: ● Sets the data "123456" font type to a different font from the main document. Such as: Arial.
- Page 89 RW80L User Manual Open the Preference. ● If the document is open, you can set it in the document: file-print-preferences.
- Page 90 RW80L User Manual 1)Add Barcode firstly.
- Page 91 RW80L User Manual 2)Set the “Font Name” and the “Barcode Option”.
- Page 92 RW80L User Manual 3) Click the “Printer Setting”. ● Choose the “Display Language for Properties”...
- Page 93 RW80L User Manual Turn on the “Font Substitution”, select the system text need to be replaced (for example, Arial), ● and then select the font you want to replace (for example, 01) and click Settings, and the replacement font will display "01".
- Page 94 RW80L User Manual...
- Page 95 RW80L User Manual...
- Page 96 RW80L User Manual...
- Page 97 RW80L User Manual ● If you do not have a barcode set, the action is as follows: 1) Suppose you change the size of the data "123456", for example: 2) Set the Printing preferences.
- Page 98 RW80L User Manual 3)Click the “Printer Setting”. ● Choose the “Display Language for Properties”. 4)Turn on the “Font Substitution”.
- Page 99 RW80L User Manual 5)Select the “System Font”, for example: Arial.
- Page 100 RW80L User Manual 6)Select the font to that you went to replace.
- Page 101 RW80L User Manual 7)Click “Set”.
- Page 102 RW80L User Manual...
-
Page 103: Other Settings
RW80L User Manual 9.5.2 Other Settings 1) Click ”Start”→“Devices and Printers”. Right click “RW80L” and choose “Printer properties”. 2) Choose “General”, click on “Print Test Page”, then it will print the current settings. - Page 104 RW80L User Manual 3) Click “Port” to change the other connecting port. 4) Click “Advanced” to set the available time for using.
-
Page 105: Uninstall Windows Driver
RW80L User Manual 9.6 Uninstall Windows Driver 1) Double click Windows Driver, and then click “OK”. 2) Choose “Uninstall printer driver”, then click “Next”... - Page 106 RW80L User Manual 3) Choose “RW80L”, then click “Next” 4) Then it is complete to uninstall.
Need help?
Do you have a question about the RW80L and is the answer not in the manual?
Questions and answers