Table of Contents
Advertisement
Quick Links
Advertisement
Table of Contents

Related Manuals for Element RW-337D


Summary of Contents for Element RW-337D
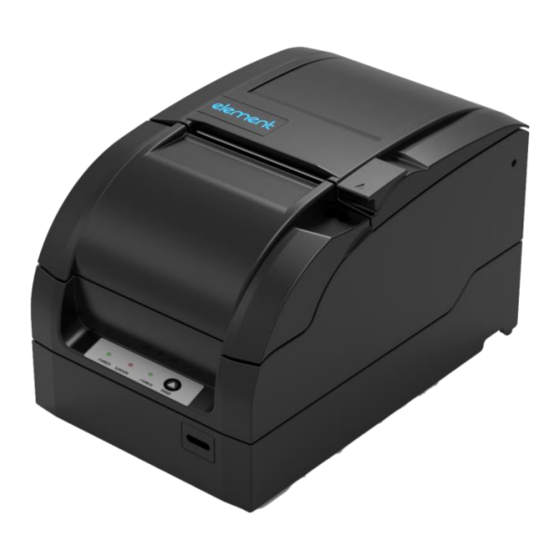
- Page 1 RW-337D Receipt Printer Service Manual RW-337D Service Manual I Page 1 of 61...
- Page 2 Declaration Information in this document is subject to change without notice. Element LTD. (hereinafter referred to as “element”) reserves the right to improve product as new technology, components, software, and firmware become available. If users need further data about this product or have any doubt about safety issues that might arise from using it, please feel free to contact your dealer.
- Page 3 In order to ensure the stable work of each components and printer’s lifetime, you need to conduct a regular maintenance monthly at least. The regular maintenance includes printer status check, printer dust cleaning and part lubrication. If the printer has a larger workload, the maintenance cycle can be appropriately shortened. RW-337D Service Manual I Page 3 of 61...
-
Page 4: Table Of Contents
4 Disassembly and Assembly ............................9 4.1 Maintenance Tools ..............................9 4.2 Disassemble the printer ............................10 4.2.1 Disassemble the printer cover........................10 4.2.2 Disassemble the main control board cover ....................13 RW-337D Service Manual I Page 4 of 61... - Page 5 7.7 Problem during the printing process ........................38 Appendix ..................................39 Appendix 1 Hexadecimal Dump Mode........................39 Appendix 2 Command list ............................40 Appendix 3 EEPROM setting table ..........................42 Appendix 4 Spare part list ............................43 RW-337D Service Manual I Page 5 of 61...
- Page 6 Appendix 5 Exploded drawing of the printer ......................46 Appendix 6 Part list ..............................49 Appendix 7 Outline drawing ............................53 Appendix 8 Main board layout ........................... 54 Appendix 9 Lubrication............................... 55 RW-337D Service Manual I Page 6 of 61...
-
Page 7: Features And Specifications
1 Features and Specifications 1.1 Features The RW-337D is a 9-pin serial impact dot matrix receipt printer offering high quality, high speed, and stable performance. It is widely used in real-time printing on-site, such as POS system, kitchen and finance applications. -
Page 8: Printer Overview
2 Printer Overview The RW-337D printer consists of the following parts: Pinter mechanism part, NDLF main control board, expanded interface board. Main control board unit block diagram is shown as below: Communication Host interface module Power input Communication interface STY_HHEAD... - Page 9 Position of all the sockets in the main control board RW-337D Service Manual I Page 3 of 61...
-
Page 10: Main Control Board Description
3 Main Control Board Description RW-337D can be connected to another device with USB, serial, parallel, Ethernet or WIFI interface. 3.1 USB interface 3.1.1 Parameter ➢ Data transfer: Supports USB1.1 Protocol ➢ Connector: USB B type standard socket 3.1.2 Interface signal The printer built-in USB interface supports USB1.1 protocol, of which the outlet is USB A type. -
Page 11: Interface Connection And Signal Function
Externally supplied nStrobe signals ➢ Handshaking mode: Busy Signal ➢ Handshaking pressure: TTL compatible ➢ Connector: IEEE 1284-B(CENTRONICS) socket 3.3.2 Time Sequence of the Parallel Interface Module Time Sequence of Parallel Interface (compatible mode) RW-337D Service Manual I Page 5 of 61... -
Page 12: Interface Signal
During data transmitting, the host end should not neglect the Busy signal, otherwise the printing data will be lost. The parallel interface signal cable should be as short as possible. RW-337D Service Manual I Page 6 of 61... -
Page 13: Parameter
➢ Supports parameter configuration ➢ Supports firmware update online ➢ Supports printer status inquiry and interface module maintenance based in HTTP mode 3.4.2 Protocol supported ➢ IP ➢ ARP ➢ ICMP ➢ TCP RW-337D Service Manual I Page 7 of 61... -
Page 14: Electrical Character
Compatible with the frame type of Ethernet II format. 3.4.5 Interface signal The interface use 10BASE-T standard which comply to IEEE802.3. Signal Name Description Data sending + Data sending- Data receiving+ Reserved Reserved Data receiving- Reserved Reserved RW-337D Service Manual I Page 8 of 61... -
Page 15: Disassembly And Assembly
During maintenance, be careful not to damage the print head surface and the print bar. 4.1 Maintenance Tools Maintenance Tools: ➢ Cross screwdriver ➢ Sharp-nose pliers ➢ Wire cutter Assistant materials: ➢ Lubricant grease ➢ Alcohol ➢ Absorbent cotton RW-337D Service Manual I Page 9 of 61... -
Page 16: Disassemble The Printer
Take off the vertical pluggable interface board shown in the figure. Push out the power cover plate in the arrow direction; Take off the built-in power supply from its location position. RW-337D Service Manual I Page 10 of 61... - Page 17 Remove the four screws (ST2.9x6) shown in the figure with cross screwdriver; Take off the top cover. Remove the four screws (ST2.9x6) shown in the figure with cross screwdriver, and take off the front cover. RW-337D Service Manual I Page 11 of 61...
- Page 18 Please do not pull the connection wire to avoid damage to the wire when plug and unplug the connection wire Remove the two screws (ST2.9x6) shown in the figure with cross screwdriver, and take off the button board. RW-337D Service Manual I Page 12 of 61...
-
Page 19: Disassemble The Main Control Board Cover
Remove the two sunk screws (M3x5) shown in the figure at ② with cross screw driver and take off the guide plate; Take off the power switch in the arrow direction shown in the figure RW-337D Service Manual I Page 13 of 61... -
Page 20: Disassemble The Stationary Blade Cutter Module
Please be careful to keep the stationary blade disassembled to avoid damage to human body; Please be careful to keep the stationary blade disassembled to avoid being scratched by hard objects. RW-337D Service Manual I Page 14 of 61... -
Page 21: Disassemble The Non-Retraction Platen Roller Module
Remove the two screws (ST2.9x6) shown in the figure with the cross screwdriver; Move the cutter sliding blade along the arrow direction (move forward horizontally, then move upward), and then disassemble the sliding blade module. RW-337D Service Manual I Page 15 of 61... - Page 22 Disassemble the hook rotation shaft in the direction shown in the figure; Disassemble the hook module and spanner of mechanism. Disassemble the “E”-ring shown in the figure with sharp-nose pliers, and disassemble the two plastic gears. RW-337D Service Manual I Page 16 of 61...
-
Page 23: Disassemble The Paper Cabinet Module
Unscrew the two ST2.6x6 screws with the cross screwdriver and take the paper guide elastic plate off. RW-337D Service Manual I Page 17 of 61... - Page 24 Remove the one screw (ST2.6x6) at ② shown in the figure with cross screwdriver, pull the lock frame with a moderate force outwards and take off the vertical paper near end sensor. RW-337D Service Manual I Page 18 of 61...
- Page 25 Take off the paper roll shaft in the arrow direction shown in the figure. Remove the three screws (ST2.9x6) shown in the figure with cross screwdriver and take off the right side plate of paper cabinet. RW-337D Service Manual I Page 19 of 61...
-
Page 26: Disassemble The Print Module
First move the ribbon support plate 4mm to the left side in the horizontal direction as the arrow shown, and then lift up the ribbon support plate so as to take the ribbon support plate off. RW-337D Service Manual I Page 20 of 61... - Page 27 Take off the guide shaft at the arrow ③ shown. Remove the two screws (ST2.9x6) shown in the figure with cross screwdriver and take off the ribbon support plate module. Disassemble the spring shown in the figure with sharp-nose pliers. RW-337D Service Manual I Page 21 of 61...
- Page 28 Remove the two screws (ST2.9x6) shown in the figure with cross screwdriver, and then take off the tight plate and timing belt. RW-337D Service Manual I Page 22 of 61...
- Page 29 Take off the one “E”-ring shown in the figure with sharp-nose pliers and take off the gear 3. Take off the gear 1 and ribbon rotation wheel. RW-337D Service Manual I Page 23 of 61...
-
Page 30: Assemble The Printer
Remove the two screws (M3x8) shown in the figure with cross screwdriver and take off the carriage motor. 4.3 Assemble the printer Assemble the printer in the reverse sequence of printer disassembly. RW-337D Service Manual I Page 24 of 61... -
Page 31: Printer Maintenance
Open the rear cover, remove the two screws (ST2.6x10) and take off ribbon guide plate, then take off the print head from carriage and pull out the print head cable with moderate force in the arrow direction, and finally disassemble the print head. RW-337D Service Manual I Page 25 of 61... -
Page 32: Cutter Replacement
After the print head cooling down, open the front cover and remove the four screws (ST2.9X6), then take off the front cover. Remove the two screws (M3X5) and take the stationary blade off. RW-337D Service Manual I Page 26 of 61... - Page 33 Cut the cable ties and detach the cutter cable off from the main control board. Remove the two screws (ST2.9X6) and disassemble the movable blade together with the cutter holder. Remove the two screws (M3X5) and disassemble the movable blade. RW-337D Service Manual I Page 27 of 61...
-
Page 34: Main Control Board Replacement
Disassemble the printer cover after print head cooling down with reference to section 4.2.1; Pull out the paper feed motor cable from main control board with moderate force. Remove the two screws (M3X8) with cross screwdriver and take off the paper feed motor. RW-337D Service Manual I Page 28 of 61... -
Page 35: Cr Motor Replacement
Remove the two M3X8 screws and take off the CR motor in the arrow direction as shown in the figure. Install a new CR motor in the reverse steps. Caution: While disassembling the locking frame of printer, the force must be moderate to avoid damaging the cover of printer; RW-337D Service Manual I Page 29 of 61... -
Page 36: Upper Mark Sensor Replacement
Cut the cable tie shown at ① in the figure with wire cutter, then remove the three ST2.6X6 screws with cross screwdriver and disassemble the upper path module as shown in the figure: Remove the two ST2.2X4 screws with cross screwdriver, then disassemble the mark sensor as shown in the figure: RW-337D Service Manual I Page 30 of 61... -
Page 37: Lower Mark Sensor Replacement
When the lower mark sensor is fixed at position ①, please replace the sensor in above steps; when the lower mark sensor is fixed at position ②③④, please skip over the step 4 above. RW-337D Service Manual I Page 31 of 61... -
Page 38: Hp Sensor Replacement
Disassemble the paper cabinet module according to step 2 and 3 in section 4.2.5; Remove the two ST2.6X6 screws with cross screwdriver and disassemble the paper end sensor as shown in the RW-337D Service Manual I Page 32 of 61... -
Page 39: Printer Adjustment
② until the print spacing measured meets the standard distance requirements. Fix the eccentric bushing with glue to complete the print spacing adjustment; RW-337D Service Manual I Page 33 of 61... -
Page 40: Tighten Transmission Belt Of Carriage
After the print head cooling down, open the front cover and take off the ribbon; Remove the two ST2.9X6 screws with cross screwdriver, tighten the transmission belt in the arrow direction(about 1~2 kg force), then fix the two screws to complete tightening transmission belt . RW-337D Service Manual I Page 34 of 61... -
Page 41: Error Types And Processing
The processing method of rear cover open error can be set by command GS ( E. When the cutter error occurs due to the paper jam, please turn off the printer, and turn on the printer after clearing paper jam. RW-337D Service Manual I Page 35 of 61... -
Page 42: Troubleshooting
1) Problems: Big noise during paper feeding. Possible causes and solutions: ➢ The paper feed motor is damaged, please replace it; ➢ The paper feeding gear is worn out, please replace it. RW-337D Service Manual I Page 36 of 61... -
Page 43: Abnormal Ribbon Action
➢ Close the rear cover after clearing paper jammed; ➢ Keep far away from cutter sliding blade to avoid it being scratched while resetting the sliding blade, then turn on the power and the cutter will reset automatically. Caution: RW-337D Service Manual I Page 37 of 61... -
Page 44: Printer Doesn't Work
3) Problems: Paper feeding is continuously. Possible causes and solutions: ➢ The currently used paper type is not accordant with the printer setting, please print self-test page to confirm the printer setting and use the correct paper. RW-337D Service Manual I Page 38 of 61... -
Page 45: Appendix
2) Send command “0x1D 0x28 0x41 0x02 0x00 0x00 0x01”, the printer will enter into dump mode. ➢ Terminate Hexadecimal Dump mode: Send command “0x1D 0x28 0x41 0x02 0x00 0x00 0x01”, the printer will enter into dump mode. RW-337D Service Manual I Page 39 of 61... -
Page 46: Appendix 2 Command List
1B 72 n 027 114 n Select print color ESC t n 1B 74 n 027 116 n Select code page ESC { n 1B 7B n 027 123 n Turn on/off upside-down printing RW-337D Service Manual I Page 40 of 61... - Page 47 027 105 Partial cut ESC m 1B 6D 027 109 Partial cut ESC u n 1B 75 027 117 n Peripheral status transmission ESC v 1B 76 027 118 Paper status transmission RW-337D Service Manual I Page 41 of 61...
-
Page 48: Appendix 3 Eeprom Setting Table
[Description] Write a WORD type data to EEPROM address specified by n, data1 is low-bit data and data2 is high-bit data. After changing the EEPROM configuration, the configuration will be effective only after restarting the printer. RW-337D Service Manual I Page 42 of 61... -
Page 49: Appendix 4 Spare Part List
Microswitch of front cover 7600-9014125 Microswitch of end 7600-9011464 cover Paper end sensor 7600-9005462 horizontal paper near end 7600-9034616 sensor vertical paper near end 7600-9031884 sensor HP sensor 7600-9031883 Platen roller 8301-9009121 RW-337D Service Manual I Page 43 of 61... - Page 50 (Only ND220) Paper guide elastic plate 8104-9009186 Paper feed motor 3200-9004997 Carriage motor 3200-9015008 Driving gear 8221-9000487 Gear Tight gear 8221-9000488 Platen roller 8203-9002066 gear 18 Paper feed gear Transition gear 7702-9009477 RW-337D Service Manual I Page 44 of 61...
- Page 51 Transition gear 8203-9000489 (25-19) Print Gear 3 (42-17) 8203-9001158 gear Scan gear 1 8203-9001159 (25-15) Timing tooth belt 4930-9018827 Cutter 3100-9040048 Main control board 7201-9034525 Button and LED 7600-9031881 Button label (English) 8012-9028534 RW-337D Service Manual I Page 45 of 61...
-
Page 52: Appendix 5 Exploded Drawing Of The Printer
Appendix 5 Exploded drawing of the printer Exploded drawing of cover module Exploded drawing of print module RW-337D Service Manual I Page 46 of 61... - Page 53 Exploded drawing of stationary blade Exploded drawing of platen roller module RW-337D Service Manual I Page 47 of 61...
- Page 54 Exploded drawing of paper cabinet module Exploded drawing of control board box module RW-337D Service Manual I Page 48 of 61...
-
Page 55: Appendix 6 Part List
Fasten plate(rustproof iron) riveted 7700-9007766 RW-337D.01.01.08R module Ribbon drive plate (rustproof iron) 7700-9007764 RW-337D.01.01.06R riveted module 7600-9031883 HP sensor 4013-9000297 M3×8 Screw module 8203-9001159 BSC-2000A.01.24R Scan gear 1 8203-9000490 RW-337D.01.03.18.07R Ribbon driving gear RW-337D Service Manual I Page 49 of 61... - Page 56 8301-9009121 RW-337D.01.09.09R Platen roller Transition gear 34(special for 7702-9009477 RW-337D.01.09.15R paper-pulling structure) 4400-9000293 Φ3 “E”-ring 8103-9009187 RW-337D.01.09.05R Print bar 7700-9028660 RW-337D.01.09.15R Riveted platen roller left support frame 8207-9004682 RW-337D.01.02.13R Upper path plate RW-337D Service Manual I Page 50 of 61...
- Page 57 7205-9024276 S25PORT2.1 25-pin serial interface board 7205-9034345 IFSEV1.0 RJ45 106. 4000-9000185 M2.5×5 Pan head screw 8201-9040036 RW-337D.01.02.05R Guide plate 107. 4001-9000165 M3×5 Flat screw 108. 7700-9028536 RW-337D.01.01R Riveted main board cover 109. RW-337D Service Manual I Page 51 of 61...
- Page 58 Pan head screw 110. 111. 4200-9004101 Φ2 Flat washer 7201-9034525 NDLKV1.0 Main board 112. Pluggable interface board (USB + cash 8103-9028537 RW-337D.01.02R drawer) 113. Pluggable interface board (Ethernet + 8103-9028538 RW-337D.01.03R cash drawer) RW-337D Service Manual I Page 52 of 61...
-
Page 59: Appendix 7 Outline Drawing
Appendix 7 Outline drawing RW-337D Service Manual I Page 53 of 61... -
Page 60: Appendix 8 Main Board Layout
Appendix 8 Main board layout Top side of Main control board Bottom side of Main control board RW-337D Service Manual I Page 54 of 61... -
Page 61: Appendix 9 Lubrication
Please do not lubricate platen roller shaft and its sleeve. Please lubricate the carriage guide shaft in maintenance. Caution: The lubrication grease is special (EM50), please ask distributor or manufacture for advice. RW-337D Service Manual I Page 55 of 61...
Need help?
Do you have a question about the RW-337D and is the answer not in the manual?
Questions and answers