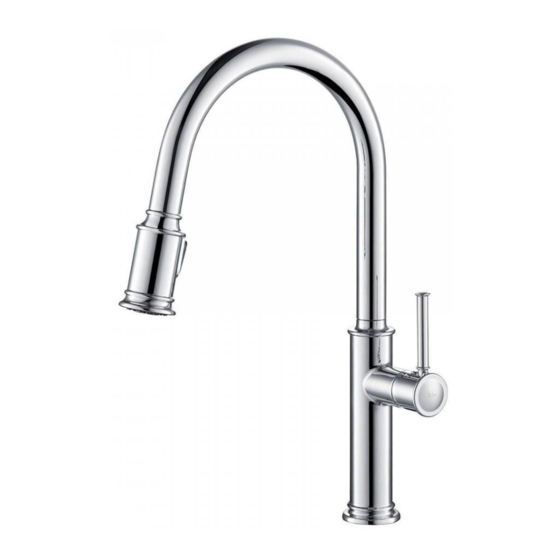
Summary of Contents for Kraus KPF-1680CH
- Page 1 I N S TA L L AT I O N MA N UA L Single Handle Pull-Down Kitchen Faucet KPF-1680 www.kraususa.com I Toll Free: 1.800.775.0703 I © 2017 Kraus USA Inc. I REV. Oct 3, 2017...
- Page 2 Thank you for your purchase We would like to take this opportunity to thank you for choosing Kraus. We hope that you are completely satisfied with your purchase, and enjoy it for years to come. If you have any questions, or require technical assistance, please contact us at 800.775.0703 and one of our representatives will be happy to help.
-
Page 3: Prior To Installation
Prior to Installation: • Make sure you have all necessary parts by checking the diagram and parts list. If any part is missing or damaged, please contact Kraus Customer Service at 800-775-0703 for a replacement • Turn off the cold and hot water at the angle stops and turn on the old faucet to release any built up pressure •... - Page 4 Diagram and Parts List...
- Page 5 Diagram and Parts List Tools you will need 1. Spray Head 2. Faucet Body Adjustable Wrench 3. Deck Plate Assembly A. Deck Plate B. Base Plate 4. Mounting Hardware A. Rubber & Metal Washer B. Mounting Nut Silicone Sealant C. Mounting Screws (optional) 5.
- Page 6 Faucet Installation Procedure Installer Tip: Shut off main water supply before installing new faucet...
- Page 7 STEP1 STEP 2A STEP 2B Step 1: Remove mounting hardware Remove the mounting screws (4C), mounting nut (4B), and rubber & metal washer (4A) from the mounting pipe Step 2A: Faucet installation - with deck plate For three-hole installation: STEP 4 STEP 5 Deck plate (3A), base plate (3B), and silicone sealant...
- Page 8 Step 2B: Faucet installation - without deck plate For single-hole installation: Deck plate (3A), base plate (3B), and silicone sealant are NOT required STEP1 STEP 2A Step 3: Install faucet and mounting hardware Insert faucet body (2) into hole in countertop or deck plate assembly (3).
- Page 9 Step 4: Secure mounting hardware Adjust direction of faucet body (2) so that handle is on right side of faucet. Tighten mounting nut (4B) until snug. Tighten mounting screws (4C) to nut with Phillips screwdriver until snug Step 5: Attach spray hose and counterweight Connect spray hose (5) to quick connector (7) attached to supply line.
- Page 10 Step 6: Connect waterlines Connect waterlines (not included) to hot and cold copper lines (8). Connect waterlines (13) to angle stops. Tighten both ends of waterlines with a wrench until snug. Turn on hot and cold angle stops and check for leaks Step 7: Flush spray hose Remove spray head (1) from...
-
Page 11: Replacement Parts
Replacement Parts Spray Head Check Valve Spray Hose Hose Guide Plastic Clip Handle Button Hexagon Nut Set Screw Metal Handle Cartridge Cover 10. Locking Nut 11. Washer 12. Cartridge 13. Cartridge Housing 14. Rubber O-Ring Cold 15. Deck Plate Water Water 16. -
Page 12: Troubleshooting
Trouble - Shooting If you have followed the instructions carefully and your faucet still does not work properly, take the following corrective steps: P R O B L E M C A U S E A C T I O N Leakage under faucet Locking nut has come Remove button located... - Page 13 Maintenance - Cartridge Replacement Step 1: Remove button located at the top of the handle. Loosen the set screw with a hex wrench. Remove the handle and unscrew cartridge cover by hand Step 2: Unscrew the locking nut with an adjustable wrench.
- Page 14 Any product reported to the authorized dealer or to Kraus as being defective within the warranty period will be repaired or replaced with a product of equal value at the option of Kraus. This warranty extends to the original owner or end-user, and is not transferable to a subsequent owner.
- Page 15 (HI, AK, and Puerto Rico shipping charges may apply). International shipping fees are not included. COMMERCIAL WARRANTY Kraus extends the above warranty for a period of one (1) year to purchasers of products for industrial, commercial, and business use. All incidental or consequential damages are specifically excluded. No additional warranties, express or implied, are given, including but not limited to any implied warranty of merchantability or fitness for a particular purpose.
- Page 16 Please take a moment to share your experience. Visit http://www.kraususa.com/review to let us know what you think about your new Kraus product. Contact Us to Learn More 1.800.775.0703 / www.kraususa.com / customerservice@kraususa.com Like & Follow KrausUSA Download the Kraus Care & Maintenance Guide at: http://www.kraususa.com/maintenance www.kraususa.com...


Need help?
Do you have a question about the KPF-1680CH and is the answer not in the manual?
Questions and answers