Kraus Britt KPF-1690 Installation Manual
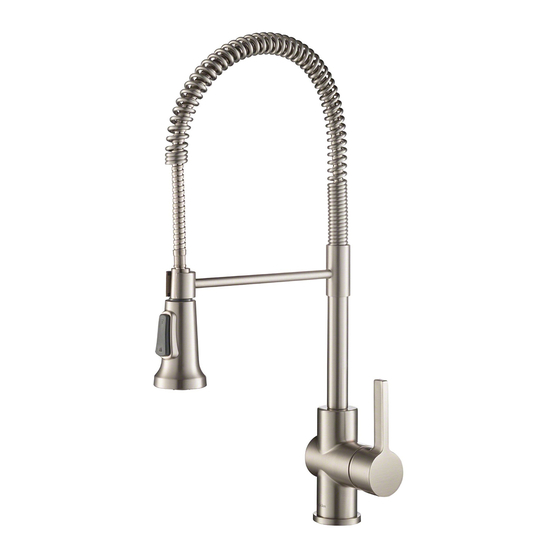
Single handle commercial kitchen faucet
Hide thumbs
Also See for Britt KPF-1690:
- Installation manual ,
- Installation manual (33 pages) ,
- Installation manual (16 pages)

Related Manuals for Kraus Britt KPF-1690


Summary of Contents for Kraus Britt KPF-1690
- Page 1 INSTALLATION GUIDE Britt Single Handle Commercial Kitchen Faucet KPF-1690 www.kraususa.com Toll Free: 1.800.775.0703 © 2018 Kraus USA Inc. REV. January 30, 2020...
- Page 2 Congratulations on the purchase of your new Kraus plumbing fixture! Please keep the box and packaging materials until your product is completely installed. If you have any questions, require technical assistance or have any problems with your product: STOP DO NOT RETURN TO STORE Please contact our Customer Service Team 1-800-775-0703 / customerservice@kraususa.com...
-
Page 3: Prior To Installation
Prior to Installation: · Make sure you have all necessary parts by checking the diagram and parts list. If any part is missing or damaged, please contact Kraus Customer Service at 800-775-0703 for a replacement. · Turn off the hot and cold water supply at the angle stops and turn on the old faucet to release any built up pressure. - Page 4 Diagram and Parts List E. Escutcheon A. Spray Head B. Faucet Body F. Base Plate G. Escutcheon Mounting Hardware C. Mounting Hardware C1. Rubber & Metal Washer G1. Bolt C2. Mounting Nut G2. Plastic Nut H. 2.5 mm Hex Wrench C3.
-
Page 5: Faucet Dimensions
Faucet Dimensions 10 3/4" (271.6mm) 4 5/8" 8 1/2" (116.6mm) (215mm) 2 1/8" 2 1/8" (54.2mm) (55.2mm) 3/8" Compression... - Page 6 Step 1. Remove mounting hardware Shut off the water supply. Remove the old faucet. Clean the mounting surface. Remove mounting hardware (C) from faucet body (B). Step 2. Install the faucet assembly (without deckplate) Before installation, ensure that the flange (D) is placed on the bottom of the new faucet assembly (B).
- Page 7 Step 3. Install the escutcheon Before installation, remove the flange (D). Screw the bolts (G1) into the escutcheon (E) and ensure that the base plate (F) is pressed onto the escutcheon (E) before the escutcheon (E) is installed over the three holes on the sink.
- Page 8 Step 5. Secure the faucet assembly Install the plastic washer and metal washer (C1) onto the threaded mounting shank. Thread the nut (C2) onto the mounting shank. Lock the nut (C2) into position by tightening the screws (C3). Do not overtighten. Step 6.
- Page 9 Please note that doing so will remove the capability of this product to meet specifi c low- flow standards. Kraus is not liable for any alterations made to the product post-sale, and highly advises that you consult with your local or...
-
Page 10: Replacement Parts
Replacement Parts Replacement Finish/Color Part # Parts List 1. Spray Head KP27195 SFS,BG,SFACB,SFSB,MB,AB* 2. 2.2 GPM Washer KP27197 KP27196 3. 1.8 GPM Washer KP27025 4. Sprayer Hose BLAB,BLBG,BLSFSB BLMB,BLSFACB,SFS* KP27026 5. Inverter GR,BL* KP27027 6. Spring SFS,BG,SFACB,SFSB,AB* KP27080 7. Inverter GR,BL* KP27029 8. -
Page 11: Troubleshooting
Troubleshooting If you have followed the instructions carefully and your faucet still does not work properly, take the following corrective steps: PROBLEM CAUSE ACTION Leakage under faucet handle The bonnet nut (14) has come loose Tighten the bonnet nut. Clean or replace and the ring on the cartridge is dirty the cartridge or damaged... -
Page 12: Care And Maintenance
Do not clean with soaps, acid, polish, abrasives or harsh cleaners Do not use cloth with a coarse surface Unscrew the aerator and clean when necessary Download the Kraus Care & Maintenance Guide at: http://www.kraususa.com/maintenance This installation manual is subject to change without further notice. - Page 13 Any product reported to the authorized dealer or to Kraus as being defective within the warranty period will be repaired or replaced with a product of equal value at the option of Kraus. This warranty extends to the original owner or end-user, and is not transferable to a subsequent owner.
- Page 14 This warranty gives you specific legal rights, and you may also have other rights which vary from state to state. KRAUS USA has the right to change, modify, and/or update the warranty policy at any time. For the latest, most up to date...
- Page 15 Kraus USA, Inc. 12 Harbor Park Drive Port Washington, NY 11050 Toll-free 800-775-0703 Customerservice@kraususa.com If you are a plumbing contractor or trade professional please contact a Kraus Pro Representative at: Kraus USA, Inc. 12 Harbor Park Drive Port Washington, NY 11050 516-801-8955 Proservice@kraususa.com...
- Page 16 IMPORTANT Register Your Kraus Product Activate Your Warranty Access Premium Customer Support Get Product Information REGISTER TODAY http://www.kraususa.com/registration www.kraususa.com...
Need help?
Do you have a question about the Britt KPF-1690 and is the answer not in the manual?
Questions and answers