Table of Contents
Advertisement
Quick Links
Advertisement
Table of Contents

Related Manuals for Bosch HBM56B551


Summary of Contents for Bosch HBM56B551
- Page 1 Double oven HBM56B551B [en] Instruction manual...
-
Page 3: Table Of Contents
Storing settings in the memory ............. 14 Starting the memory ................ 14 Additional information on products, accessories, replacement Sabbath mode................14 parts and services can be found at www.bosch-home.com and Starting Sabbath mode..............14 in the online shop www.bosch-eshop.com Childproof lock .................14 Switching on the childproof lock........... -
Page 4: Important Safety Information
: Important safety information Read these instructions carefully. Only then A draught is created when the appliance ■ will you be able to operate your appliance door is opened. Greaseproof paper may safely and correctly. Retain the instruction come into contact with the heating manual and installation instructions for element and catch fire. -
Page 5: Causes Of Damage
The cable insulation on electrical Causes of damage ■ appliances may melt when touching hot Caution! parts of the appliance. Never bring Accessories, foil, greaseproof paper or ovenware on the ■ electrical appliance cables into contact cooking compartment floor: do not place accessories on the with hot parts of the appliance. -
Page 6: Your New Oven
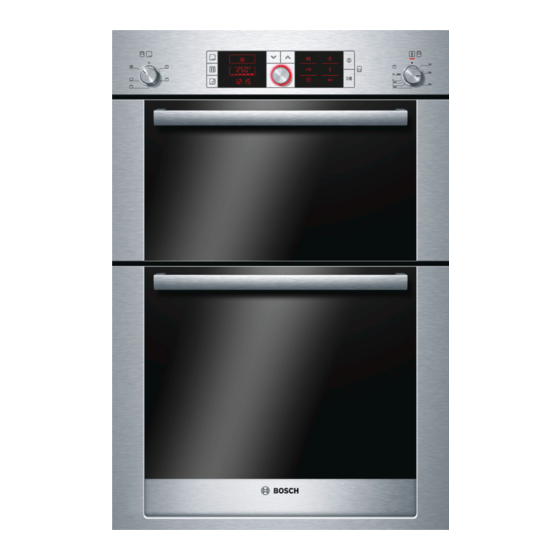
Your new oven Here you will learn about your new oven. The control panel and the individual operating controls are explained. You will find information on the cooking compartment and the accessories. Control panel Here is an overview of the control panel. The display never shows all of the symbols at the same time. -
Page 7: Display
inertia, the temperature displayed may differ slightly from the Type of heating and tem- actual temperature in the cooking compartment. perature range Grill, small area For grilling small amounts of Residual heat steaks, sausages, toast and 1, 2 or 3 When the appliance is switched off, the temperature indicator pieces of fish. -
Page 8: Cooking Compartment
Cooking compartment The oven light switches on when you open the oven door. You can use the button to switch the light on and off. The oven light is located in the cooking compartment. A cooling fan protects the oven from overheating. Cooling fan Oven light The cooling fan switches on and off as required. - Page 9 Optional accessories HEZ number universal pan HEZ332003 For moist cakes, baked items, frozen meals and large joints. It can also be used to catch dripping fat when grilling directly on the wire rack. Slide the universal pan into the oven with the sloping edge fac- ing the oven door.
-
Page 10: After-Sales Service Products
Optional accessories HEZ number Steam filter HEZ329000 You can retrofit this to your oven. The steam filter filters out grease particles from the exhaust air, thereby reducing odours. Only for appliances with a 6, 7 or 8 as the second digit in the E-no.(e.g. -
Page 11: Setting The Oven
Setting the oven Setting the type of heating and temperature In this section, you will find out how to set a type of heating and temperature for the ò top oven. Example shown below: Top/bottom heating setting, 180 °C For the ó... -
Page 12: Setting Rapid Heating
Setting a later end time Setting rapid heating See Setting a later end time in the Timesetting options section. Press the button to activate rapid heating. The symbol appears next to the selected temperature. The temperature Setting rapid heating indicator bars start filling. Once all the bars are filled, rapid heating is complete. -
Page 13: Setting A Later End Time
Set the cooking time using the rotary selector. Press the button to close the time-setting options menu. Press the button. The time-setting options menu closes. Confirm by pressing the button. The main oven is on standby. The [ ] end time is shown in the clock display. -
Page 14: Memory
Memory You can save the settings for a dish in the ó main oven in the Saving another setting memory and call it up again at any time. Enter and save the new setting. The old settings are The Memory function is particularly useful for dishes that you overwritten. -
Page 15: Basic Settings
Basic settings ó main oven has various basic settings, which you can match to your needs. Function Basic setting Options Audible signal after a cooking time has = 2 minutes = 10 seconds ™‚ ƒ ‚ elapsed ƒ = 2 minutes = 5 minutes „... -
Page 16: Automatic Switch-Off
You can now change other basic settings, as described in Cancelling points 2 to 4. Press the button. The changes are not applied. Press and hold the button until the clock appears. This ° takes about four seconds. All changes are saved. Automatic switch-off main oven has an automatic switch-off function. -
Page 17: Care And Cleaning
Care and cleaning With good care and cleaning, your oven will remain clean and Cleaning self-cleaning surfaces in the cooking compartment fully-functioning for a long time to come. Here we will explain The back wall, ceiling and side walls of both cooking how to maintain and clean your oven correctly. -
Page 18: Detaching And Attaching The Oven Door
Refitting the rails First insert the rail into the rear socket, press it to the back slightly (figure A), and then hook it into the front socket (figure B). Fold back both locking levers (figure C). Close the oven door. The rails fit both the left and right sides. -
Page 19: Troubleshooting
Removing the intermediate panel Lift the intermediate panel slightly and pull it out towards you. Fitting the door panel Insert the door panel at an angle towards the back into both brackets as far as it will go. The smooth surface must face Cleaning outwards. -
Page 20: Replacing The Oven Light Bulb
Replacing the oven light bulb Replace faulty oven light bulbs. Spare bulbs can be obtained from the after-sales service or specialist retailers. Only use these oven light bulbs. For the main oven: E14, 220 - 240 V, 40 W, heat-resistant to ■... -
Page 21: Saving Energy
Place the baking tins and cookware in the centre of the wire universal pan should also be inserted at level 1. Fat and juices rack. If you are grilling food directly on the wire rack, the are caught in the universal pan, which keeps the oven cleaner. Accessories Level Temperature... -
Page 22: Environmentally-Friendly Disposal
Environmentally-friendly disposal This appliance is labelled in accordance with European Directive 2012/19/EU concerning used electrical and Dispose of packaging in an environmentally-friendly manner. electronic appliances (waste electrical and electronic equipment - WEEE). The guideline determines the framework for the return and recycling of used appliances as applicable throughout the EU. - Page 23 Meat Beef When cooking pot roasts, ensure that sufficient liquid is added. Pour the specified amount of liquid into the ovenware. You can also use the marinade. Cook sirloin fatty-side up. Programmes Programme num- Weight range in kg Add liquid Weight setting Beef Pot roast, fresh...
-
Page 24: Selecting And Setting A Programme
If you wish the meat to brown, add it as the last ingredient to Stew the roasting dish on top of the vegetables. If you do not want it You can combine various types of meat and fresh vegetables. to brown so much, mix the meat in among the vegetables. Cut the meat into bite-sized pieces. -
Page 25: Tips For The Automatic Programmes
Select the desired programme number using the rotary selector. The programme starts. You will see the cooking time [ counting down on the clock display. Press the button. The programme has ended A weight is suggested in the clock display. A signal sounds. -
Page 26: Tested For You In Our Cooking Studio
Tested for you in our cooking studio Here you will find a selection of dishes and the ideal settings for Baking trays that are placed in the oven at the same time will them. We will show you which type of heating and which not necessarily be ready at the same time. - Page 27 Food Dish Shelf Type of Temperature Time position heating in °C in minutes Swiss roll Universal pan + swiss roll tin 200-210 10-12 Wire rack + swiss roll tin 180-190 10-12 Tart Wire rack + Ø 20 cm plate or pie tin 200-210 50-60 Wire rack + Ø...
-
Page 28: Baking Tips
ò Top oven Food Dish Shelf posi- Type of Temperature Time tion heating in °C in minutes Victoria sandwich Wire rack + 1 tin, 160-170 25-30 dia. 20 cm Scones Wire rack + baking tray 200-210 10-12 Small cakes Wire rack + 12-cup tin 150-160 25-30 Jam tarts... - Page 29 When the roast is ready, turn off the oven and allow it to rest for When roasting joints of pork with a rind, make cuts in the rind 10 minutes. This allows better distribution of the meat juices. crossways and if it is to be turned, first place the joint with the rind side down in the dish.
- Page 30 Food Dish Shelf Type of Temperature Time, min. per position heating in °C 500 g + add. time Pork Roast joint Universal pan with wire insert 180-200 35 + 40 Loin joint Universal pan with wire insert 190-210 30-45 Belly Universal pan with wire insert 220-240 25 + 40...
-
Page 31: Tips For Roasting And Grilling
Food Dish Shelf posi- Type of Grill setting Time tion heating in minutes Fish Whole trout, 300 g each Wire rack + universal pan 20-25 Fillets, 150 g each Wire rack + universal pan 1. side 5-7, 2. side 5-7 ò... -
Page 32: Preprepared Products
Preprepared products Leave a little space between bread rolls when crisping them up. Do not place too many bread rolls on the accessories. Observe the instructions on the packaging. Sprinkle grated cheese over the top of your lasagne to give it a If you line the accessories with greaseproof paper, make sure beautiful and evenly browned finish. -
Page 33: Special Dishes
Food Dish Shelf posi- Type of Temperature Time tion heating in °C in minutes Lasagne, chilled Lasagne, 400 g Wire rack 180-190 20-25 Lasagne, 1200 g Wire rack 170-180 30-35 * Preheat. Special dishes Pour into cups or small screw-top jars and cover with cling film. -
Page 34: Drying
Drying Line the universal pan and the wire rack with greaseproof or parchment paper. With 3D hot air, you can dry foods brilliantly. Turn very juicy fruit or vegetables several times. Use unblemished fruit and vegetables only and wash them Remove fruit and vegetables from the paper as soon as they thoroughly. -
Page 35: Test Dishes
Test dishes These tables have been produced for test institutes to facilitate German apple pie on 2 levels: Place dark springform cake tins the inspection and testing of the various appliances. one above the other. German apple pie on 1 level: Place dark springform cake tins diagonally next to each other. - Page 36 Robert Bosch Hausgeräte GmbH Carl-Wery-Straße 34 81739 München Germany www.bosch-home.com *9000715719* 930903 9000715719...
Need help?
Do you have a question about the HBM56B551 and is the answer not in the manual?
Questions and answers