
Related Manuals for DivioTec NDM362


Summary of Contents for DivioTec NDM362
- Page 1 Tansportation Network Camera TDR728 Mobile Camera NDM362/TBR728 TDR728 TDR728 User Manual Released on 2020.02.04 Note: The manual is subject to change without notice...
-
Page 2: Table Of Contents
ontents Chapter 1: Product Introduction Image - ROI ...........................21 Configurations ......................21 Overview ..........................1 Image - Privacy Zone ......................22 Physical Descriptions ......................2 Configurations ......................22 Hardware Installation (Ceiling Mount) ................. 2 Image - OSD .........................23 Hardware Installation (Wall Mount)................3 General Settings ......................23 Text Overlay .........................23 Chapter 2: Camera Configuration... - Page 3 LDAP Configurations ....................32 Event - Object Detection ....................47 Network - DDNS ........................33 Object Detection Configurations ................47 DDNS Configurations ....................33 Setup Detection Area ....................49 Network - RTSP ........................34 Object Schedule Settings ..................50 RTSP Configurations ....................34 Event - FTP Upload ......................51 Multicast (Stream 1 to Stream 3) .................35 FTP Upload Handler Configurations ..............51 Network - GB28181 ......................37 Remote Server ......................51...
-
Page 4: Chapter 1: Product Introduction
1: p hapter roduCt ntroduCtIon Overview... -
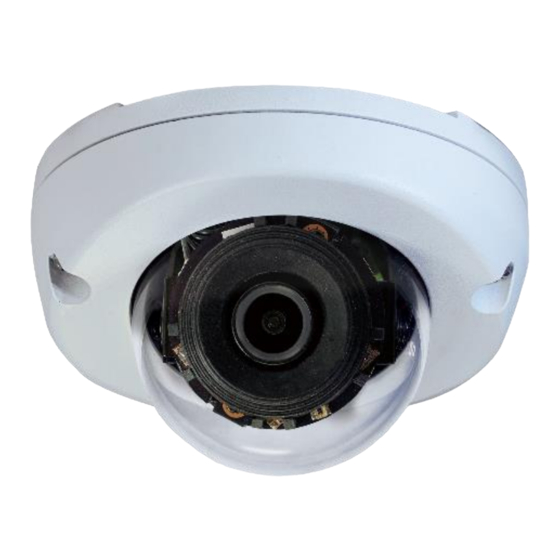
Page 5: Physical Descriptions
Physical Descriptions Hardware Installation (Ceiling Mount) 1. Position the placement sticker at the desired installation location. 2. Drill three mounting holes, and insert the included screw anchors. 3. Drill a 30mm hole for the network cable. 4. Separate the top cover. Mount the camera using the supplied hardware, and adjust the lens to the appropriate position. -
Page 6: Hardware Installation (Wall Mount)
Hardware Installation (Wall Mount) 1. Position the placement sticker at the desired installation location. 2. Drill three mounting holes, and insert the included screw anchors. 3. Attach the silicon base pad to the bottom of the camera (this step may be omitted if the network cable runs behind the wall). -
Page 7: Chapter 2: Camera Configuration
1. Download the CAM-Finder installer file.Please access: http://www. before proceeding. diviotec.com/index.php?tid=1603&pid=31&cid=50 2. Unzip the CAM-FINDER file to a location on the hard drive. You can access the camera via a web browser or CAM-FINDER software. - Page 8 5. Confirm the directory that the program will be installed on. To specify 7. Specify which user accounts on the computer can access the program, a different folder, please click on the Browse button and locate the the options are Everyone and Just me. desired installation folder.
- Page 9 9. Click on the Next button to begin installation. 10. Once the installation process is complete, click on the Close button to finish. A shortcut will be created on the desktop.
-
Page 10: Cam-Finder
CAM-FINDER 3. Once the camera is discovered, it will show the following information: ▪ Model Name 1. Locate and open the CAM-FINDER software shortcut on the desktop. ▪ IP address ▪ MAC address ▪ UUID ▪ Serial Number ▪ Version 4. -
Page 11: Introduction To The Cam-Finder User Interface
Introduction to the CAM-FINDER User Interface Button Functions Function Button Description Search Discovers IP cameras available on the network. Assign IP Changes the IP address of the camera. Opens the web browser to the home page of Home Page the camera. Firmware Upgrades the camera firmware. -
Page 12: Web Browser
Web Browser 1. Locate and open one of the web browsers (such as Internet Explorer, Chrome, Firefox, etc.) shortcut on the desktop. 2. In the address bar, type 192.168.0.250 (default IP address of the camera) and then press the Enter button. 3. -
Page 13: Configuring The Camera's Setting
Configuring the Camera’s Setting 1. To configure the camera’s setting, click on the Setup button on the main screen to enter the configuration menu. Setup... -
Page 14: Browsing Through The Configuration Menu
Browsing Through the Configuration Menu The layout of the configuration menu is split into two sections. All the camera settings are located on the left hand side of the interface, clicking The following are the camera settings available on the left hand side: on them will open their corresponding sub-menu on the right. -
Page 15: Video - Video Configuration
Video - Video Configuration Primary Stream 1 Codec Configures the format of the video stream, the options are H.265, H.264 and MJPEG. Resolution Configures the resolution of the video stream. The available options are 1920x1080 and 1280x720. Rate Control Configures the Rate Control mode as CBR (constant bit rate) or CVBR (constrained variable bit rate) for the stream. -
Page 16: Secondary Stream
Video Configuration Cont. Smart GOP Enables or disables Smart GOP feature. Enabling it will allow GOP to automatically increase when no moving objects are detected to save bandwidth. When moving objects are detected, GOP will automatically decrease. Bit Rate Configures the bit rate, the range is 64~8000. Users can enter the value or adjust it through the slider bar. -
Page 17: Third Stream
Video Configuration Cont. Third Stream Resolution Configures the resolution of the video stream. The available options are 640x360 and 320x240. Quality Configures the video quality of the stream. The options are High, Normal and Low. Frame Rate Adjusts the frame rate of the video stream, the range is 1~30FPS. The stream will be off if 0 is selected. -
Page 18: Video - Audio Configuration
Video - Audio Configuration Audio Settings Audio In Enables or disables audio-in on the camera. Audio In Volume Volume adjustment for audio-in of the camera. The available options are High, Mid and Low. Audio Out Enables or disables audio-out on the camera. When enabled, specify the volume in the Volume textbox. -
Page 19: Image - Exposure
Image - Exposure Configurations Profile Assists users to set up one Day profile and one Night profile. AE Mode The available options are Auto, 50Hz, 60Hz and Lock. If Lock is selected, then Exposure Time Control, Gain Control and BLC cannot be edited. - Page 20 Exposure Cont. Gain Control The available options are OFF, Low, Medium, High and User Define. Select User Define to enter the value of Maximum Gain (the range is 1~512) manually. Gain The range is 1~512. It can only be edited when Lock is selected as the AE Mode.
-
Page 21: Day Night Setting
Exposure Cont. Day Night Setting Image Profile Select Day or Night profile to automatically set up parameters quickly. The available options are Auto, Force Day and Force Night. Day Night Control Select the Day and Night control mode. The available options are Auto, Force Day, Force Night and Switch Schedule. -
Page 22: Image - Basic Settings
Image - Basic Settings Orientation Mirror Flips the image horizontally (flip left-to-right) or vertically (flip top-to- bottom). They can be selected at the same time. Rotate Allows you to get a vertically oriented image from the camera. It is suitable for narrow corridors, hallways or aisles applications. Digital Processing Stabilize Enables or disables video stabilization function. - Page 23 Basic Settings Cont. Brightness Adjust Configures the brightness of the image, the range is 0 ~ 100, with 0 being the lowest brightness. Enter the values or adjust the bar to increase or decrease the values. The default value is 50. Hue Adjust Configures the overall hue of the image, the range is 0 ~ 100.
-
Page 24: Image - Roi
Image - ROI Configurations ROI is used to select which areas will be monitored and recorded with higher image quality while using lower image quality for other non-ROI zones to save bandwidth and storage. The instructions below illustrate how to setup ROI. -
Page 25: Image - Privacy Zone
Image - Privacy Zone Configurations Configures which area of the video stream will be masked for privacy. There are 5 privacy zones that can be configured. 1. Select ON to enable Privacy Zone function. The default is OFF. 2. Select the area to set the privacy zone by holding down the mouse button and drag to make a rectangular square, release the button once the desired area is covered. -
Page 26: Image - Osd
Image - OSD General Settings Camera Name Specifies a name for the device. The maximum length is 32 characters. Background Configures the background color of the text overlay, the options are Translucent (light grey) or Transparent. Text Color Configures the text colour as Black, White, Green or Yellow. Text Overlay There are 4 content positions (Top Left, Top Right, Bottom Left and Bottom Right) to display the camera name, current date/time and text overlay. -
Page 27: Network - Basic
Network - Basic IPv4 Settings DHCP Enables or disables DHCP, use this feature if the camera is connected to a network with DHCP server. To manually configure an IP address, disable DHCP and input the IP address, subnet mask, default gateway, primary and secondary DNS server address. System Settings HTTP Port Configures the HTTP port number of the web configuration menu. -
Page 28: Rtmp Settings
Basic Cont. RTMP Settings RTMP Enables or disables RTMP function. Configures the web URL address. Save Save button to apply the configurations, click on this button once all the settings are confirmed for the new changes to take effect. -
Page 29: Network - Ftp
Network - FTP Configurations Enable Enables or disables FTP access to this camera. This function is only available when an SD card is inserted. You can access files in the SD card attached to the IP camera. Password Specifies the FTP login password to access the IP camera. Max Connection Specifies the maximum number of FTP connections the IP camera can support. -
Page 30: Network - Ssl
Network - SSL SSL Configurations Mode Disabled: Support for http only. Optional: Support for http & https. Required: Support for https only. Certificate Install New Certificate Provides options to install a new CA certification. Save Save button to apply the configurations, click on this button once all the settings are confirmed for the new changes to take effect. -
Page 31: Network - Ssh
Network - SSH SSH Configurations Enable Enables or disables SSH access to this camera. Password Specifies the SSH login password to access the IP camera. Save Save button to apply the configurations, click on this button once all the settings are confirmed for the new changes to take effect. -
Page 32: Network - 802.1X
Network - 802.1x 802.1x Configurations Protocol The default is None to disable 802.1x function. Select the protocols to enable 802.1x function. The available protocols are EAP-MD5, EAP-TLS, EAP-TTLS or EAP-PEAP. After the protocol has been selected, manually configure the username, password and other required information. -
Page 33: Network - Snmp
Network - SNMP SNMP Configurations No SNMP Server Disables SNMP function. SNMP V2c Enables or disables SNMPv2c support. Community String Configures the community string. Trap Configuration Specifies the destination IP address to send SNMP trap messages. SNMP V3 Enables or disables SNMPv3 support. User Configures the SNMPv3 username. -
Page 34: Network - Firewall
Network - Firewall Firewall Configurations Mode Select OFF to disable the filtering of the specified IP address. Select Allow or Deny in the drop-down menu to specify the type of filtering rule applied to the IP address entered. Address1 to Address8 The IP address and associated protocol (TCP, UDP or None) to filter can be entered here. -
Page 35: Network - Ldap
Network - LDAP LDAP Configurations Enables or disables LDAP, use this feature if the camera is connected to a network with LDAP server. After enabling LDAP, manually configure the LDAP server and other required information. Save Save button to apply the configurations, click on this button once all the settings are confirmed for the new changes to take effect. -
Page 36: Network - Ddns
Network - DDNS DDNS Configurations Enable Enables or disables DDNS service. Hostname Hostname of the DDNS account. DDNS Server Select the DDNS service provider from the drop-down menu, the available providers are DynDNS, NO-IP, and Two-DNS. The default option is DynDNS. -
Page 37: Network - Rtsp
Network - RTSP RTSP Configurations Authentication Enables or disables verification of the account and password. The account and password are same as the camera’s login account and password. Port Configures the port number for stream 1 to stream 3. The range is 554/1025~65535. -
Page 38: Multicast (Stream 1 To Stream 3)
RTSP Cont. Multicast (Stream 1 to Stream 3) Enable RTSP Multicast Enables or disables RTSP multicast streaming. Always Multicast Check this option to enable the video stream to start multicast streaming without using RTCP. Video IP Configures the multicast address to stream video. Video Port Configures the port number of the video stream. - Page 39 RTSP Cont. Path Configures the URL address of the video stream. Configures the time-to-live threshold of the multicast datagram before it is discarded by the router. Save Save button to apply the configurations, click on this button once all the settings are confirmed for the new changes to take effect.
-
Page 40: Network - Gb28181
Network - GB28181 GB28181 Configurations Enable Enables or disables GB28181 settings. After enabling GB28181, manually configure the related information for GB28181 settings. Save Save button to apply the configurations, click on this button once all the settings are confirmed for the new changes to take effect. -
Page 41: System - Date/Time
System - Date/Time Date/Time Configurations Display Format Displays the current date and time. There are various formats to select from the drop-down menu. Time Setting Time Server None: Disables synchronization of the current date/time through the internet. DHCP: If your DHCP server provides NTP server information, select this setting to enable NTP information retrieval. -
Page 42: System - Maintenance
Firmware Version Displays the current firmware version. Model Name Displays the IP camera model number. Serial Number NDM362/TDR728 Displays the IP camera serial number. MAC Address Displays the IP camera MAC number. Firmware Update To update the camera’s firmware, click on the Browse button and locate the firmware image file, once the file is selected, press the Upload button to begin. -
Page 43: Backup
Maintenance Cont. Reset to Factory Default Click this button to restore all the camera’s setting back to factory default, including IP address (default is 192.168.0.250). Download Log File Records all the status information of the camera in list format when the camera is connecting to the PC. -
Page 44: System - User Management
System - User Management Admin Setting Admin The default username is Admin. Users cannot change it. Password Set up the password for administrator’s authorization. Admin Re-type Password Retype the same password to confirm. User List Displays user accounts available on the camera. Press New User to add a new account and set up the authorization level of this user from the following User Information. -
Page 45: User Information
User Management Cont. User Information This section allows users to set up each new user’s authorization level. A total of ten accounts can be created for Admins/Views. Access Level Admins: Has full control (read/write) over every configuration menu item. Admin Views: Only has access (read) to the live view of the camera (main screen). -
Page 46: Event - Alarm Handler
Event - Alarm Handler Alarm Handler Configurations Enable Enables or disables the alarm schedule setup. Alarm Schedule Settings Press S for a particular weekday to set up a 24-hour schedule automatically. Press D for a particular weekday to clear all the previous scheduled settings automatically. -
Page 47: Event - Motion Detection
Event - Motion Detection Motion Configurations This section configures which area of the live video will be monitored for detecting motion. Enable Enables or disables motion detection function. Sensitivity Configures the sensitivity of motion detection, the range is 0 to 100. Zone1 to Zone5 Setup Configures the type of area layout to use for motion detection. -
Page 48: Motion Schedule Settings
Motion Detection Cont. Motion Schedule Settings Press S for a particular weekday to set up a 24-hour schedule automatically. Press D for a particular weekday to clear all the previous scheduled settings automatically. Configure the scheduled time by holding down the mouse button and clicking the time block to enable the schedule settings on the selected time. -
Page 49: Event - Tampering Alarm
Event - Tampering Alarm Tampering Alarm Configurations Enable Enables or disables tampering detection function. Sensitivity Configures the sensitivity level of tampering detection, the options are High, Medium and Low. Tampering Schedule Settings Press S for a particular weekday to set up a 24-hour schedule automatically. Press D for a particular weekday to clear all the previous scheduled settings automatically. -
Page 50: Event - Object Detection
Event - Object Detection Object Detection Configurations Enable Enables or disables object detection function. Detect mode Configures the methods of object detection, the options are Object- Counting, Line Intrusion, Zone Object-Counting and Zone intrusion. Object-Counting: To create a Object-Counting area for calculation (no event trigger), on the live video screen, select the area by holding down the mouse button and draw the Object-Counting lines, release the button once the desired area is covered. - Page 51 Object Detection Cont. Zone intrusion: To create a Zone intrusion area for triggering events, on the live video screen, select the area by clicking the mouse button to specify the first anchor point, then draw a line to place the second anchor point. Continue to draw lines for the third and fourth anchor points, then finish off the selection by clicking the first anchor point.
-
Page 52: Setup Detection Area
Object Detection Cont. Outside for Zone Object-Counting: Objects entering from outside the zone area to the inside will be counted as Outside. Objects leaving from inside the zone area to the outside will not be counted as Inside or Outside. Count Reset Resets all the counting results of Line Counting or Zone Counting to zero. -
Page 53: Object Schedule Settings
Object Detection Cont. Object Schedule Settings Press S for a particular weekday to set up a 24-hour schedule automatically. Press D for a particular weekday to clear all the previous scheduled settings automatically. Configure the scheduled time by holding down the mouse button and clicking the time block to enable the schedule settings on the selected time. -
Page 54: Event - Ftp Upload
Event - FTP Upload FTP Upload Handler Configurations Configures which type of event trigger to enable and the FTP server address that the camera will connect to. The options are: ▪ Trigger Alarm Detection ▪ Trigger Motion Detection ▪ Trigger Tampering Alarm ▪... -
Page 55: Event - Smtp Notification
Event - SMTP Notification SMTP Notification Handler Configurations This section configures the SMTP mail server address that the camera will use for sending emails. From Specifies the email address of the sender. Trigger Event Configures which type of event trigger to enable and the SMTP server address that the camera will connect to. -
Page 56: Smtp Server
SMTP Notification Cont. SMTP Server Host Address Specifies the host name or IP address of the SMTP mail server. Port Number Specifies the port number of the SMTP mail server. Username Specifies the login username for the SMTP mail server. Password Specifies the login password for the SMTP mail server. -
Page 57: Event - Network Storage
Event - Network Storage Network Storage Configurations Network Storage This section configures the network storage server address that the camera will use when an event trigger is detected. Trigger Event Configures which type of event trigger to enable and the network storage server that the camera will connect to. -
Page 58: Login Certificate
Network Storage Cont. Login Certificate Username and Password Specifies the login username and password for the network storage server. Mount and Remove Network Storage Mount Set up a network connection with the network storage server. All the video recordings or snapshots from event triggers will be uploaded to the network storage server. -
Page 59: Event - Relay Handler
Event - Relay Handler Relay Handler Configurations This section configures the event trigger options for devices connected to the DI/DO of the camera. Trigger Alarm: When a signal is detected from Alarm in, the Alarm out will be triggered. Trigger Motion Detection: When a motion detection event is detected, the Alarm out will be triggered. -
Page 60: Event - Sd Record Handler
Event - SD Record Handler SD Record Handler Configurations Configures which type of event trigger to enable the SD recording and scheduling function. The following options are available: ▪ Enable Trigger Alarm Detection ▪ Enable Trigger Motion Detection ▪ Enable Trigger Tampering Alarm ▪... -
Page 61: Alarm/Motion/Tampering Alarm/Object Detection Settings
SD Record Handler Cont. Alarm/Motion/Tampering Alarm/Object Detection Settings Record Type Selected: Snapshot Pre-event Snapshots Configures the number of pre-event snapshots to upload to SD card. The options are 0, 1, 3, 5 and 10. Post-event Snapshots Configures the number of post-event snapshots to upload to SD card. The options are 0, 1, 3, 5, 10, 30 and 60. -
Page 62: Alarm/Motion/Tampering Alarm/Object Detection Settings
SD Record Handler Cont. Alarm/Motion/Tampering Alarm/Object Detection Settings Record Type Selected: Video Pre-event Record Configures the length of the pre-event recording. The range is 1~5 seconds. FileName Prefix Configures a prefix to append to the filename. The default prefixes for Alarm, Motion, Tampering Alarm and Object Detection are Alarm, Motion, Tampering and Object respectively.
Need help?
Do you have a question about the NDM362 and is the answer not in the manual?
Questions and answers