
Related Manuals for German pool GPR-GY900L


Summary of Contents for German pool GPR-GY900L
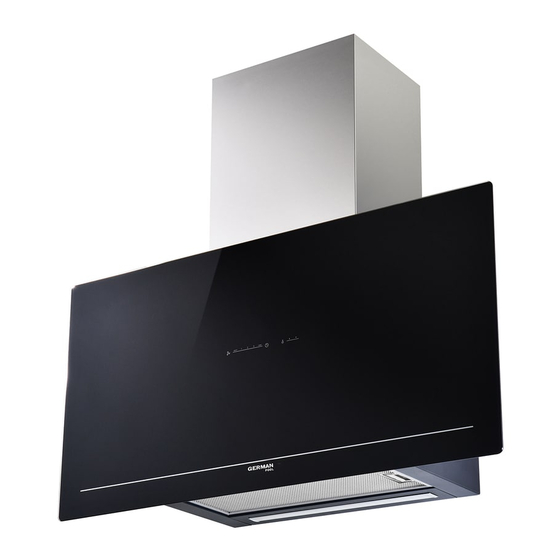
- Page 1 Wall-mount Type GPR-GY900L Range Hood Online Warranty Registration Please read these instructions and warranty information carefully before use and keep them handy for future reference. U S E R M A N U A L...
- Page 2 請即進行保用登記﹗ 有關保用條款細則,請看本說明書最後一頁。 Please register your warranty information now! For Warranty Terms & Conditions, please refer to the last page of this user manual.
-
Page 3: Table Of Contents
Content Installation Operation Instructions Care & Maintenance Technical Specifications Warranty Terms & Conditions Dear Customer, Thank you for buying our hood. Please read these instructions carefully for its optimum installation, use and maintenance. -
Page 4: Installation
Installation... - Page 5 Installation...
- Page 6 Installation...
- Page 7 Installation Notice Before Installation Warning: consult local regulations regarding fumes outlets. Do not connect the hood to a fume, ventilation or hot air duct. Confirm that room ventilation is appropriate with the local authorities. Make sure the maximum air extraction flow rate for the appliances in the room does not exceed 4Pa (0.04 mbar).The room must have adequate ventilation if an extractor hood is used simultaneously with appliances that run on gas or other fuels.
-
Page 8: Operation Instructions
Operation Instructions Notice Before Use Watch the video clip Warning: the hood may stop working during an electrostatic discharge (e. g. lightning). This involves no risk of damage. Switch off the electricity supply to the hood and power on after one minute. Do not allow the hood to be used by children or persons with reduced (physical, sensory or mental) capabilities or lack of experience and knowledge, unless they have been given instruction concerning use of the appliance by a person responsible for... - Page 9 Operation Instructions Control Panel The different control panels are described below. Check the panel model installed on your hood and see the figure indicated in each case.
- Page 10 Operation Instructions Panel With Sliding Switch (Fig. PI) Extractor fan speed - positions: OFF, speed 1, 2 and 3 Extractor fan operating control pilot light. Lighting on and off switch. Panel With Electronic Button (Fig. P2) Lighting on and off. Lighting control indicator.
- Page 11 Operation Instructions P.11...
- Page 12 Operation Instructions Four-Speed Panel - Digital Display (Fig. P3) Lighting on and off. Extractor fan on and off. Decrease extractor fan speed. Extractor fan speed display panel. Increase extractor fan speed. Enable extractor fan turbo speed. Enable and disable extractor fan timer. Timer: the extractor fan works for 5 minutes at the current speed and another 5 minutes at each of the lower speeds until it stops and the lighting switches off.
- Page 13 Operation Instructions Sliding Touch Panel (Fig. P6) Extractor fan on and off. Sliding touch panel for extractor fan speed control. Also used in combination with the lighting button. In panels with TURBO (i) button, Turbo speed only will work for 5 minutes, once it runs out, the speed will decrease to 9th speed.
-
Page 14: Care & Maintenance
Care & Maintenance P.14... - Page 15 Care & Maintenance Hood Maintenance Watch the video clip Warning: always switch off the electricity supply before carrying out maintenance work on the hood. In the event of a fault, contact an official distributor or authorized dealer. Exterior cleaning: use non-corrosive, liquid detergent and avoid the use of abrasive cleaning products.
-
Page 16: Technical Specifications
Technical Specifications Model GPR-GY900L Voltage/ Frequency 220-240 V / 50 Hz Power (MAX) 133.5W Lighting 3.5W Sound Level 67.0 dB (MAX) 1200 m Exhaust Flow Dimensions (H)845/1160 (W)900 (D)290 mm Exhaust Outlet Diameter Ø125mm/5", Ø152mm/6" Net Weight 22 kg Specifications are subject to change without prior notice. - Page 17 目錄 安裝 操作說明 清潔與保養 技術規格 保用條款 尊敬的用戶: 感謝您購買我們的抽油煙機產品。為了達到最佳的安裝、使用及保養效果, 請您仔細閱讀本使用說明書。 P.17...
- Page 18 安裝 P.18...
- Page 19 安裝 P.19...
- Page 20 安裝 P.20...
- Page 21 安裝 安裝前注意事項 注意:請參考您當地有關油煙排放標準的規定。請勿將抽油煙機與其他排煙管道、 通風管道或熱風管道連接。請向當地權威機構確認室內通風條件是否適合安裝。請 確保室內家用電器的最大排氣風壓率不超過 4 帕(0.04 毫巴)。如抽油煙機需與 其他燃氣設備一同使用,必須保證室內通風條件充分。必須通過其他燃氣設備的排 煙管道排放空氣。必須遵照有關排氣標準的規定。 請使用最小直徑 I25/5" 或 152/6"、PVC 材質的硬塑膠管作為室外排煙管。以上要 求不適用於無排煙系統的抽油煙機(具備帶活性炭過濾網的重複循環系統)。 請遵照圖例中的說明和圖1至圖16中的圖示安裝抽油煙機。 燃氣灶與抽油煙機之間的距離請遵照廚房電器生產商的指示。 僅適用於廚房燃氣灶:燃氣灶與抽油煙機的最小距離必須至少為 65 厘米。 試運行抽油煙機 注意事項:運行抽油煙機前,請先關閉供電電源,檢查供電電壓與電流是否符合抽 油煙機銘牌上所示規定。 如抽油煙機帶有插頭,請遵照適用法規將插頭連接至鄰近區域內的電源插座。 如抽油煙機不帶有插頭,請遵照當地法規將其直接連接至具斷路器斷連保護的 電源。 P.21...
- Page 22 操作說明 使用前注意事項 注意事項:抽油煙機可能會在靜電放電時停止工作(如閃電時)。這不會造成抽油 煙機的損壞。此時,請關閉電源開關,在一分鐘後重新打開電源開關。 請勿讓兒童、障礙人士(包括生理、感官、心理)或缺乏知識經驗者使用,除非有 人在旁指導,保證其安全使用抽油煙機。 應注意照看兒童,避免兒童玩弄設備。 為避免火災危險,請定期清洗金屬過濾網以及長期積聚熱油的抽油煙機控制台。請 勿在抽油煙機下方直接燒烤食物。 若發現抽油煙機出現損壞或瑕疵,請勿使用。請聯繫本公司維修部或授權經銷商。 在使用燃氣灶時,相鄰零部件可能會過熱。 P.22...
- Page 23 操作說明 控制面板 觀 看操 作 視 頻 以下內容包括不同的控制面板。查看您抽油煙機上安裝的面板 型號,並參考相應圖示。 P.23...
- Page 24 操作說明 帶滑動開關的控制面板(圖示PI) 1. 風機轉速鍵︰關閉、風速1、2和3。 2. 風機操作控制指示燈。 3. 照明燈開關鍵。 帶電子按鍵的控制面板(圖示P2) 1. 照明燈開關鍵。 2. 照明燈操作控制指示燈。 3. 風機轉速鍵︰風速1、2和3。按兩次風速鍵可關閉風機。加速檔 ( ) 僅僅能 工作 5分鐘,一旦超過5分鐘,油煙機將自動退回到第二檔。 4. 風機操作控制指示燈。 定時器:按住所選風速持續兩秒鐘,直到顯示屏閃爍。風機會先以當前風速工作5 分鐘再逐漸降至每一低速檔分別工作5分鐘,直到自動停止工作。 取消定時器:按一下所選風速鍵。 P.24...
- Page 25 操作說明 P.25...
- Page 26 操作說明 四檔風速控制面板 數字顯示屏(圖示P3) 1. 照明燈開關鍵。 2. 風機開關鍵。 3. 風機減速鍵。 4. 風機轉速顯示屏。 5. 風機加速鍵。 6. 風機渦輪加速鍵。 7. 風機定時器開關鍵。 定時器:風機會先以當前風速工作5分鐘,再逐漸降至每一低速檔分別工作5分鐘, 直到自動停止工作,照明燈自動關閉。 五鍵式控制面板(圖示P4) 1. 風機操作控制指示燈。 2. 照明燈開關。 3. 風機關閉鍵。 4. 風機轉速鍵:風速1、2和3。 輕觸式控制面板〔圖示P5) 1. 濾油網清潔的警告顯示屏/按鍵。在需要更換濾油網時發出警告一一清潔或更換 濾油網後,按下按鍵關閉警告。 2. 風機定時器開關鍵。 3. 照明燈開關鍵。按住照明燈開關鍵可調節照明燈亮度。 4. 風機開關鍵。 5. 風機轉速鍵:風速 1、2 和 3/4。按兩次風速按鍵可關閉風機。加速檔(T)僅僅 能工作5分鐘,一旦超過5分鐘,油煙機將自動退回到第二檔。...
- Page 27 操作說明 滑動輕觸式控制面板(圖示 P6) 1. 風機開關鍵。 2. 控制風機轉速的滑動輕觸式面板。也可與照明燈開關鍵搭配操作。按兩次風速 按鍵可關閉風機。加速檔僅僅能工作5分鐘,一旦超過5分鐘,抽油煙機將自動 退回到第二檔。 3. 照明燈開關鍵。按下按鍵,當其閃爍時,通過操作滑動輕觸式面板調節 照明燈亮度。 4. 風機定時器開關鍵。 5. 濾油網清潔警告顯示屏/按鍵。在需要更換濾油網時發出警告——清潔或更換濾 油網後,按下按鍵關閉警告。 定時器:風機會先以當前風速工作 2 分鐘,再逐漸降至每一低速檔分別工作 2 分 鐘,直到自動停止工作,照明燈自動關閉。 觸摸式控制面板 TC5V(圖示 P7) 1. 風機開關鍵。 2. 風機轉速鍵:風速 SILENT、1、2、3 和 TURBO。按兩次風速按鍵可關閉風 機。加速檔僅僅能工作5分鐘,一旦超過5分鐘,油煙機將自動退回到第二檔。 加速檔僅僅能工作5分鐘,一旦超過5分鐘,油煙機將自動退回到第三檔。 3. 風機定時器開關鍵。 4. 照明燈開關鍵。 5. 降低燈強度按鍵。 6. 增加燈強度按鍵。 濾油網清潔警告顯示屏/按鍵。在需要更換濾油網時發出警告——清潔或更換濾油網 後,按下按鍵關閉警告。 定時器:風機會先以當前風速工作 5分鐘,再逐漸降至每一低速檔分別工作 5 分 鐘,直到自動停止工作。 P.27...
- Page 28 清潔與保養 P.28...
- Page 29 清潔與保養 保養抽油煙機 觀看 操 作 視 頻 注意事項:保養抽油煙機前,請務必先關閉供電電源。若發生故 障,請聯繫本公司分部或授權經銷商。 外部清潔:請使用無腐蝕性的液體清潔劑,請勿使用含研磨劑的 清潔產品。 濾油網:為了防止火災,請每月徹底清洗濾油網,或每當顯示屏指示燈顯示清潔 警告時清洗。清洗時,拆下濾油網,用熱水與清潔劑清洗。如使用洗碗機清洗, 請垂直放置濾油網,避免固體沉澱物殘留在濾網上。切勿磨光。 活性炭過濾網:每 3 個月進行更換。(另購配件) 重要說明:如抽油煙機每天使用超過 2 小時,請增加過濾網清洗/更換的頻率。 請務必使用由原廠生產的原裝過濾網。 更換燈泡 (圖示A-B) 注意事項:更換燈泡前,請先關閉供電電源,等燈泡冷卻後再進行更換。 重要說明:請參照抽油煙機銘牌上的規定更換新燈泡。 更換鹵素燈泡時,請使用帶鋁製燈罩的燈泡。請勿使用二向色燈泡,以免燙傷。 抽油煙機所配備的燈泡只應在電機運行過程使用,不應該長時間開啟或作為日常照 明燈具使用。 P.29...
- Page 30 技術規格 GPR-GY900L 型 號 220-240 V / 50 Hz 電 壓 / 頻率 133.5W 功 率 (最高) 3.5W 照 明燈 67.0 dB 噪 音 1200 m (最高) 排風量 (H)845/1160 (W)900 (D)290 mm 產品尺寸 Ø125mm/5", Ø152mm/6" 排風口直徑 22 kg 淨重 產 品 規 格及 設計如有變 更,恕不另行通知。...
-
Page 31: Warranty Terms & Conditions
- the serial number is modified, damaged or removed from the product. - 機身編號被擅自塗改、破壞或刪除。 4. German Pool will, at its discretion, repair or replace any 4. 總代理有權選擇維修或更換配件或其損壞部份。 defective part. 5. This warranty will be void if there is any transfer of 5. - Page 32 Fax:+86 757 2980 8318 HONG KONG TOP BRAND TEN YEAR ACHIEVEMENT AWARD © All rights reserved. Copying, reproducing or using the contents of this manual is not allowed without prior authorization from German Pool, violators will be prosecuted. www.germanpool.com GPR-GY900L-M-20(3)
Need help?
Do you have a question about the GPR-GY900L and is the answer not in the manual?
Questions and answers