Table of Contents
Advertisement
Quick Links
Advertisement
Table of Contents

Related Manuals for Scilogex SCI100-Pro


Summary of Contents for Scilogex SCI100-Pro
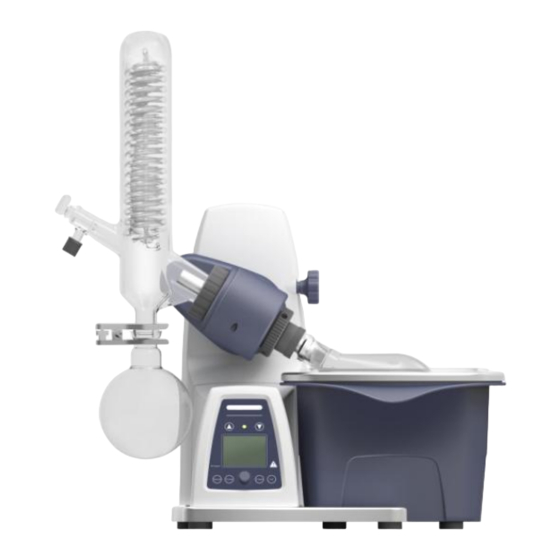
- Page 1 Rotary Evaporator User Manual LCD Digital Rotary Evaporator Please read the User Manual carefully before use, and follow all operating and safety instructions! Technical specifications and outline are subject to change without prior notice. Ver.20180717...
-
Page 2: Table Of Contents
Contents Preface ................. 1 Service ................. 1 Warranty ................1 Safety Instructions ............2 Proper Use ..............5 Inspection ..............6 3.1 Receiving Inspection ..........6 3.2 Listing of Items ............. 6 Control and Display ............. 6 4.1 Control elements ............ 6 4.2 Display.............. -
Page 3: Preface
Rotary Evaporator Preface Warranty Welcome to the “Rotary Evaporator User Manual”. Users should read this Manual carefully, follow the instructions This instrument is warranted to be free from defects in and procedures, and be aware of all the cautions when using materials and workmanship under normal use and service, this instrument. -
Page 4: Safety Instructions
Rotary Evaporator • Ensure that there is sufficient space above the device 1. Safety Instructions as the glass assembly may exceed the height of the • device. Read the operating instructions in full before starting • up and follow the safety instructions. Prior to each use, always check the device, accessories •... - Page 5 Rotary Evaporator • of the distillation equipment. The cooler must work Do not operate the appliance in explosive atmospheres, with hazardous substances or under water. properly. Monitor the coolant flow rate at the cooler • outlet. Only process media that will not react dangerously to •...
- Page 6 Rotary Evaporator for stress relief. mechanism to lift the evaporator piston out of the • heating bath. Evacuate the danger zone and warn those CAUTION! Avoid peroxide formation. Organic peroxides can accumulate in distillation and exhaust in the surrounding area! •...
-
Page 7: Proper Use
Rotary Evaporator supply network if the device power switch is off or the 2. Proper Use plug is pulled out. The instrument is designed for distilling in schools, • The socket for the mains cord must be easily laboratories or factories. Together with the accessories accessible. -
Page 8: Inspection
Rotary Evaporator 3. Inspection 4. Control and Display 3.1 Receiving Inspection 4.1 Control elements Unpack the equipment carefully and check for any damages which may have arisen during transport. Please contact Motor manufacturer/supplier for technical support. Condenser Note: Evaporating flask 1. - Page 9 Rotary Evaporator Items Descriptions LED power Push the key and then rotate control knob Speed key to set the rated speed in the range from 20 Lift-up key Lift-down key Speed to 280. Push the key and then rotate control knob to set the rated temperature in the range LCD display Temperature...
-
Page 10: Display
Rotary Evaporator the key the lift stops and remains in that Display when the rotating function is position. switched ON. LCD display LCD displays the real working state. Display when the heating function is Temp switched ON. Power ON, LED power flash. When the LED power unit running, LED power is lit. -
Page 11: Installation And Operation
Rotary Evaporator Figure 7 switched ON, displaying remaining time. The same way, press the temperature key for 3s to change Interval display Displaying the “Int” target value. the heating mode to water, display as Figure 8. area Table 3 Switch the heating mode: Turn on the heating bath, default heating mode is water. - Page 12 Rotary Evaporator Figure 6 Figure 7 CAUTION! Loosen transportation lock (Figure 7). • • Hold the lift with your hand on the height position and Remove the clamping device for the angle setting of remove the thumb screw on the back of the appliance the rotation drive on the right side of the lift by (a).
- Page 13 Rotary Evaporator Figure 8 Figure 9 • Note: Prior to commissioning, hand-tighten the plastic Open the locking device on the drive head by turning it 60° counter clockwise (e), (Figure 9). screw nut (f) left-aligned. • Feed the steam pipe in until it stops. •...
- Page 14 Rotary Evaporator Figure 11 Figure 12 • Installing condenser (g) (Figure 12 and Figure 13). Load the cap nut (h) and locking spring (i) to condenser in turn. Tighten the cap nut hand-screwed (h). Start the device at 200 rpm for 2 min. Then tighten the cap nut firmly.
-
Page 15: Operation
Rotary Evaporator • Connecting tubes (Figure 15). Vacuum tube Cooling water Cooling water Figure 14 Figure 15 5.2 Operation • Make sure the required operating voltage and power supply voltage match. • Ensure the socket must be properly grounded. • Plug in the power cable,ensure the power is on and begin initializing. -
Page 16: Faults
Rotary Evaporator • Press Lift-up/Lift-down key, the lift goes up/down. 6. Faults Release Lift-up/Lift-down key, the lift stops. • Instruments can’t be power ON • Push the speed key and then rotate control knob to set - Check whether the power line is unplugged the rated speed. -
Page 17: Maintenance And Cleaning
Rotary Evaporator 7. Maintenance and Cleaning cleanser. • If you require maintenance service, must be • Proper maintenance can keep instruments working cleaned the instrument in advance to avoid properly and lengthen its lifetime. pollution of hazardous substances, and to •... -
Page 18: Specifications
Rotary Evaporator EN 61010-1 Operation of this equipment in a residential area is likely to UL 3101-1 cause harmful interference in which case the user will be CAN/CSA C22.2(1010-1) required to correct the interference at his own expense. EN 61010-2-10 Construction in accordance with the following EMC standards: EN 61326-1... - Page 19 Rotary Evaporator Table 4 External rotor brushless Motor motor Speed Range [rpm] 20-280 Speed Display Reversible Direction Rotation Temperature Range [° C] RT -180 Heat Control Accuracy [° C] ± 1 Temperature Display Heat Output [W] 1300 Lift Motor Stroke [mm] Timer [min] 1-999 Overall...
- Page 20 SCILOGEX, LLC 1275 Cromwell Ave. Suite C6 Rocky Hill, CT 06067 USA Tel: +1(860) 436-9221 Fax: +1(860) 436-9745 info@scilogex.com www.scilogex.com...
Need help?
Do you have a question about the SCI100-Pro and is the answer not in the manual?
Questions and answers