Table of Contents
Advertisement
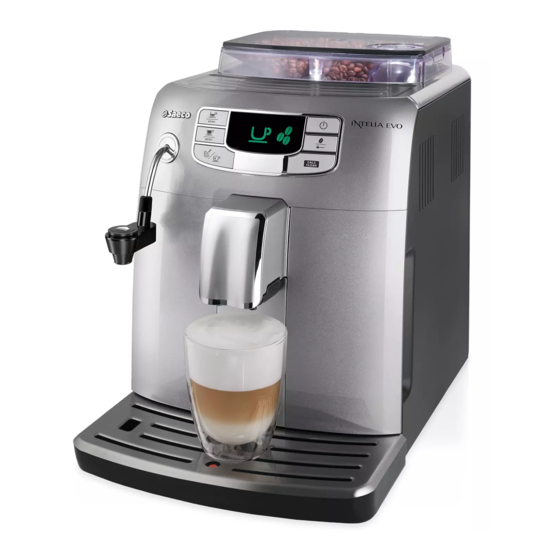
Coffee Machine
Service
General Information
Description
Housing material
Size (w x h x d)
Weight
Power Cord length
Control panel
Water tank
Coffee bean hopper capacity
Coffee grounds drawer capacity
Pump pressure
Boiler
Safety devices
All parts of this document are the property of Saeco International Group.
All rights reserved. This document and all the information herein is provided without liability deriving from any errors or omissions. Furthermore, no part may be reproduced, used or
collected, except where express authorisation has been provided in writing or through a contractual agreement.
Published by Saeco International Group
00014
Service Manual
Value
Thermoplastic material
256mm x 340mm x 440 mm (data may vary depending on the model)
9.0 kg (data may vary depending on the model)
1.2m
Front panel
1.5 litres
300 g
10
15 bar
Stainless steel type
Thermal fuse
Subject to modification
Intelia - Intuita
Rev. 07 MAY 2016
2012-Sept-07
EN 4219 400
Advertisement
Table of Contents

Related Manuals for Philips Saeco INTELIA


Summary of Contents for Philips Saeco INTELIA
- Page 1 Coffee Machine Intelia - Intuita Service Service Manual Rev. 07 MAY 2016 General Information Description Value Housing material Thermoplastic material Size (w x h x d) 256mm x 340mm x 440 mm (data may vary depending on the model) Weight 9.0 kg (data may vary depending on the model) Power Cord length 1.2m...
-
Page 2: Table Of Contents
INTELIA-INTUITA Table of contents Page Table of contents Page Service mode Introduction 5.1.1. Intelia Cappuccino test mode 1.1. Documentation required 5.1.2. Intelia Focus and Class Test mode 1.2. Tools and equipment required 5.1.3. Intelia Latte test mode 1.3. Material 5.1.4 Intuita test mode 1.4. - Page 3 INTELIA-INTUITA CHAPTER 1 INTRODUCTION...
-
Page 4: Introduction
INTELIA-INTUITA 01 INTRODUCTION Documentation required The following documentation is needed for repair procedures: • Instruction booklet for specific model • Technical documentation for specific model (diagrams, exploded view, sympton cure and service manual) Tools and equipment required As well as the standard equipment, the following is required: Qty. -
Page 5: Service Policy
INTELIA-INTUITA 01 INTRODUCTION Water Flowmeter Two-way solenoid valve Two-way solenoid valve Flowmeter Image 1 Hot water /steam From this point circuit in pressure From this point circuit High temperaure Steam and hot water Steam pipe Water tank Water tank Pump Pump Brewing Unit Brewing Unit... -
Page 6: External Machine Parts
INTELIA-INTUITA 01 INTRODUCTION Coffee bean hopper 1.6.1 External machine parts with lid Intelia Cappuccino Grinding adjustment Coffee dispenser Water dispenser (removable) Service hatch Drip tray+grille Pre-ground coffee Brewing unit compartment Dreg drawer Control panel Milk carafe Power cable socket and Water tank main switch Drip tray release... - Page 7 INTELIA-INTUITA 01 INTRODUCTION Coffee bean Intelia Class e Focus Hot water/steam hopper with lid dispensing pipe Pannarello (Intelia Focus) Service hatch Cappuccino valve (Intelia Class) Power cable socket and main switch Drip tray+grille Pre-ground coffee Brewing unit compartment Dreg drawer Control panel Coffee...
-
Page 8: Internal Machine Parts
INTELIA-INTUITA 01 INTRODUCTION 1.6.2 Internal machine parts Coffee grinder Grinding adjustment insert 2-way solenoid valve KYB Interface card Power board Steam pipe Safety valve Boiler cover and boiler Power cable connector Flow-meter Boiler pin Pump New location solenoid valve... -
Page 9: Technical Specifications
INTELIA-INTUITA CHAPTER 2 TECHNICAL SPECIFICATIONS... - Page 10 INTELIA-INTUITA 02 TECHNICAL SPECIFICATIONS 2.1. Technical specifications Power supply and output: 240 V~ 50 Hz 1850 W - 230 V~ 50/60 Hz 1850 W 120 V~ 60 Hz 1500 W - 100 V~ 50/60 Hz 1300 W Temperature monitoring: (NTC) variable resistor sensor - transmits the value to the electronic card Safety system: 2 thermostats at 190°C one shot...
-
Page 11: Specification For The Measurement Of The Coffee Products
INTELIA-INTUITA 02 TECHNICAL SPECIFICATIONS 2.2. Specification for the measurement of the coffee products temperature. The temperature is influenced by the flow from the dispenser and stratification of temperatures in the glass. In order to consider these phenomena and to introduce measures that allow comparisons in controlled conditions, below guidelines must be followed: Conditions: a) Water temperature in tank: 23°C (+/-2°C). -
Page 12: Specification For The Measurement Of The Milk Products
INTELIA-INTUITA 02 TECHNICAL SPECIFICATIONS 2.2.1. Specification for the measurement of the Milk products temperature. Milk evaluation To carry out the test, a partially skimmed UHT milk with a percentage of grease between 1.5-1.8% at a refrigerator temperature Trefr. (between 4 to 10°C) must be used. The milk product must be checked on a beaker of 250 ml of capability and with an inner diameter of 70mm, brewing 100gr of product. - Page 13 INTELIA-INTUITA 02 TECHNICAL SPECIFICATIONS How to measure the milk cream. The temperature (Trefr or Tamb) of the milk doesn’t affect as much the test result on measuring the milk cream; by convection is assumed to always use milk at refrigerator temperature Trefr.. Manual systems (Pannarello) Pour 100cc.
-
Page 14: Machine Parameters And Performance
INTELIA-INTUITA 02 TECHNICAL SPECIFICATIONS 2.3. Machine parameters and performance Minimum Default Maximum Programm. by PRODUCT User quantity quantity quantity Production / QUANTITY programmable (Puls.) (Puls.) (Puls.) Service Espresso Long coffee Pre-ground Hot water Continues until the water supply has been exhausted (capacitive sensor) Steam pannarello Continues until the water supply has been exhausted (capacitive sensor) - Page 15 INTELIA-INTUITA 02 TECHNICAL SPECIFICATIONS DREG DRAWER Description and values 5 sec. Time-out for dreg drawer Dreg emptying alarm, if the dreg drawer is Reset dreg counter removed for more than 5 seconds. STANDBY Description and values Inlet time (default) 30 minutes Inlet time programmed by Production/Serv- Boiler temperature during Standby Boiler OFF...
-
Page 16: Brief Instructions
INTELIA-INTUITA CHAPTER 3 BRIEF INSTRUCTIONS... -
Page 17: Intelia Cappuccino Customer And Programming Menu
INTELIA-INTUITA 03 BRIEF INSTRUCTIONS 3.1. Intelia Cappuccino customer and programming menu ON/OFF button espresso dispensing Aroma button / Pre-ground button button Long espresso button MENU dispensing button special beverages cappuccino dispensing button selection button Machine ready signals (GREEN) Machine at correct temperature Machine dispensing - for coffee bean dispensing 1 espresso... - Page 18 INTELIA-INTUITA 03 BRIEF INSTRUCTIONS Alarm signals (RED) Insert the dreg drawer. Close the service door. No beans inside the coffee Empty the dreg drawer and the drip container. tray. After filling the container, the cycle can be restarted. The Brewing Unit must be Fill water tank.
-
Page 19: Intelia Latte Customer And Programming Menu
INTELIA-INTUITA 03 BRIEF INSTRUCTIONS 3.2. Intelia Latte customer and programming menu Espresso coffee brew Latte Macchiato brew button button Long espresso brew Display Cappuccino brew button button “Aroma” - Pre-ground Hot Milk brew button coffee button SON/OFF button “MENU” button Special beverages selection button Ready signals (Green Colour) - Page 20 INTELIA-INTUITA 03 BRIEF INSTRUCTIONS The machine is programming Insert the milk carafe and press the amount of milk to be the “ “ button to start the dispensed in order to prepare brewing and save. a Latte Macchiato. Press “ “...
- Page 21 INTELIA-INTUITA 03 BRIEF INSTRUCTIONS Warning signals (Read Colour) Insert the coffee grounds Close the service door drawer. Empty the coffee grounds No coffee beans in the coffee drawer liquid bean hopper. After refilling recovery tray. the hopper, the cycle can be restarted.
-
Page 22: Intelia Focus And Class Customer And Programming Menu
INTELIA-INTUITA 03 BRIEF INSTRUCTIONS 3.3. Intelia Focus and Class customer and programming menu ON/OFF button espresso dispensing button Aroma / Pre-ground button Long espresso dispensing button Descaling button Hot water/steam (Focus) selection button Machine ready signals (GREEN) Machine at correct temperature Machine in phase for dispensing - for coffee bean dispensing 1 cup of espresso... - Page 23 INTELIA-INTUITA 03 BRIEF INSTRUCTIONS Alarm signals (RED) Insert the dreg drawer. Close the service door. No beans inside the coffee Empty the dreg drawer and the container. drip tray. After filling the container, the cycle can be restarted. The Brewing Unit must be Fill water tank.
-
Page 24: Intuita Customer And Programming Menu
INTELIA-INTUITA 03 BRIEF INSTRUCTIONS 3.4. Intuita customer and programming menu “Double coffee” light “Warning” light “No coffee” light “Coffee grounds “No water” light drawer” light Cappuccino brewing / Steam Hot water dispensing button dispensing button ON/OFF button Descaling button Espresso coffee brew button Long espresso brew button “Aroma”... - Page 25 INTELIA-INTUITA 03 BRIEF INSTRUCTIONS Alarm signals BLINKING BLINKING Insert the coff ee grounds Prime the circuit. drawer. BLINKING FAST BLINKING Close the service door. The Brew Empty the coffee grounds Group must be inserted into the drawer and the liquid recovery machine.
-
Page 26: Operation, Cleaning And Maintenance
INTELIA-INTUITA 03 BRIEF INSTRUCTIONS 3.5. Operation, cleaning and maintenance Operating the machine Fill water tank Fill the coffee bean hopper Switch on the appliance Press the button to start the appliance Heating When the heating phase begins, wait for it to finish Rinse Carry out a rinse cycle for the internal circuits Machine ready... -
Page 27: Operating Logic
INTELIA-INTUITA CHAPTER 4 OPERATING LOGIC... -
Page 28: Water Circuit
INTELIA-INTUITA 04 OPERATING LOGIC 4.1. Water circuit Intelia Cappuccino UP TO S/N TU901335143351 KEEP FOR 120 volt... - Page 29 INTELIA-INTUITA 04 OPERATING LOGIC Intelia Cappuccino FROM S/N TU901335143352 ONLY 230v...
- Page 30 INTELIA-INTUITA 04 OPERATING LOGIC Intelia Focus e Class-Intuita...
-
Page 31: Coffee Cycle
INTELIA-INTUITA 04 OPERATING LOGIC 4.2. Coffee cycle Main switch ON START STOP Time Coffee grinder Pulses (Dosage) Heating approx. 45 sec. Pump Pump operation (flow meter pulses) in accordance with the amount of product selected. Brewing unit gear motor Heating Ready Coffee cycle Status... -
Page 32: Single Microswitch
INTELIA-INTUITA 04 OPERATING LOGIC 4.3. Single microswitch The gear motor is powered by a direct cur- rent motor that engages with the smaller double toothed wheel using a worm screw. The unit is mounted on the axle of the large gear wheel and when a coffee is requested, it moves from the standby position to the dis- pensing position, and then back to the stand-... -
Page 33: Coffee Grinder
INTELIA-INTUITA 04 OPERATING LOGIC 4.5. Coffee grinder The coffee grinder is driven by a direct current motor (1) using a worm screw helicoidal wheel transmission (2). The worm screw (2) drives a plastic gear wheel (3), which turns the lower grinder (4) and the increment pin (5) There are two magnets (6) in the gear wheel;... -
Page 34: Dose Self-Learning (Sas)
INTELIA-INTUITA 04 OPERATING LOGIC 4.7. Dose self-learning (SAS) The aim of this function is to automatically regulate the average dose of ground coffee (SELF- LEARNING); this takes place with an algorithm based on three pieces of data that the machine receives via the card: 1. -
Page 35: Water Level Detection (Water Tank)
INTELIA-INTUITA 04 OPERATING LOGIC 4.8. Water level detection (water tank) “Water low” message (water reserve) Function: The water level is monitored by a capacitative sensor, located one Water tank third of the way up the water tank wall. If the electronics assembly detects, by means of the sensor, that the amount of water in the tank has dropped below the above mentioned level, a water reserve remains available for Sensor... -
Page 36: Water Filter
INTELIA-INTUITA 04 OPERATING LOGIC 4.10. Water filter Water filter Function: • Reduced limescale deposits which take longer to form. • Improved water quality. • Improved taste due to the ideal water hardness. Life span / descaling performance: • - 10 ° dH •... -
Page 37: Service Mode
INTELIA-INTUITA CHAPTER 5 SERVICE MODE... -
Page 38: Intelia Cappuccino Test Mode
INTELIA-INTUITA 05 SERVICE MODE 5.1.1. Intelia Cappuccino test mode To enter Test Mode 1. Hold down the buttons Espresso and Menu. 2. Turn on the main switch at the rear of the machine Entry into Test Mode results in a screen divided into sections, as illustrated in the diagram below. Firmware Software version Shows the version of the firmware loaded and the internal checksum (it gives univocal traceability) - Page 39 INTELIA-INTUITA 05 SERVICE MODE Close the side door (the dreg drawer must already be in position) The DOOR indicator must change from “N” to “Y” ERROR condition: If the indication does not change, check the Microswitch on the hatch and relative wiring (JP14), make sure that the dreg drawer is correctly in position.
- Page 40 INTELIA-INTUITA 05 SERVICE MODE Press the ESPRESSO button to move the unit to Work position. When the unit is in position, the WORK indication changes from “N” to “Y”, the absorption current must be less than 200mA without the brewing unit on, and less than 300mA with the brewing unit on.
- Page 41 INTELIA-INTUITA 05 SERVICE MODE Operational check - solenoid valves and pump Initial Status If the following screen appears it means that the dreg drawer is not correctly inserted, or that the side door is not completely closed. The screen will disappear only after the drawer has been inserted or the door closed. Press the ESPRESSO button to activate solenoid valve EV1 (2-way, normally closed).
- Page 42 INTELIA-INTUITA 05 SERVICE MODE ERROR: If the number remains 0, the display turns red, and the motor is run- ning, the problem lies in the Hall sensors, or their wiring, or in the Control Board/Power Board input (JP2). If the motor does not run, the problem may lie in the chain (JP8), the coffee grinder wiring or the actual coffee grinder.
-
Page 43: Intelia Focus And Class Test Mode
INTELIA-INTUITA 05 SERVICE MODE 5.1.2. Intelia Focus and Class Test mode To enter Test Mode 1. Hold down the Espresso and Menu buttons. 2. Switch on the main switch at the back of the machine. Entry into Test Mode results in a screen divided into sections, as illustrated in the diagram below. Firmware Software version Shows the version of the firmware loaded for Focus and Class. - Page 44 INTELIA-INTUITA 05 SERVICE MODE Insert grounds drawer The DREG indicator must change from “N” to “Y” ERROR condition: If the indication does not change, check the microswitch on the dreg drawer and relative wiring (JP16). Close the side hatch (the dreg drawer must be inserted) The DOOR indicator must change from “N”...
- Page 45 INTELIA-INTUITA 05 SERVICE MODE Press the espresso button to move the brewing unit to the “HOME” position When the unit reaches the HOME position the indicator changes from “N” to “Y”, the absorbed current, without the brewing unit, must be less than 200, and with the brewing unit less than 300 mA ERROR condition: The HOME indicator always stays on “N”...
- Page 46 INTELIA-INTUITA 05 SERVICE MODE Press STAND_BY “ ” to move to the next screen Operational check - coffee grinder and boiler Initial Status Press the aroma button to activate the coffee grinder The coffee grinder starts to spin and the number of pulses is indicated by the number circled in red, the other numbers have no significance for this test.
- Page 47 INTELIA-INTUITA 05 SERVICE MODE SteamOut To enter Test Mode 1. Hold down the Espresso and Menu buttons 2. Switch on the main switch at the back of the machine This procedure is carried out whenever you need to completely empty the residual water from the boiler.
- Page 48 INTELIA-INTUITA 05 SERVICE MODE 5.1.3. Test Mode Intelia latte To enter Test Mode A) Hold down the Espresso and Milk buttons. B) Switch on the main switch at the back of the machine. LATTE ESPRESSO MACCHIATO LONG COFFEE CAPPUCCINO AROMA MILK SELECTION MENU...
- Page 49 INTELIA-INTUITA 05 SERVICE MODE Operational check - microswitches and sensors Initial status If you insert a full drip tray the TANK-H20 indicator must change from “N” to “Y”. ERROR condition: If the indication does not change, check the capacitive sensor and relative wir- ing (JP23). Insert grounds drawer The DREG indicator must change from “N”...
- Page 50 INTELIA-INTUITA 05 SERVICE MODE Operational check – brewing unit Initial status IMPORTANT: This check can only be carried out with the dreg drawer in and the side hatch closed Press the espresso button to move the brewing unit to the “WORK” position When the unit is in position, the WORK indication changes from “N” to “Y”, the absorption current must be less than 200mA without the brewing unit on, and less than 300mA with the brewing unit on.
- Page 51 INTELIA-INTUITA 05 SERVICE MODE Operational check - solenoid valve and pump Initial status If the dreg drawer is in position and the side hatch closed, the EV cannot be done. If it is not in the right position, a warning message is shown on the display, which turns yellow. Press the espresso button to activate the solenoid valve The indication next to EV1 changes from “OFF”...
- Page 52 INTELIA-INTUITA 05 SERVICE MODE Operational check - coffee grinder and boiler Initial Status Press the aroma button to activate the coffee grinder The coffee grinder starts to spin and the number of pulses is indicated by the number circled in red, the other numbers have no significance for this test. ERROR: If the number remains 0, the display changes to red, and the motor runs, the problem lies in the Hall sensors, or their wiring, or in the CPU/POWER input...
- Page 53 INTELIA-INTUITA 05 SERVICE MODE 5.1.4. Intuita To enter Test Mode The machine enters in test mode by pushing the ESPRESSO and COFFEE buttons and then turn- ing ON the AC power. As long as the buttons are pressed the machine shows LED Double Service flashing. When the buttons are released the machine passes to the first level of the test.
- Page 54 INTELIA-INTUITA 05 SERVICE MODE The user can switch the level by pressing the ON/OFF button, the machine shows the level of the test: a) Level 1: LED No Water b) Level 2: LED No Water, LED Error c) Level 3: LED No Water, LED Error, LED Double d) Level 4 : LED No Water, LED Error, LED Double, LED No Beans e) Level 5 : LED No Water, LED Error, LED Double, LED No Beans, LED Dump Box TEST MODE Level 0...
- Page 55 INTELIA-INTUITA 05 SERVICE MODE Level 0 (LED) Description : Verify keyboard LED Action : LED ON/OFF always blink during the test. The others LED blink once, then only one LED is ON starting from No Water, Error, Double, No Beans, Dump Box, Calc Clean, Steam, Coffee, Espresso, Hot Water. The sequence is always repeated.
- Page 56 INTELIA-INTUITA 05 SERVICE MODE Level 2 (switch) [LED No Water + Error ON] Description: Verify the security switch connection Action: Mechanical move the switch and verify the relative electrical feedback Start condition (no water tank, no BU, no dump box, door open) All LED are blinking (because every switch is OFF) Closing every switch turns ON the LED Switch...
- Page 57 INTELIA-INTUITA 05 SERVICE MODE Level 4 (Water Circuit) [LED No Water + Error + Double + No Beans ON] Description: Verify the water circuit component: flux meter, pump, electro valve, brewing unit Action: Turn on and off actuators along water and coffee beverage circuit. Start condition (water tank full, BU, dump box, door closed) ON/OFF Hot water...
- Page 58 INTELIA-INTUITA 05 SERVICE MODE Level 5 (Grinder & Heater) [LED No Water + Error + Double + No Beans + Dump Box ON] Description: Verify temperature increase in the heater and grinder rotation Action: Turn on and off actuators Start condition (water tank full, BU, dump box, door close) ON/OFF Hot water Espresso...
-
Page 59: Saeco Service Center - Quick Start Guide
INTELIA-INTUITA 05 SERVICE MODE 5.2. Error codes ERROR DESCRIPTION CODES The coffee grinder is blocked (grinder blades jammed or sensor not reading properly) The brewing unit is blocked in work position (microswitch not released in up position after 3", torque error trying to move down, descent time out exceeded) The brewing unit is blocked in home position (microswitch not released in down position after 3", torque error trying to move up, ascent time... -
Page 60: Servicing And Maintenance
INTELIA-INTUITA CHAPTER 6 SERVICING AND MAINTENANCE... -
Page 61: Repair Flow
Final inspection test 13 Steam out before shipping out, if temperature is below 0° to prevent any demaged due to frozen water. No need for those families Minuto family (all platform); Incanto family new; Pico Baristo; 14 Gran Baristo; Intelia V2; Philips 2000‐2100; Incanto Executive; Moltio family (all platform). Please also check for GDA_113455 Provide precise IRIS code, according dedicated code table for Coffee products. The location code from the part you have worked on MUST be completed always with the part 15 ... - Page 62 Grinder Is the grinder noise normal Steam Steam Does the steam work Hot Water Does the hot water work INTELIA-INTUITA 06 SERVICING AND MAINTENANCE Milk (if applicable) Cappuchino Does the cappuccinatore produce good froth Leakage Leakage 14 Did the product leak during the testing 15 Draining the circuit (in winter) ...
-
Page 63: Disassembly
INTELIA-INTUITA CHAPTER 7 DISASSEMBLY... -
Page 64: Intelia Cappuccino Outer Shell
INTELIA-INTUITA 07 DISASSEMBLY 7.1. Intelia Cappuccino outer Shell Remove the water tank, coffee con- tainer cover, drip tray, dreg drawer, brewing unit, carafe or hot water dispenser. Unscrew the screws shown Lift the top cover. Unscrew the screws shown Slide out the hatch. and remove the finger and slide out the left side protection. -
Page 65: Intellia Class And Focus Outer Shell
INTELIA-INTUITA 07 DISASSEMBLY 7.2. Intellia Class and Focus outer Shell Remove the water tank, coffee con- tainer cover, drip tray, dreg drawer, brewing unit, cappuccino maker or pannarello. Unscrew the marked Raise the top Loosen the screws as illustrated Slide out the hatch. screws and remove cover. -
Page 66: Grinder Blades
INTELIA-INTUITA 07 DISASSEMBLY 7.4. Grinder blades To extract the top support of the appliance, press on the grinding adjustment spindle (A) and turn the support anticlockwise until it unhooks. Turn the grinder blades anticlockwise out of the support. Turn the grinder blades clockwise out of the support. The bayonet connections can be accessed from the rear. -
Page 67: Coffee Grinder Adjustment
INTELIA-INTUITA 07 DISASSEMBLY 7.5. Coffee grinder adjustment The grinding adjustment can be set by the user (only with the coffee grinder in operation) by pressing and turning (only by one click at a time) the insert inside the coffee bean hopper with the aid of the wrench supplied. -
Page 68: Intelia Class And Focus Two-Way Solenoid Valve
INTELIA-INTUITA 07 DISASSEMBLY 7.7. Intelia Class and Focus two-way solenoid valve 1) Loosen the screws highlighted. 2) Remove the card support assem- bly. 3) Loosen the screws holding the solenoid valve to the upper plate. 4) Disconnect all electrical and water circuit connections. -
Page 69: Pump
INTELIA-INTUITA 07 DISASSEMBLY 1) Loosen the screws holding the front cover of the carafe fitting body and release it from its seat 2) Loosen the screws as illustrated 3) Remove carafe presence sensors 4) Remove carafe fitting Teflon pipe 7.10. Pump Disconnect the water circuit connections (A) and electrical connections (B), loosen the safety valve (C) and slide the pump off the brackets (D). -
Page 70: Gear Motor
INTELIA-INTUITA 07 DISASSEMBLY 7.14. Gear motor Unscrew the screws shown Unscrew the screws shown and Lift the top cover. and slide out the left side remove the finger protection. body. Unscrew the screws as illustrated and remove the front panel to Slide out the fork as illustrated. - Page 71 INTELIA-INTUITA 07 DISASSEMBLY Loosen the screws as illustrated and Loosen the screws as illustrated and remove the gear motor cover. remove the boiler pin (A). The following are located inside the compartment pro- tected by the casing: - Electric motor (A) with gears (B) and (C) for trans- mission and timing of the dispenser.
-
Page 72: Boiler
INTELIA-INTUITA 07 DISASSEMBLY 7.15. Boiler Release the boiler cover Unscrew the marked screw and disconnect the and take it off. electrical and water circuit connections. 7.16. Dispenser assembly Loosen the screws as illustrated and remove the front panel to Slide out the fork as illustrated. access the screws which fix the dispenser cover into place. -
Page 73: Control Board And Display
INTELIA-INTUITA 07 DISASSEMBLY Loosen the screws as illustrated and release the insert in the bottom of the body to obtain easy access for valve disassembly Loosen the screws as illustrated, remove the hydraulic connections and take out the valve 7.18. Control board and display Disconnect the electrical connections Loosen the screws as illustrated and unhook the card support. -
Page 74: Fitting And Removing Oetiker Clamps
INTELIA-INTUITA 07 DISASSEMBLY 7.19. Fitting and removing Oetiker clamps 1) Boiler connection. 2) Other connections. Use a suitable pair of pliers to remove the Tighten the clamp as illustrated. clamp (as illustrated). 11/11... -
Page 75: Notes
INTELIA-INTUITA CHAPTER 8 NOTES... - Page 76 INTELIA-INTUITA 08 NOTES...
-
Page 77: Water Circuit Diagram
INTELIA-INTUITA CHAPTER 9 WATER CIRCUIT DIAGRAM... - Page 78 INTELIA-INTUITA 09 WATER CIRCUIT DIAGRAM Intelia Cappuccino UP TO S/N TU901335143351 KEEP FOR 120 volt...
- Page 79 INTELIA-INTUITA 09 WATER CIRCUIT DIAGRAM Intelia Cappuccino FROM S/N TU901335143352 ONLY 230v...
- Page 80 INTELIA-INTUITA 09 WATER CIRCUIT DIAGRAM Intelia Focus - Class - Latte and Intuita...
- Page 81 INTELIA-INTUITA CHAPTER 10 ELECTRICAL DIAGRAM...
- Page 82 INTELIA-INTUITA 10 ELECTRICAL DIAGRAM Intelia Cappuccino UP TO S/N TU901335143351 KEEP FOR 120 volt...
- Page 83 INTELIA-INTUITA 10 ELECTRICAL DIAGRAM Intelia Cappuccino FROM S/N TU901335143352 ONLY 230v -Intelia Focus - Class - Latte and in- tuita...
Need help?
Do you have a question about the Saeco INTELIA and is the answer not in the manual?
Questions and answers