Table of Contents
Advertisement
Quick Links
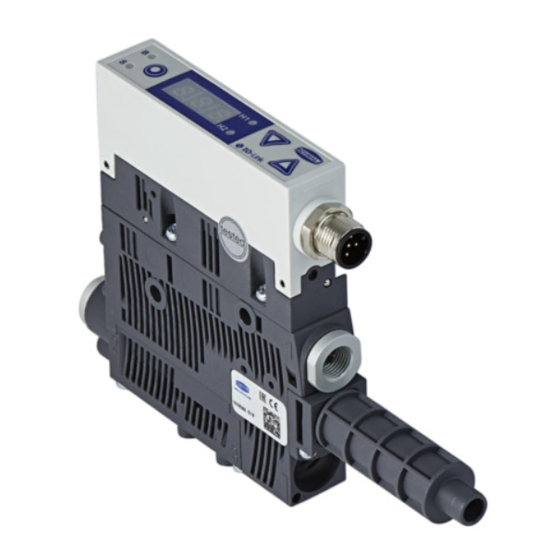
Compact Ejectors SCPSb, SCPS, SCPSi, SCPSt and SCPS(i)-L (One
and Two-Stage Variants)
Maintenance instructions
Note
The Maintenance instructions were originally written in German. Store in a safe place for future reference. Sub-
ject to technical changes without notice. No responsibility is taken for printing or other types of errors.
Published by
© J. Schmalz GmbH, 01/22
This document is protected by copyright. J. Schmalz GmbH retains the rights established thereby. Reproduction of
the contents, in full or in part, is only permitted within the limits of the legal provisions of copyright law. Any mod-
ifications to or abridgments of the document are prohibited without explicit written agreement from
J. Schmalz GmbH.
J. Schmalz GmbH · Johannes-Schmalz-Str. 1 · 72293 Glatten, Germany · T: +49 7443 2403-0
schmalz@schmalz.de
EN-US · 30.30.01.00962 · 01 · 01/22
Advertisement
Table of Contents

Related Manuals for Schmalz SCPSb


Summary of Contents for Schmalz SCPSb
- Page 1 Any mod- ifications to or abridgments of the document are prohibited without explicit written agreement from J. Schmalz GmbH. J. Schmalz GmbH · Johannes-Schmalz-Str. 1 · 72293 Glatten, Germany · T: +49 7443 2403-0 schmalz@schmalz.de EN-US · 30.30.01.00962 · 01 · 01/22...
-
Page 2: Table Of Contents
Contents Contents 1 Important Information ........................... 3 Note on Using this Document ...................... 3 The technical documentation is part of the product ................ 3 Warnings in This Document........................ 3 Symbol.............................. 3 Warranty .............................. 3 2 Maintenance.............................. 4 Safety Instructions .......................... 4 Illustrations ............................ 4 Replacing the Press-In Screens...................... -
Page 3: Important Information
ð Failure to follow the instructions in these Maintenance instructions may result in injuries! ð Schmalz is not liable for damage or malfunctions that result from failure to heed these instructions. If you still have questions after reading the technical documentation, contact Schmalz Service at: www.schmalz.com/services... -
Page 4: Maintenance
These instructions are intended as guidelines for customers replacing certain wearing parts. However, we generally recommend professional maintenance in the plant. This also includes a final test for proper function and a warranty extension of 6 months. 2 Maintenance 2.1 Safety Instructions Maintenance work may only be carried out by qualified personnel. -
Page 5: Replacing The Silencer
2. Press in the new filter screens (1) as far as they will go using a suitable tool or mandrel. 2.4 Replacing the Silencer Heavy infiltration of dust, oil, and so on, may contaminate the silencer (2) and reduce the suction capacity. Clean- ing the silencer is not recommended due to the capillary effect of the porous material. -
Page 6: Changing The Piston
3. The new silencer elements (4) a) 10.02.02.04141 Silencer insert Only with single-stage version: b) 25.03.02.00006 Perforated disk c) 10.07.08.00020 Sealing ring d) 10.02.02.04152 Slide the insulating plate into the ejector body Put on the cover and fasten with two screws – tightening torque 0.7 Nm 2.5 ... - Page 7 3. Carefully lever the two plastic pistons out of the holes in the housing using a small screwdriver. 4. Clean the boreholes with a lint-free cloth. 5. Grease the piston seals of the new piston rods (f) and the guide bushes (1) with pneumatic grease Insert the piston rods (f) in the guide bushes (1) in the correct position f) Piston rod part no.
-
Page 8: Changing The Non-Return Valve
7. Connect the vacuum module (1) and control (2) to- gether and tighten the fastening screws with a tightening torque of 0.7 Nm 2.6 Changing the Non-Return Valve 1. Loosen the four fastening screws of the ejector module. 2. Remove the ejector module (1) and remove the non-return valve or the valve flap and sealing. -
Page 9: Spare And Wearing Parts
4. Connect the ejection module (1) and vacuum mod- ule (2) together and tighten the four fastening screws with a tightening torque of 0.7 Nm. 3 Spare and wearing parts Maintenance work may only be carried out by qualified personnel. 4 WARNING! Risk of injury due to improper maintenance! After performing any maintenance or repair work, check that the system is functioning correctly, particularly the safety features.
Need help?
Do you have a question about the SCPSb and is the answer not in the manual?
Questions and answers