Table of Contents
Advertisement
Quick Links
Advertisement
Table of Contents

Related Manuals for Shark WANDVAC WS632SM Series


Summary of Contents for Shark WANDVAC WS632SM Series
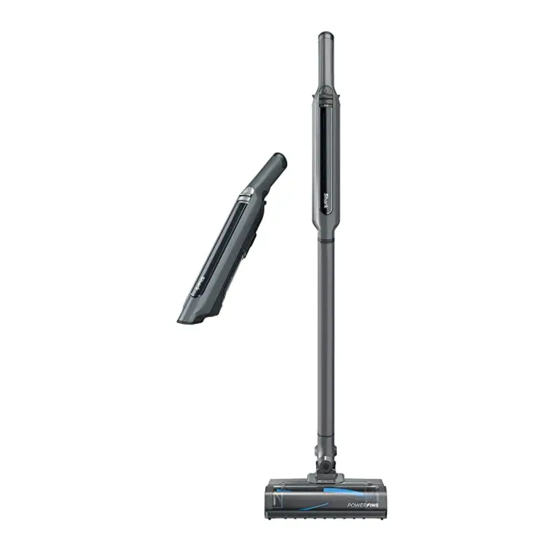
- Page 1 WANDVAC ™ SYSTEM Cordless Handheld Vacuum WS632SM Series OWNER’S GUIDE...
-
Page 2: Important Safety Instructions
® branded filters and This vacuum contains no serviceable parts. accessories. Damage caused by non- Shark filters and accessories may not be Use only as described in this manual. covered by the warranty. DO NOT use the vacuum for any... -
Page 3: Battery Pack
DK012-133090H-B. Use of an incorrect e) Smoking or burning objects (hot charger may result in no charging, and/ coals, cigarette butts, or matches) or unsafe conditions. Use only Shark ® f) Flammable or combustible materials battery XSBT330EU. (lighter fluid, petrol, or kerosene) - Page 4 ASSEMBLY 1. Insert Wand into Nozzle. 3. Make sure the Dock Plate is facing upright. Slide 2. Insert Handheld Vacuum into wand. the Charging Post into the slot on the back of the dock until it clicks into place. For proper operation, ensure all components are 4.
-
Page 5: Li-Ion Battery
LI-ION BATTERY Prior to first use, charge the battery completely. A full charge takes approximately 3.5 hours. RUNTIMES PER FULLY CHARGED BATTERY Visit sharkclean.my and sharkclean.sg online or review the included Quick Start Guide. LED BATTERY POWER AND CHARGING INDICATORS Charging Nearly Full... -
Page 6: Charging And Storage
CHARGING AND STORAGE CHARGER BATTERY Plug the Charger into a wall outlet. To remove the battery from the hand vac or the charging post, press the release tabs on the battery cap and slide out the battery. To reinstall, slide the battery into the compartment in the handle unit it clicks, or into, or into the slot in the dock charging post. - Page 7 CONTROLS POWER BOOST MODE Press the On/Off button on the handle to turn For an added boost in power, press and hold the on power. To turn off power, press the Button at the base of the handle of the handheld button again.
-
Page 8: Cleaning Modes
CLEANING MODES UPRIGHT WITH WAND ABOVE-FLOOR HANDHELD To detach the handheld vacuum from the wand, To clean floors, place foot on floor nozzle and tilt press the buttons on both sides of the handle, and handheld vacuum back. lift the handheld vacuum off the wand. To reattach the handheld vacuum to the wand, NOTE: To remove accessories from the hand vac, press align the nozzle over the top of the wand and slide... -
Page 9: Maintaining Your Vacuum
MAINTAINING YOUR VACUUM EMPTYING THE DUST CUP 1. With the power off, slide the release button 2. Wipe dust screen lightly with cloth to remove forward, and the dust cup will swing open. Tap the dust and dirt. filter screen lightly to knock off dust and debris. CLEANING THE DUST CUP AND FILTERS 1. - Page 10 MAINTAINING YOUR VACUUM CLEANING THE DUST CUP AND FILTERS 1. To deep-clean the dust cup and the cyclone 2. When the dust cup is completely dry, filter, first push the dust cup lid open. Use reinsert the cyclone filter housing. Make the wire handle to lift the cyclone filter sure the wire handle on the filter housing is housing out of the dust cup.
-
Page 11: Checking For Blockages
MAINTAINING YOUR VACUUM CHECKING FOR BLOCKAGES Checking for Blockages in the Handheld Vacuum: 1. Turn off vacuum. 2. Remove the handheld vacuum from the wand. 3. Check all intake openings to the dust cup and remove any debris or blockages. Checking for Blockages in the Wand: 1. - Page 12 MAINTAINING YOUR VACUUM WARNING: To reduce the risk of shock and unintended operation, turn off power and remove the battery before servicing. Vacuum is not picking up debris. No suction or light suction. Third indicator light on hand vacuum is solid yellow.
-
Page 13: Standard Accessories
STANDARD ACCESSORIES Battery Duster Crevice Tool Pet-Multi Tool ADDITIONAL ACCESSORIES AVAILABLE FOR PURCHASE Motorised Pet Tool (included with some models) Second Battery (included with some models) NOTE: Not all accessories come with all units. Please see the Quick Start Guide for your unit's configuration. To order additional accessories, visit sharkclean.my and sharkclean.sg s h a r kc l e a n . - Page 14 • Removal of blockages. If a blockage does occur please refer to the trouble shooting guide within your Shark Operating manual • Use of parts and accessories that are not genuine Shark components s h a r kc l e a n . my...
-
Page 15: Register Your Purchase
REGISTER YOUR PURCHASE Benefits of registering your product and creating an account: MY sharkclean.my • Get easier, faster product support and access to warranty information SG sharkclean.sg • Access troubleshooting and product care instructions • Be among the first to know about RECORD THIS INFORMATION exclusive product promotions Model Number: ������������������������... - Page 16 Illustrations may differ from actual product. We are constantly striving to improve our products; therefore the specifications contained herein are subject to change without notice. © 2021 SharkNinja Operating LLC. SHARK and WANDVAC are trademarks of SharkNinja Operating LLC. WS632SM�Series�IB�MP�Mv6�210902 PRINTED IN CHINA...
Need help?
Do you have a question about the WANDVAC WS632SM Series and is the answer not in the manual?
Questions and answers