Table of Contents
Advertisement
Quick Links
Advertisement
Table of Contents

Related Manuals for Stoelting 112


Summary of Contents for Stoelting 112
- Page 1 OPTIMA 112 OWNER' S MANUAL Manual No. 513602 Sept. 2003, Rev. 1...
- Page 3 Need Parts or Service? We stock the parts you need. Our Technicians are factory trained and are certified in the Stoelting Technicare program. CALL Distributor: _________________________ Phone No.: _________________________ Model No.: _______________________ Serial No.: _______________________ Purchase Date: ____________________ Start-Up Date:____________________...
- Page 5 STOELTING COUNTERTOP MODEL GRAVITY FREEZER This manual provides basic information about the freezer. Instructions and suggestions are given covering its operation and care. The illustrations and specifications are not binding in detail. We reserve the right to make changes to the freezer without notice, and without incurring any obligation to modify or provide new parts for freezers built prior to date of change.
-
Page 7: Table Of Contents
SECTION 1. INTRODUCTION 1.1 Description... 1.2 Specifications ... 2. INSTALLATION INSTRUCTIONS 2.1 Safety Precautions ... 2.2 Shipment and Transit... 2.3 Freezer Installation ... 2.4 Installing Permanent Wiring ... 3. INITIAL SET-UP AND OPERATION 3.1 Operator's Safety Precautions ... 3.2 Operating Controls and Indicators... 3.3 Sanitizing ... - Page 8 FIGURE TITLE Model Optima 112 Freezer ... 1 Specifications ... 1 Warning Label Locations ... 3 Leveling ... 4 Space and Ventilation Requirements ... 4 Electrical Plug ... 5 Installing Tray and Cover ... 5 Power Cord Connection ... 5 Controls ...
-
Page 9: Safety Information
The instructions or warnings they give are not substitutes for proper accident prevention measures. If you need to replace a part, use genuine Stoelting parts with the correct part number or an equivalent part. We strongly recommend that you do not use replacement parts of inferior quality. -
Page 11: Description
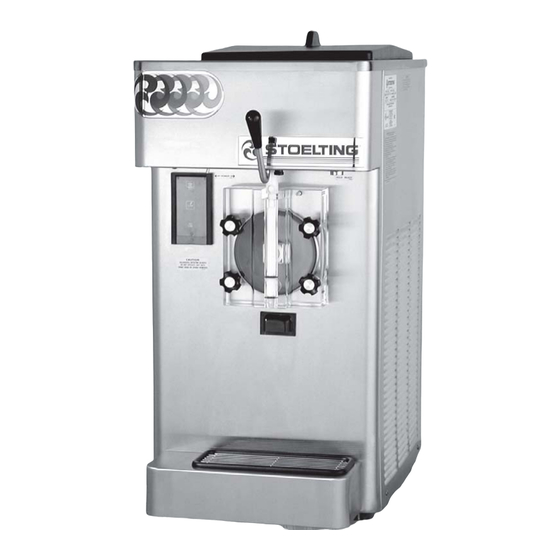
SECTION 1 DESCRIPTION AND SPECIFICATIONS 1.1 DESCRIPTION The Stoelting Optima 112 countertop model freezer is grav- ity fed. The freezer is equipped with fully automatic con- trols to provide a uniform product. The freezer is designed to operate with almost any type of commercial shake mix available. - Page 12 MODEL OPTIMA 112 COUNTERTOP MODEL GRAVITY SHAKE FREEZER DIMENSIONS: Freezer: 17.88" (45.42cm) wide x 30.25" (76.80cm) deep x 37.31" (94.80cm) high Crated: 28.75" (73cm) wide x 38.75" (98.4cm) deep x 43" (109.2cm) high WEIGHT: Freezer: 290 lbs. (131.5kg) ELECTRICAL: Description...
-
Page 13: Installation Instructions
If danger, warning or caution labels are needed, indicate the part number, type of label, location of label, and quantity required along with your address and mail to: ATTENTION: Customer Service Figure 2. Warning Label Locations STOELTING, LLC 502 Hwy. 67 Kiel, Wisconsin 53042... -
Page 14: Shipment And Transit
10 days and request inspection. The customer must place claim for damages and/or shortages in shipment with the carrier. Stoelting, LLC. cannot make any claims against the carrier. 2.3 FREEZER INSTALLATION... -
Page 15: Installing Permanent Wiring
WARNING Do not alter or deform electrical plug in any way. Altering the plug to fit into an outlet of different configu- ration may cause fire, risk of electrical shock, product damage and will void the warranty. E. Connect the power cord. The plug is designed for 208 or 230 volt/20 amp duty. -
Page 17: Initial Setup And Operation
3.1 OPERATOR'S SAFETY PRECAUTIONS SAFE OPERATION IS NO ACCIDENT; Observe these rules: A. Know the freezer. Read and understand the Operating Instructions. B. Notice all warning labels on the freezer. C. Wear proper clothing. Avoid loose fitting gar- ments, and remove watches, rings or jewelry which could cause a serious accident. -
Page 18: Sanitizing
A. SPIGOT SWITCH The SPIGOT switch will automatically actuate the auger drive and refrigeration systems when the spigot is opened to dispense product. When the spigot is closed, the drive motor and compressor will remain "on" until the product in the barrel reaches the proper temperature. -
Page 19: Freeze Down And Operation
CAUTION Avoid prolonged contact of sanitizer with freezer parts. Prolonged contact of sanitizer with freezer may cause corrosion of stainless steel parts. In general, sanitizing may be conducted as follows: A. Push the mix inlet regulator into hopper with air inlet (long) tube toward the front of the freezer (Fig.7). -
Page 20: Mix Information
F. Place the OFF-ON switch in the ON position, then press the PUSH TO FREEZE switch until the freezer starts. NOTICE After the gearmotor starts, there is a 3 second de- lay before the compressor starts. G. After about 7 to 10 minutes the freezer will shut OFF and the green light will illuminate indicating the product is ready to serve. -
Page 21: Cleaning The Freezer
C. Empty the freezer by opening the spigot and draining into a bucket. (Fig. 13). D. Place the OFF-ON switch in the OFF position. Figure 13. Draining Mix 3.7 CLEANING THE FREEZER NOTICE The frequency of cleaning the freezer and freezer parts must comply with local health regulations. -
Page 22: Cleaning The Freezer Parts
E. Remove the auger assembly from the freezer (Fig.15). Keep the rear of the auger shaft tipped up once it is clear of the freezer to avoid dropping rear seal. Figure 15. Auger Shaft Removal F. Remove scraper blades and the rear seal assembly. G Wipe socket lubricant from the drive end (rear) of the auger with a cloth or paper towel. -
Page 23: Routine Cleaning
To assemble the freezer parts, refer to the following steps: A. Assemble all O-rings onto parts dry, without lubri- cation. Then apply a thin film of sanitary lubrication to exposed surfaces of the O-rings. Also apply a thin film of sanitary lubricant inside and outside of the front auger support bushing. - Page 24 It is recommended that a maintenance schedule be fol- lowed to keep the freezer clean and operating properly. A. Cleaning and Sanitizing Information Soft serve freezers require special consideration when it comes to food safety and proper cleaning and sanitizing. The following information has been compiled by Purdy Products Company, makers of Stera-Sheen Green Label Cleaner/Sanitizer and specifically...
-
Page 25: Preventive Maintenance
SANITIZING – After the machine has been cleaned and contains no milkstone, the machine is reassembled. Then a FDA-approved sanitizing solution is run through the machine to kill bacteria. The machine is then ready for food preparation. As a recommended cleaner and sanitizer for your frozen dessert machine, STERA-SHEEN has proven to be one of the best daily maintenance products for: ·... -
Page 26: Extended Storage
C. MONTHLY CAUTION The freezer has an air cooled condenserand must have proper air circulation. Maintain a minimum of 3" clearance at all louvered panels. Failure to clean the condenser filter on a regular basis and provide proper clearance may result in serious freezer damage and may void any factory war- ranties. -
Page 27: Troubleshooting Charts
g i l a l f . r u i t c t e l g i l o l f a l f v i f . f f . n i g i l n i l i l i SECTION 4 TROUBLESHOOTING CHARTS . - Page 28 t e l l a i t l e t l e p i l n i l t e l t e l t e l " . r " F ° ° 7 t a l t e l t a l i a f r u l...
- Page 29 To Clear Error Modes Clean Error 04: Allow freezer to remain on (light blinking) with the power switch in the ON position for ten (10) minutes minimum. Next, place the power switch in the OFFposition for five (5) seconds minimum, then place the power switch in the ON position to restart freezer.
- Page 30 " 5 " 3 s t i " 8 o l l " 5 " 5 " 3 t i u . s t a l i . e l s t i . T . t t i f t i l t i l °...
-
Page 31: Reference Drawings
SECTION 5 REFERENCE DRAWINGS ITEM STOELTING PN 336530-SV 625314 3177738 624614 508135 .001 FRONT DOOR ASSEMBLY DESCRIPTION Front Door - Shake O-ring, 6" OD x 1/4 CS Door Pin Spigot Body O-ring, 3/4 IDX 1.0 ODX 1/8 CS Lubricant, Petro-Gel, 4 Oz. Tubes... -
Page 32: Auger Drawing
ITEM STOELTING PN 4177749 666786 624678 149002 508048 .001 508135 .001 162155 AUGER ASSEMBLY DESCRIPTION Auger Shaft Seal, Rear with Insert O-ring, 1-1/2 x 1-1/8 x 3/16 CS Bearing Front Auger Celcon Spline Lubricant Lubricant, Petro-Gel 4 oz. tubes Blade, Scraper... -
Page 33: Warranty Information
Stoelting, LLC warrants to the first user (the “Buyer”) that the freezer cylinders, hoppers, compressors, drive motors, speed reducers, auger and auger flights of Stoelting soft serve / shake freezers will be free from defects in materials and workmanship under normal use and proper maintenance appearing within five (5) years, and that all other...
Need help?
Do you have a question about the 112 and is the answer not in the manual?
Questions and answers