Table of Contents
Advertisement
Advertisement
Table of Contents

Related Manuals for Rage MICRO WARBIRD Series


Summary of Contents for Rage MICRO WARBIRD Series
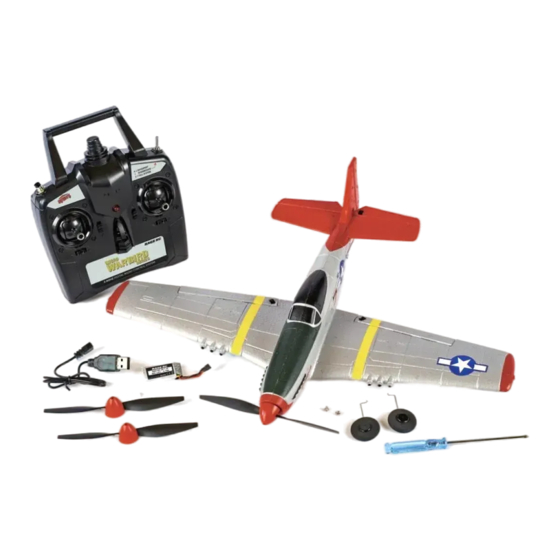
- Page 1 P-51D Mustang P-51D Mustang F4u Corsair F4u Corsair t-28 trojan t-28 trojan...
-
Page 2: Safety Precautions
Safety Precautions Age Recommendation; 14 years and up. This is not a toy. As the owner of this airplane, you are responsible to make sure that injury to others or damage to property is avoided. Make sure that you are familiar with the entire instruction manual before operation. Battery Warnings Important Notice: Mishandling of LiPo batteries can result in fire, personal injury and/or property damage! -
Page 3: Charging Instructions
Charging Instructions Red LED on while charging 1. Unplug the battery from your plane. LED off when charge done 2. Plug the charger into the USB port on your computer or USB adapter. 3. Connect battery to the charger. 4. The charging process will take up to 3 hours. -
Page 4: Transmitter Layout
Transmitter Layout LED Indicator PASS Switch One-key Stunt Button Elevator Trim Throttle/Rudder Aileron/Elevator Rudder Trim Aileron Trim ON/OFF Switch Centering Control Surfaces NOTE: Turn the PASS switch off (expert mode) before you complete the steps below. See more information in "PASS System" section. With the transmitter turned on and the battery conected to the ESC (and installed in the battery compartment), it is now possible to check the center of all control surfaces. - Page 5 Center Control Surfaces (cont.) Push Rod Arc-shaped Section Push Rod Arc-shaped Section If the rudder is not properly centered, If the elevator is not properly centered, adjust the push rod length by bending the adjust the push rod length by bending the arc-shaped section slightly with needle arc-shaped section slightly with needle nose pliers until the rudder is centered.
-
Page 6: Digital Trim
Digital Trim Digital trims allow you to adjust the center position of aileron, rudder, or elevator. Each time the trim button is pressed, the Elevator servo output will change one angle. If the Trim Rudder trim button is held, the output will scroll Trim in that direction until the trim button is Aileron... - Page 7 Stunt Function Button The stunt button allows the pilot to perform a roll or loop automatically when flying in either PASS One-key Stunt Button assist mode. As shown in the below diagrams, while flying in either mode, press the one-key stunt button on the left shoulder of the transmitter and you will hear several beeps.
-
Page 8: Propeller Replacement
Prop Saver Instructions Each Prop/Spinner set includes the propeller, spinner and forward part. Base Spinner (RGRA1216) See page 10 for specific part numbers for each airplane. Forward Propeller Part The prop saver keeps the propeller and prop shaft from damage, along with preventing the electronic components from over current. -
Page 9: Flight Checklist
Flight Checklist IMPORTANT NOTE: Although this section can be used as a quick start guide, we strongly suggest that you read the entire manual before proceeding. This checklist is NOT intended to replace the content included in this instruction manual. - Always turn the transmitter on first. -
Page 10: Replacement Parts
Replacement Parts Micro P-51D Mustang Item Number Description RGRA1300 Micro P-51D RTF RGRA1310 Fuselage; P-51 RGRA1311 Main Wing and Tail; P-51 RGRA1312 Pushrod Set; P-51 RGRA1313 Prop/Spinner Set; P-51 RGRA1315 Front Landing Gear; P-51, F4U Micro F4U Corsair Item Number Description RGRA1301 Micro F4U Corsair RTF RGRA1315 Front Landing Gear; P-51, F4U RGRA1320 Fuselage; F4U RGRA1321 Main Wing and Tail; F4U RGRA1322 Pushrod Set; F4U RGRA1323 Prop/Spinner Set; F4U, T-28 Micro T-28 Trojan Item Number Description RGRA1302 Micro T-28 Trojan RTF RGRA1323 Prop/Spinner Set; F4U, T-28 RGRA1324 Fuselage; T-28 RGRA1325 Main Wing and Tail; T-28... -
Page 11: Limited Warranty
Remedy - Rage R/C’s sole obligation and purchaser’s sole and exclusive remedy shall be that Rage R/C will, at its option, either (a) service, or (b) replace, any Product determined by Rage R/C to be defective. Rage R/C reserves the right to inspect any and all Product(s) involved in a warranty claim. - Page 12 2021 HRP Distributing, Inc...
Need help?
Do you have a question about the MICRO WARBIRD Series and is the answer not in the manual?
Questions and answers