Table of Contents
Advertisement
Advertisement
Table of Contents

Related Manuals for Rage Super Cub MX


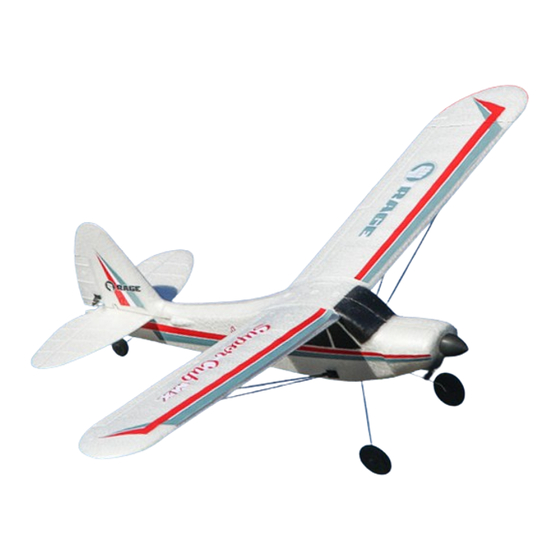
Summary of Contents for Rage Super Cub MX
-
Page 1: Specifications
Specifications Wingspan: 500mm (19.75 inches) Length: 355mm (13.94 inches) Flying Weight: 54g (1.90 oz.) Battery: 3.7V 1S 360mAh LiPo Charger: USB 1S LiPo Charger Gyro: PASS (Pilot Assist Stability Software) Transmitter: 2.4 GHz 4-channel (3-channel airplane operation) -
Page 2: Table Of Contents
Table of Contents Specifications Table of Contents General Precautions Safety Precautions FCC Information LiPo Battery Warning Super Cub MX RTF Contents Charging the LiPo Battery Binding Super Cub MX Assembly Transmitter Details Battery Install Install Transmitter Batteries Arming the Motor... -
Page 3: Safety Precautions
Safety Precautions Failure to use this product in the intended manner as described in the following instruction can result in damage and/or personal injury. A Radio Controlled (RC) airplane/helicopter/quadcopter is not a toy! If misused it can cause serious bodily harm and damage to property. Keep items that could become entangled away from the propeller, including loose clothing, tools, etc. Be especially sure to keep your hands, face and other parts of your body away from the propeller. As the user of this product you are solely and wholly responsible for operating it in a manner that does not endanger yourself and others or result in damage to the product or the property of others. This model is controlled by a radio signal that is subject to possible interference from a variety of sources outside your control. This interference can cause momentary loss of control so it is advisable to always keep a safe distance from objects and people in all directions around your model as this will help to avoid collisions and/or injury. FCC Information This device complies with part 15 of the FCC rules. Operation is subject to the following two conditions: (1) This device may not cause harmful interference, and (2) This device must accept any interference received, including interference that may cause undesired operation. Caution: Changes or modifications not expressly approved by the party responsible for compliance could void the user’s authority to operate the equipment. This product contains a radio transmitter with wireless technology which has been tested and found to be compliant with the applicable regulations governing a radio transmitter in the 2.400GHz to 2.4835GHz frequency range. The associated regulatory agencies of the following countries recognize the noted certifications for this product as authorized for sale and use: USA, UK, AU LiPo Battery Warning IMPORTANT NOTE: Lithium Polymer batteries are significantly more volatile than the alkaline, NiCd or NiMH batteries also used in RC applications. -
Page 4: Super Cub Mx Rtf Contents
Super Cub MX RTF Contents Charging the LiPo Battery It is important to fully charge the LiPo flight battery before your first flight. The USB charger can be powered by the USB port on your computer or a wall plug USB port. Plug the charger into a suitable USB port and then plug the flight battery into the charger. A red light will illuminate and blink during charging. When the charge is complete the red light will go out. CAUTION: ONLY CHARGE THE FLIGHT BATTERY WITH THE INCLUDED USB LIPO CHARGER OR A SUITABLE LITHIUM BATTERY CHARGER. NEVER ATTEMPT TO CHARGE A LIPO BATTERY WITH A CHARGER THAT IS NOT SPECIFICALLY MADE FOR USE WITH LITHIUM BATTERIES. -
Page 5: Super Cub Mx Assembly
Super Cub MX Assembly The Super Cub MX comes nearly ready-to-fly. All that is required to complete is the installation of the landing gear. Insert the landing gear wire into the slot at the rear of the battery box. The wheels should be raked for- ward. The landing gear are held in place by friction, no screws are necessary to retain. Battery Install Insert the battery into the battery box located on the bottom of the fuselage. First, turn on the transmitter with the throttle off (left transmitter stick all the way down). Then plug in the connector, which will power up the aircraft. Unplug the flight battery at the end of each flight. Transmitter Details Antenna Handle PASS Switch Power LED Elevator Trim Not Used Elevator/Rudder Throttle Stick Stick Not Used Rudder Trim On/Off... -
Page 6: Arming The Motor
Arming the Motor The left stick on the transmitter controls the throttle function. When the transmitter is on and the aircraft flight battery is plugged in, the electronics will be active but the motor will not be armed. To arm the motor, cycle the throttle stick from the OFF to the ON position and then back to OFF. You will hear an arming tone and the next time that the throttle stick is raised the motor will start. Throttle Throttle Down In normal flight operations, always turn the transmitter on first and then power up the aircraft. Keep the aircraft still for 3-5 seconds to allow the gyro to properly calibrate before flying. Cycle the throttle OFF/ON/OFF to arm the motor. When finished flying always unplug the flight battery first and then turn off the transmitter. Control Functions The Super Cub MX comes nearly completely assembled. All the control surfaces have been pre-connected. Check that the direction of movement is correct for each of the control func- tions. This is accomplished by first turning on your transmitter (make sure that your throttle stick is at the bottom position) and then plugging in your charged 1-cell flight battery. Leave the throttle stick in its off position. The motor will not be activated until the throttle stick is cycled from the bottom to the top and back to the bottom. Flip the PASS switch located on the right shoulder of the transmitter away from you, into the Assist Off position. In this position the con- trol surfaces will only move when the sticks on the transmitter are moved. With the transmitter sticks in their neutral positions the control surfaces on the aircraft should be neutral. Servo Reversing If a control surface is moving in the wrong direction the servos operation will need to be re- versed electronically. Follow these steps to reverse a servo: • Turn on the transmitter and plug the flight battery into the airplane. • Flip the PASS switch to No Assist (Switch toward rear of transmitter). • Do not arm the motor. • Hold the control stick for the function that you want to reverse all the way till it stops. • Hold the control stick in place until you see the control surface change directions - within 3 to 5 seconds. -
Page 7: Center Control Surfaces
Center Control Surfaces With both the transmitter and the aircraft powered on and the PASS switch in the "No Assist" position, check the control surfaces for correct centering. If the surface is not centered, make the adjustment to the pushrod length by either opening or closing the gap at the U-shaped section of the pushrod. Adjust Here Rudder not properly centered. Rudder properly centered. Adjust Here Antenna Elevator not properly centered. Elevator properly centered. Handle PASS Switch Electronic Trims Power LED All trims should be centered mechanically as shown in the Center Control Surfaces Elevator Trim Not Used section above. If adjustments are required for level flight when flying the Super Cub MX, the electronic trims should be used. If Elevator/Rudder Throttle Stick up elevator trim is needed, press the bot- Stick tom half of the elevator trim button several Not Used Rudder Trim times until level flight is achieved. Do the oposite if down trim is required. In similar... -
Page 8: Control Movement
Control Movement With both the transmitter and the aircraft powered on and the motor armed (cycle throttle stick OFF/ON/OFF), Check the movement of the control surfaces. The PASS switch on the upper right of the transmitter should be in the OFF (toward back of transmitter) for these tests. When the elevator stick is moved Elevator toward the bottom of the transmitter the elevator should move up. When in flight this will raise the nose. When the elevator stick is moved toward the top of the transmitter the elevator should move down. When in flight this Elevator Down will lower the nose. Aircraft viewed from top When the rudder stick is moved to the left of the transmitter the rudder should move left. When in... -
Page 9: Pilot Assist Stability Software (Pass)
Pilot Assist Stability Software (PASS) PASS (Pilot Assist Stability Software) is incorporated into your Super Cub MX. It allows the pilot to tailor the response of the airplane to his abilities. As your piloting skills grow the capabilities of the Super Cub MX grow with you. Full Assist (Switch toward pilot) In this mode, the amount of roll, rate of climb, and rate of dive are limited. Self leveling is also engaged. The reduced roll, climb and dive angles are to aid the newer pilot in not overcontrolling the aircraft. If at any time the airplane feels out of control, simply let go of the sticks and the model will return to normal flight. Partial Assist (Switch center position) This mode allows for greater pilot input and increases the maximum roll angle and the climb and dive angles possible. The aircraft still cannot be rolled inverted but will loop. As in Full Assist, the aircraft is self leveling if the sticks are released. No Assist (Switch away from pilot) In this mode all electronic stability control is turned off. The full range of aerobatic flight, including rolls, loops and inverted flight are possible. If while first attempting these advanced maneuvers you become disoriented simply switch to Partial or Full Assist to automatically level the aircraft and regain control. -
Page 10: First Flight
Calibration The PASS system used in the Super Cub MX is pre-calibrated from the factory. Recalibration is only necessary if the aircraft does not respond correctly (pitches up or down) when the PASS switch is activated. With the aircraft sitting on a level surface and the tail raised to a "wings level"... -
Page 11: Limited Warranty
Limited Warranty Warranty Period: Rage R/C warrants that the Super Cub MX (“Product”) will be free from original factory defects in materials and workmanship upon purchase (“Warranty Period”). What is Not Covered - This warranty is not transferable and does not cover (a) cosmetic damage, (b) damage due to acts of God, accident, misuse, abuse, negligence, commercial use, or due to improper use, installation, operation or maintenance, (c) modification to any part of the Product, (d) attempted service by anyone other than a Rage R/C authorized service center, or (e) Product not purchased from an authorized Rage R/C dealer. OTHER THAN THE EXPRESS WARRANTY ABOVE, RAGE R/C MAKES NO OTHER WARRANTY OR REPRESENTATION, AND THREFORE DISCLAIMS ANY AND ALL IMPLIED WARRANTIES, INCLUD- ING, WITHOUT LIMITATION, THE IMPLIED WARRANTIES OF NON-INFRINGEMENT, MERCHANTABILITY AND SUITABILITY FOR A PARTICULAR PURPOSE. THE PURCHASER ACKNOWLEDGES THAT THEY ALONE HAVE DETERMINED THAT THE PRODUCT WILL MEET THE REQUIREMENTS OF THEIR INTENDED USE. Purchaser’s Remedy - Rage R/C’s sole obligation and purchaser’s sole and exclusive remedy shall be that Rage R/C will, at its option, either (a) service, or (b) replace, any Product determined by Rage R/C to be defective. Rage R/C reserves the right to inspect any and all Product(s) involved in a warranty claim. Service or replacement decisions are at the sole discretion of Rage R/C. Proof of purchase is required for all warranty claims. SERVICE OR REPLACEMENT AS PROVIDED UNDER THIS WARRANTY IS THE PURCHASER’S SOLE AND EXCLUSIVE REMEDY. Limitation of Liability - RAGE R/C SHALL NOT BE LIABLE FOR SPECIAL, INDIRECT, INCIDENTAL OR CONSEQUENTIAL DAMAGES, LOSS OF PROFITS OR PRODUCTION OR COMMERCIAL LOSS IN ANY WAY, REGARDLESS OF WHETHER SUCH CLAIM IS BASED IN CONTRACT, WARRANTY, TORT, NEGLIGENCE, STRICT LIABILITY OR ANY OTHER THEORY OF LIABILITY, EVEN IF RAGE R/C HAS BEEN ADVISED OF THE POSSIBILITY OF SUCH DAMAGES. Further, in no event shall the liability of Rage R/C exceed the individual price of the Product on which liability is asserted. As Rage R/C has no control over use, setup, final assembly, modification or misuse, no liability shall be assumed nor accepted for any resulting damage or injury. By the act of use, setup or assembly, the user accepts all resulting liability. If you as the purchaser or user are not prepared to accept the liability associated with the use of the Product, purchaser is advised to return the Product immediately in new and unused condition to the place of purchase. Law - These terms are governed by Utah law (without regard to conflict of law principals). This warranty gives you specific legal rights, and you may also have other rights which vary from state to state. Rage R/C reserves the right to change or modify this warranty at any time without notice. Rage R/C, an exclusive brand of: HRP Distributing, Inc. - Page 12 2018 HRP Distributing, Inc...
Need help?
Do you have a question about the Super Cub MX and is the answer not in the manual?
Questions and answers