Advertisement
Quick Links
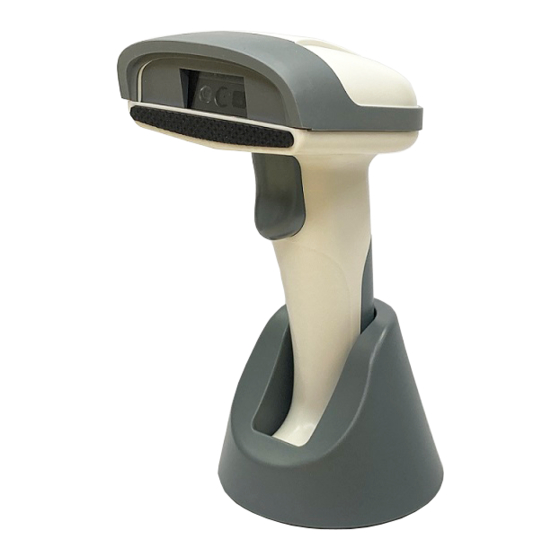
2D Wireless
Barcode Scanner
Quick Guide
2D Wireless Scanner Quick Guide (Rev1)
P/N: 8013-0078000
GETTING CONNECTED (CRADLE MODE, USB)
The following steps apply to the scanner paired with a charging cradle
whose bottom label is printed with "USB HID":
1. Plug the charging cradle to host device with an USB cable.
2. Power up the scanner by pressing the trigger.
3. Scan USB HID Cradle Mode (recommended) or USB VCP
Cradle Mode.
USB HID
USB VCP
Cradle Mode
Cradle Mode
4. The scanner will emit one short beep with LED indicator turning solid
blue after successfully connecting to charging cradle. If the charging
cradle fails to connect to the scanner, scan Disconnect, as seen in
step 3 of Getting Connected (BT HID), unplug the cable from
charging cradle and plug it back. The charging cradle will be able
to connect to the nearest scanner when the cable is plugged.
5. To swap charging cradle, please follow step 1 ~ 3, and then scan
Disconnect, as seen in step 3 of Getting Connected (BT HID), unplug
the cable from the charging cradle you want to disconnect, and plug
the cable to the charging cradle you want to connect. The charging
cradle will be able to connect to the nearest scanner when the cable
is plugged.
FCC WARNING STATEMENT
This equipment has been tested and found to comply with the limits for a Class B digital
device, pursuant to Part 15 of the FCC Rules. These limits are designed to provide
reasonable protection against harmful interference in a residential installation.
This equipment generates, uses and can radiate radio frequency energy and, if not
installed and used in accordance with the instructions, may cause harmful interference
to radio communications. However, there is no guarantee that interference will not
occur in a particular installation. If this equipment does cause harmful interference to
radio or television reception, which can be determined by turning the equipment off
and on, the user is encouraged to try to correct the interference by one of the following
and on, the user
measures:
measures:
• Reorient or rel
• Reorient or relocate the receiving antenna.
• Increase the se
• Increase the separation between the equipment and receiver.
• Connect the e
• Connect the equipment into an outlet on a circuit different from that to which the
receiver is connected.
receiver is co
• Consult the dealer or an experienced radio/TV technician for help.
• Consult the de
CANADIAN DOC STATEMENT
CANADIAN DOC
This digital appa
This digital apparatus does not exceed the Class B limits for radio noise for digital
apparatus set ou
apparatus set out in the Radio Interference Regulations of the Canadian Department of
Communications
Communications.
Le présent appareil numérique n'émet pas de bruits radioélectriques dépassant les
Le présent appa
r r
r
limites applicables aux appareils numériques de las classe B prescrites dans le
limites applicable
R R
Réglement sur le
Réglement sur le brouillage radioélectrique édicté par les ministère des Communica-
tions du Canada
tions du Canada.
CE MARKING AN
CE MARKING AND EUROPEAN UNION COMPLIANCE
Testing for compliance to CE requirements was performed by an independent
Testing for comp
laboratory. The unit under test was found compliant with all the applicable Directives,
laboratory. The u
2004/108/EC a
2004/108/EC and 2006/95/EC.
WASTE ELECTRI
WASTE ELECTRICAL AND ELECTRONIC EQUIPMENT
The WEEE direct
The WEEE directive places an obligation on all EU-based manufacturers and
importers to take
importers to take-back electronic products at the end of their useful life.
ROHS STATEME
ROHS STATEMENT OF COMPLIANCE
A A
This product is co
This product is compliant to Directive 2002/95/EC.
NON-MODIFICA
NON-MODIFICATION STATEMENT
Changes or modifications not expressly approved by the party responsible for
compliance could void the user's authority to operate the equipment
GETTING CONNECTED (CRADLE MODE, RS232)
The following steps apply to the scanner paired with a charging cradle
whose bottom label is printed with "RS232":
1. Plug the charging cradle to host device with an RS232 cable.
2. Power up the scanner by pressing the trigger.
3. Scan RS232 Cradle Mode.
RS232
Cradle Mode
4. The scanner will emit one short beep with LED indicator turning solid
blue after successfully connecting to charging cradle. If the charging
cradle fails to connect to the scanner, scan Disconnect, as seen in
step 3 of Getting Connected (BT HID), unplug the cable from
charging cradle and plug it back. The charging cradle will be able
to connect to the nearest scanner when the cable is plugged.
5. To swap charging cradle, please follow step 1 ~ 3, and then scan
Disconnect, as seen in step 3 of Getting Connected (BT HID), unplug
the cable from the charging cradle you want to disconnect, and plug
the cable to the charging cradle you want to connect. The charging
cradle will be able to connect to the nearest scanner when the cable
is plugged.
WARNING AND CAUTION
1. Take any metals into contact with the terminals in connectors.
2. Use the scanner where any inflammable gases.
If following condition occur, immediately power off the host computer,
disconnect the interface cable, and contact your nearest dealer.
1. Smoke, abnormal odors or noises come from the scanner.
2. Drop the scanner so as to affect the operation or damage its housing.
Do not do behavior below.
1. Put the scanner in places excessively high temperatures such as expose
under direct sunlight.
2. Use the scanner in extremely humid area or drastic temperature
changes.
3. Place the scanner in oily smoke or steam environment such as cooking
range.
4. Be covered or wrapped up the scanner in bad-ventilated area such as
under cloth or blanket.
5. Insert or drop foreign materials or water into scanning window or vents.
6. Using the scanner while hand is wet or damp.
7. Use the scanner with anti-slip gloves containing plasticizer and
Do Not
chemicals or organic solvents such as benzene, thinner, insecticide etc
to clean the housing. Otherwise, it could not result fire and electrical
shock but housing may be broken and injured.
8. Scratch or modify the scanner and bend, twist, pull or heat its interface
cable.
9. Put heavy objects on interface cable.
Do not stare the light source from the scanning window or do not point the
scanning window at other people's eyes or eyesight may be damaged
by direct exposure under the light.
Do not put the scanner on an unstable or inclined plane.
The scanner may drop, creating injuries.
Once the interface cable is damaged such as exposed or broken copper
wires, stop using immediately and contact your dealer. Otherwise, it could
result fire or electrical shock.
RoHS
GETTING CONNECTED (BT HID)
BT HID is compatible with iOS, Android and Windows and requires
applications that accept keyboard data. Folllow below steps:
1. Power up the scanner by pressing the trigger.
2. Scan BT HID.
BT HID
3. Press and hold the trigger until beeps with LED indicator flashing blue
and green. Alternatively you may scan Disconnect.
Disconnect
4. Pair with "BarCode Scanner HID" from the discovered device list.
5. The scanner will emit one short beep with LED indicator turning solid
blue after successfully connecting to the host device.
BEEPER INDICATION
Single short beep
i. Wireless connection
ii. Good read
Single long beep
Power down
Two beeps
Wireless disconnection
Two beeps (high-low)
Succesful configuration
Two beeps (low-high)
Good read (Memory Mode)
Three short beeps
Reads a barcode while disconnected
Three beeps
Succesful configuration
(low-medium-high)
One short beep & one
Power up
long beep (low-high)
One short beep & one
Power off
long beep (high-low)
Seven beeps
Low power (Battery life < 5%)
(shuts down thereafter)
LED INDICATION
Flashing blue & green
Discoverable in BT HID
Flashing blue
Discoverable in BT SPP
Solid blue
Connected
1 green flash
Good read / Power up
2 green flashes
Disconnected
Solid red
Charging
GETTING CONNECTED (BT SPP)
BT SPP is compatible with Android and Windows. A serial communi-
cation software is required for this profile. Follow below steps:
1. Power up the scanner by pressing the trigger.
2. Scan BT SPP, the scanner will emit two beeps with LED
indicator flashing blue.
BT SPP
3. Pair with "BarCode Scanner spp" from the discovered device list.
If the host is unable to find the scanner in the discovered device list,
scan Disconnect.
Disconnect
4. Enter serial communication software (TeraTerm, PuTTY, etc...) and
open the serial port occupied by the scanner.
5. The scanner will emit one short beep with LED indicator turning
solid blue after successfully connecting to host device.
Advertisement

Related Manuals for Marson MT8210B


Summary of Contents for Marson MT8210B
- Page 1 BEEPER INDICATION 2D Wireless WARNING AND CAUTION FCC WARNING STATEMENT Single short beep i. Wireless connection This equipment has been tested and found to comply with the limits for a Class B digital 1. Take any metals into contact with the terminals in connectors. Barcode Scanner device, pursuant to Part 15 of the FCC Rules.
- Page 2 GENERAL SETTINGS BUZZER SLEEP TIMEOUT UPPER / LOWER CASE DEFAULT LOW VOLUME MEDIUM VOLUME ALL LOWER CASE ALL UPPER CASE 30 SECONDS 1 MINUTE CHECK VERSION 5 MINUTES HIGH VOLUME AS IS INVERT CASE 30 MINUTES VIBRATOR iOS TOUCH KEYBOARD BATTERY LIFE NEVER IMMEDIATE...
- Page 3 FCC Warning Statement Changes or modifications not expressly approved by the party responsible for compliance could void the user’s authority to operate the equipment. This equipment has been tested and found to comply with the limits for a Class B digital device, pursuant to Part 15 of the FCC Rules. These limits are designed to provide reasonable protection against harmful interference in a residential installation. This equipment generates uses and can radiate radio frequency energy and, if not installed and used in accordance with the instructions, may cause harmful interference to radio communications. However, there is no guarantee that interference will not occur in a particular installation. ...
Need help?
Do you have a question about the MT8210B and is the answer not in the manual?
Questions and answers