
Related Manuals for Pentair CLEAN AND CLEAR PLUS CCP240


Summary of Contents for Pentair CLEAN AND CLEAR PLUS CCP240
- Page 1 CLEAN AND CLEAR PLUS ® CARTRIDGE FILTER INSTALLATION AND USER’S GUIDE IMPORTANT SAFETY INSTRUCTIONS READ AND FOLLOW ALL INSTRUCTIONS SAVE THESE INSTRUCTIONS...
-
Page 2: Table Of Contents
CUSTOMER SERVICE / TECHNICAL SUPPORT If you have questions about ordering Pentair Aquatic Systems™ replacement parts, and pool products, please contact: Customer Service and Technical Support, USA (8 A.M. to 7:30 P.M. — Eastern Time) Phone: (800) 831-7133 Fax: (800) 284-4151 Web site Visit www.pentairpool.com or www.staritepool.com for... - Page 3 Plus Cartridge Filter. Consult ® Pentair Water Pool and Spa, Inc. with any questions regarding this equipment. Attention Installer: This guide contains important information about the installation, operation and safe usage of this product. This information should be given to the owner and/or operator of this equipment after installation.
- Page 4 IMPORTANT WARNING AND SAFETY INSTRUCTIONS THIS FILTER OPERATES UNDER HIGH PRESSURE When any part of the circulating system, (e.g., closure, pump, filter, valve(s), etc.), is serviced, air can enter the system and become pressurized. Pressurized air can cause the top closure to separate which can result in severe injury, death, or property damage.
-
Page 5: Section I: Filter Installation
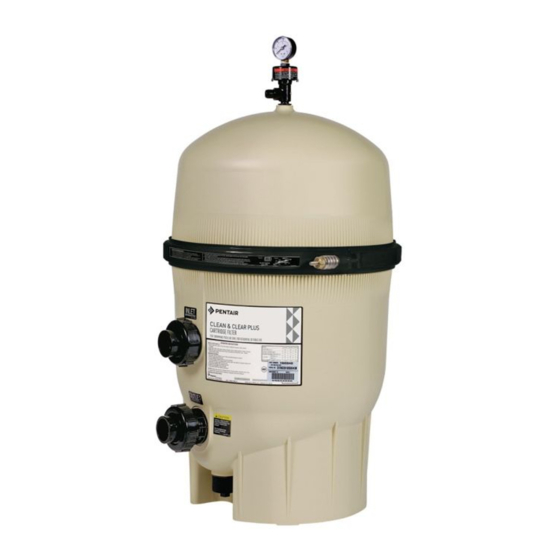
SECTION I. FILTER INSTALLATION A. GENERAL INFORMATION 1. The Clean and Clear Plus Cartridge Filter should be ® mounted on a level concrete slab. Position the filter so that instructions, warnings and the pressure gauge are visible to the operator. It also should be positioned so that the piping connections, control valve and drain port are convenient and accessible for servicing and winterizing. -
Page 6: Section Ii: Filter Operation And Cleaning
If doubt exists as to the pressure to which the system will be subjected, install an ASME approved automatic Pressure Relief or Pressure Regulator in the circulation system for the lowest working pressure of any of the components in the system. SECTION II. -
Page 7: Clamp Installation Instructions
The pressure gauge is the primary indicator of how the filter is operating. Maintain your pressure gauge in good working order. Your filter is a piece of machinery, do not tamper with it, attempt to disassemble it or otherwise adjust it unless you fully understand it's operation. Serious injury or death can occur if the equipment is improperly handled. -
Page 8: System Restart Instructions
Begin to tighten nut using a 7/8" wrench. Then tap around the outside of the filter clamp with a mallet (or similar tool) to insure uniform loading and proper seating of the clamp. Continue tapping and tightening until the spring coils touch each other. Do not tighten beyond this point. Follow the procedures in Section C, System Restart Instructions. -
Page 9: Cleaning Filter Manually
D. CLEANING FILTER MANUALLY Operating the filter system without filter internal components installed can allow air to accumulate within the filter. Pressurized air can cause the lid to blow off which can result in severe injury, death or property damage. Always operate filter system with filter internal components installed. -
Page 10: Replacing Filter Cartridges
E . REPLACING FILTER CARTRIDGES Filter cartridge element life will vary with pool conditions such as bather load, wind, dust, etc. You can expect an average cartridge life of 3 years under normal conditions. To replace cartridge element follow steps in Section D, Cleaning Filter, eliminating step D.7. F. - Page 11 B. Until the water initially put into the pool has been completely filtered, short filter cycles in between cleanings are normal. In most cases pool owners are dismayed by the undesirable color and appearance of water in a newly filled pool. Plaster dust can be responsible for short filter cycles, requiring frequent cleaning.
-
Page 12: Section Iv: Technical Data
SECTION IV. TECHNICAL DATA A. FLOW RATES PRESSURE DROP vs FLOW FLOW (gpm) Clean and Clear Plus Cartridge Filters ® Recommended Flow Rate Flow Rate GPM Turnover Capacity in Gallons Filter Area Vertical* Product # Model # sq. ft. Clearance Res. -
Page 13: Section V: Replacement Parts
SECTION V. REPLACEMENT PARTS A. ILLUSTRATED PARTS VIEW 8, 17 CLEAN AND CLEAR PLUS Cartridge Filter Installation and User’s Guide ®... -
Page 14: Parts List
B. REPLACEMENT PARTS LIST Item Part Item Part Description Description 190058 Gauge, pressure, ¼ in. 195612 Spring 98209800 High Flow manual air relief valve 14 55035000 Baffle, bulkhead assy. (HFMARV) 190039 Baffle, bulkhead assy. 98201200 Hose and retainer clips for 15 86006900 O-ring, bulkhead, lower HFMARV (Optional accy.) 16 98960311 Bulkhead union, (set) ... - Page 15 NOTES...
- Page 16 Pentair reserves the right to change specifications without prior notice. Pentair is an equal opportunity employer. © 2015 Pentair Water Pool and Spa, Inc. All rights reserved. This document is subject to change without notice. *178558*...
Need help?
Do you have a question about the CLEAN AND CLEAR PLUS CCP240 and is the answer not in the manual?
Questions and answers