Table of Contents
Advertisement
Quick Links
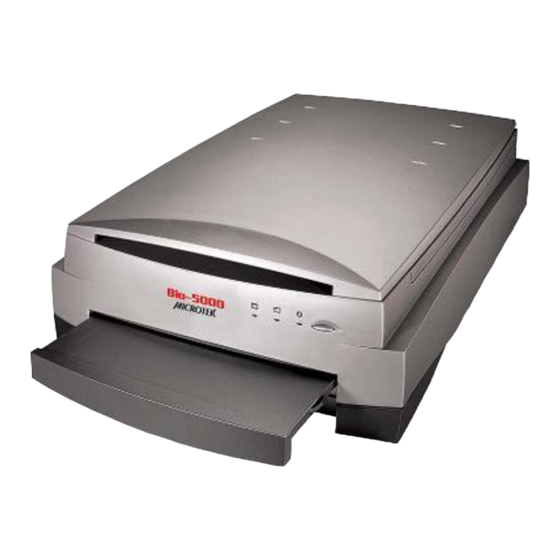
The Bio-5000 is a combined flatbed and film scanner for electrophoresis gels and film
formats that also offers additional functionality to scan reflective art or prints as large
as 8.5" x 14". The Bio-5000 is equipped with Microtek's patented Emulsion Direct
Imaging Technology (E.D.I.T.) for delivering distortion-free images in transparency
scanning. The 0.05 minimum optical density (Dmin) provides a wider and clearer range
for capturing light tones of images.
Contents
Getting to Know Your Bio-5000 ....................................................................... 1
Features of the Bio-5000 .................................................................................. 2
Taking a Closer Look ........................................................................................ 3
Unlocking the Scanner .................................................................................... 4
Positioning Your Originals .............................................................................. 5
Positioning Electrophoresis Gels ........................................................... 6
Using the Leak-Free Glass Holder .................................................. 6
Positioning Transparent Film ................................................................. 7
Using the Leak-Free Glass Holder .................................................. 7
Positioning Reflective Originals ............................................................. 8
Copyright © 2013 Microtek International, Inc.
I49-004655 E, September 2013
Getting to Know Your Bio-5000
http://www.microtek.com
Scanning Scenarios ......................................................................................... 9
Scanning Electrophoresis Gels ............................................................ 10
Scanning Transparent Film ................................................................... 12
Scanning Reflective Originals ............................................................... 14
Scanning Originals Applied with Auto Focus ..................................... 16
Specifications / System Requirements ........................................................ 18
FCC Compliance Statement .......................................................................... 19
Advertisement
Table of Contents

Related Manuals for Microtek Bio-5000


Summary of Contents for Microtek Bio-5000
-
Page 1: Table Of Contents
Getting to Know Your Bio-5000 The Bio-5000 is a combined flatbed and film scanner for electrophoresis gels and film formats that also offers additional functionality to scan reflective art or prints as large as 8.5" x 14". The Bio-5000 is equipped with Microtek's patented Emulsion Direct Imaging Technology (E.D.I.T.) for delivering distortion-free images in transparency... -
Page 2: Features Of The Bio-5000
The results of Auto Focus can be best seen when used with uneven, creased photos and film. • 4800 x 9600-dpi resolution: The exceptionally high resolution of the Bio-5000 lets you scan even postage-size images and enlarge them with amazing clarity, with little loss of detail. -
Page 3: Taking A Closer Look
Taking a Closer Look Scanner lid Glass surface (Upper scan bed) Vertical ruler Power button Horizontal ruler Power indicator (green) Reflective Ready indicator (amber) Transparency Ready indicator (amber) Hi-Speed USB port (1) Power connector Bio-5000 Supplement... -
Page 4: Unlocking The Scanner
When the screw has been tightened, this indicates that your scanner is locked. 4. Turn off your scanner. The scanner is now ready for transport. Bio-5000 Supplement... -
Page 5: Positioning Your Originals
Also, make sure the calibration strip faces the front of the scanner when you insert the holder into the lower compartment of the Bio-5000. The correct side up is the side showing the holder •... -
Page 6: Positioning Electrophoresis Gels
Positioning Electrophoresis Gels This procedure applies when you use the lower scan bed of the Bio-5000 to scan the electrophoresis gels. Using the Leak-Free Glass Holder 1. Place the electrophoresis gel to be scanned on top of the glass surface of the Leak-Free Glass Holder. -
Page 7: Positioning Transparent Film
Positioning Transparent Film This procedure applies when you use the lower scan bed of the Bio-5000 to scan transparencies, such as positive or negative film. Using the Leak-Free Glass Holder 1. Place the film to be scanned face down on top of the glass surface of the Leak- Free Glass Holder. -
Page 8: Positioning Reflective Originals
Positioning Reflective Originals This procedure applies when you use the upper scan bed of the Bio-5000 to scan reflective materials, such as photos and prints. 1. Open the scanner lid. 2. Place the original to be scanned face down on the scanner glass bed, towards the front of the scanner. -
Page 9: Scanning Scenarios
Scanning Scenarios The following pages provide various scenarios for scanning with the Bio-5000, including the following: • Scanning electrophoresis gels: This scenario details the steps for scanning electrophoresis gels. • Scanning transparent film: This scenario details the steps for scanning transparent film, such as 4"... -
Page 10: Scanning Electrophoresis Gels
When you have completed the settings, press the Done/Save button, and the scanner will automatically scan and save your image based on your settings. Bio-5000 Supplement... - Page 11 Bio-5000 Supplement...
-
Page 12: Scanning Transparent Film
When you have completed the settings, press the Done/Save button, and the scanner will automatically scan and save your image based on your settings. Bio-5000 Supplement... - Page 13 Bio-5000 Supplement...
-
Page 14: Scanning Reflective Originals
When you have completed the settings, press the Done/Save button, and the scanner will automatically scan and save your image based on your settings. Bio-5000 Supplement... - Page 15 Bio-5000 Supplement...
-
Page 16: Scanning Originals Applied With Auto Focus
The target sign marks the area where the Auto Focus is applied to. In this case, the software system automatically detects, calculates and selects the area applied with the Auto Focus function. Auto Focus target sign Scan frame (enclosed by dotted lines) Bio-5000 Supplement... - Page 17 6. Click the Scan (or “Scan to”) button in the Preview window to start the final scan. This final scan process will include the Auto Focus function to make the image look clearer and sharper. Bio-5000 Supplement...
-
Page 18: Specifications / System Requirements
• Pentium IV PC or higher with USB, or Hi-Speed USB (USB 2.0) port • Microsoft Windows 2000, XP, Vista or Windows 7 Important Specifications, software bundles, and accessories are subject to change without notice. Not responsible for typographic errors. Bio-5000 Supplement... -
Page 19: Fcc Compliance Statement
This device complies with Part 15 of the FCC Rules. Operation is subject to the following two conditions: (1) This device may not cause harmful interference, and (2) this device must accept any interference received, including interference that may cause undesired operation. Bio-5000 Supplement... - Page 20 Bio-5000 Supplement...
Need help?
Do you have a question about the Bio-5000 and is the answer not in the manual?
Questions and answers