Microtek ScanMaker 6000 Quick Start
Microtek scanmaker 6000: quick start
Hide thumbs
Also See for ScanMaker 6000:
- Supplementary manual (18 pages) ,
- User manual (160 pages) ,
- Tutorial (16 pages)
Advertisement
Quick Links
Installing your Microtek ScanMaker 6000
Unpack Contents
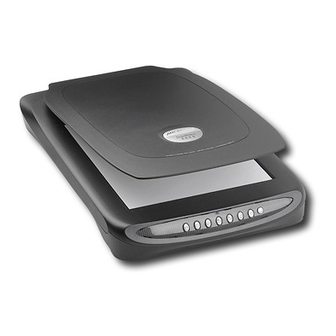
ScanMaker 6000 scanner
Power adapter
Software CD
LightLid 35
Hi-Speed USB cable
Install Software
Important:
Do not remove
the yellow stickers from your
scanner until you are told to
do so. You must install
software before connecting
your scanner.
Always close any open
programs and turn off
Anti-virus utilities before
installing software.
PC:
A. Place the Microtek CD-ROM into the CD-ROM drive.
B. Follow the on-screen instructions to install the driver and software.
NOTE: If the Microtek Software Installer screen does not come up automatically,
double-click the following in succession: "My Computer"; the CD-ROM icon; then
cdsetup.exe to start the installer program.
MAC:
A. Place the Microtek CD-ROM into the CD-ROM drive. Install the Adobe
software first, and then install the rest of the software components.
B. Restart your computer.
NOTE: After rebooting your Macintosh, the Microtek software will attempt to
locate your scanner on the system. Since this is your first install and you have
not yet connected the scanner, simply ignore the message that appears and
proceed to the next step.
Unlock Scanner
Unlocked
Locked
A. Remove the yellow "Step 3" sticker from your scanner.
B. With the scanner power off, turn the scanner on its side to see the
locking screw at the bottom.
C. Using a coin, turn the locking screw clockwise until the arrow mark
points to the position as indicated in the graphic above, with the icon on
the lock showing as "unlocked" .
NOTE: To lock the scanner (for shipping and other reasons), turn the locking screw
counterclockwise until the arrow mark points to the "Locked" position. Do not turn the
scanner upside down and attempt to lock the scanner this way.
Connect Scanner
C
B
To the power adapter
A. Remove the yellow "Step 4" sticker from your scanner.
B. Connect the power adapter to the back of the scanner.
C. Plug the power adapter into a power source.
E
To the Hi-Speed USB cable
D. Connect one end of the cable to your computer.
E. Connect the other end of the cable to the scanner.
F .
Press the power button at the front panel of
your scanner, and wait for the light to stop
blinking and stay on steady.
The system will detect your scanner
automatically.
Power button
NOTE: If your computer has both Hi-Speed USB (USB 2.0) and USB 1.1 ports, connect
the cable to the Hi-Speed USB port. Use the USB 1.1 port only if your computer does
not have Hi-Speed USB.
Scanning Basics
1. Place the scan material
A. To scan photos, place the photo to be
scanned on the scanner bed. The top end of
the original should be positioned towards
the front of the scanner, with the surface to
be scanned facing down.
NOTE: For the automatic cropping feature to
work correctly during the preview scan of your
photo, make sure the scanner lid is completely
flat and closed over the scan bed.
B. To scan film, use the LightLid 35. See
"Using the LightLid 35" (back section) for
more details.
2. Launch ScanWizard 5
To launch ScanWizard 5 as a stand-alone program, double-click the
ScanWizard 5 icon on your desktop. The Standard Control Panel will
appear, and the scanner will automatically perform a "fast preview" of your
image, based on settings specified under the Original, Scan Type, and
Purpose categories (buttons).
Scanner Buttons
D
The ScanMaker 6000 is equipped with seven scanner buttons, providing quick access to
the most frequently used functions. These buttons are Cancel/Setup, Scan, Copy,
E-mail, OCR, Scan-to-Web, and Custom.
•
Cancel/Setup: Cancels the scanning job when the scanner is scanning. Launches the
Microtek Scanner Configuration (MSC) utility when the scanner is not scanning.
•
Scan: Captures images that can be saved as files or sent to an image-editing application.
•
Copy: Scans the image and sends it to your printer.
•
E-mail: Scans the image and delivers it directly to your e-mail editor.
•
OCR: Scans a text document, converts, and saves it in text file format. Files may be
immediately edited if configured in the MSC utility.
•
Scan-to-Web: Scans an image and sends the output to a website. Your default browser will
open and display the captured image.
•
Custom: Customizes this button to perform your preferred function, such as Power Saving,
Scan, Fax, or Launch Application.
F
3. Select preferences
Use the following buttons to change the settings according to your
preferences.
Original – Defines the category of the media (scan material).
Scan Type – Selects the output image type (color, gray, or B&W).
Purpose – Sets the image resolution to match your target application.
NOTE: Click the Scale Output, Adjust, and Reset buttons if you need to make
further adjustments.
For details on how to use the Advanced Control Panel, refer to the
ScanMaker 6000 Supplement PDF document in the Microtek CD-ROM.
Mac OS X
Windows XP
4. Scan your material
A. Click the Scan to button from the ScanWizard 5 Control Panel.
B. When the Save As dialog box appears, specify the folder location, a file
name, and the format for the output image, then click Save. The image is
scanned and saved to the specified location.
Send image to application after saving:
If this option is checked, the scanned image is saved first, then automatically
delivered to an image-editing software, an e-mail editor, or a web browser as
indicated in the destination box.
E-mail
Cancel/
Scan
Copy
OCR
Scan-to-
Setup
Web
TURN OVER TO CONTINUE
Custom
Advertisement

Related Manuals for Microtek ScanMaker 6000


Summary of Contents for Microtek ScanMaker 6000
-
Page 1: Connect Scanner
Original, Scan Type, and Purpose categories (buttons). Scanner Buttons The ScanMaker 6000 is equipped with seven scanner buttons, providing quick access to the most frequently used functions. These buttons are Cancel/Setup, Scan, Copy, E-mail, OCR, Scan-to-Web, and Custom. - Page 2 For more details on the use of the LightLid 35 as well as information on how instructions in this guide or the ScanMaker 6000 Supplement PDF document to scan film, refer to the ScanMaker 6000 Supplement PDF document in the in the Microtek CD-ROM.
Need help?
Do you have a question about the ScanMaker 6000 and is the answer not in the manual?
Questions and answers