
Related Manuals for Zanussi ZDF26011XA


Summary of Contents for Zanussi ZDF26011XA
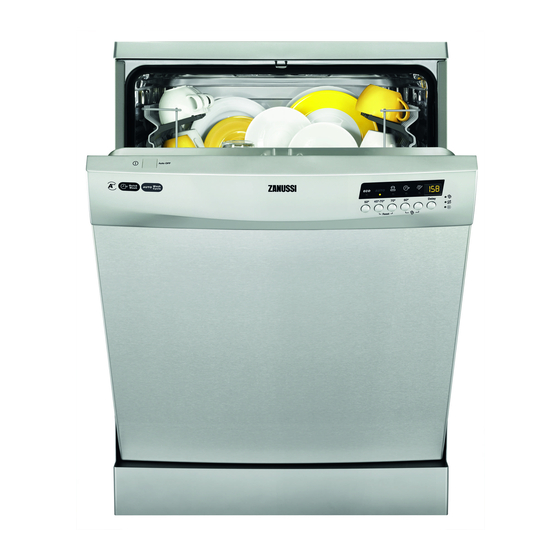
- Page 1 User Manual GETTING STARTED? EASY. ZDF26011XA NL Gebruiksaanwijzing Afwasautomaat EN User Manual Dishwasher FR Notice d'utilisation Lave-vaisselle...
-
Page 2: Veiligheid Van Kinderen En Kwetsbare Mensen
VEILIGHEIDSINFORMATIE Lees zorgvuldig de meegeleverde instructies voor installatie en gebruik van het apparaat. De fabrikant is niet verantwoordelijk voor letsel of schade veroorzaakt door een verkeerde installatie of verkeerd gebruik. Bewaar de instructies altijd op een veilige en toegankelijke plaats voor toekomstig gebruik. VEILIGHEID VAN KINDEREN EN KWETSBARE MENSEN Dit apparaat kan worden gebruikt door kinderen vanaf 8 jaar en... -
Page 3: Montage
Laat de deur van het apparaat niet open staan zonder toezicht • om te voorkomen dat er iemand over struikelt. Schakel het apparaat uit en trek de stekker uit het stopcontact • voordat u onderhoudshandelingen verricht. Gebruik geen waterstralen onder druk en/of stoom om het •... - Page 4 • Vaatwasmiddel is gevaarlijk. Volg de veiligheidsinstructies op de verpakking van het vaatwasmiddel op. • Speel niet met het water van het apparaat en drink het niet op. • Verwijder de borden pas uit het apparaat als het programma is voltooid. Er kan vaatwasmiddel op de borden zitten.
- Page 5 BEDIENINGSPANEEL Aan/uit-toets Toets startuitstel Weergave Programmakeuzetoetsen Indicatielampjes INDICATIELAMPJES Aanduiding Beschrijving XtraDry-indicatielampje. Glansmiddelindicatielampje. Dit indicatielampje is altijd uit als het programma in werking is. Zoutindicatielampje. Dit indicatielampje is altijd uit als het programma in werking is.
- Page 6 PROGRAMMA’S Verbruiksgegevens Mate van vervui- Programma ling Programmafasen Type belading Programma- Energie- Water duur (kWh) (min) Normaal bevuild • Voorspoelen 0.932 Serviesgoed en • Wassen 50 °C bestek • Spoelgangen • Drogen Alles • Voorspoelen 40 - 150 0.6 - 1.4 7 - 12 Serviesgoed, •...
- Page 7 INSTELLINGEN PROGRAMMAKEUZE-MODUS Het apparaat staat in de programmakeuzemodus als na de activering alle programmalampjes gaan branden en het display twee horizontale statusbalkjes weergeeft. Als het apparaat in de programmakeuzemodus staat, kan een programma worden ingesteld. Druk, als het bedieningspaneel niet deze stand weergeeft, op Reset. RESET-FUNCTIE Houd tegelijkertijd ingedrukt tot het apparaat in de programmakeuzemodus staat.
-
Page 8: De Waterontharder Instellen
DE WATERHARDHEIDTABEL Duitse hardheid Franse hardheid Wateronthardings- mmol/l Clarke-graden (°dH) (°fH) niveau 47 -50 84 - 90 8.4 - 9.0 58 - 63 43 - 46 76 - 83 7.6 - 8.3 53 - 57 37 - 42 65 - 75 6.5 - 7.5 46 - 52 29 - 36... -
Page 9: De Aanduiding Leeg Glansmiddelreservoir Deactiveren
DE AANDUIDING LEEG GLANSMIDDELRESERVOIR DEACTIVEREN Terwijl het apparaat in de instelmodus staat: 1. Druk op • De indicatielampjes zijn uit. • Het indicatielampje blijft knipperen. • Het display toont de huidige instelling: – = aanduiding glansmiddelreservoir leeg geactiveerd. – = aanduiding glansmiddelreservoir leeg gedeactiveerd. 2. -
Page 10: Dagelijks Gebruik
ZOUT TOEVOEGEN Doe voor het eerste gebruik één liter water in het zoutreservoir. Water en zout kunnen uit het zoutreservoir stromen als u het bijvult. Gevaar voor roest. Start om dit te voorkomen een programma nadat u het zoutreservoir heeft bijgevuld. GLANSMIDDEL TOEVOEGEN Met glansmiddel wordt het serviesgoed zonder vlekken of strepen gedroogd. -
Page 11: Multitabletten Toevoegen
MULTITABLETTEN TOEVOEGEN • Stel de waterontharder op het laagste niveau in. DE AUTO OFF-FUNCTIE Deze functie verlaagt het energieverbruik door het apparaat automatisch uit te schakelen als het niet werkt. De functie gaat werken: • 5 minuten na voltooiing van het programma. •... -
Page 12: Optie Xtradry
OPTIE XTRADRY Activeer deze optie als u het droogresultaat een boost wilt geven. Bij het gebruik van deze optie kunnen de duur van sommige programma's, het waterverbruik en de temperatuur van de laatste spoeling worden beïnvloed. De optie XtraDry is geen permanente optie en moet elke cyclus geselecteerd worden. Deze optie is niet van toepassing op OPTIE DELAY max. -
Page 13: Aanwijzingen En Tips
5 min • Druk op de aan/uit-toets of wacht totdat de Auto Off-functie het apparaat automatisch heeft uitgeschakeld. • Draai de waterkraan dicht. Als u de deur opent voor de activering van Auto Off, wordt het apparaat automatisch uitgeschakeld. AANWIJZINGEN EN TIPS ALGEMEEN belangrijk om het correcte niveau voor de waterontharder in te stellen voor goede... -
Page 14: Onderhoud En Reiniging
2. Zorg ervoor dat het zout- en het • Leg lichte voorwerpen in het bovenrek. Zorg glansmiddeldoseerbakje gevuld zijn. ervoor dat de voorwerpen niet verschuiven. 3. Start het kortste programma met een • Zorg er voor dat de sproeiarm vrij kan spoelfase. -
Page 15: De Sproeiarmen Reinigen
• Zorg ervoor dat er geen etensresten of vuil in of rond de rand van de opvangbak zitten. • Plaats de platte filter (C) terug. Zorg ervoor dat het goed onder de 2 geleidingen zit. • Plaats de filters (A) en (B) terug. •... - Page 16 Probleem en alarmcode Mogelijke oorzaak en oplossing U kunt het apparaat niet acti- • Zorg dat de stekker in het stopcontact zit. veren. • Zorg dat er geen zekering in de zekeringenkast is doorgebrand. Het programma begint niet. • Zorg dat de deur van het apparaat is gesloten. •...
-
Page 17: De Was- En Droogresultaten Zijn Niet Naar Tevredenheid
Probleem en alarmcode Mogelijke oorzaak en oplossing Het apparaat maakt kortslui- • De stroomsterkte is onvoldoende om alle tegelijk werkende ap- ting. paraten van stroom te voorzien. Controleer de stroomsterkte van het stopcontact en het vermogen op de meter, of zet één van de in gebruik zijnde apparaten uit. -
Page 18: Technische Informatie
Probleem Mogelijke oorzaak en oplossing Opvallend veel schuim tijdens • Gebruik alleen wasmiddel voor afwasautomaten. het wassen. • Het glansmiddeldoseerbakje is lek. Neem contact op met een servicecentrum. Roestresten op bestek. • Er wordt voor het wassen teveel zout in het water gebruikt. Zie 'De waterontharder instellen'. -
Page 19: Aanwijzingen Voor Testinstituten
Energieverbruik Uit-modus (W) 0.10 1) Zie het typeplaatje voor andere waarden. 2) Als het hete water door alternatieve, milieuvriendelijkere energiebronnen geproduceerd wordt (bijv. zon- nepanelen en windenergie), gebruik dan een heetwatervoorziening om het energieverbruik te verminderen. TYPEPLAATJE AANWIJZINGEN VOOR TESTINSTITUTEN Stuur voor alle benodigde informatie over testprestaties een e-mail naar: info.test@dishwasher-production.com... -
Page 20: Safety Information
SAFETY INFORMATION Before the installation and use of the appliance, carefully read the supplied instructions. The manufacturer is not responsible for any injuries or damages that are the result of incorrect installation or usage. Always keep the instructions in a safe and accessible location for future reference. -
Page 21: Safety Instructions
Do not keep the appliance door open without supervision to • prevent to fall on it. Before any maintenance operation, deactivate the appliance • and disconnect the mains plug from the socket. Do not use high pressure water sprays and/or steam to clean •... - Page 22 • Do not remove the dishes from the appliance until the programme is completed. There can be detergent on the dishes. • The appliance can release hot steam if you open the door while a programme operates. • Do not put flammable products or items that are wet with flammable products in, near or on the appliance.
-
Page 23: Control Panel
CONTROL PANEL On/off button Delay button Display Programme buttons Indicators INDICATORS Indicator Description XtraDry indicator. Rinse aid indicator. It is always off while the programme operates. Salt indicator. It is always off while the programme operates. - Page 24 PROGRAMMES Consumption values Degree of soil Programme Programme phases Type of load Duration Energy Water (min) (kWh) Normal soil • Prewash 0.932 Crockery and • Wash 50 °C cutlery • Rinses • • Prewash 40 - 150 0.6 - 1.4 7 - 12 Crockery, cut- •...
-
Page 25: Programme Selection Mode
SETTINGS PROGRAMME SELECTION MODE The appliance is in programme selection mode when after the activation all the programme indicators come on and the display shows two horizontal status bars. When the appliance is in programme selection mode it is possible to set a programme. If the control panel does not show this condition, do the Reset. -
Page 26: The Water Hardness Table
THE WATER HARDNESS TABLE German degrees French degrees Water softener mmol/l Clarke degrees (°dH) (°fH) level 47 -50 84 - 90 8.4 - 9.0 58 - 63 43 - 46 76 - 83 7.6 - 8.3 53 - 57 37 - 42 65 - 75 6.5 - 7.5 46 - 52... -
Page 27: Deactivating The Rinse Aid Empty Notification
DEACTIVATING THE RINSE AID EMPTY NOTIFICATION While the appliance is in user mode: 1. Press • The indicators are off. • The indicator continues to flash. • The display shows the current setting: – = rinse aid empty notification activated. –... -
Page 28: Daily Use
ADDING RINSE AID The rinse aid helps to dry the dishes without streaks and stains. It is automatically released during the hot rinse phase. DAILY USE 1. Open the water tap. • If the rinse aid indicator is on, fill the rinse 2. -
Page 29: Starting A Programme
• 5 minutes after the completion of the programme. • After 5 minutes if the programme has not started. STARTING A PROGRAMME 1. Keep the appliance door ajar. 2. Press the on/off button to activate the appliance. Make sure that the appliance is in programme selection mode. -
Page 30: Option Delay
OPTION DELAY max. 1. Press Delay until the display shows the delay time you want to set. 2. Close the appliance door, the countdown starts. The countdown starts to decrease with steps of 1 hour. When the countdown is completed the programme starts. OPENING THE DOOR WHILE THE APPLIANCE OPERATES If you open the door while a programme is running, the appliance stops. -
Page 31: Hints And Tips
HINTS AND TIPS GENERAL • Detergent tablets do not fully dissolve with short programmes. To prevent detergent residues on The following hints will ensure optimal cleaning and the tableware, we recommend that you use the drying results in daily use and also help to protect tablets with long programmes. -
Page 32: Care And Cleaning
• The position of the items in the baskets is 2. First remove items from the lower basket, then correct. from the upper basket. • The programme is applicable for the type of load and for the degree of soil. At the end of the program water can •... -
Page 33: Troubleshooting
• If you regularly use short duration programmes, specific cleaning product for dishwashers. these can leave deposits of grease and Follow carefully the instructions on the limescale inside the appliance. To prevent this, packaging of the product. we recommend to run long duration programmes at least 2 times per month. -
Page 34: The Washing And Drying Results Are Not Satisfactory
Problem and alarm code Possible cause and solution The remaining time in the dis- • This is not a defect. The appliance is working correctly. play increases and skips nearly to the end of program time. Small leak from the appliance •... - Page 35 Problem Possible cause and solution There are whitish streaks or blu- • The release quantity of rinse aid is too much. Adjust the rinse ish layers on glasses and dishes. aid level to a lower level. • The quantity of detergent is too much. There are stains and dry water •...
-
Page 36: Technical Information
TECHNICAL INFORMATION Dimensions Width / height / depth (mm) 600 / 850 / 625 Voltage (V) 220 - 240 Electrical connection Frequency (Hz) Water supply pressure Min. / max. bar (MPa) 0.5 (0.05) / 8 (0.8) Water supply max 60 °C Cold water or hot water Capacity Place settings... -
Page 37: Sécurité Des Enfants Et Des Personnes Vulnérables
CONSIGNES DE SÉCURITÉ Avant d'installer et d'utiliser cet appareil, lisez soigneusement les instructions fournies. Le fabricant ne pourra être tenu pour responsable des blessures et dégâts résultant d'une mauvaise installation ou utilisation. Conservez toujours les instructions dans un lieu sûr et accessible pour vous y référer ultérieurement. SÉCURITÉ... -
Page 38: Instructions De Sécurité
Placez les couteaux et les couverts avec des bouts pointus • dans le panier à couverts avec les pointes tournées vers le bas ou en position horizontale. Ne laissez pas la porte de l'appareil ouverte sans surveillance • pour éviter tout risque de chute. Avant toute opération d'entretien, éteignez l'appareil et •... -
Page 39: Maintenance
• Retirez le dispositif de verrouillage de la porte pour empêcher les enfants et les animaux de s'enfermer dans l'appareil. AVERTISSEMENT! Tension dangereuse. • Si le tuyau d'arrivée d'eau est endommagé, débranchez immédiatement la fiche de la prise secteur. Contactez le service après-vente pour remplacer le tuyau d'arrivée d'eau. -
Page 40: Panneau De Commande
PANNEAU DE COMMANDE Touche Marche/Arrêt Touche Départ différé Affichage Touches de programme Voyants VOYANTS Indicateur Description Voyant XtraDry. Voyant du réservoir de liquide de rinçage. Ce voyant est toujours éteint pendant le déroulement du programme. Voyant du réservoir de sel régénérant. Ce voyant est toujours éteint pendant le dé- roulement du programme. - Page 41 PROGRAMMES Valeurs de consommation Degré de salissu- Phases du pro- Programme gramme Consomma- Type de vaisselle Durée tion électri- (min) (kWh) Normalement • Prélavage 0.932 sale • Lavage 50 °C Vaisselle et • Rinçages couverts • Séchage Tous • Prélavage 40 - 150 0.6 - 1.4 7 - 12...
-
Page 42: Mode Programmation
RÉGLAGES MODE PROGRAMMATION L'appareil est en mode Programmation lorsque, après sa mise en marche, tous les voyants de programme s'allument et 2 barres d'état horizontales sont affichées. Lorsque l'appareil est en mode Programmation, il est possible de sélectionner un programme. Si le bandeau de commande ne montre pas cette condition, effectuez la Reset. -
Page 43: Réglage De L'adoucisseur D'eau
TABLEAU DE DURETÉ DE L'EAU Degrés alle- Degrés français Niveau de l'adou- mands mmol/l Degrés Clarke (°fH) cisseur d'eau (°dH) 47 -50 84 - 90 8.4 - 9.0 58 - 63 43 - 46 76 - 83 7.6 - 8.3 53 - 57 37 - 42 65 - 75... -
Page 44: Avant La Première Utilisation
DÉSACTIVATION DE LA NOTIFICATION DU DISTRIBUTEUR DE LIQUIDE DE RINÇAGE VIDE Lorsque l'appareil est en mode utilisateur : 1. Appuyez sur • Les voyants sont éteints. • Le voyant continue à clignoter. • L'affichage indique le réglage actuel : – = notification du distributeur de liquide de rinçage vide activée. -
Page 45: Utilisation Quotidienne
AJOUT DU SEL RÉGÉNÉRANT Avant la première utilisation, versez un litre d'eau dans le réservoir de sel régénérant. De l'eau et du sel peuvent sortir du réservoir de sel régénérant lorsque vous le remplissez. Risque de corrosion. Afin d'éviter cela, après avoir rempli le réservoir de sel régénérant, démarrez un programme. AJOUT DU LIQUIDE DE RINÇAGE Le liquide de rinçage permet de sécher la vaisselle sans laisser de traînées ni de taches. -
Page 46: Fonction Auto Off
UTILISATION DE PASTILLES TOUT EN 1 • Réglez l'adoucisseur d'eau au niveau minimal. FONCTION AUTO OFF Cette fonction réduit la consommation d'énergie en éteignant automatiquement l'appareil lorsqu'il n'est pas en cours de fonctionnement. La fonction est activée : • 5 minutes après la fin du programme. •... -
Page 47: Fin Du Programme
OPTION XTRADRY Activez cette option lorsque vous voulez améliorer les performances de séchage. En utilisant cette option, la durée de certains programmes, la consommation d'eau et la température du dernier rinçage peuvent être affectés. L'option XtraDry n'est pas une option permanente et doit être sélectionnée à chaque cycle. Cette option n'est pas compatible avec le programme OPTION DELAY max. -
Page 48: Utilisation De Sel Régénérant, De Liquide De Rinçage Et De Produit De Lavage
5 min • Pour éteindre l'appareil, appuyez sur la touche Marche/Arrêt ou attendez que la fonction Auto Off l'éteigne automatiquement. • Fermez le robinet d'eau. Si vous ouvrez la porte avant l'activation de la fonction Auto Off, l'appareil s'éteint automatiquement. CONSEILS RACCORDEMENT L'adoucisseur doit être réglé... -
Page 49: Entretien Et Nettoyage
QUE FAIRE SI VOUS NE VOULEZ PLUS • Vérifiez que les verres ne se touchent pas pour UTILISER DE PASTILLES TOUT EN 1 éviter qu'ils ne se brisent. • Placez les petits articles dans le panier à Avant de commencer à utiliser le produit de lavage, couverts. -
Page 50: En Cas D'anomalie De Fonctionnement
NETTOYAGE DES FILTRES • Assurez-vous qu'il ne reste aucun résidu alimentaire ni salissure à l'intérieur ou autour du bord du collecteur d'eau. • Remettez le filtre plat (C) en place. Assurez-vous qu'il soit correctement positionné entre les 2 guides. • Remontez les filtres (A) et (B). - Page 51 Pour certaines anomalies, l'écran affiche un La plupart des problèmes peuvent être code d'alarme. résolus sans avoir recours au service après- vente agréé. Problème et code d'alarme Cause et solution possibles L'appareil ne s'allume pas. • Assurez-vous que la fiche du câble d'alimentation est bien insé- rée dans la prise de courant.
-
Page 52: Les Résultats De Lavage Et De Séchage Ne Sont Pas Satisfaisants
Problème et code d'alarme Cause et solution possibles La porte de l'appareil est diffi- • L'appareil n'est pas de niveau. Desserrez ou serrez les pieds ré- cile à fermer. glables (si disponibles). • De la vaisselle dépasse des paniers. Bruit de cliquetis ou de batte- •... - Page 53 Problème Cause et solution possibles Il y a des taches et traces de • La quantité de liquide de rinçage libérée n'est pas suffisante. gouttes d'eau séchées sur les Placez le sélecteur de dosage du liquide de rinçage sur le ni- verres et la vaisselle.
-
Page 54: Caractéristiques Techniques
Reportez-vous aux chapitres « Avant la première utilisation », « Utilisation quotidienne » ou « Conseils » pour connaître les autres causes probables. CARACTÉRISTIQUES TECHNIQUES Dimensions Largeur / hauteur / profondeur 600 / 850 / 625 (mm) Tension (V) 220 - 240 Branchement électrique Fréquence (Hz) Pression de l'arrivée d'eau... - Page 56 WWW.ZANUSSI.COM/SHOP...
Need help?
Do you have a question about the ZDF26011XA and is the answer not in the manual?
Questions and answers