Table of Contents
Advertisement
Quick Links
Advertisement
Chapters
Table of Contents

Subscribe to Our Youtube Channel
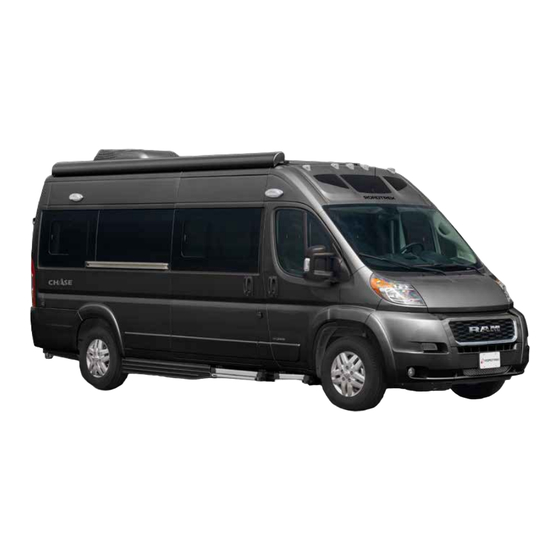
Related Manuals for Roadtrek CHASE 2021


Summary of Contents for Roadtrek CHASE 2021
- Page 1 2 0 2 1 O W N E R ’ S M A N U A L www.roadtrek.com 04/27/2021...
-
Page 2: Table Of Contents
Contents Introduction ........................................... 6 Disclaimer ............................................6 Copyright ............................................6 Do’s and Don’ts ..........................................7 Symbol Legend ........................................... 7 Regulatory Warnings ........................................7 Information, Cautions and Warnings ..................................8 Before You Head Out ........................................10 Coming Home ..........................................11 Interior Living Space ........................................12 Cabinets ............................................ - Page 3 Antenna and Cable Connections ....................................23 Refrigerator ..........................................23 Microwave Oven ......................................... 24 Propane Cooktop ........................................24 Hot Water ............................................ 25 Outside Your Roadtrek ........................................26 Awning ............................................26 Exterior Shower .......................................... 28 Side Door Step ........................................... 28 Rear Door Screen ........................................29 Side Door Screen ........................................
- Page 4 About Propane ........................................... 38 Regulatory Concerns ......................................... 38 Electrical System ........................................... 39 Coach Batteries .......................................... 39 Battery Disconnect Switch ......................................39 Charging Your Batteries ......................................39 Inverter Charger ......................................... 39 Underhood Generator ........................................ 39 Solar ............................................40 On Board 120 Volt AC Power ..................................... 40 Standard 3000W Inverter ......................................
- Page 5 At Least Twice a Year ......................................... 48 At Least Once a Year......................................... 51 Other Maintenance Checks ...................................... 51 Tire Service Kit ..........................................51 Roadtrek Two Year Limited Warranty ..................................52 Obtaining Service ......................................... 53 Specifications ..........................................53 Roadtrek Warranty Service ......................................54 Aftermarket Disclaimer .........................................55...
-
Page 6: Introduction
Congratulations on the purchase of your Roadtrek and welcome to the Roadtrek Inc. family. The information included in this manual is meant to help and guide you with your vehicle so that you know how to properly use the many functions your Roadtrek has to offer. -
Page 7: Do's And Don'ts
All images used in this manual remain the property of Roadtrek Inc. They are for illustrative purposes only and may or may not be representative of the upfits in your Roadtrek. Contact Roadtrek Inc. for alternate licensing arrangements if you want to use or distribute this manual commercially. -
Page 8: Information, Cautions And Warnings
Turn the TV off and stow it while the vehicle is in motion. The flat screen TV should not be stored inside the Roadtrek in cold temperatures. Remove it to reduce the chance of damage from the cold. Check the Owner's Manual for the TV for storage and operating temperatures. - Page 9 Battery acid can burn your skin and damage clothing. Protective eye wear and gloves should be worn while Battery handling batteries. Effective June 2010 all Roadtrek Inc. installed batteries are sealed AGM batteries that do not require the addition of water.
-
Page 10: Before You Head Out
This unit has a 12VDC, 110VAC and potentially 36-volt solar system. These systems need to be disconnected Servicing before working on them. Before You Head Out Your new Roadtrek is ready to go with just a little bit of preparation. To prepare for your first trip, you should: Read this manual. • •... -
Page 11: Coming Home
Coming Home When you come home, there are a few maintenance tasks you should do to get your Roadtrek ready to go for next time. Refer to other sections in this manual for the procedures listed here. • On your way home, dump the gray and black tanks at a convenient facility. Visit the owner’s section of our website to read the HOWTO: Wastewater Dumping guide for a concise description of the procedure to do this. -
Page 12: Interior Living Space
Interior Living Space Cabinets Your Roadtrek is equipped with cabinet latches which prevent the door from opening while the vehicle is in motion. The pushbuttons on the cabinet latches toggle from latched (button in) to openable (button out) by pressing the button. (Pictures 13.1, 13.2) To open a cabinet, press the button to pop the latch, pull gently on the latch, and the cabinet door will open. - Page 13 Cabinets (Continued) Picture 14.1 Picture 14.3 Picture 14.2 Apply moderate upward pressure and GENTLE Each cabinet has an adjustable arm to hold the Turn screw clockwise to lower cabinet face outward pressure with both thumbs on the bottom door open (if it won’t latch), counterclockwise to raise it up corners of the door to open a stuck cabinet (if it won’t open)
-
Page 14: Galley Cabinets
Galley Cabinets Immediately beneath the galley countertop there two cabinets and one drawer to hold your kitchen supplies. The drawer underneath the stove pulls out and can be used to hold silverware and small cooking utensils. (Picture 15.1) Picture 15.1 Galley with propane cooktop Lights All but 2 of the coach lights are controlled via the control panel. -
Page 15: Tables
Tables The tables (Pictures 17.2, 18.1) can be set up to use either the front or rear lounge areas for dining, computer, gaming, or other recreational use. The table leg is stored in the closet to the left of the galley, next to the water heater. (Picture 16.1) The leg keys into a T-nut fitting in the floor plate. To install the table leg in the floor plate, unscrew the T-nut all the way on the end of the table leg and insert the T-nut into the key in the floor plate. - Page 16 Front Table Setup The vehicle will not drive unless the front seats are locked and forward facing. Picture 17.2 Front lounge table Picture 17.1 To rotate the front seats, lift on the front inside corner trim...
-
Page 17: Captain's Seats
Captain’s Seats The two captain's seats in the front of your Roadtrek are adjustable fore-and-aft by pulling up on the bar under the front of the seat and will swivel when the inside corner is pulled up. Always return the seats to the forward-facing position when driving. They will lock into this position and stay locked until the swivel tab is raised again. -
Page 18: Window Treatments
Window Treatments The nightshade curtain blocks airflow. (Picture 19.1) If you leave the window open, then close the nightshade, close all other windows, and then close the side door, it is possible for the curtain to get blown out of the track. Always close the window prior to closing the nightshade. The window curtains slide to the right and left. -
Page 19: Ventilation
Ventilation Your Roadtrek is equipped with a ceiling mounted ventilation fan. (Picture 21.1) The fan has a cover that must be raised by turning the large knurled knob or with the remote. Raise the cover, then use the remote to the desired speed and temperature. -
Page 20: Sleeping Facilities
Sleeping Facilities Your Roadtrek has beds that can be configured as twin beds (picture 22.1) or king bed (picture 22.2). Experiment with different configurations to find what works best for you. Picture Driver side: Picture • There is a perforated door installed on the driver’s side bed for exhaust of the hot air from the inverter which is instated at one position towards the front of the van. -
Page 21: Bathroom Facilities
Always engage this pin before moving the vehicle, even for a short distance. Using the Toilet The enclosed bathroom in the Roadtrek contains a marine toilet. To flush the toilet, press the foot pedal located at the bottom of the front of the toilet bowl. (Picture 25.2) Picture 25.1... -
Page 22: Shower
Shower Picture 26.1 Picture 26.2 Picture 26.3 Shower connection and knob Shower drain Shower curtain and light To take a shower, unscrew the drain stopper in the center of the bathroom floor. (Picture 26.2) Release the hook and loop fastener straps retaining the shower curtain and slide the shower curtain along its track to enclose the shower space. -
Page 23: Appliances
Appliances The Smart TV is in the rear lounge area on the passenger side. The television uses 120 volts, so the inverter, generator, or shore power must be on and available for It to work. The TV is supplied with a remote control. -
Page 24: Microwave Oven
Microwave Oven The oven is a standard microwave oven. It operates much the same as the microwave at your house. It is probably lower powered, so cooking may take a bit longer. The microwave will operate from the batteries through the inverter for reheating purposes or other brief use. However, for extended microwave use, you must be connected to shore power or have the optional generator running. -
Page 25: Hot Water
Hot Water Your Roadtrek is equipped with a propane fired tankless water heater. The heater has no tank and operates on demand. At low flows water may be hot, while at high flows water may be cooler, this is normal. When you turn on the water heater you will not hear it fire up. It only ignites when it senses a water demand. -
Page 26: Outside Your Roadtrek
(Picture 30.2) The awning has two support struts that must be used to support the awning. (Picture 30.3) These are secured to the two attachment points on the side of the Roadtrek. Refer to the awning manual for the proper way of securing the awning supports to the attachments. - Page 27 If the power to the vehicle is not available, the awning can be safely retracted using the manual override located on the idler (right) end of the case. (Picture 30.4) This procedure cannot be used to extend the awning. 1. Remove the plug from the right end cap and save. 2.
-
Page 28: Exterior Shower
Side Doorstep Your Roadtrek is equipped with a step that automatically extends when the side door is opened for easy entry and exit out of your vehicle. The controls can be accessed thru the firefly control unit. With the step switch on, the step will extend once when the door is open and remain extended even if the door is closed. -
Page 29: Rear Door Screen
Rear Door Screen Roadtrek’s have a rear screen which allows you to open the rear doors to get fresh air and a better view, without bugs coming in or (attended) pets going out. (Picture 33.1, 32.2, 32.3) The screen is attached to the rear door frame and cargo area floor. Along the bottom of the screen you can find three large pockets that can be used to store a range of different items. -
Page 30: Side Door Screen
Side Door Screen In addition to the rear door screen, there is also a side door screen which will allow you to keep the side door open for ventilation without admitting insects. The side door screen offers a bug (and no-see-ums) screen that comes equipped with a magnetic door catch that allows you to easily pass through the door without having to zip it open and closed. -
Page 31: Utilities
Utilities Just like your house, your Roadtrek has fresh water, electricity, wastewater disposal, heating, and cooling systems. In the Roadtrek, these systems are self-contained and travel with you. Your vehicle should be reasonably level to allow normal operation of the system. -
Page 32: Water Pump
Water Pump To use the water in the tank, you need to turn on the water pump using the firefly Control Panel. (Picture 35.1) Wastewater Gray Tank Galley sink, bathroom sink and shower drain water drains into the gray water tank. The shower and sink have traps to prevent tank odors from entering the living space. -
Page 33: Gate Valves And Macerator Hose Location
Gate Valves and Macerator Hose Location The wastewater holding tank gate valves and macerator system is located on the driver side of the van just forward of the rear tire behind a fold down access door (picture 35.3). To access the area, place a hand in each of the molded hand pulls and lift the door slightly to release it from the magnets and track and fold the door downward. -
Page 34: Heating And Cooling
If this is set to any other, then “auto” the A/C fan will be on. Air Conditioning The air conditioner (AC) provides cooling for your Roadtrek using electric shore power or the under- hood generator. (Picture 36.3) The AC can be operated normally when you are plugged in to shore power. -
Page 35: Propane System
Propane System The propane tank is located on the passenger side of the van, just forward of the rear tire (picture 36.4). The access door is hinged at the top and held closed magnetically. Grab the bottom of the door and swing it upwards to access the propane tank (picture 36.5). Ensure the propane system and their respective appliances are turned off before filling the propane tank. -
Page 36: Propane Tank Filling
Main Shutoff valve Propane Tank Propane tank main shutoff valve Propane Tank Filling To fill the tank, first turn off all propane appliances, then turn off the tank shutoff valve. We recommend that you find a qualified LPG technician to fill the tank. The following is an outline of the process to help you understand and not intended to be complete, nor to substitute for formal training or instruction. -
Page 37: Propane Relief Valve
Note the amount it takes to fill your tank. The seven-gallon tank in your Roadtrek will hold 5.9 gallons / 22 liters when completely empty and filled to the correct 80% full level. -
Page 38: Propane Sender
The Roadtrek's propane tank is mounted outside the vehicle and will vent propane where it can dissipate; any tank inside the vehicle will vent into the passenger compartment, creating an explosive propane-air mixture inside the enclosed space, which also contains many potential sources of ignition. -
Page 39: Electrical System
Coach Batteries Your Roadtrek uses a combination of Lithium and AGM batteries. These are sealed batteries. Do not attempt to open them. There is no maintenance possible on these batteries. Battery Disconnect Switch The battery disconnect switch provides power to all 12-volt appliances, such as the water pump, the refrigerator, the Firefly control panel and so forth. -
Page 40: Solar
Standard 3000W Inverter The standard configuration includes a 3000-watt inverter. (Picture 38.2) This inverter provides 120- volt AC (household current) for the outlets in your Roadtrek; primarily the ones running the TV and Picture 38.1 the DVD player. It will run the microwave and the air conditioner. -
Page 41: Shore Power
Shore Power The shore power connection is through the shore power cord, stored in the driver's side large compartment. See Outside your Roadtrek for location. The switchover from shore power to inverter is automatic. To connect to external (shore) power, open the side compartment and remove the power cord. Plug the power cord into the campsite 30-amp power source. -
Page 42: Monitor Panel
12-volt electrical devices to work. Remember to turn off two switches -the inverter switch and the battery disconnect switch when your Roadtrek is not being used to avoid discharging the batteries. Picture 40.1 Picture 40.2... -
Page 43: Inverter
Shore Power Shore power is the name for power supplied by a utility company that you plug into to provide power to your Roadtrek. Please visit the owner’s section of our website to read the HOWTO: Shore Power for a concise guide to plugging in and unplugging from shore power. -
Page 44: Distribution Panel
Flip the cover to the right and note the sticker under the cover with the identifying information on each breaker. (Picture 44.1) When storing the Roadtrek for the winter, turn off the battery disconnect switch, the inverter, and all circuit breakers in this panel. -
Page 45: Alarms And Warnings
Alarms and Warnings Propane and CO Monitor Your vehicle has been equipped with a combination propane leak and carbon monoxide detection device for your protection. It is located slightly above floor level next to the furnace and below the fridge. Be sure the detector is operating while using your vehicle. -
Page 46: Low Battery Level
Fire Extinguisher Your Roadtrek comes equipped with a dry chemical fire extinguisher suitable for all fires. (Picture 46.1) Before every trip, check to see that the needle on the dial is in the green range. If not, replace the fire extinguisher. DO NOT test your fire extinguisher by discharging it - total discharge time is 8 to 12 seconds, so it will become rapidly depleted if you test it this way. -
Page 47: Maintenance
Maintenance Tires See the automotive chassis manufacturer's owner's manual and documents for tire warranty information. Inflation pressure information is on the sticker inside the galley cabinet door. The current RAM ProMaster® manual recommends checking tire pressures regularly, at least every other week and before a long trip. -
Page 48: At Least Every Three Months
At Least Every Three Months • Flush water to the toilet. Use a hose or bucket to fill the tank through the toilet and dump. Flush gray water holding tank. Use a hose or bucket to fill the tank through the galley sink and dump. Flush and sanitize freshwater tank. - Page 49 To prevent water from entering your vehicle, avoid spraying water directly into exterior vents or grills. Do not use a power washer to clean your Roadtrek because damage to the paint, removal of decals and water leaks will result. Hand washing or commercial car washes accommodating large vehicles are the best way to keep your Roadtrek clean and shiny.
- Page 50 RV service facility. However, all warranty repairs at non-authorized RV service facilities must be preauthorized by Roadtrek Inc. Roadtrek Inc. will, at its option, replace or repair free of charge (including related labor) any defective part, about which the Purchaser shall notify their Roadtrek Dealer within the warranty period.
-
Page 51: At Least Once A Year
Roadtrek Inc. Limited Motorhome Warranty is void unless the following conditions are adhered to: 1. Warranty registration on the Motorhome must be completed by the Dealer and submitted to Roadtrek Inc. within 48 hours of date of retail delivery. When warranty applications are made and Warranty Card is not on file at Roadtrek Inc., reimbursement of claim will be delayed until proof of original purchase is... -
Page 52: Roadtrek Two Year Limited Warranty
Contact Roadtrek directly for servicing instructions. Warranty Intent The intent of this extended warranty is to ensure the new owner of a Roadtrek that it is worry free from manufacturer caused defects (excluding the chassis) for the first Two (2) years of use. -
Page 53: Obtaining Service
When your Roadtrek needs service, determine if the issue is with the Roadtrek upfits or the RAM ProMaster® chassis. For Roadtrek upfits, contact your dealer. Start with the service writer, then the service manager and finally, if you are unable to resolve your issues with the service department, contact the dealership managing partner or owner. -
Page 54: Roadtrek Warranty Service
Roadside Assistance Plan You are enrolled in a 24/7 roadside assistance plan for the first 2 years of the limited warranty upon registration of your Roadtrek. The roadside assistance plan is transferrable to subsequent owners within the 2-year coverage period. If your motorhome is disabled because of any nonconformity covered by this limited warranty or in certain other situations, our roadside assistance provider will assist by providing the following services: towing, mobile mechanic (where available), fuel delivery, tire change, battery jumpstart, lockout service and emergency fluids. -
Page 55: Aftermarket Disclaimer
The compatibility of aftermarket systems and components should be researched thoroughly either with the dealer or manufacture as they may interfere with the performance of Roadtrek Inc. recreation vehicle systems and components, further affecting the warranty of the vehicle as designed. -
Page 56: Howtos
Téléphone: 819-994-3328 (dans la région de Ottawa-Gatineau et à l’extérieur du pays) Sans frais: 1-800-333-0510 (au Canada) Internet: http://www.tc.gc.ca/rappels HOWTOs For access to more information on how to reform general functionalities of your Roadtrek, please go to: https://www.roadtrek.com/owners/#section-howto&FAQ Roadtrek Inc. -
Page 57: Appendix: Firefly Monitor Panel User Manual
APPENDIX FIREFLY MONITOR PANEL USER MANUAL Roadtrek Inc. - Page 58 Promaster Zion V1 Manual...
- Page 59 Roadtrek Promaster Zion V1 Manual (Revision 4) The information contained in this manual is a general overview of the Firefly system and is subject to change at any time. Table of Contents Touchscreen Overview Home Lights Climate Control Settings Mobile App...
-
Page 60: Touchscreen Overview
Touchscreen Overview Upon system startup, the warning screen below will appear requesting that the batteries be turned on before continuing. If no batteries have been toggled on, the system will be unable to function. Tap any icon from the vertical navigation menu to select the desired page. The currently selected page will always be listed in the top corner of the screen. -
Page 61: Home
Home Buttons will turn Blue while a circuit is on and colorless once the circuit has been turned off. This color change is known as showing status. Light Master controls all interior lights at once. When Light Master Off is pressed, it will remember which lights were on. - Page 62 Individual tank graphics represent the percentage filled for holding tanks. LP Tank Readings: • Below 25% will read “Low” and the tank level will show as normal. Toggle On/Off • From 25% to 75%, the tank level and percentage will show as normal. •...
-
Page 63: Lights
Lights This screen will control the lighting for the entire coach. Tap any button to turn the desired light On/Off. Lights with up/down arrows are dimmable. Press and hold these buttons to bring the brightness up or down. Tap the buttons to toggle On/Off. -
Page 64: Climate Control
Climate Control Use the Arrows to select your desired set temperature. Current zone temperature/mode/fan speed indicator. Fan Only Mode – Available if HVAC is off. The fan will operate by choosing High or Low. Auto will turn the fan off. Cool –... -
Page 65: Settings
Settings Tap to navigate to the Vegatouch Mira connection screen. When Auto Dimming is enabled, the screen will enter sleep mode after 60 seconds of inactivity. Tap anywhere on the screen to wake it up. Please note that even if Auto Dimming has been disabled, the screen will still enter sleep mode after 4 hours of inactivity during daytime hours (5am –... - Page 66 Drag the slider to adjust screen brightness. Tap the buttons to set the time or select 24-hour time mode. Floorplan display.
-
Page 67: Mobile App
Settings/Mobile App Vegatouch Mira is a wireless control module that easily connects to any Android or iOS device to give total control to many electrical, electronic and mechanical systems in your coach. Pair any device with the coach’s built-in interface to monitor and control many coach components. -
Page 68: Vegatouch Mira Setup
Vegatouch Mira Setup Notice: Make sure that Bluetooth is turned ON in your smart device settings before proceeding. Locate the Login Information: The login information can be found by clicking on the Mobile App button on the settings page of the touchscreen or from the Mira module’s label. - Page 69 Notice: iOS Setup Tips Turn on Bluetooth to allow Vegatouch Mira to connect to Accessories. If you do not have Bluetooth turned ON in your iOS settings you will see this screen. Do not click OK, you must click SETTINGS. Your Bluetooth Settings page will now appear and you should turn Bluetooth ON.
- Page 70 App Settings: Access the App Settings page by tapping the triangle (at the bottom of the screen) to expose the Settings button. Tap the gear to visit the settings page. Tap the Temperature Units selection to choose between Fahrenheit and Celsius. System Information and Mira Name.
- Page 71 Diagnostic Tools: Tap to display a list of currently connected devices. Remote Help is available by calling Firefly Integrations. Do not enable remote help without consultation. Remote Help: If instructed by Firefly, tap Enable Remote Help for advanced technical support. Once enabled, provide the Session ID to allow Firefly to remotely connect to your Mira app (internet connection required).
-
Page 72: Wireless Switch Pairing
Wireless Switch Pairing The wireless Mid Switch will need to be paired to the touchscreen before first use. Press and Hold the switch graphic for 5 seconds. Tap Start Pairing. You’ll have 30 seconds to press and hold both buttons on the switch panel at the same time for 5 seconds. -
Page 73: Network Diagnostics
Settings/Network Diagnostics Screen/G12: This screen will show the status of the Lyra screen and G12 panel. It will also display any currently active inputs and outputs. Active Online Devices/Faults: This screen will display the status of the Aircon and list any faults the system is currently experiencing. A triangle will appear at the top of the screen whenever a fault condition is present. -
Page 74: Low Voltage
Low Voltage Your system will sound an alarm and show this screen whenever system voltage is low. The system will alarm at 3 different voltage levels for specific amounts of time depending on your battery type: Adjust the buzzer’s volume by rotating the Lithium dial to Open/Close the grille. -
Page 75: Overcurrent Detection
Overcurrent Detection If an output on the G12 experiences an overcurrent fault, a lightning bolt graphic will appear at the top of the screen. Tapping the Lightning Bolt graphic will result in a Warning screen with a brief set of instructions. -
Page 76: Ssp17 Switch Panels
SSP17 Switch Panel SSP17 switch panels use wireless RF technology to communicate with the Lyra touchscreen. These switches are powered by a 2032-coin cell battery. If you press a switch panel button and the operational LED does not illuminate, you’ll need to change the battery. Simply use your fingers to pry the switch panel away from the wall-mounted backplate to access the battery compartment on the back of the switch. -
Page 77: G12 Dc Panel
G12 DC Panel Your G12 control panel is the power distribution center for the coach. This panel receives the signals sent from your touchscreen/switch panels and performs the actions that have been requested by activating and deactivating the required circuits. Every circuit controlled by the G12 is numbered and listed on a black label (load list) which is usually mounted next to the G12 panel. -
Page 78: Networking
Networking Your distribution panel and touchscreen connect via your coach’s RV-C network. Each component will have a NET LED that is used to show network status. If a NET LED is displaying anything other than solid green and some of the panel’s functions are not working, please use the keys below to determine the network status of your hardware. -
Page 79: Network Status Indicators
Network Status Indicators Every component of the Firefly system uses an LED to communicate network status. Use the key below to determine the network status of your hardware. Panel Network Status Indicator – Applies to any device with a network indicator: Fast flashing Green Light (4 times/sec) –... -
Page 80: Mira Net Led Status Key
Mira NET LED Status Key The NET LED on your Mira module can change color in different situations. Use the following key to determine the operational status of your module. Device has no power or has completely failed Fast flashing green (4 times/sec) Device is attempting to make initial connection to the CAN network and good files Solid green...
Need help?
Do you have a question about the CHASE 2021 and is the answer not in the manual?
Questions and answers