Table of Contents
Advertisement
Quick Links
Advertisement
Table of Contents

Related Manuals for Roadtrek SS AGILE 2020


Summary of Contents for Roadtrek SS AGILE 2020
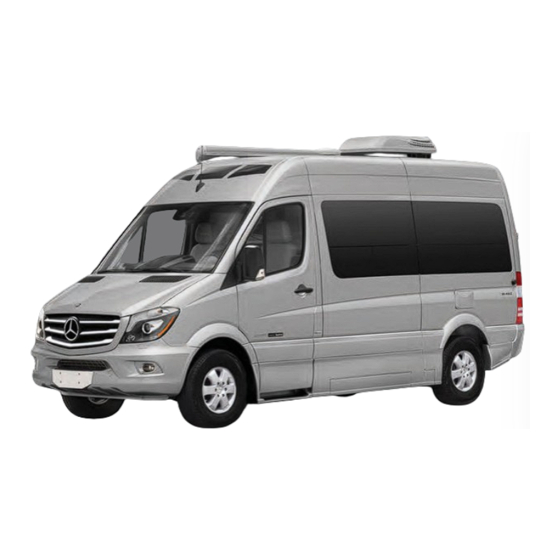
- Page 1 2 02 0 O W N E R ’ S M A N U A L www.roadtrek.com...
-
Page 2: Table Of Contents
Lights ............................................. 15 Tables ............................................ 16 Rear Table ..........................................16 Front Table ..........................................17 Captain’s Seats ........................................18 Blinds ............................................. 20 Ventilation ..........................................21 Sleeping Facilities ........................................22 Sofa Bed ..........................................22 Twin Beds ..........................................23 King Bed ..........................................23 Roadtrek Inc. - Page 3 Microwave Convection Oven ....................................28 Microwave Convection Oven (Big Inverter Version) ............................... 28 Cooktop Stove ....................................... 29 Hot Water..........................................29 Outside Your Roadtrek ......................................30 Awning ........................................... 30 Exterior Step .......................................... 31 Sliding Side Door ........................................32 Rear Door Screen ........................................33 Outside Shower ........................................
- Page 4 12 Volt DC Power ........................................51 The EcoTrek Batteries ......................................51 Turning on the Batteries ......................................52 The 12V Main Power Switch ......................................53 Inverter ..........................................53 Shore Power and Battery Charge Indicator ................................53 Other Switches ........................................54 Patio Light ..........................................54 Roadtrek Inc.
- Page 5 At Least Twice a Year ......................................59 At Least Once a Year ......................................60 Other Maintenance Checks ....................................60 Tire Service Kit ..........................................60 Roadtrek Inc. Two (2)-year limited Warranty………………………………………………………………………………………………………………………...61 Roadtrek Limited Warranty…....................................64 Obtaining Service ........................................64 Contacting Roadtrek Inc ......................................64 Arbitration Provision ........................................
- Page 6 Specifications..........................................65 Roadside Assistance Program ....................................65 Registration ..........................................66 Aftermarket Disclaimer ......................................66 Regulatory Notices ........................................66 HOWTOs ............................................66 Roadtrek Inc.
-
Page 7: Introduction To Your Ss Agile
Introduction to Your SS Agile Congratulations on the purchase of your Roadtrek and welcome to the family. The information included in this manual is meant to help and guide you using your vehicle so that you know how to properly use the many functions your Roadtrek has to offer. -
Page 8: References
All images used in this manual remain the property of Roadtrek Inc. They are for illustrative purposes only and may or may not be representative of the upfits in your Roadtrek. Contact Roadtrek Inc. for alternate licensing arrangements if you want to use or distribute this manual commercially. -
Page 9: Information, Cautions And Warnings
Turn the TV off and stow it while the vehicle is in motion. The flat screen TV should not be stored inside the Roadtrek in cold temperatures. Remove it to reduce the chance of damage from the cold. Check the Owner's Manual for the TV for storage and operating temperatures. - Page 10 Close the sliding side door prior to opening or closing the awning. Awning When storing the dining table, secure in place using the snap-on strap. Dining Table Extra Counter Make sure the stove is off and has cooled prior to lowering the stove cover. Space Roadtrek Inc.
-
Page 11: Before You Head Out
This unit has a 12VDC, 110VAC and potentially 36-volt solar system. These systems need to be disconnected Servicing before working on them. Before You Head Out Your new Roadtrek is ready to go with just a little bit of preparation. To prepare for your first trip, you should: • Read this manual. •... -
Page 12: Coming Home
Coming Home When you come home, there are a few maintenance tasks you should do to get your Roadtrek ready to go for next time. Refer to other sections in this manual for the procedures listed here. • On your way home, dump the gray and black tanks at a convenient facility. See the HOWTO: Wastewater Dumping section for a concise description of the procedure to do this. -
Page 13: Interior Living Space
Interior Living Space Cabinets Your Roadtrek is equipped with cabinet latches that are rated for 50 lbs, which prevent the door from opening while the vehicle is in motion. The pushbuttons on the cabinet latches toggle from latched (button in) to openable (button out) by pressing the button. (Pictures 13.1, 13.2) To open a cabinet, press the button to pop the latch, pull gently on the latch, and the cabinet door will open. - Page 14 The screw in the top part of the hinge nearest the pivot point adjusts the vertical location of the door. Screw out to raise the door and fix stuck doors; screw in to lower the door and fix doors that won't stay shut when latched. (Picture 14.2) Roadtrek Inc.
-
Page 15: Galley Drawers
Picture 15.1 Lights Your Roadtrek is equipped with interior LED lighting designed to give you control based on your requirements. There are three lights down the length of the aisle, and one more over the galley. Before attempting to turn on any interior lights, you MUST ensure the battery disconnect switch is turned on. -
Page 16: Tables
Tables Your Roadtrek is equipped with two tables for your use, one for the front and one for the rear of the vehicle. (Picture 16.2) Rear Table The rear table is stored under the bench seat on the driver’s side. The table leg is stored behind the driver's seat. (Picture 16.1) To install the table, place the leg into the existing floor socket. -
Page 17: Front Table
Pull the table out from its drawer-like storage in the galley cabinet. Flip the support bracket (Picture 17.1) out from behind the driver's seat. Fold the tabletop leaf over so it rests on the support bracket. (Pictures 17.2, 17.3) Picture 17.1 Picture 17.2 Picture 17.3 Front table support Front table being set up Fully extended Roadtrek Inc. -
Page 18: Captain's Seats
Do not force the seats around. Swiveling the seats is easier if you open the doors and loosen the tilt steering wheel adjustment and move the steering wheel as far forward and up as possible. Roadtrek Inc. - Page 19 (Picture 19.1) The swivel lever for the rear seat is on the right (passenger) side of the base. (Picture 19.2) Push it backward to release the lock and swivel the seat. (Picture 19.3) Picture 19.1 Picture 19.2 Picture 19.3 Seat swivel adjustment Outboard front seat Lumbar support adjustment adjustments on inboard side seat Roadtrek Inc.
-
Page 20: Blinds
The curtains on the sliding door and the rear door slide on tracks. It is best to use both hands, one near each track, to move the curtains. Roadtrek Inc. -
Page 21: Ventilation
Ventilation Your Roadtrek is equipped with a ceiling mounted ventilation fan. (Picture 21.1) The fan has a cover that must be raised by turning the large knurled knob or by using the remote. Raise the cover or use the remote to the desired speed and temperature. -
Page 22: Sleeping Facilities
Sleeping Facilities Your Roadtrek has sleeping capacity for two people on the rear bed. Sofa Bed Picture 22.1 Picture 22.2 Sofa switch Sofa upright You can configure the rear bed as a King or Twin bed depending on your preference or requirements. You begin by lowering the sofa. -
Page 23: Twin Beds
Always put the seatbelts back when you raise the sofa. To do this, open the back door of the vehicle and push the seatbelts through the sofa between the seat and back cushions. Picture 23.2 NEVER use the rear seats for passengers without seatbelts. King bed Roadtrek Inc. -
Page 24: Bathroom Facilities
Using the Toilet The bathroom in your Roadtrek contains a marine type toilet. To secure the doors once inside, use the inside latch. To flush the toilet, use your foot to press the foot pedal located at the bottom of the toilet, then release the foot pedal. -
Page 25: Shower
Refasten the drain stopper in the center of the bathroom floor (this is important as it stops the content of the grey water from sloshing into the shower area while the vehicle is in motion) • Dry the shower curtain with a towel or allow it to air dry before storing it Roadtrek Inc. - Page 26 Shower (Continued) Picture 26.1 Picture 26.2 Shower hose extending from its Shower hose stored storage location Roadtrek Inc.
-
Page 27: Appliances
Appliances TV and Home Theatre System Your Roadtrek is equipped with a 120-volt TV and home theatre system with remote control for your enjoyment and viewing pleasure. In order to generate power to these appliances, you must turn on the inverter, connect to shore power, or run the generator if so equipped. -
Page 28: Refrigerator
Refrigerator The refrigerator in your Roadtrek is a 12-volt DC / 120-volt AC compressor refrigerator that switches automatically between voltages. It uses 12-volt battery power except when 120-volt current is available. The temperature control for the refrigerator is located to the right of the freezer. -
Page 29: Cooktop Stove
The propane stove requires ventilation while in use. Make sure you have a window open and the ceiling fan cover open slightly. Do not use the propane cooktop for heating the interior of the Roadtrek - carbon monoxide poisoning will result. -
Page 30: Outside Your Roadtrek
Outside Your Roadtrek Awning Your Roadtrek is equipped with an easy to use power roll up awning. Please read the awning manual before you start. You need to know how the supports are attached and how to secure the awning. The steps here are meant as an indication of what is needed. -
Page 31: Exterior Step
Exterior Step Your Roadtrek is equipped with a step that automatically extends when the side door is opened for easy entry and exit out of your vehicle. With the step switch on, the step will extend once when the door is open and remain extended even if the door is closed. With the switch off, the step will extend and retract every time the door is opened and closed. -
Page 32: Sliding Side Door
Sliding Electric Door For user instructions, please refer to the Mercedes Benz owner’s manual found here: https://assets.mbvans.com/Mercedes-Benz-Vans/Manuals/2020/Manual-MY2020-with-Nav-and-SXM.pdf Roadtrek Inc. -
Page 33: Rear Door Screen
Rear Door Screen As an option, some Roadtrek’s have a rear screen which will allow you to open the rear doors and get fresh air without bugs coming in. Look for this screen in the hanging wardrobe behind the bathroom in your new Roadtrek. It attaches to the rear door frame with a zipper and hook-and-loop fasteners. -
Page 34: Outside Shower
On the driver's side near the rear, there is a rectangular compartment which houses the outside shower. (Picture 34.1) Like the inside shower, this will provide hot and cold running water should you choose to shower outside. Use the auxiliary key which came with your Roadtrek to unlock the compartment door. -
Page 35: Utility Bays
Utility Bays There are two exterior access doors along the bottom between the wheels on the driver’s side of the vehicle. (Picture 35.1) Picture 35.1 Picture 35.2 Driver’s side bays Lid support Picture 35.3 Shore power connection Propane tank Roadtrek Inc. -
Page 36: Fuel Fill
CATV connection Fuel Fill The fuel fill door is located directly behind the driver on the outside of the vehicle. (Picture 36.2) To fill your Roadtrek with fuel; 1. Open the driver side door 2. Swing open the fuel fill cover 3. -
Page 37: Utilities
The city water connection is on the left of the front compartment at the bottom along the driver's side of the vehicle. Unscrew the white plastic plug and use your pressure regulator and hose to connect your Roadtrek to the water source. Remember to disconnect and store the hose before driving. - Page 38 City Water (Continued) To connect the Roadtrek's water system to an outside source: • Turn the water pump off. • Close the city tank fill valve by turning the handle to the vertical position. (Picture 39.1) • Close all interior faucets.
-
Page 39: Wastewater
If it stays together, swells up, or clumps into a solid mass, it`s not safe and should be disposed of in the trash and not down the toilet. See HOWTO: Wastewater Dumping for more information on dumping. Picture 40.1 Roadtrek Inc. -
Page 40: Heating And Cooling
Heating and Cooling Heating Your Roadtrek is heated with a Suburban propane furnace, located on the passenger side of the aisle beneath the side bench. The furnace is controlled by the thermostat, above the rear side window. (Picture 41.1) Select "Furnace" and the desired temperature. The fan on the furnace will continue to run for a minute or two after the furnace is turned off - this is controlled by a heat sensor on the combustion chamber in the heater and is normal. -
Page 41: Electrical System
Batteries The standard batteries in your Roadtrek are sealed AGM (absorbed glass mat) batteries. Do not attempt to open them. There is no user maintenance possible on these batteries except keeping them charged - you never have to add water to them. -
Page 42: Lithium Batteries
Press the lower rocker switch to turn it on. If the batteries don't come on right away (the blue indicator light does not come on) press the reset button for about 3 seconds to power up the Battery Management System. Roadtrek Inc. -
Page 43: If The Batteries Are Depleted
To activate the internal battery heater, turn on the battery and connect via shore power or start the engine. The heaters will warm a frozen battery in 30-45 mins depending on wind speed, location of the batteries and the temperature from which you start to heat them. Discharge a battery helps accelerate the warming process. Roadtrek Inc. -
Page 44: Jump Starting Your Engine
This switch should be off when you are not using your Roadtrek, and on whenever you are driving or camping. The "Battery On" light next to it will indicate the position of the switch. (Picture 45.3) Picture 45.3... -
Page 45: Standard Watt Inverter
120-volt electricity is being used. Monitor panel for unit’s propane generator The inverter is configured at the factory for the batteries and power sources in the Roadtrek. Please do not change any settings without consulting your owner's manual and dealer. -
Page 46: Engine Generator
We recommend you also have your belts inspected during every oil change. NAPA belt number for long wheelbase Sprinter Roadtrek’s with the engine generator is 060523HD, and the belt dimensions are 13/16" x 52 7/8" or 20 mm x 1342 mm outside circumference. -
Page 47: Solar Panels
Solar Panels The solar panels operate automatically, and the charger and controller are configured at the factory. There are no user-configurable options on the controller. (Picture 48.1) Picture 48.1 Solar controller in cabinet above driver. Roadtrek Inc. -
Page 48: Shore Power
To disconnect, unthread the black plastic ring and rotate the plug slightly counterclockwise to pull it out. Picture 49.1 Power cord stored beneath sofa Picture 49.4 Picture 49.2 Picture 49.3 Attached shore power cord Shore Power connection point L-shaped prong on plug, and corresponding L-shaped hole in cord end Roadtrek Inc. -
Page 49: Electrical Outlets
If you are not getting power from an outlet, check and reset this button if needed by pushing it in. The one over the galley provides protection for outlets on the driver's side of the Roadtrek. The outlet behind the passenger side rear captain's chair provides GFCI protection for the TV and DVD player, so check it if your TV is not receiving power. -
Page 50: Monitor Panel
Monitor Panel Inverter Control Panel The monitor panel controls two separate power sources; the 12-volt DC power and the 120 volt AC power via the inverter. The inverter switch also has a shore power and battery charging indicator. Roadtrek Inc. -
Page 51: 12 Volt Dc Power
12 Volt DC Power The EcoTrek Batteries If your Roadtrek has the optional EcoTrek batteries, you have individual switches for each EcoTrek 200 module. Picture 52.1 Picture 52.2 EcoTrek 400 dual Jump starting an EcoTrek 200; note the left bank is off A single EcoTrek 200 will have one rocker switch at the bottom and one pushbutton switch at the top of the panel. -
Page 52: Turning On The Batteries
To activate the internal battery heater, turn on the battery and connect via shore power or start the engine. The heaters will warm a frozen battery in 30-45 mins depending on wind speed, location of the batteries and the temperature from which you start to heat them. Discharge a battery helps accelerate the warming process. Roadtrek Inc. -
Page 53: The 12V Main Power Switch
Shore Power and Battery Charge Indicator There is a shore power indicator and battery charging indicator light on the right side of the remote inverter switch to show you when the system is receiving shore power and charging your batteries. Roadtrek Inc. -
Page 54: Other Switches
These indicator lights will give you an approximate reading, to the nearest third, of how much is in each tank. The four indicator light levels for the battery represent low, fair, good, and charging states of charge. Picture 55.1 Picture 55.2 Picture 55.3 Patio light switch Water pump switch Tank and battery level indicators Roadtrek Inc. -
Page 55: Distribution Panel
56.1) Open the cabinet, remove the cover, and note the label on the cover identifying information for each breaker and fuse, as to what appliance or light each one supplies power to. (Picture 56.2) When storing the Roadtrek for extended periods of time, turn off the battery disconnect switch, your inverter, and the main 30A circuit breaker in this panel. -
Page 56: Alarms And Warnings
The detector has a useful service life, beyond which it needs to be replaced. See Manufacturer’s Owner’s Manual for other operating instructions or look for the sticker which is sometimes placed on the detector to see the replacement date. The detector may chirp if the coach batteries are running low. Picture 57.1 Propane and Carbon Monoxide alarm Roadtrek Inc. -
Page 57: Smoke Detector
Picture 58.1 Fire Extinguisher Your Roadtrek comes equipped with a dry chemical fire extinguisher suitable for all fires. (Picture 58.2) Before every trip, check to see that the needle on the dial is in the green range. If not, replace the fire extinguisher. DO NOT test your fire extinguisher by discharging it - total discharge time is 8 to 12 seconds, so it will become rapidly depleted if you test it this way. -
Page 58: Maintenance
At Least Monthly Check coolant level in the coolant recovery reservoir. • Check windshield washer fluid, brake fluid and power steering fluid levels. • • Check operation of all exterior lamps, including brake lamps, turn signals and hazard warning flashers. Roadtrek Inc. -
Page 59: At Least Every Three Months
Rinsing the panel two or three times a year to remove excess dirt is all you need to do to keep the panel operating at full output. • With the tank empty, add one cup of mineral oil and one cup of hot water to the gray tank. Roadtrek Inc. -
Page 60: At Least Once A Year
To prevent water from entering your vehicle, avoid spraying water directly into exterior vents or grills. Do not use a power washer to clean your Roadtrek because damage to the paint, removal of decals and water leaks will result. Hand washing or commercial car washes accommodating large vehicles are the best way to keep your Roadtrek clean and shiny. -
Page 61: Roadtrek Inc. Two (2)-Year Limited Warranty
RV service facility. However, all warranty repairs at non-authorized RV service facilities must be preauthorized by Roadtrek Inc. Roadtrek Inc. will, at its option, replace or repair free of charge (including related labor) any defective part, about which the Purchaser shall notify their Roadtrek Dealer within the warranty period. - Page 62 Roadtrek Inc. Limited Motorhome Warranty is void unless the following conditions are adhered to: 1. Warranty registration on the Motorhome must be completed by the Dealer and submitted to Roadtrek Inc. within 48 hours of date of retail delivery. When warranty applications are made and Warranty Card is not on file at Roadtrek Inc., reimbursement of claim will be delayed until proof of original purchase is...
- Page 63 Contact Roadtrek directly for servicing instructions. Warranty Intent The intent of this extended warranty is to ensure the new owner of a Roadtrek that it is worry free from manufacturer caused defects (excluding the chassis) for the first Two (2) years of use.
-
Page 64: Roadtrek Limited Warranty
When your Roadtrek needs service, determine if the issue is with the Roadtrek upfits or the Mercedes Sprinter chassis. For Roadtrek upfits, contact your dealer. Start with the service writer, then the service manager and finally, if you are unable to resolve your issues with the service department, contact the dealership managing partner or owner. -
Page 65: Arbitration Provision
Roadside Assistance Plan You are enrolled in a 24/7 roadside assistance plan for the first 2 years of the limited warranty upon registration of your Roadtrek. The Roadside Assistance plan is non-transferable. If your motorhome is disabled because of any nonconformity covered by this limited warranty or in certain other situations, our roadside assistance provider will assist by providing the following services: towing, mobile mechanic (where available), fuel delivery, tire change, battery jump-start, lockout service and emergency fluids. - Page 66 The compatibility of after-market systems and components should be researched thoroughly either with the dealer or manufacture as they may interfere with the performance of Roadtrek Inc., recreation vehicle systems and components, further affecting the warranty of the vehicle as designed.
Need help?
Do you have a question about the SS AGILE 2020 and is the answer not in the manual?
Questions and answers