Table of Contents
Advertisement
Advertisement
Table of Contents

Related Manuals for Roadtrek CS Adventurous 2019


Summary of Contents for Roadtrek CS Adventurous 2019
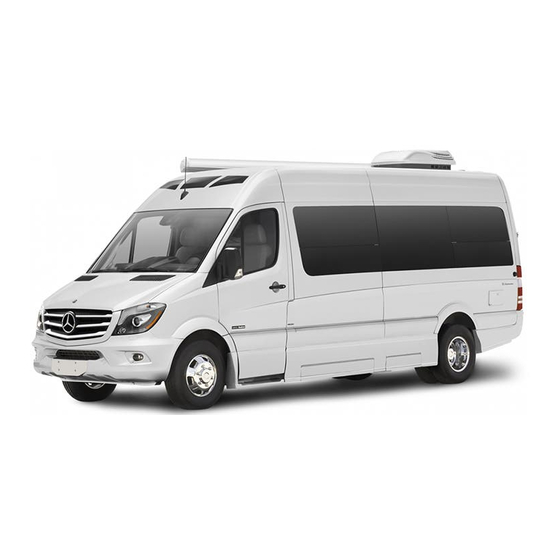
- Page 1 2 0 1 9 O W N E R ’ S M A N U A L www.roadtrek.com...
-
Page 2: Table Of Contents
Contents Introduction to Your Roadtrek ....................................... 7 Disclaimer ............................................7 Copyright ............................................7 References ..........................................8 Do’s and Don’t’s ..........................................8 Symbol Legend ..........................................8 Regulatory Warnings ........................................8 Information, Cautions and Warnings ....................................9 Before You Head Out ........................................11 Coming Home .......................................... - Page 3 Water Heater ..........................................37 Optional Induction Cooktop ......................................38 Home Theatre System ......................................... 39 Optional HDTV ..........................................39 Outside Your Roadtrek ........................................ 40 Running Boards on Drivers Side .................................... 40 Awning ............................................ 42 Rear Doors ..........................................44 Exterior Step ........................................... 45 Shore Power ...........................................
- Page 4 Distribution Panel, AC Breaker and 12-Volt Fuse Panels ............................57 (Optional) Solar Panels ......................................... 58 Outlets ............................................58 Electrical System .......................................... 59 Coach Batteries ........................................59 Battery Disconnect Switch ..................................... 59 Inverter Charger ........................................59 Alternator Charger and Battery Separator ................................59 Batteries ..........................................60 Roadtrek Inc.
- Page 5 Owner Maintenance Checks ......................................69 When You Stop for Fuel or Weekly ..................................69 Every Other Week ........................................69 At Least Every Three Months ....................................69 At Least Twice a Year ......................................70 At Least Once a Year ......................................70 Roadtrek Inc.
- Page 6 Roadtrek Limited Warranty ......................................73 How to Obtain the Limited Warranty ..................................73 How to Get Service ........................................ 73 Contacting Roadtrek ........................................ 73 Arbitration Provision ....................................... 74 Specifications ..........................................74 Roadside Assistance Plan ...................................... 75 Registration ..........................................77 Aftermarket Disclaimer ........................................78 Regulatory Notices ........................................
-
Page 7: Introduction To Your Roadtrek
Introduction to Your Roadtrek Congratulations on the purchase of your Roadtrek, and welcome to the family. The information included in this manual is meant to help and guide you through the many functions your Roadtrek has to offer. Please keep this manual in your vehicle as a reference for when you are traveling. If you have any questions or comments on information found in this document, please contact us at manuals@roadtrekinc.com. -
Page 8: References
All images used in this manual remain the property of Roadtrek Inc. They are for illustrative purposes only and may or may not be representative of the upfit in your Roadtrek. Contact Roadtrek Inc. for alternate licensing arrangements if you want to use or distribute this manual commercially. -
Page 9: Information, Cautions And Warnings
Turn the TV off and stow it while the vehicle is in motion. The flat screen TV should not be stored inside the Roadtrek in cold temperatures. Remove it to reduce the chance of damage from the cold. Check the Owner's Manual for the TV for storage and operating temperatures. - Page 10 Close the sliding side door prior to opening or closing the awning. Dining Table When storing the two dining tables, secure in place using the clips attached. Make sure the stove is off and has cooled prior to using the counter space. Counter Space Roadtrek Inc.
-
Page 11: Before You Head Out
This unit has a 12-VoltDC, 110VAC and optional 36-volt solar system. These systems need to be disconnected Servicing before working on them. Before You Head Out Your new Roadtrek is ready to go with just a little bit of preparation. To prepare for your first trip, you should: • Read this manual. •... -
Page 12: Coming Home
Coming Home When you come home, there are a few maintenance tasks you should do to get your Roadtrek ready to go for next time. Refer to other sections in this manual for the procedures listed here. • On your way home, dump the grey and black waste water tank at a convenient facility. See the HOW TO’s: Waste Water Dumping for a concise description of the procedure to do this. - Page 13 AGM or optional Lithium battery(ies). • * If you turn everything off, your solar panels (If Equipped), will keep your coach batteries charged to a safe level while your Roadtrek is parked. o Solar panels will only keep your Roadtrek charged when parked outside.
- Page 14 30AMP Shore Power Cord Coach Coaches Monitor Panel with Optional EcoTrek Lithium Battery Connect Port. Battery Disconnect Switch Switches Located on Overhead Shown. Storage Cabinet Wall Over Passenger Seat. Picture 14.4 Coach Inverter Switch in the On Position. Roadtrek Inc.
-
Page 15: Interior Living Space
The objects may shift position with vehicle motion and cause injury when the cabinets are opened. For this reason, Roadtrek recommends that you are aware of the weight and stability of objects that you store in overhead cabinets. -
Page 16: Cabinet Adjustment
Using an allen wrench, turn the screw to the right to tighten the hinge and put more friction on your cabinet door. Turn the screw to the left to loosen the pressure that is applied and allow for the cabinet to be opened with less force. (Picture 16.2.) Roadtrek Inc. -
Page 17: Galley Cabinets
Picture 17.4 Picture 17.5 The Rear Kitchen Galley Closet Has Four Three Slide Out Drawers Beneath Galley Three Level Storage Cabinet Levels with Three Removable Shelves. Cooktop. *Note – Shown with Optional Located Beneath Galley Sink. Induction Cooktop.* Roadtrek Inc. -
Page 18: Galley Instant Hot Water Dispenser
(*Note – All of these drawers have conventional non-locking knobs and a friction closure mechanism to secure them while your Roadtrek is in motion. Make sure they are completely closed before driving.) In your kitchen galley, your sides and back splash area are protected from cooking elements by stainless steel panels. (Picture 17.1 on Previous Page.) - Page 19 Turn the instant hot water dispenser off when not in use as this appliance uses a large amount of electricity to operate. Failure to do so could result in significant drain on your battery system.*For detailed information on this appliance, consult the Products/Appliance Owner's Manual that accompanies your coach. Roadtrek Inc.
-
Page 20: Lights
Picture of 12-Volt Lighting in the On Upwards on Lights Lens Cover Until You Position. Gently Push Upwards on a Hear a Click and Release to Turn On. Light’s Lens Cover Until You Hear a Click and Then Release to Turn Them Off. Roadtrek Inc. -
Page 21: Tables Legs And Leg Mounts
Picture 21.3 Leg Mount Bases Located in Coach Rear T-Nut Fully Extended – Leg Mount Base. Double Table Leg Storage Inside Closet to (Shown Here) and in Front Between 2 the Rear of the Washroom. Row Seating and Refrigerator. Roadtrek Inc. - Page 22 Large Angled Table Stored Behind Drivers Passenger Side Bolster Cushion. on Passenger Storage Side. Just in Front of Refrigerator. Picture 22.4 Picture 22.5 Picture 22.6 Rear Table Setup. To Stow Front Table, Use Clips and Front Dining Lounge Setup. Rubber Bumpers as Shown. Roadtrek Inc.
- Page 23 (Picture 22.4 and 22.5 on Previous Page.) To stow the front table, place the bottom of the table behind the rubber bumpers along the bottom, and secure the top with the two white clips attached. (Picture 22.6 on Previous Page.) Roadtrek Inc.
-
Page 24: Front Swivel Seats
This vehicle will not drive unless the front seats are forward facing and locked. The vehicle will not go into gear. The two captain's seats in the front of your Roadtrek are adjustable fore and aft by pulling up on the metal bar under the front seats. (Picture 24.2) Always return the seats to the forward-facing position before driving. - Page 25 Emergency Brake Handle Must be in The Rear Dial Reclines Your Captain’s Down Position for Seats to Swivel Seat. The Middle Lever Lifts and Lowers Properly. Your Seat Base Height. Front Dial Adjusts Your Front Seat Base Height. Roadtrek Inc.
- Page 26 Wall and Position the Seat as Desired. Towards the Rear and Swivel Seat to Desired Location. Always return the seats to the forward-facing position when driving. The seats will lock into place as you swivel them to the forward-facing position. Roadtrek Inc.
-
Page 27: Window Treatments
No Light and Visibility Your Roadtrek driver’s-side rear window and passenger’s-side rear window come with dual pleated window shade coverings. (Pictures 27.1 and 27.2). The daylight shade allows for some light and visibility while the nighttime shade blocks out almost all light and visibility. -
Page 28: Rear Windows And Sliding Passenger Side Door
Rear Windows and Sliding Passenger Side Door Your Roadtrek rear windows come with dual pleated window shade coverings. (Picture 28.1 and Picture 28.2) The daylight shade allows some light and visibility into the coach. For smooth operation of shade, use two hands on the grooved fingertip lift rail to lift up or pull down. -
Page 29: Front Window Treatments
Front Window Treatments Your Roadtrek comes equipped with a three-piece privacy shade system for your coach’s front windows. Setup information and illustrations are below. Picture 29.1 Picture 29.2 Picture 29.3 Storage Bag Containing Three Window Front Door Window Shades. With Door Open, Place Shade in Place to Shades. -
Page 30: Ventilation
Ventilation Your Roadtrek is equipped with a ceiling-mounted ventilation fan. Fan is located between the washroom and galley. (Picture 30.1) When cooking or using the galley stove, ensure the ventilation fan is operating in this area. The fan has a cover that must be raised prior to using by rotating the knob. (Picture 30.2) Turn the knob towards the left (Counter-Clockwise) to raise the cover. -
Page 31: Sleeping Facilities
Sleeping Facilities Your Roadtrek can be configured as two-Twin or one King bed setup. Follow the steps on Pages 31 & 32 to setup your desired sleeping facilities. Picture 31.1 Picture 31.2 Picture 31.3 Use Button to Lower Sofa Into Position for... - Page 32 Twin and King Bed Instruction (Continued): Picture 32.2 Picture 32.1 Replace the Bolster Cushions to Start the Completed King 76”x74” Bed View from King Bed Configuration. Front of Coach. Roadtrek Inc.
-
Page 33: Bathroom Facilities
To secure the bathroom door from the inside, overlap the left side door over the right-side door and use the inside latch to secure. (Picture 33.2) The bathroom in your Roadtrek contains a marine-type toilet. (Picture 33.3) To flush the toilet, use your foot to press the foot pedal located at the bottom of the toilet to expel the waste, then release the foot pedal once bowl is emptied. -
Page 34: Shower Setup
Shower Setup: The Roadtrek comes with a permanently-enclosed washroom with a stand-up or sit-down shower: *Please refer to pictures starting on page 35.* Taking A Shower • To take a shower, unscrew the drain stopper in the bathroom floor and store for safe keeping and reinstallation after your shower. - Page 35 Picture 35.4 Picture 35.5 Picture 35.6 Pull Up on Knob to Start Flow of Water Pull the Shower Curtain All the Way to Washroom Light and Shower Handle for Shower. Push Down When Done. End of Track. Holder. Roadtrek Inc.
-
Page 36: Refrigerator
*Note – For Microwave to Operate, The Galley Inverter Must Be On.* For extended microwave use, you should be connected to shore power, have the galley inverter on or have the under-hood generator running. Picture 36.4 Convection Microwave Oven Roadtrek Inc. -
Page 37: Propane Cooktop
*Note – Alde System Water Reset Components in Passenger Side Closet. *Read the Alde Appliance Button Shown. If Triggered, Push Bolster Do Not Allow For Storage in Manual for Specific Operating Down and Turn Blue Trigger Button Either Location. Instructions.* Shown.* Roadtrek Inc. -
Page 38: Optional Induction Cooktop
Induction Cooktop Stove. If your Roadtrek has one or two optional ion cooktop stoves, your coach will contain two inverters. One inverter will operate the 110-Volt items in your coach and the second will be dedicated to the 110-Volt items in your kitchen galley. Location of inverter will vary by build.) Picture 38.2... -
Page 39: Home Theatre System
Home Theatre System Your Roadtrek is equipped with a 12-Volt 6-speaker home theatre system. The speaker system is controlled through your 110-Volt Blu-Ray remote control and viewed on the optional 24” 12-Volt HDTV. (Picture 39.1) The cabinetry directly above the Blu-Ray player, the cabinetry houses cable TV, over-the-air antenna, 12-Volt TV power receptacle and speaker control knob. -
Page 40: Outside Your Roadtrek
Running Boards on Driver’s Side Your Roadtrek has lift up running boards on the driver’s side of the vehicle. (Picture 40.1) When lifted these running boards when lifted will allow access to your city water intake, propane system (If Equipped), external cable TV hookup, chassis spare tire location, macerator hose and gate valves for grey and black tanks, and 30AMP external power hook up. - Page 41 Outside Your Roadtrek Continued: Running Boards on Drivers Side Continued: The forward most running board will reveal your city water connection, propane system (If Equipped), followed by your macerator hose and waste gate valves for grey and black tanks, and exterior cable TV hookup. (Pictures 41.1, 41.2 and 41.3) The rear running board houses the spare tire location, (Picture 41.4) and 30AMP hookup.
-
Page 42: Awning
Awning Your Roadtrek is equipped with an easy-to-use power roll-up awning. To extend the awning, use the power extend/retract button located over the passenger-side cab seat. (Picture 42.1) * Note – The awning power button requires 12-Volt power; make sure your battery disconnect is in the On position.*... - Page 43 * Note – The awning is only powered when the ignition is in the Off position. The awning button will not operate with the engine running. Picture 43.4 3. After Releasing Leg from Awning Track, Either Secure Using Brackets Attached to Coach or Secure into the Ground. Roadtrek Inc.
-
Page 44: Rear Doors
Rear Doors: The rear doors of your Roadtrek have the ability to open to 90 degrees and to 270 degrees resting against the coach. To open: Picture 44.1 Picture 44.2 Picture 44.3 Pull the Rear Doors Until the Door To Release Bracket, Push Door Closed Pull Door and Bracket Until Clear of Bracket Locks in Place at 90 Degrees. -
Page 45: Exterior Step
Exterior Step Your Roadtrek is equipped with a side entry step that automatically extends when you open the passenger side entry door. (Picture 45.1) To keep the step extended when the side door is opened or closed, turn the switch located on the inside pillar to the On position. (Picture 45.2) When in the Off position, the side entry step will extend and retract every time the side cargo door is opened. -
Page 46: Shore Power
Outside Your Roadtrek Continued: Shore Power The shore power connection is through the shore power cord and stored in the rear of the coach under the sofa. (Picture 46.1) The shore power connect port is located underneath the second running board on the driver’s side right in front of the rear axle. Notice that one terminal has a slight bend to it. -
Page 47: Utilities
Utilities Just like your house, your Roadtrek has fresh water, electricity, waste water disposal, heating and cooling systems. In the Roadtrek these systems are self-contained and travel with you. Your vehicle should be reasonably level to allow for normal operation of these systems. -
Page 48: City Water
City Water Your Roadtrek can operate in either fully-self-contained mode or can be connected to a water supply. If your city water connection has a built-in regulator (Picture 48.1 or 48.2) you do not need an external regulator. If unsure, purchase and use an external regulator. -
Page 49: Waste Water
See HOW TO: Waste Water Dumping for more information. Screw in Shower Drain Plug to Prevent Water in Grey Tank from Entering Into the *Note - Black and Grey water tank capacities can vary depending on options and Shower Pan. configuration.* Roadtrek Inc. -
Page 50: Indicators
Tank Levels. The air conditioner provides cooling for your Roadtrek using shore power, batteries, or the underhood generator. The air conditioner can be operated normally when plugged in to shore power or running the underhood generator while driving or idling. The air conditioner will run for a limited time on your AGM or lithium batteries. -
Page 51: Alde Hydronic Heating System
Heating Alde Radiant Heating System The Alde radiant heating system provides, hot water, coach heating, and engine pre-heating for your Roadtrek. The Alde control unit is located on the rear drivers-side closet in the uppermost left hand corner. (Picture 51.1) *Read the Alde Appliance Manual for Specific Operating, Storage and Coolant Information and Instructions.*... - Page 52 (Picture 52.2) Picture 52.1 Picture 52.2 Alde Frost Control in Operating Mode. Alde Engine Pre-Heat Switch Located on Turn to Right to Reset if Tripped. Passenger Seat Pedestal. Roadtrek Inc.
-
Page 53: Dumping
Push the handle in and turn the handle left and right to attempt to loosen the clogged object. (Picture 53.3) Picture 53.1 Picture 53.2 Picture 53.3 Macerator Hose and Tank Gate Valves. Macerator Discharge Button. Macerator Override Handle. Roadtrek Inc. -
Page 54: Monitor Panel
The battery disconnect switch supplies 12-Volt battery power to the 12-Volt lights and other cabin appliances. This switch must be on for any of the 12-Volt electrical devices to work. To avoid discharging the batteries when your Roadtrek is not in use, remember to turn off these switches: Picture 54.1 Roadtrek Monitor Panel. -
Page 55: Inverters
Air Flow. ü NEVER USE THE SWITCH LOCATED ON THE ACTUAL INVERTER(S) TO TURN IT ON OR OFF. THIS SWITCH IS THERE FOR MAINTENANCE PURPOSES ONLY AND SHOULD ONLY BE ACCESSED BY A CERTIFIED ROADTREK SERVICE TECHNICIAN. Other Switches Picture 55.2 Picture 55.1... -
Page 56: Patio Lights
The battery-charge-level indicator is located directly to the right of the battery disconnect switch. The fresh, grey, and black water tank levels are located just under the Roadtrek Logo. The button to check these levels are located just beneath the level indicators. Your battery disconnect switch must be on for these displays to work. -
Page 57: Distribution Panel, Ac Breaker And 12-Volt Fuse Panels
Distribution Panel, AC Breaker and 12-Volt Fuse Panels Your Roadtrek will have several 12-Volt fuse panels, and a distribution panel. They are located in different locations within the coach including the driver’s seat base, upper cabinetry over driver’s captain’s seat on driver’s side, and outside of cabinetry over second-row captain’s seat. -
Page 58: (Optional) Solar Panels
Roadtrek. EHGNA strongly recommends that you make no adjustments to the charge controller or its programming. If equipped with a display, the charge controller displays either system voltage or amperes generated by the panels. -
Page 59: Electrical System
Coach Batteries The coach batteries in your Roadtrek are AGM or Optional Lithium Battery cells. DO NOT ATTEMPT TO OPEN THEM! There is no user maintenance needed on these batteries. *Tampering with your batteries will void the Roadtrek warranty on them.* Plug your coach in to external shore power whenever possible to ensure your coach batteries are in a fully-charged state. -
Page 60: Batteries
Coach Batteries The coach batteries in your Roadtrek are either sealed AGM batteries or optional Lithium Battery cells. (If Equipped) Optional EcoTrek Lithium Battery modules will add additional switches to the bank of switches already in your coach. (Picture 60.1) To turn on your AGM batteries, turn On the battery disconnect switch on your monitor panel. -
Page 61: On Board 120-Volt Ac Power/3000W Inverter
The power button on your 3000W inverter itself must always stay in the off position. If the switch is turned to the On position your inverter will be running, continuously draining your battery levels. It also overrides the inverter switch that is located on your monitor panel of your Roadtrek. -
Page 62: Engine Generator
NAPA belt number for Sprinter ® Roadtrek’s models with the engine generator is 060523HD, and the belt dimensions are 13/16" x 52 7/8" or 20 mm x 1342 mm outside circumference. -
Page 63: Alarms And Warnings
Alarms and Warnings Propane and CO Alarm Your Roadtrek has been equipped with a combination propane leak and carbon monoxide detection device for your protection. It is located slightly above floor level on the passenger side bolster box just to the rear of the washroom. (Picture 63.1) Be sure the detector is operating while using your vehicle. -
Page 64: Fire Extinguisher
Fire Extinguisher Your Roadtrek comes equipped with a dry chemical fire extinguisher suitable for BC fires. (Flammable Liquids and Energized Electrical Equipment) It is attached to the passenger seat base on the rear facing towards the second row captain’s seat. (Picture 64.1) Before every trip, check to see that the needle on the dial is in the green range. -
Page 65: Flat Or Leaking Tire Maintenance
OEM spare tire replacement kit. Provide this to Roadside Assistance or tire shop when replacing flat tire.*( (Picture 65.3) Roadtrek recommends that you have roadside service replace a flat or leaking tire or that you stop at a nearby tire shop as soon as practical. -
Page 66: Tow Hitch And Tow Rating
Tow Hitch and Tow Rating Tow Hitch Your Roadtrek is equipped with a Class IV hitch with 500 pounds of tongue weight capacity. It is equipped with a seven-way wiring hook-up. (Picture 66.1) Your Roadtrek can tow a maximum amount of 5,000lbs. -
Page 67: Xl Edition Information
XL Edition Information If your Roadtrek is an XL edition, you have an extra 18” in length over the normal Sprinter ® chassis. Your overall coaches length is 24’1” versus the standard 22’9” model. With the XL edition you can get additional items not found on the 22’9” coaches. The first of those items is an optional bed headboard. (Picture 67.1) This headboard is removable by unscrewing the fasteners at each end of the headboard. -
Page 68: Maintenance
Tire rotation intervals depend on wear and other factors, but tires should be rotated at least every maintenance interval, defined in your Sprinter ® owner's manual. Occupant Cargo Carrying Capacity See the information labels attached to the driver door post. Roadtrek Inc. -
Page 69: Owner Maintenance Checks
Sanitize by adding 1/2 cup chlorine bleach to the tank, fill with water, let sit for at least two hours, and drain. Adding 1/2 cup vinegar to the next tankful, which will also be drained before filling with fresh water for use, can help dissipate the bleach residue smell. Refer to other sections in this manual for drain and fill locations. Roadtrek Inc. -
Page 70: At Least Twice A Year
Have appliances tested and cleaned. • Wax and polish and protect exterior surfaces. The wheels are coated aluminum and there is no bare aluminum on the vehicle, so do not use aluminum polish on any surface of your Roadtrek. Roadtrek Inc. - Page 71 To prevent water from entering your vehicle, avoid spraying water directly into exterior vents or grills. Do not use a power washer to clean your Roadtrek because damage to the paint, removal of decals and water leaks will result. Hand washing or commercial car washes accommodating large vehicles are the best way to keep your Roadtrek clean and shiny.
- Page 72 B pillar (right side of the door frame, near the latch). These specifications refer to the baseline Roadtrek upfits. Options and upgrades may change these specifications.
-
Page 73: Roadtrek Limited Warranty
When your Roadtrek needs service, determine if the issue is with the Roadtrek upfits or the Mercedes Sprinter chassis. For Roadtrek upfits, contact your dealer. Start with the service writer, then the service manager and finally, if you are unable to resolve your issues with the service department, contact the dealership managing partner or owner. -
Page 74: Arbitration Provision
Roadside Assistance Plan You are enrolled in a 24/7 roadside assistance plan for the first 2 years of the limited warranty upon registration of your Roadtrek. The Roadside Assistance plan is non-transferable. If your motorhome is disabled because of any nonconformity covered by this limited warranty or in certain other situations, our roadside assistance provider will assist by providing the following services: towing, mobile mechanic (where available), fuel delivery, tire change, battery jump-start, lockout service and emergency fluids. -
Page 75: Registration
Registration Please send the following form to our email, salessupport@roadtrekinc.com. Your new Roadtrek should be registered on your behalf by your dealer. If that step is overlooked, then please use the following form below and send to us by mail or email. -
Page 76: Aftermarket Disclaimer
The compatibility of after-market systems and components should be researched thoroughly either with the dealer or manufacture as they may interfere with the performance of Roadtrek Inc., recreation vehicle systems and components, further affecting the warranty of the vehicle as designed.
Need help?
Do you have a question about the CS Adventurous 2019 and is the answer not in the manual?
Questions and answers
I have an issue where while sitting in storage (2019 Roadtrack RS Adventurous), I did not pull the main power disconnect and therefore drained the vehical starter battery for the van. When I try to charge the battery, it trips the "low voltage" alarm and the anti-theft alarm goes off. I **** not sure how to reset the system or stop the alarm so that I can reconnect the battery. Any advice?